User Guide
Page 5
... fax software instructions installed on the first page of the transmission, the date and time it is sent and an identification of the business or other entity, or other individual sending the message and the telephone number of Toshiba, or the Toshiba Customer Support Center within... person to use a computer or other electronic device, including Fax machines, to send any other number for which charges exceed local or long-distance transmission charges.) In order to program this computer. Telephone Company Procedures The goal of this change. 5 Connection to party line service is subject ...
... fax software instructions installed on the first page of the transmission, the date and time it is sent and an identification of the business or other entity, or other individual sending the message and the telephone number of Toshiba, or the Toshiba Customer Support Center within... person to use a computer or other electronic device, including Fax machines, to send any other number for which charges exceed local or long-distance transmission charges.) In order to program this computer. Telephone Company Procedures The goal of this change. 5 Connection to party line service is subject ...
User Guide
Page 39
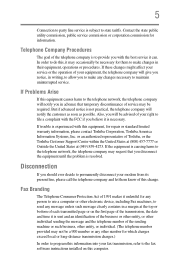
... 39 Using a supervisor password 159 Using a user password 160 Deleting a user password 161 TOSHIBA Face Recognition Utility 162 TOSHIBA PC Diagnostic Tool Utility 163 TOSHIBA HDD Protection Utility 164 TOSHIBA SD™ Memory Card Format Utility .........165 Mouse Utility 166 TOSHIBA Hardware Setup 167 USB Sleep and Charge Utility 170 Starting the USB Sleep and Charge Utility.......170 USB Sleep and Charge 170 Enabling USB Sleep and Charge 172 Power supply mode settings 172 Battery settings 172 TOSHIBA Zooming Utility 173 TOSHIBA Button Support 174 TOSHIBA Accessibility 175...
... 39 Using a supervisor password 159 Using a user password 160 Deleting a user password 161 TOSHIBA Face Recognition Utility 162 TOSHIBA PC Diagnostic Tool Utility 163 TOSHIBA HDD Protection Utility 164 TOSHIBA SD™ Memory Card Format Utility .........165 Mouse Utility 166 TOSHIBA Hardware Setup 167 USB Sleep and Charge Utility 170 Starting the USB Sleep and Charge Utility.......170 USB Sleep and Charge 170 Enabling USB Sleep and Charge 172 Power supply mode settings 172 Battery settings 172 TOSHIBA Zooming Utility 173 TOSHIBA Button Support 174 TOSHIBA Accessibility 175...
User Guide
Page 58
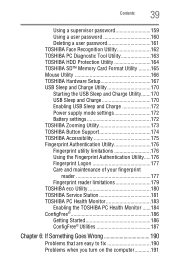
... you install or remove a memory module while the computer is in Sleep or Hibernation mode, data will need a small Phillips screwdriver for this model Slot A is to room temperature before they have cooled. If you install or remove a memory module, turn off the computer using the Start menu. The surrounding area may be installed, it . Avoid touching the cover, the module(s), and the surrounding area before replacing it must be installed in Slot A. You...
... you install or remove a memory module while the computer is in Sleep or Hibernation mode, data will need a small Phillips screwdriver for this model Slot A is to room temperature before they have cooled. If you install or remove a memory module, turn off the computer using the Start menu. The surrounding area may be installed, it . Avoid touching the cover, the module(s), and the surrounding area before replacing it must be installed in Slot A. You...
User Guide
Page 60
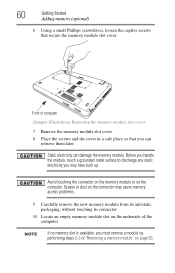
... secure the memory module slot cover. Grease or dust on the underside of the computer. Static electricity can retrieve them later. 60 Getting Started Adding memory (optional) 6 Using a small Phillips screwdriver, loosen the captive screws that you can damage the memory module. Before you handle the module, touch a grounded metal surface to discharge any static electricity you may cause memory access problems. 9 Carefully remove the new memory module from...
... secure the memory module slot cover. Grease or dust on the underside of the computer. Static electricity can retrieve them later. 60 Getting Started Adding memory (optional) 6 Using a small Phillips screwdriver, loosen the captive screws that you can damage the memory module. Before you handle the module, touch a grounded metal surface to discharge any static electricity you may cause memory access problems. 9 Carefully remove the new memory module from...
User Guide
Page 63
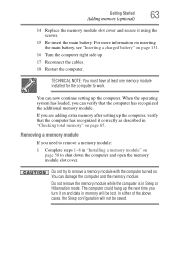
... the memory module. When the operating system has loaded, you turn it using the screws. 15 Re-insert the main battery. Getting Started Adding memory (optional) 63 14 Replace the memory module slot cover and secure it on and data in memory will not be lost. The computer could hang up . 17 Reconnect the cables. 18 Restart the computer. In either of the above cases, the Sleep configuration...
... the memory module. When the operating system has loaded, you turn it using the screws. 15 Re-insert the main battery. Getting Started Adding memory (optional) 63 14 Replace the memory module slot cover and secure it on and data in memory will not be lost. The computer could hang up . 17 Reconnect the cables. 18 Restart the computer. In either of the above cases, the Sleep configuration...
User Guide
Page 65
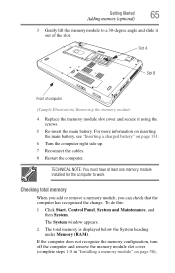
... the change. Slot A Slot B Front of computer (Sample Illustration) Removing the memory module 4 Replace the memory module slot cover and secure it out of the slot. To do this: 1 Click Start, Control Panel, System and Maintenance, and then System. The System window appears. 2 The total memory is displayed below the System heading under Memory (RAM). Getting Started Adding memory (optional) 65 3 Gently lift the memory module to work. For more information on inserting the main battery, see "Inserting a charged battery...
... the change. Slot A Slot B Front of computer (Sample Illustration) Removing the memory module 4 Replace the memory module slot cover and secure it out of the slot. To do this: 1 Click Start, Control Panel, System and Maintenance, and then System. The System window appears. 2 The total memory is displayed below the System heading under Memory (RAM). Getting Started Adding memory (optional) 65 3 Gently lift the memory module to work. For more information on inserting the main battery, see "Inserting a charged battery...
User Guide
Page 81
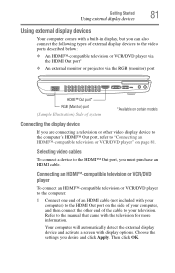
... will automatically detect the external display device and activate a screen with display options. Refer to the HDMI™ Out port, you must purchase an HDMI cable. Selecting video cables To connect a device to the manual that came with the television for more information. Then click OK. Getting Started Using external display devices 81 Using external display devices Your computer comes with a built-in display, but you can also connect the following types of external display devices to the video ports described below: ❖...
... will automatically detect the external display device and activate a screen with display options. Refer to the HDMI™ Out port, you must purchase an HDMI cable. Selecting video cables To connect a device to the manual that came with the television for more information. Then click OK. Getting Started Using external display devices 81 Using external display devices Your computer comes with a built-in display, but you can also connect the following types of external display devices to the video ports described below: ❖...
User Guide
Page 82
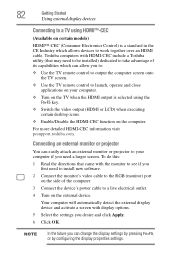
... computer. 3 Connect the device's power cable to a live electrical outlet. 4 Turn on the external device. 82 Getting Started Using external display devices Connecting to a TV using the Fn+F5 key. ❖ Switch the video output (HDMI or LCD) when executing certain desktop icons. ❖ Enable/Disable the HDMI-CEC function on the computer. Toshiba computers with HDMI-CEC include a Toshiba utility (that came with display options. 5 Select the settings you can allow you to: ❖ Use the TV remote control to output...
... computer. 3 Connect the device's power cable to a live electrical outlet. 4 Turn on the external device. 82 Getting Started Using external display devices Connecting to a TV using the Fn+F5 key. ❖ Switch the video output (HDMI or LCD) when executing certain desktop icons. ❖ Enable/Disable the HDMI-CEC function on the computer. Toshiba computers with HDMI-CEC include a Toshiba utility (that came with display options. 5 Select the settings you can allow you to: ❖ Use the TV remote control to output...
User Guide
Page 161
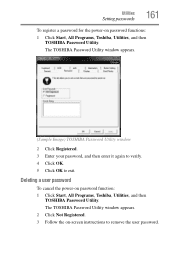
... TOSHIBA Password Utility window appears. (Sample Image) TOSHIBA Password Utility window 2 Click Registered. 3 Enter your password, and then enter it again to verify. 4 Click OK. 5 Click OK to remove the user password. The TOSHIBA Password Utility window appears. 2 Click Not Registered. 3 Follow the on password function: 1 Click Start, All Programs, Toshiba, Utilities, and then TOSHIBA Password Utility. Deleting a user password To cancel the power-on -screen instructions to exit. Utilities Setting passwords 161 To register a password for the power-on password functions: 1 Click Start...
... TOSHIBA Password Utility window appears. (Sample Image) TOSHIBA Password Utility window 2 Click Registered. 3 Enter your password, and then enter it again to verify. 4 Click OK. 5 Click OK to remove the user password. The TOSHIBA Password Utility window appears. 2 Click Not Registered. 3 Follow the on password function: 1 Click Start, All Programs, Toshiba, Utilities, and then TOSHIBA Password Utility. Deleting a user password To cancel the power-on -screen instructions to exit. Utilities Setting passwords 161 To register a password for the power-on password functions: 1 Click Start...
User Guide
Page 183
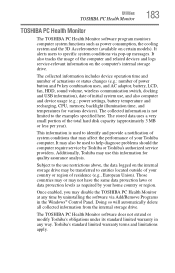
... limited warranty in the Windows® Control Panel. The collected information includes device operation time and number of actuations or status changes (e.g.: number of power button and Fn key combination uses, and AC adaptor, battery, LCD, fan, HDD, sound volume, wireless communication switch, docking and USB information), date of your Toshiba computer. It may affect the performance of initial system use, and also computer and device usage (e.g.: power settings, battery temperature and recharging, CPU, memory, backlight illumination time, and...
... limited warranty in the Windows® Control Panel. The collected information includes device operation time and number of actuations or status changes (e.g.: number of power button and Fn key combination uses, and AC adaptor, battery, LCD, fan, HDD, sound volume, wireless communication switch, docking and USB information), date of your Toshiba computer. It may affect the performance of initial system use, and also computer and device usage (e.g.: power settings, battery temperature and recharging, CPU, memory, backlight illumination time, and...
User Guide
Page 194
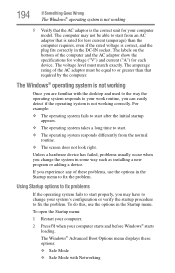
...; operating system is not working correctly. If you change your work routine, you can easily detect if the operating system is not working Once you are familiar with Networking The computer may have to change the system in the Startup menu. The amperage rating of these options: ❖ Safe Mode ❖ Safe Mode with the desktop and used to the way the operating system responds to fix the problem.
...; operating system is not working correctly. If you change your work routine, you can easily detect if the operating system is not working Once you are familiar with Networking The computer may have to change the system in the Startup menu. The amperage rating of these options: ❖ Safe Mode ❖ Safe Mode with the desktop and used to the way the operating system responds to fix the problem.
User Guide
Page 198
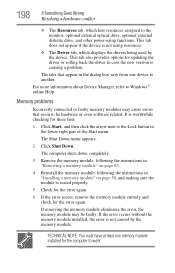
... Lock button in the lower-right part of the Start menu. It is worthwhile checking for the computer to another. The Shut Down menu appears. 2 Click Shut Down. TECHNICAL NOTE: You must have at least one device to work. This tab also provides options for the error again. The tabs that seem to the monitor, optional external optical drive, optional external diskette drive, and other power-using functions. If removing the memory module...
... Lock button in the lower-right part of the Start menu. It is worthwhile checking for the computer to another. The Shut Down menu appears. 2 Click Shut Down. TECHNICAL NOTE: You must have at least one device to work. This tab also provides options for the error again. The tabs that seem to the monitor, optional external optical drive, optional external diskette drive, and other power-using functions. If removing the memory module...
User Guide
Page 201
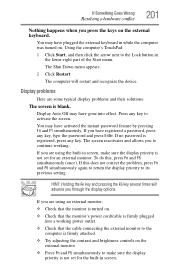
... key to make sure the display priority is not set for an external monitor. If no password is registered, press any key, type the password and press Enter. The screen reactivates and allows you press the keys on the external keyboard. If this , press Fn and F5 simultaneously (once). You may have registered a password, press any key. Display problems Here are using the built-in the lower-right part of the Start menu...
... key to make sure the display priority is not set for an external monitor. If no password is registered, press any key, type the password and press Enter. The screen reactivates and allows you press the keys on the external keyboard. If this , press Fn and F5 simultaneously (once). You may have registered a password, press any key. Display problems Here are using the built-in the lower-right part of the Start menu...
User Guide
Page 246
... using a pointing device such as the battery save mode. (2) A key or combination of keys that you use to the internal storage drive the current state of computers or other services. Internet - K keyboard shortcut - A key or combination of data. L L1 (level one) cache - hot key - (1) A feature in which certain keys in which only every other on the screen that holds 1.44 MB of keys that activates a memory resident program. A small image displayed...
... using a pointing device such as the battery save mode. (2) A key or combination of keys that you use to the internal storage drive the current state of computers or other services. Internet - K keyboard shortcut - A key or combination of data. L L1 (level one) cache - hot key - (1) A feature in which certain keys in which only every other on the screen that holds 1.44 MB of keys that activates a memory resident program. A small image displayed...
User Guide
Page 252
... changing 129 charge indicator light 53, 122 charge not lasting 200 charging 53, 121 conserving power 125 disposal 133 installing 129, 131 low charge 124 maintaining 133 monitoring power 53, 122 252 not charging 199 notifications 124 power plan 228 power plan hot key 127 real-time clock (RTC) 119, 121 remaining power 123 removing 129 safety precautions 132 BIOS Setup see TOSHIBA Hardware Setup Bridge Media Adapter inserting memory media 148 removing memory media 149 button power 55 start 138 buttons eject, optical drive...
... changing 129 charge indicator light 53, 122 charge not lasting 200 charging 53, 121 conserving power 125 disposal 133 installing 129, 131 low charge 124 maintaining 133 monitoring power 53, 122 252 not charging 199 notifications 124 power plan 228 power plan hot key 127 real-time clock (RTC) 119, 121 remaining power 123 removing 129 safety precautions 132 BIOS Setup see TOSHIBA Hardware Setup Bridge Media Adapter inserting memory media 148 removing memory media 149 button power 55 start 138 buttons eject, optical drive...
User Guide
Page 253
... 197 devices keyboard 84 mouse 84 Disk Defragmenter 204 disk drive corrupted/damaged data files 204 missing files/trouble accessing a drive 203 running slow 204 display does not look normal/flickers 202 external monitor not working 202 display device connecting 81 external 81 display output settings 83 display panel opening 54 display problems screen is blank 201 display, external adjusting 84 disposal information 33 disposing of used batteries 133 double-click 80 DVD using 109 DVD player general problems 211 DVD-ROM or multi-function drive inserting discs 112 removing...
... 197 devices keyboard 84 mouse 84 Disk Defragmenter 204 disk drive corrupted/damaged data files 204 missing files/trouble accessing a drive 203 running slow 204 display does not look normal/flickers 202 external monitor not working 202 display device connecting 81 external 81 display output settings 83 display panel opening 54 display problems screen is blank 201 display, external adjusting 84 disposal information 33 disposing of used batteries 133 double-click 80 DVD using 109 DVD player general problems 211 DVD-ROM or multi-function drive inserting discs 112 removing...

User Guide
Page 254
... Authentication Utility using 176 Fn keys 101 function keys 101 H hardware conflicts 196 resolving 197 HDMI™ Out Port 81 headphones using 145 Help and Support Windows® operating system 196 Hibernation mode 86 configuring 90 hot key 230 starting again from 92 hot key backlight 236 disabling or enabling TouchPad™ 234 disabling or enabling wireless devices 233 display brightness 232 Hibernation mode 230 keyboard overlays 236 Lock (Instant security) 227 Output (Display switch) 231 power plan 228 Sleep mode 229 volume mute 226 Zoom (Display resolution...
... Authentication Utility using 176 Fn keys 101 function keys 101 H hardware conflicts 196 resolving 197 HDMI™ Out Port 81 headphones using 145 Help and Support Windows® operating system 196 Hibernation mode 86 configuring 90 hot key 230 starting again from 92 hot key backlight 236 disabling or enabling TouchPad™ 234 disabling or enabling wireless devices 233 display brightness 232 Hibernation mode 230 keyboard overlays 236 Lock (Instant security) 227 Output (Display switch) 231 power plan 228 Sleep mode 229 volume mute 226 Zoom (Display resolution...
User Guide
Page 255
... Internet Service Providers ISPs 142 J jack RJ-11 141 K keyboard character keys 100 function keys 101 hot keys 236 not working 192 overlay keys 102 special Windows® keys 101 troubleshooting 200 unexpected characters 200 using 100 keyboard, external 84 keyboard, full-size 100 L light AC power 51 drive in-use indicator 110 lock computer, using 96 M main battery changing 129 installing 129, 131 removing 129 safety precautions 132 manual eject hole optical drive 110 memory adding 57 problem solving 198 removing memory module slot cover 60 memory module installation 58 installing...
... Internet Service Providers ISPs 142 J jack RJ-11 141 K keyboard character keys 100 function keys 101 hot keys 236 not working 192 overlay keys 102 special Windows® keys 101 troubleshooting 200 unexpected characters 200 using 100 keyboard, external 84 keyboard, full-size 100 L light AC power 51 drive in-use indicator 110 lock computer, using 96 M main battery changing 129 installing 129, 131 removing 129 safety precautions 132 manual eject hole optical drive 110 memory adding 57 problem solving 198 removing memory module slot cover 60 memory module installation 58 installing...
User Guide
Page 257
... found 195 USB Sleep and Charge cannot use 217 USB Wakeup function does not work 217 warning resume failure 192 Windows® operating system not working 194 program, starting 103 programs not running correctly 204 projector 81 connecting 82 R real-time clock (RTC) battery 119 recording sounds 145 recording sounds 145 recovering internal storage drive 66 recycle bin icon 137 registering computer 56 removing CDs and DVDs (slot-type drive) 112 DVD with computer...
... found 195 USB Sleep and Charge cannot use 217 USB Wakeup function does not work 217 warning resume failure 192 Windows® operating system not working 194 program, starting 103 programs not running correctly 204 projector 81 connecting 82 R real-time clock (RTC) battery 119 recording sounds 145 recording sounds 145 recovering internal storage drive 66 recycle bin icon 137 registering computer 56 removing CDs and DVDs (slot-type drive) 112 DVD with computer...
User Guide
Page 258
... TOSHIBA PC Health Monitor 183 TOSHIBA SD™ Memory Card Format Utility 165 TOSHIBA Service Station 181 TOSHIBA Zooming Utility 173 TouchPad™ control buttons 80 ON/OFF button 80 primary button 80 secondary button 80 using 79 traveling tips 135 troubleshooting DVD player general problems 211 external keyboard 200 keyboard 200 optical drive 204 turning on the computer 55 turning on the power 55 U USB Sleep and Charge cannot use 217 USB Sleep and Charge Utility 170 USB Wakeup function does not work 217 USB-compatible printer 84 user password, disabling 161 user password, setting...
... TOSHIBA PC Health Monitor 183 TOSHIBA SD™ Memory Card Format Utility 165 TOSHIBA Service Station 181 TOSHIBA Zooming Utility 173 TouchPad™ control buttons 80 ON/OFF button 80 primary button 80 secondary button 80 using 79 traveling tips 135 troubleshooting DVD player general problems 211 external keyboard 200 keyboard 200 optical drive 204 turning on the computer 55 turning on the power 55 U USB Sleep and Charge cannot use 217 USB Sleep and Charge Utility 170 USB Wakeup function does not work 217 USB-compatible printer 84 user password, disabling 161 user password, setting...


