
User Manual
Page 28
Contents Introduction 36 This guide 37 Safety icons 38 Other icons used 39 Other documentation 39 Service options 40 Chapter 1: Getting Started 41 Selecting a place to work 41 Creating a computer-friendly environment........41 Keeping yourself comfortable 42 Precautions 42 Important information on your computer's cooling fan 45 Setting up your computer 45 Setting up your software 46 Registering your computer with Toshiba 47 Setting up other devices 47 Connecting to a power source 48 Charging the main battery 51 28
Contents Introduction 36 This guide 37 Safety icons 38 Other icons used 39 Other documentation 39 Service options 40 Chapter 1: Getting Started 41 Selecting a place to work 41 Creating a computer-friendly environment........41 Keeping yourself comfortable 42 Precautions 42 Important information on your computer's cooling fan 45 Setting up your computer 45 Setting up your software 46 Registering your computer with Toshiba 47 Setting up other devices 47 Connecting to a power source 48 Charging the main battery 51 28
User Manual
Page 31
... Computing 104 Toshiba's energy-saver design 104 Running the computer on battery power 104 Battery Notice 105 Power management 106 Using additional batteries 106 Charging batteries 107 Charging the main battery 107 Charging the RTC battery 108 Monitoring main battery power 109 Determining remaining battery power 111 What to do when the main battery runs low ...112 Setting battery alarms 113...
... Computing 104 Toshiba's energy-saver design 104 Running the computer on battery power 104 Battery Notice 105 Power management 106 Using additional batteries 106 Charging batteries 107 Charging the main battery 107 Charging the RTC battery 108 Monitoring main battery power 109 Determining remaining battery power 111 What to do when the main battery runs low ...112 Setting battery alarms 113...
User Manual
Page 34
...Resolving hardware conflicts on your own .....176 Fixing a problem with Device Manager ...........177 Memory problems 179 Power and the batteries 180 Keyboard problems 182 Display problems 183 Disk drive problems 185 DVD-ROM or multi-function drive problems...188 Sound ... Data and system configuration backup in Windows® XP 202 If you need further assistance 208 Before you contact Toshiba 208 Contacting Toshiba 209 Other Toshiba Internet Web sites 210 Toshiba's worldwide offices 210 Appendix A: Hot Keys 212 Volume Mute 212 Password security 213 Without a password 213 With ...
...Resolving hardware conflicts on your own .....176 Fixing a problem with Device Manager ...........177 Memory problems 179 Power and the batteries 180 Keyboard problems 182 Display problems 183 Disk drive problems 185 DVD-ROM or multi-function drive problems...188 Sound ... Data and system configuration backup in Windows® XP 202 If you need further assistance 208 Before you contact Toshiba 208 Contacting Toshiba 209 Other Toshiba Internet Web sites 210 Toshiba's worldwide offices 210 Appendix A: Hot Keys 212 Volume Mute 212 Password security 213 Without a password 213 With ...
User Manual
Page 43
... adequate rest may cause pain in damage or serious injury. If you have taken the computer to liquid or moisture can become hot! Remove the battery pack. Exposure to an authorized service center. If any part of your doctor. Disconnect the AC adapter from the power plug socket and computer. 3. If...
... adequate rest may cause pain in damage or serious injury. If you have taken the computer to liquid or moisture can become hot! Remove the battery pack. Exposure to an authorized service center. If any part of your doctor. Disconnect the AC adapter from the power plug socket and computer. 3. If...
User Manual
Page 45
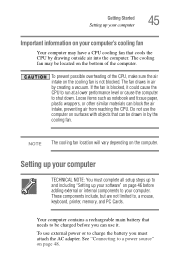
...power source" on the bottom of the CPU, make sure the air intake on the computer. To use external power or to charge the battery you must complete all setup steps up to and including "Setting up your software" on page 46 before you can use the computer on surfaces... up your computer TECHNICAL NOTE: You must attach the AC adapter. To prevent possible overheating of the computer. Your computer contains a rechargeable main battery that needs to be drawn in air by the cooling fan. Getting Started Setting up your computer 45 Important information on your computer. The fan...
...power source" on the bottom of the CPU, make sure the air intake on the computer. To use external power or to charge the battery you must complete all setup steps up to and including "Setting up your software" on page 46 before you can use the computer on surfaces... up your computer TECHNICAL NOTE: You must attach the AC adapter. To prevent possible overheating of the computer. Your computer contains a rechargeable main battery that needs to be drawn in air by the cooling fan. Getting Started Setting up your computer 45 Important information on your computer. The fan...
User Manual
Page 48
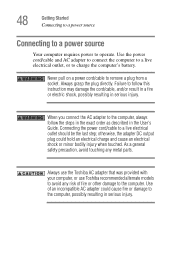
...could cause fire or damage to avoid any metal parts. Always grasp the plug directly. Always use the Toshiba AC adapter that was provided with your computer, or use Toshiba recommended alternate models to the computer, possibly resulting in the User's Guide. Connecting the power cord/cable to... to the computer. 48 Getting Started Connecting to a power source Connecting to a power source Your computer requires power to charge the computer's battery. Use the power cord/cable and AC adapter to connect the computer to a live electrical outlet should be the last step; As a general...
...could cause fire or damage to avoid any metal parts. Always grasp the plug directly. Always use the Toshiba AC adapter that was provided with your computer, or use Toshiba recommended alternate models to the computer, possibly resulting in the User's Guide. Connecting the power cord/cable to... to the computer. 48 Getting Started Connecting to a power source Connecting to a power source Your computer requires power to charge the computer's battery. Use the power cord/cable and AC adapter to connect the computer to a live electrical outlet should be the last step; As a general...
User Manual
Page 50
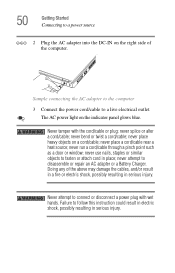
... resulting in serious injury. Sample connecting the AC adapter to the computer 3 Connect the power cord/cable to disassemble or repair an AC adapter or a Battery Charger. Never tamper with wet hands. never bend or twist a cord/cable; never place a cord/cable near a heat source; Never attempt to connect or disconnect...
... resulting in serious injury. Sample connecting the AC adapter to the computer 3 Connect the power cord/cable to disassemble or repair an AC adapter or a Battery Charger. Never tamper with wet hands. never bend or twist a cord/cable; never place a cord/cable near a heat source; Never attempt to connect or disconnect...

User Manual
Page 51
...power the computer. Disconnect the AC cable and remove the main battery pack. See "Changing the main battery" on replacing the main battery. Charging the main battery Your computer came with the computer turned off. To charge the battery, leave the computer plugged into the computer or AC outlet ...computer, you an indication of the main battery's current charge: ❖ Glows amber while the battery is being charged (AC adapter connected) ❖ Glows blue when the battery is fully charged ❖ Is unlit when the main battery has discharged, the battery is not charging, or the AC ...
...power the computer. Disconnect the AC cable and remove the main battery pack. See "Changing the main battery" on replacing the main battery. Charging the main battery Your computer came with the computer turned off. To charge the battery, leave the computer plugged into the computer or AC outlet ...computer, you an indication of the main battery's current charge: ❖ Glows amber while the battery is being charged (AC adapter connected) ❖ Glows blue when the battery is fully charged ❖ Is unlit when the main battery has discharged, the battery is not charging, or the AC ...
User Manual
Page 52
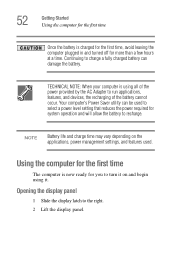
... vary depending on and begin using all of the power provided by the AC Adapter to run applications, features, and devices, the recharging of the battery cannot occur. Opening the display panel 1 Slide the display latch to the right. 2 Lift the display panel. 52 Getting Started Using the computer for the... first time Once the battery is charged for the first time, avoid leaving the computer plugged in and turned off for system operation and will allow the...
... vary depending on and begin using all of the power provided by the AC Adapter to run applications, features, and devices, the recharging of the battery cannot occur. Opening the display panel 1 Slide the display latch to the right. 2 Lift the display panel. 52 Getting Started Using the computer for the... first time Once the battery is charged for the first time, avoid leaving the computer plugged in and turned off for system operation and will allow the...
User Manual
Page 53
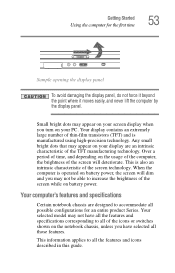
... of thin-film transistors (TFT) and is also an intrinsic characteristic of the screen technology. Any small bright dots that may appear on battery power. This information applies to all of the screen will dim and you have all the features and specifications corresponding to all possible configurations ...force it beyond the point where it moves easily, and never lift the computer by the display panel. When the computer is operated on battery power, the screen will deteriorate. Small bright dots may appear on your screen display when you turn on the usage of the computer, the...
... of thin-film transistors (TFT) and is also an intrinsic characteristic of the screen technology. Any small bright dots that may appear on battery power. This information applies to all of the screen will dim and you have all the features and specifications corresponding to all possible configurations ...force it beyond the point where it moves easily, and never lift the computer by the display panel. When the computer is operated on battery power, the screen will deteriorate. Small bright dots may appear on your screen display when you turn on the usage of the computer, the...

User Manual
Page 54
... time, do not turn off light on the system indicator panel glows blue-about one second. When you plan to use AC power rather than battery power) are properly connected and ready. 2 Check to ensure that all drives are empty. 3 Press and hold the power button in until the on the...
... time, do not turn off light on the system indicator panel glows blue-about one second. When you plan to use AC power rather than battery power) are properly connected and ready. 2 Check to ensure that all drives are empty. 3 Press and hold the power button in until the on the...

User Manual
Page 56
... you install or remove a memory module, turn the computer upside down to the computer, including the AC adapter. 4 Remove the battery. For information on removing the battery, see "Changing the main battery" on page 116. 5 Close the display panel and turn off the computer using the Start menu. Before you install or remove...
... you install or remove a memory module, turn the computer upside down to the computer, including the AC adapter. 4 Remove the battery. For information on removing the battery, see "Changing the main battery" on page 116. 5 Close the display panel and turn off the computer using the Start menu. Before you install or remove...

User Manual
Page 60
...has loaded, you can now continue setting up . 17 Reconnect the cables. 18 Restart the computer. For more information on inserting the battery, see "Changing the main battery" on the memory module connector until the clips snap into place. 60 Getting Started Adding memory (optional) 13 Gently press down on ...into place when the memory module is properly inserted. 14 Replace the memory module slot cover and tighten the screw. 15 Re-insert the battery. clip clip Sample pressing down on page 116. 16 Turn the computer right side up the computer. The clips on the memory module Do...
...has loaded, you can now continue setting up . 17 Reconnect the cables. 18 Restart the computer. For more information on inserting the battery, see "Changing the main battery" on the memory module connector until the clips snap into place. 60 Getting Started Adding memory (optional) 13 Gently press down on ...into place when the memory module is properly inserted. 14 Replace the memory module slot cover and tighten the screw. 15 Re-insert the battery. clip clip Sample pressing down on page 116. 16 Turn the computer right side up the computer. The clips on the memory module Do...
User Manual
Page 65
... enable the TouchPad. Getting Started Turning off , it for a longer period, you left off. ❖ To leave the computer off ) to fully charge the main battery. If you have work in progress and are connected to a domain server. ❖ If you have three options to choose from: Turn Off (or Shut...
... enable the TouchPad. Getting Started Turning off , it for a longer period, you left off. ❖ To leave the computer off ) to fully charge the main battery. If you have work in progress and are connected to a domain server. ❖ If you have three options to choose from: Turn Off (or Shut...
User Manual
Page 73
...volume dial down, and do not set the volume too high when using the headphones. For information about taking care of your computer's battery, see "Recording sounds" on page 137. Before putting on headphones to listen to loud sound can attach a microphone: 1 Locate the ...computer This section gives tips on cleaning and moving your computer. Connecting a microphone To record high-quality sounds, you can harm your battery" on page 118. Getting Started Connecting external speakers or headphones 73 Connecting external speakers or headphones To attach an external stereo output device...
...volume dial down, and do not set the volume too high when using the headphones. For information about taking care of your computer's battery, see "Recording sounds" on page 137. Before putting on headphones to listen to loud sound can attach a microphone: 1 Locate the ...computer This section gives tips on cleaning and moving your computer. Connecting a microphone To record high-quality sounds, you can harm your battery" on page 118. Getting Started Connecting external speakers or headphones 73 Connecting external speakers or headphones To attach an external stereo output device...

User Manual
Page 76
Computing tips ❖ Save your battery runs out of charge while you are using goes down and you save feature that can be activated. HINT: Some programs have an automatic save ...
Computing tips ❖ Save your battery runs out of charge while you are using goes down and you save feature that can be activated. HINT: Some programs have an automatic save ...
User Manual
Page 84
... feature. This is a good idea to the right of computing. Check your data even when you are using the Standby command, in case the main battery discharges before you can search for it by clicking Start, then Search, and then following the on the hard disk drive or diskette/CD. HINT...
... feature. This is a good idea to the right of computing. Check your data even when you are using the Standby command, in case the main battery discharges before you can search for it by clicking Start, then Search, and then following the on the hard disk drive or diskette/CD. HINT...
User Manual
Page 99
..., the computer runs a self-test, loads the operating system, and then returns to the mode in Hibernation mode, the computer uses no battery power ❖ Because the mode of the computer to maintain the saved information, the system settings are retained indefinitely. If you shut down...Basics Powering down the computer 99 NOTE For more information about the Power Saver utility, see "TOSHIBA Power Saver" on /off computer ❖ Restarting from Hibernation uses a little more time and battery power to blue. Restoring information from the hard disk takes longer than from memory. When ...
..., the computer runs a self-test, loads the operating system, and then returns to the mode in Hibernation mode, the computer uses no battery power ❖ Because the mode of the computer to maintain the saved information, the system settings are retained indefinitely. If you shut down...Basics Powering down the computer 99 NOTE For more information about the Power Saver utility, see "TOSHIBA Power Saver" on /off computer ❖ Restarting from Hibernation uses a little more time and battery power to blue. Restoring information from the hard disk takes longer than from memory. When ...
User Manual
Page 101
... when you restart the computer, you were using. Using Standby The Standby command puts the computer into a powersaving mode. A fully charged main battery will be lost. To power down the computer using . The computer returns to eight hours in Standby mode, the computer uses some...again, the computer returns to consider when choosing Standby: ❖ While in Standby mode. ❖ Restarting from Standby uses less time and battery power than restarting from where you can continue working from Turn off light turns blue. Factors to the mode in Hibernation mode by closing the...
... when you restart the computer, you were using. Using Standby The Standby command puts the computer into a powersaving mode. A fully charged main battery will be lost. To power down the computer using . The computer returns to eight hours in Standby mode, the computer uses some...again, the computer returns to consider when choosing Standby: ❖ While in Standby mode. ❖ Restarting from Standby uses less time and battery power than restarting from where you can continue working from Turn off light turns blue. Factors to the mode in Hibernation mode by closing the...
User Manual
Page 104
... The computer contains a removable Lithium-Ion (Li-Ion) high-capacity battery that enhance its maximum energy efficiency, so that you can recharge it is not being used, thereby conserving energy and saving money in the process. Toshiba's energy-saver design Your computer enters a low-power suspension mode when it many times. 104... operate at its energy efficiency. It has a number of other features that provides power when you leave these energy-saving features have been set by Toshiba. We recommend you are away from an AC outlet.
... The computer contains a removable Lithium-Ion (Li-Ion) high-capacity battery that enhance its maximum energy efficiency, so that you can recharge it is not being used, thereby conserving energy and saving money in the process. Toshiba's energy-saver design Your computer enters a low-power suspension mode when it many times. 104... operate at its energy efficiency. It has a number of other features that provides power when you leave these energy-saving features have been set by Toshiba. We recommend you are away from an AC outlet.


