User Guide
Page 21
Contents Introduction 27 This guide 29 Safety icons 30 Other icons used 30 Your computer's features and specifications ....31 Other documentation 31 Service options 31 Chapter 1: Getting Started 32 Selecting a place to work 32 Setting up a work environment 32 Keeping yourself comfortable 33 Computer user comfort recommendations .......33 Good Working Posture 33 Using the notebook with an external keyboard, mouse or monitor 34 Typing style 35 Taking breaks and varying tasks 35 Mobile computing tips 36 Transporting the notebook 36 21
Contents Introduction 27 This guide 29 Safety icons 30 Other icons used 30 Your computer's features and specifications ....31 Other documentation 31 Service options 31 Chapter 1: Getting Started 32 Selecting a place to work 32 Setting up a work environment 32 Keeping yourself comfortable 33 Computer user comfort recommendations .......33 Good Working Posture 33 Using the notebook with an external keyboard, mouse or monitor 34 Typing style 35 Taking breaks and varying tasks 35 Mobile computing tips 36 Transporting the notebook 36 21
User Guide
Page 23
... Computing tips 81 Using the keyboard 82 Character keys 83 Function keys 83 Special Windows® keys 83 Starting a program 84 Starting a program using the Search programs and files field 84 Starting a program from the Start menu...........85 Saving your work 85 Backing up your work 85 Restoring your work 86 Using the optical... optical disc 88 Removing a disc with the computer on 89 Playing optical media 89 Recording optical media 90 Removing a disc with the computer off 91 Toshiba's online resources 91
... Computing tips 81 Using the keyboard 82 Character keys 83 Function keys 83 Special Windows® keys 83 Starting a program 84 Starting a program using the Search programs and files field 84 Starting a program from the Start menu...........85 Saving your work 85 Backing up your work 85 Restoring your work 86 Using the optical... optical disc 88 Removing a disc with the computer on 89 Playing optical media 89 Recording optical media 90 Removing a disc with the computer off 91 Toshiba's online resources 91

User Guide
Page 25
... Setting passwords 123 Using a supervisor password 123 Using a user password 125 Deleting a user password 125 TOSHIBA Face Recognition Utility 126 TOSHIBA PC Diagnostic Tool Utility 127 Mouse Utility 128 TOSHIBA Hardware Setup 129 TOSHIBA Sleep Utility 130 Starting the TOSHIBA Sleep Utility 130 USB Sleep and Charge 130 Enabling/Disabling USB Sleep and Charge......132 Power...
... Setting passwords 123 Using a supervisor password 123 Using a user password 125 Deleting a user password 125 TOSHIBA Face Recognition Utility 126 TOSHIBA PC Diagnostic Tool Utility 127 Mouse Utility 128 TOSHIBA Hardware Setup 129 TOSHIBA Sleep Utility 130 Starting the TOSHIBA Sleep Utility 130 USB Sleep and Charge 130 Enabling/Disabling USB Sleep and Charge......132 Power...
User Guide
Page 31
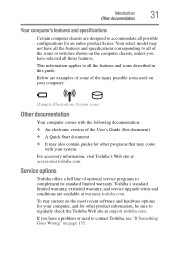
... shown on the computer chassis, unless you have selected all the features and icons described in this document) ❖ A Quick Start document ❖ It may also contain guides for other programs that may come with your computer: (Sample Illustration) System icons Other... and service upgrade terms and conditions are available at accessories.toshiba.com. This information applies to regularly check the Toshiba Web site at support.toshiba.com. Service options Toshiba offers a full line of optional service programs to contact Toshiba, see "If Something Goes Wrong" on page 135....
... shown on the computer chassis, unless you have selected all the features and icons described in this document) ❖ A Quick Start document ❖ It may also contain guides for other programs that may come with your computer: (Sample Illustration) System icons Other... and service upgrade terms and conditions are available at accessories.toshiba.com. This information applies to regularly check the Toshiba Web site at support.toshiba.com. Service options Toshiba offers a full line of optional service programs to contact Toshiba, see "If Something Goes Wrong" on page 135....
User Guide
Page 32
Chapter 1 Getting Started This chapter provides tips for the computer and any other equipment to do the first time you are using your computer effectively, summarizes how to ... provide adequate ventilation. Selecting a place to be used in prime operating condition, protect your computer. Setting up a work environment Place the computer on the Quick Start document (that is portable and designed to work area from: ❖ Dust, moisture, and direct sunlight. 32 Leave enough space around the computer and other...
Chapter 1 Getting Started This chapter provides tips for the computer and any other equipment to do the first time you are using your computer effectively, summarizes how to ... provide adequate ventilation. Selecting a place to be used in prime operating condition, protect your computer. Setting up a work environment Place the computer on the Quick Start document (that is portable and designed to work area from: ❖ Dust, moisture, and direct sunlight. 32 Leave enough space around the computer and other...
User Guide
Page 33
... the thigh. ❖ The space under your desk should be close enough to your notebook and other than speakers that you use a foot rest. Getting Started 33 Selecting a place to work ❖ Equipment that generates a strong electromagnetic field, such as stereo speakers (other items that are connected to the computer) or...
... the thigh. ❖ The space under your desk should be close enough to your notebook and other than speakers that you use a foot rest. Getting Started 33 Selecting a place to work ❖ Equipment that generates a strong electromagnetic field, such as stereo speakers (other items that are connected to the computer) or...
User Guide
Page 34
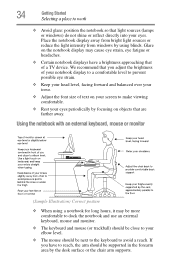
... work ❖ Avoid glare: position the notebook so that light sources (lamps or windows) do not shine or reflect directly into your eyes. 34 Getting Started Selecting a place to make viewing comfortable. ❖ Rest your eyes periodically by focusing on objects that are farther away. Glare on the notebook display may...
... work ❖ Avoid glare: position the notebook so that light sources (lamps or windows) do not shine or reflect directly into your eyes. 34 Getting Started Selecting a place to make viewing comfortable. ❖ Rest your eyes periodically by focusing on objects that are farther away. Glare on the notebook display may...
User Guide
Page 35
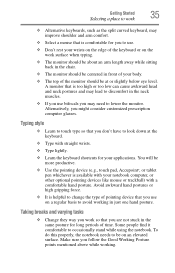
... sure you might consider customized prescription computer glasses. Some people find it comfortable to be at the keyboard. ❖ Type with a comfortable hand posture. Getting Started 35 Selecting a place to work ❖ Alternative keyboards, such as the split curved keyboard, may improve shoulder and arm comfort. ❖ Select a mouse that is...
... sure you might consider customized prescription computer glasses. Some people find it comfortable to be at the keyboard. ❖ Type with a comfortable hand posture. Getting Started 35 Selecting a place to work ❖ Alternative keyboards, such as the split curved keyboard, may improve shoulder and arm comfort. ❖ Select a mouse that is...
User Guide
Page 36
... short, strategically spaced rest breaks to avoid eye strain and body fatigue. Mobile computing tips ❖ When using an ergonomically-designed computer case. 36 Getting Started Selecting a place to work is affecting your health, try to identify the sources of your computer.
... short, strategically spaced rest breaks to avoid eye strain and body fatigue. Mobile computing tips ❖ When using an ergonomically-designed computer case. 36 Getting Started Selecting a place to work is affecting your health, try to identify the sources of your computer.

User Guide
Page 37
... monitor close to eye level? ❏ Is the monitor about an arm length away? ❏ Have you take breaks, at least once an hour? Getting Started 37 Selecting a place to work For more specific recommendations on the safety and comfort of your computer environment, customers in the forearm area (not at...
... monitor close to eye level? ❏ Is the monitor about an arm length away? ❏ Have you take breaks, at least once an hour? Getting Started 37 Selecting a place to work For more specific recommendations on the safety and comfort of your computer environment, customers in the forearm area (not at...
User Guide
Page 38
... reading from the power plug socket and computer. 3. Never place a heavy object on your lap. Remove the battery pack. Turning off the computer. 2. 38 Getting Started Selecting a place to work Never allow any liquids to spill into any of these instructions could damage the computer or cause system failure. ❖ Never...
... reading from the power plug socket and computer. 3. Never place a heavy object on your lap. Remove the battery pack. Turning off the computer. 2. 38 Getting Started Selecting a place to work Never allow any liquids to spill into any of these instructions could damage the computer or cause system failure. ❖ Never...
User Guide
Page 39
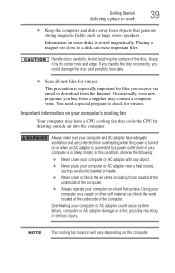
Getting Started 39 Selecting a place to work ❖ Keep the computer and disks away from objects that cools the CPU by its center hole and edge. Handle ...
Getting Started 39 Selecting a place to work ❖ Keep the computer and disks away from objects that cools the CPU by its center hole and edge. Handle ...
User Guide
Page 40
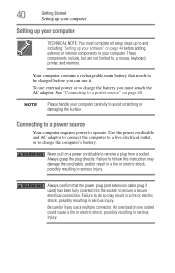
... one socket could cause a fire or electric shock, possibly resulting in serious injury. An overload on page 44 before you use a multiple connector. 40 Getting Started Setting up your computer Setting up your computer TECHNICAL NOTE: You must attach the AC adaptor. These components include, but are not limited to operate...
... one socket could cause a fire or electric shock, possibly resulting in serious injury. An overload on page 44 before you use a multiple connector. 40 Getting Started Setting up your computer Setting up your computer TECHNICAL NOTE: You must attach the AC adaptor. These components include, but are not limited to operate...
User Guide
Page 41
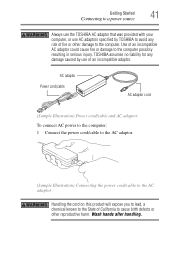
... hands after handling. Use of an incompatible AC adaptor could cause fire or damage to cause birth defects or other damage to the computer. Getting Started 41 Connecting to a power source Always use the TOSHIBA AC adaptor that was provided with your computer, or use AC adaptors specified by...
... hands after handling. Use of an incompatible AC adaptor could cause fire or damage to cause birth defects or other damage to the computer. Getting Started 41 Connecting to a power source Always use the TOSHIBA AC adaptor that was provided with your computer, or use AC adaptors specified by...
User Guide
Page 42
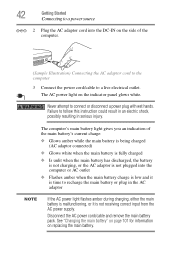
... main battery or plug in serious injury. See "Changing the main battery" on page 101 for information on the indicator panel glows white. 42 Getting Started Connecting to a power source _ + 2 Plug the AC adaptor cord into the DC-IN on the side of the main battery's current charge: ❖ Glows amber...
... main battery or plug in serious injury. See "Changing the main battery" on page 101 for information on the indicator panel glows white. 42 Getting Started Connecting to a power source _ + 2 Plug the AC adaptor cord into the DC-IN on the side of the main battery's current charge: ❖ Glows amber...

User Guide
Page 43
... will be completely charged and ready to power the computer, you turn it moves easily and never lift the computer by the display panel. Getting Started 43 Charging the main battery Charging the main battery Before using it. When the computer is now ready for the first time The computer is...
... will be completely charged and ready to power the computer, you turn it moves easily and never lift the computer by the display panel. Getting Started 43 Charging the main battery Charging the main battery Before using it. When the computer is now ready for the first time The computer is...
User Guide
Page 44
... Failure to set up your software. Adding optional external devices NOTE Before adding external devices or memory, Toshiba recommends setting up your software. After starting your computer for the first time, do not turn on your computer, the Setup Wizard guides you ...display devices" on -screen instructions. 44 Getting Started Registering your computer with Toshiba Product registration is required. Product registration can be completed by either visiting the Toshiba Web site at register.toshiba.com, or by clicking the Start button and, in which windows appear, may ...
... Failure to set up your software. Adding optional external devices NOTE Before adding external devices or memory, Toshiba recommends setting up your software. After starting your computer for the first time, do not turn on your computer, the Setup Wizard guides you ...display devices" on -screen instructions. 44 Getting Started Registering your computer with Toshiba Product registration is required. Product registration can be completed by either visiting the Toshiba Web site at register.toshiba.com, or by clicking the Start button and, in which windows appear, may ...
User Guide
Page 45
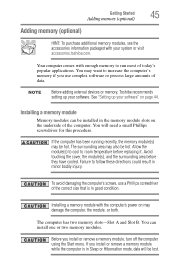
...Avoid touching the cover, the module(s), and the surrounding area before replacing it. Installing a memory module with your system or visit accessories.toshiba.com. The computer has two memory slots-Slot A and Slot B. Before you install or remove a memory module while the computer is... in minor bodily injury. If you install or remove a memory module, turn off the computer using the Start menu. The surrounding area may also be hot. Getting Started 45 Adding memory (optional) Adding memory (optional) HINT: To purchase additional memory modules, see the accessories...
...Avoid touching the cover, the module(s), and the surrounding area before replacing it. Installing a memory module with your system or visit accessories.toshiba.com. The computer has two memory slots-Slot A and Slot B. Before you install or remove a memory module while the computer is... in minor bodily injury. If you install or remove a memory module, turn off the computer using the Start menu. The surrounding area may also be hot. Getting Started 45 Adding memory (optional) Adding memory (optional) HINT: To purchase additional memory modules, see the accessories...
User Guide
Page 46
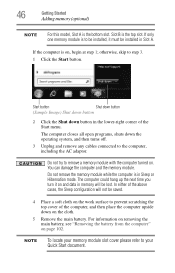
..." on page 102. NOTE To locate your memory module slot cover please refer to step 3. 1 Click the Start button. The computer closes all open programs, shuts down on the cloth. 5 Remove the main battery. If the...AC adaptor. Do not remove the memory module while the computer is in Slot A. 46 Getting Started Adding memory (optional) NOTE For this model, Slot A is to be installed, it on and data in... the lower-right corner of the Start menu. In either of the above cases, the Sleep configuration will be lost. If only one memory...
..." on page 102. NOTE To locate your memory module slot cover please refer to step 3. 1 Click the Start button. The computer closes all open programs, shuts down on the cloth. 5 Remove the main battery. If the...AC adaptor. Do not remove the memory module while the computer is in Slot A. 46 Getting Started Adding memory (optional) NOTE For this model, Slot A is to be installed, it on and data in... the lower-right corner of the Start menu. In either of the above cases, the Sleep configuration will be lost. If only one memory...
User Guide
Page 47
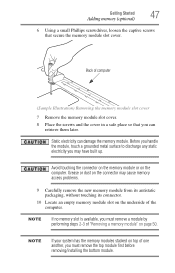
Grease or dust on the connector may have built up. Getting Started 47 Adding memory (optional) 6 Using a small Phillips screwdriver, loosen the captive screws that you can damage the memory module. Back of one another, you must ...
Grease or dust on the connector may have built up. Getting Started 47 Adding memory (optional) 6 Using a small Phillips screwdriver, loosen the captive screws that you can damage the memory module. Back of one another, you must ...


