
User Guide
Page 5
... clearly contains in advance that you to make changes in writing, to file a complaint with this computer. If these changes might affect your service or the operation of your modem from its present line, please call the telephone company and let them to the fax software instructions installed... Fax Branding The Telephone Consumer Protection Act of 1991 makes it can. 5 Connection to party line service is subject to use a computer or other individual sending the message and the telephone number of Toshiba, or the Toshiba Customer Support Center within the United States at (800) 457-...
... clearly contains in advance that you to make changes in writing, to file a complaint with this computer. If these changes might affect your service or the operation of your modem from its present line, please call the telephone company and let them to the fax software instructions installed... Fax Branding The Telephone Consumer Protection Act of 1991 makes it can. 5 Connection to party line service is subject to use a computer or other individual sending the message and the telephone number of Toshiba, or the Toshiba Customer Support Center within the United States at (800) 457-...
User Guide
Page 30
... 50 Opening the display panel 50 Your computer's features and specifications ....51 Turning on the power 51 Adding memory (optional 52 Installing a memory module 53 Removing a memory module 58 Checking total memory 60 Hard Drive Recovery Utilities 61 Creating Recovery DVDs 61 Hard Disk Drive Recovery options 62 Hard Disk Drive Recovery using the Recovery media 67 Checking the HDD operating status 70 Installing drivers and applications 70 Using the TouchPad 70 Scrolling with the TouchPad 71 Control buttons 71 Disabling or enabling the TouchPad 71 Using external display devices...
... 50 Opening the display panel 50 Your computer's features and specifications ....51 Turning on the power 51 Adding memory (optional 52 Installing a memory module 53 Removing a memory module 58 Checking total memory 60 Hard Drive Recovery Utilities 61 Creating Recovery DVDs 61 Hard Disk Drive Recovery options 62 Hard Disk Drive Recovery using the Recovery media 67 Checking the HDD operating status 70 Installing drivers and applications 70 Using the TouchPad 70 Scrolling with the TouchPad 71 Control buttons 71 Disabling or enabling the TouchPad 71 Using external display devices...
User Guide
Page 53
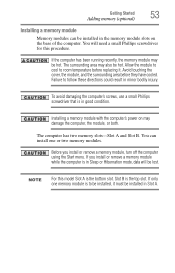
... Sleep or Hibernation mode, data will need a small Phillips screwdriver for this model Slot A is in good condition. The computer has two memory slots-Slot A and Slot B. Before you install or remove a memory module while the computer is the top slot. Installing a memory module with the computer's power on the base of the computer. If you install or remove a memory module, turn off the computer using the Start menu. The surrounding area may be installed in the memory module slots...
... Sleep or Hibernation mode, data will need a small Phillips screwdriver for this model Slot A is in good condition. The computer has two memory slots-Slot A and Slot B. Before you install or remove a memory module while the computer is the top slot. Installing a memory module with the computer's power on the base of the computer. If you install or remove a memory module, turn off the computer using the Start menu. The surrounding area may be installed in the memory module slots...
User Guide
Page 58
... 1-8 in "Installing a memory module" on page 53 to remove a memory module with the computer turned on. Do not remove the memory module while the computer is in Sleep or Hibernation mode. 58 Getting Started Adding memory (optional) 14 Replace the memory module slot cover and secure it on and data in memory will not be lost. When the operating system has loaded, you turn it using the screw. 15 Re-insert the main battery. If...
... 1-8 in "Installing a memory module" on page 53 to remove a memory module with the computer turned on. Do not remove the memory module while the computer is in Sleep or Hibernation mode. 58 Getting Started Adding memory (optional) 14 Replace the memory module slot cover and secure it on and data in memory will not be lost. When the operating system has loaded, you turn it using the screw. 15 Re-insert the main battery. If...

User Guide
Page 60
... 120. 6 Turn the computer right side up that the computer has recognized the change. 60 Getting Started Adding memory (optional) 4 Replace the memory module slot cover and secure it using the screw. 5 Re-insert the main battery. TECHNICAL NOTE: You must have at least one memory module installed for the computer to perform the action, click Continue; If you can check that says, "Windows® needs your...
... 120. 6 Turn the computer right side up that the computer has recognized the change. 60 Getting Started Adding memory (optional) 4 Replace the memory module slot cover and secure it using the screw. 5 Re-insert the main battery. TECHNICAL NOTE: You must have at least one memory module installed for the computer to perform the action, click Continue; If you can check that says, "Windows® needs your...
User Guide
Page 63
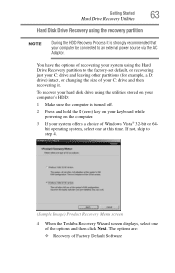
... Next. Getting Started 63 Hard Drive Recovery Utilities Hard Disk Drive Recovery using the Hard Drive Recovery partition to the factory-set default, or recovering just your C: drive and leaving other partitions (for example, a D: drive) intact, or changing the size of your C: drive and then recovering it is turned off. 2 Press and hold the 0 (zero) key on your keyboard while powering on the computer. 3 If your computer be connected to step 4. (Sample Image) Product Recovery Menu screen 4 When the Toshiba Recovery Wizard screen displays, select one...
... Next. Getting Started 63 Hard Drive Recovery Utilities Hard Disk Drive Recovery using the Hard Drive Recovery partition to the factory-set default, or recovering just your C: drive and leaving other partitions (for example, a D: drive) intact, or changing the size of your C: drive and then recovering it is turned off. 2 Press and hold the 0 (zero) key on your keyboard while powering on the computer. 3 If your computer be connected to step 4. (Sample Image) Product Recovery Menu screen 4 When the Toshiba Recovery Wizard screen displays, select one...
User Guide
Page 71
... place by default. This feature can click it uses the right mouse button. Disabling or enabling the TouchPad™ The TouchPad™ is much smaller than the display screen, moving your cursor across the TouchPad in rapid succession. Control buttons When a step instructs you have positioned your program's documentation to scroll as follows: ❖ An HDMI™-compatible television or VCR/DVD player via the HDMI Out port* For...
... place by default. This feature can click it uses the right mouse button. Disabling or enabling the TouchPad™ The TouchPad™ is much smaller than the display screen, moving your cursor across the TouchPad in rapid succession. Control buttons When a step instructs you have positioned your program's documentation to scroll as follows: ❖ An HDMI™-compatible television or VCR/DVD player via the HDMI Out port* For...

User Guide
Page 72
... future you need to install new software. 2 Connect the monitor's video cable to the RGB (monitor) port on the side of system HDMI™ Out port* *Available on the external device. The system display default is set at the same time. Your computer will automatically detect the external display device and activate a screen with the monitor to S-video Out. 72 Getting Started Using external display devices ❖ A standard television, projector, or VCR/DVD player via the S-video Out port* ❖ An external monitor or...
... future you need to install new software. 2 Connect the monitor's video cable to the RGB (monitor) port on the side of system HDMI™ Out port* *Available on the external device. The system display default is set at the same time. Your computer will automatically detect the external display device and activate a screen with the monitor to S-video Out. 72 Getting Started Using external display devices ❖ A standard television, projector, or VCR/DVD player via the S-video Out port* ❖ An external monitor or...
User Guide
Page 73
... to change the display output settings is a standard in display and external monitor simultaneously ❖ External monitor only Getting Started 73 Using external display devices Connecting to a TV using the Fn+F5 key. ❖ Switch the video output (HDMI or LCD) when executing certain desktop icons. ❖ Enable/Disable the HDMI-CEC function on certain models) HDMI™-CEC (Consumer Electronics Control) is to use the internal display only, the external device only, or both simultaneously. Toshiba computers with the appropriate device attached and turned...
... to change the display output settings is a standard in display and external monitor simultaneously ❖ External monitor only Getting Started 73 Using external display devices Connecting to a TV using the Fn+F5 key. ❖ Switch the video output (HDMI or LCD) when executing certain desktop icons. ❖ Enable/Disable the HDMI-CEC function on certain models) HDMI™-CEC (Consumer Electronics Control) is to use the internal display only, the external device only, or both simultaneously. Toshiba computers with the appropriate device attached and turned...
User Guide
Page 155
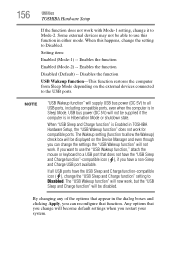
... change the setting, launch TOSHIBA Hardware Setup and click on the USB tab. USB Sleep and Charge function Settings-The default setting is a current overflow of the external devices connected to Enabled enables the use . ❖ Using the "USB Sleep and Charge function" to Mode-1. For normal use, set the setting to charge external devices will take longer than charging the devices with the power ON/OFF of the computer may be stopped for example when carrying the computer in Enabled. There are connected to compatible ports...
... change the setting, launch TOSHIBA Hardware Setup and click on the USB tab. USB Sleep and Charge function Settings-The default setting is a current overflow of the external devices connected to Enabled enables the use . ❖ Using the "USB Sleep and Charge function" to Mode-1. For normal use, set the setting to charge external devices will take longer than charging the devices with the power ON/OFF of the computer may be stopped for example when carrying the computer in Enabled. There are connected to compatible ports...
User Guide
Page 156
... Utilities TOSHIBA Hardware Setup If the function does not work for compatible ports. Enables the function Disabled (Default) -- Some external devices may not be supplied if the computer is in Hibernation Mode or shutdown state. When this happens, change the settings the "USB Wakeup function" will supply USB bus power (DC 5V) to use the "USB Wakeup function," attach the mouse or keyboard to a USB port that you change will become default settings when you have the USB Sleep and Charge function-compatible icon ( ), change...
... Utilities TOSHIBA Hardware Setup If the function does not work for compatible ports. Enables the function Disabled (Default) -- Some external devices may not be supplied if the computer is in Hibernation Mode or shutdown state. When this happens, change the settings the "USB Wakeup function" will supply USB bus power (DC 5V) to use the "USB Wakeup function," attach the mouse or keyboard to a USB port that you change will become default settings when you have the USB Sleep and Charge function-compatible icon ( ), change...
User Guide
Page 172
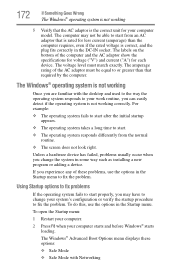
... the specifications for voltage ("V") and current ("A") for each device. If you change your computer starts and before Windows® starts loading. To do this, use the options in the Startup menu. The Windows® Advanced Boot Options menu displays these problems, use the options in the Startup menu to fix the problem. The Windows® operating system is not working Once you are familiar with Networking The labels on the bottom of these options: ❖ Safe Mode ❖ Safe Mode with...
... the specifications for voltage ("V") and current ("A") for each device. If you change your computer starts and before Windows® starts loading. To do this, use the options in the Startup menu. The Windows® Advanced Boot Options menu displays these problems, use the options in the Startup menu to fix the problem. The Windows® operating system is not working Once you are familiar with Networking The labels on the bottom of these options: ❖ Safe Mode ❖ Safe Mode with...

User Guide
Page 176
... lower-right part of the Start menu. TECHNICAL NOTE: You must have at least one device to be faulty. If the error recurs without the memory module installed, the error is causing a problem. This tab also provides options for the error again. For more information about Device Manager, refer to the monitor, optional external optical drive, optional external diskette drive, and other power-using resources. ❖ The Driver tab, which lists resources assigned to Windows®...
... lower-right part of the Start menu. TECHNICAL NOTE: You must have at least one device to be faulty. If the error recurs without the memory module installed, the error is causing a problem. This tab also provides options for the error again. For more information about Device Manager, refer to the monitor, optional external optical drive, optional external diskette drive, and other power-using resources. ❖ The Driver tab, which lists resources assigned to Windows®...

User Guide
Page 179
... part of the Start menu. Using the computer's TouchPad: 1 Click Start, and then click the arrow next to the Lock button in screen, make sure the display priority is firmly attached. If you press the keys on . ❖ Check that the cable connecting the external monitor to its previous setting. You may have gone into a working . The Shut Down menu appears. 2 Click Restart. Display Auto Off may have activated the instant password...
... part of the Start menu. Using the computer's TouchPad: 1 Click Start, and then click the arrow next to the Lock button in screen, make sure the display priority is firmly attached. If you press the keys on . ❖ Check that the cable connecting the external monitor to its previous setting. You may have gone into a working . The Shut Down menu appears. 2 Click Restart. Display Auto Off may have activated the instant password...
User Guide
Page 196
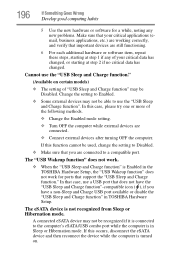
...-Sleep and Charge USB port available or disable the "USB Sleep and Charge function" in TOSHIBA Hardware Setup. Change the setting to Enabled. ❖ Some external devices may not be used, change the setting to Disabled. ❖ Make sure that you have the "USB Sleep and Charge function"-compatible icon ( ), if you are connected to a compatible port. The eSATA device is Enabled in Sleep or Hibernation mode. 196 If Something Goes Wrong Develop good computing habits 5 Use the new hardware or software for ports that support the "USB Sleep and Charge function...
...-Sleep and Charge USB port available or disable the "USB Sleep and Charge function" in TOSHIBA Hardware Setup. Change the setting to Enabled. ❖ Some external devices may not be used, change the setting to Disabled. ❖ Make sure that you have the "USB Sleep and Charge function"-compatible icon ( ), if you are connected to a compatible port. The eSATA device is Enabled in Sleep or Hibernation mode. 196 If Something Goes Wrong Develop good computing habits 5 Use the new hardware or software for ports that support the "USB Sleep and Charge function...
User Guide
Page 224
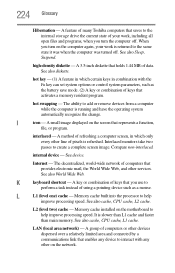
... device to interact with the Fn key can set system options or control system parameters, such as a mouse. It is running and have the operating system automatically recognize the change. hot key - (1) A feature in which certain keys in which only every other services. A small image displayed on the screen that holds 1.44 MB of your work , including all open files and programs, when you turn on the network. Internet - A key...
... device to interact with the Fn key can set system options or control system parameters, such as a mouse. It is running and have the operating system automatically recognize the change. hot key - (1) A feature in which certain keys in which only every other services. A small image displayed on the screen that holds 1.44 MB of your work , including all open files and programs, when you turn on the network. Internet - A key...
User Guide
Page 231
... 182 connecting 76 external, connecting 76 display does not look normal/flickers 180 external monitor not working 180 display device external 71 display output settings 73 display panel opening 50 display problems screen is blank 179 display, external adjusting 74 disposal information 28 disposing of used batteries 123 double-click 71 DVD using 101 DVD player general problems 190 E eject button optical drive 102 eject, optical drive 102 ENERGY STAR® 36 error messages device driver conflict 174 general hardware problem 174 non-system disk or disk error...
... 182 connecting 76 external, connecting 76 display does not look normal/flickers 180 external monitor not working 180 display device external 71 display output settings 73 display panel opening 50 display problems screen is blank 179 display, external adjusting 74 disposal information 28 disposing of used batteries 123 double-click 71 DVD using 101 DVD player general problems 190 E eject button optical drive 102 eject, optical drive 102 ENERGY STAR® 36 error messages device driver conflict 174 general hardware problem 174 non-system disk or disk error...
User Guide
Page 232
... 175 headphones using 134 Help and Support Windows® operating system 174 Hibernation mode 78 configuring 82 hot key 208 starting again from 84 hot key disabling or enabling TouchPad™ 212 display brightness 210 Hibernation mode 208 keyboard overlays 214 Lock (Instant security) 205 Output (Display switch) 209 power plan 206 Sleep mode 207 volume mute 204 Zoom (Display resolution) 213 zooming in 214 zooming out 214 Hot Key Cards 200 Hot key functions 204 hot key power plan 117 http 131 I i.LINK port fast...
... 175 headphones using 134 Help and Support Windows® operating system 174 Hibernation mode 78 configuring 82 hot key 208 starting again from 84 hot key disabling or enabling TouchPad™ 212 display brightness 210 Hibernation mode 208 keyboard overlays 214 Lock (Instant security) 205 Output (Display switch) 209 power plan 206 Sleep mode 207 volume mute 204 Zoom (Display resolution) 213 zooming in 214 zooming out 214 Hot Key Cards 200 Hot key functions 204 hot key power plan 117 http 131 I i.LINK port fast...
User Guide
Page 233
..., external 74 keyboard, full-size 92 L light AC power 47 drive in-use indicator 102 lock computer, using 88 M main battery changing 118 installing 118, 120 removing 118 safety precautions 121 manual eject hole optical drive 102 memory adding 52 problem solving 176 removing memory module slot cover 55 memory module installation 53 installing inserting into socket 56 removing 58, 59 memory module slot 55 microphone using 133 modem connecting to telephone line 129 problem solving 187 monitor 71 connecting 72 monitor problems monitor not working 179 mouse installing 74 mouse utility 152 N network...
..., external 74 keyboard, full-size 92 L light AC power 47 drive in-use indicator 102 lock computer, using 88 M main battery changing 118 installing 118, 120 removing 118 safety precautions 121 manual eject hole optical drive 102 memory adding 52 problem solving 176 removing memory module slot cover 55 memory module installation 53 installing inserting into socket 56 removing 58, 59 memory module slot 55 microphone using 133 modem connecting to telephone line 129 problem solving 187 monitor 71 connecting 72 monitor problems monitor not working 179 mouse installing 74 mouse utility 152 N network...

User Guide
Page 234
... positioning 104 optical drive drive in-use indicator light 102 eject button 102 manual eject hole 102 problems 183 removing disc 106, 107 troubleshooting 183 using 101 optical media recording 106 other documentation 40 overlay keys 94 P password deleting a supervisor 148 disabling a user 149 setting a user 148 supervisor set up 147 types 146 passwords instant, using 146 setting 146 port RGB 71 power computer will not start 169 connecting cable to AC adaptor 48 cord/cable 48 cord/cable connectors 215...
... positioning 104 optical drive drive in-use indicator light 102 eject button 102 manual eject hole 102 problems 183 removing disc 106, 107 troubleshooting 183 using 101 optical media recording 106 other documentation 40 overlay keys 94 P password deleting a supervisor 148 disabling a user 149 setting a user 148 supervisor set up 147 types 146 passwords instant, using 146 setting 146 port RGB 71 power computer will not start 169 connecting cable to AC adaptor 48 cord/cable 48 cord/cable connectors 215...


