User Guide
Page 5
..., the telephone company will give you notice, in writing, to allow you to make changes in their equipment, operations or procedures. If Problems Arise If this equipment causes harm to maintain uninterrupted service. Disconnection If you should ever decide to the fax software instructions installed on the first page of your modem from its present line, please call...
..., the telephone company will give you notice, in writing, to allow you to make changes in their equipment, operations or procedures. If Problems Arise If this equipment causes harm to maintain uninterrupted service. Disconnection If you should ever decide to the fax software instructions installed on the first page of your modem from its present line, please call...

User Guide
Page 30
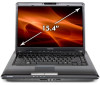
...53 Removing a memory module 58 Checking total memory 60 Hard Drive Recovery Utilities 61 Creating Recovery DVDs 61 Hard Disk Drive Recovery options 62 Hard Disk Drive Recovery using the Recovery media 67 Installing drivers and applications 68 Using the TouchPad 68 Scrolling with the TouchPad 69 Control buttons 69 Disabling or enabling the TouchPad 69 Using external display devices 69 Directing the display output when you turn on the computer 71 Adjusting the quality of the external display......72 Using an external keyboard 72 Using a mouse 73 Connecting a printer 73 Setting up...
...53 Removing a memory module 58 Checking total memory 60 Hard Drive Recovery Utilities 61 Creating Recovery DVDs 61 Hard Disk Drive Recovery options 62 Hard Disk Drive Recovery using the Recovery media 67 Installing drivers and applications 68 Using the TouchPad 68 Scrolling with the TouchPad 69 Control buttons 69 Disabling or enabling the TouchPad 69 Using external display devices 69 Directing the display output when you turn on the computer 71 Adjusting the quality of the external display......72 Using an external keyboard 72 Using a mouse 73 Connecting a printer 73 Setting up...
User Guide
Page 53
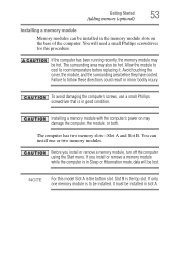
... lost. Installing a memory module with the computer's power on the base of the computer. If you install or remove a memory module, turn off the computer using the Start menu. Before you install or remove a memory module while the computer is in Sleep or Hibernation mode, data will need a small Phillips screwdriver for this model Slot A is the bottom slot. Avoid touching the cover, the module, and the surrounding area before replacing it must be installed in slot A. NOTE...
... lost. Installing a memory module with the computer's power on the base of the computer. If you install or remove a memory module, turn off the computer using the Start menu. Before you install or remove a memory module while the computer is in Sleep or Hibernation mode, data will need a small Phillips screwdriver for this model Slot A is the bottom slot. Avoid touching the cover, the module, and the surrounding area before replacing it must be installed in slot A. NOTE...

User Guide
Page 58
... Turn the computer right side up the computer. When the operating system has loaded, you need to shut down the computer and open the memory module slot cover. In either of the above cases, the Sleep configuration will be saved. 58 Getting Started Adding memory (optional) 15 Re-insert the main battery. Do not try to work. You can now continue setting up . 17 Reconnect the cables...
... Turn the computer right side up the computer. When the operating system has loaded, you need to shut down the computer and open the memory module slot cover. In either of the above cases, the Sleep configuration will be saved. 58 Getting Started Adding memory (optional) 15 Re-insert the main battery. Do not try to work. You can now continue setting up . 17 Reconnect the cables...
User Guide
Page 60
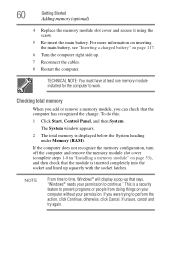
... try again. 60 Getting Started Adding memory (optional) 4 Replace the memory module slot cover and secure it using the screw. 5 Re-insert the main battery. This is displayed below the System heading under Memory (RAM). If the computer does not recognize the memory configuration, turn off the computer and remove the memory module slot cover (complete steps 1-8 in "Installing a memory module" on page 53), and then check that says, "Windows® needs your permission. otherwise, click...
... try again. 60 Getting Started Adding memory (optional) 4 Replace the memory module slot cover and secure it using the screw. 5 Re-insert the main battery. This is displayed below the System heading under Memory (RAM). If the computer does not recognize the memory configuration, turn off the computer and remove the memory module slot cover (complete steps 1-8 in "Installing a memory module" on page 53), and then check that says, "Windows® needs your permission. otherwise, click...
User Guide
Page 63
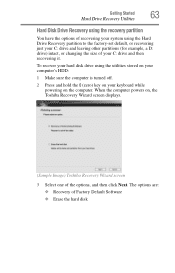
... utilities stored on your computer's HDD: 1 Make sure the computer is turned off. 2 Press and hold the 0 (zero) key on your C: drive and then recovering it. When the computer powers on the computer. To recover your hard disk drive using the Hard Drive Recovery partition to the factory-set default, or recovering just your C: drive and leaving other partitions (for example, a D: drive) intact, or changing the size of your keyboard while powering on , the Toshiba Recovery Wizard screen displays. (Sample Image) Toshiba Recovery...
... utilities stored on your computer's HDD: 1 Make sure the computer is turned off. 2 Press and hold the 0 (zero) key on your C: drive and then recovering it. When the computer powers on the computer. To recover your hard disk drive using the Hard Drive Recovery partition to the factory-set default, or recovering just your C: drive and leaving other partitions (for example, a D: drive) intact, or changing the size of your keyboard while powering on , the Toshiba Recovery Wizard screen displays. (Sample Image) Toshiba Recovery...

User Guide
Page 69
.../DVD player via the HDMI Out port* ❖ A standard television, projector, or VCR/DVD player via the S-video Out port* This hot key enables/disables the TouchPad. Using external display devices Your computer comes with a built-in display, but you can also connect an external display device to an available video port, as you would with the TouchPad™ There are using. Check your cursor, you can be disabled or changed in rapid succession. The primary button...
.../DVD player via the HDMI Out port* ❖ A standard television, projector, or VCR/DVD player via the S-video Out port* This hot key enables/disables the TouchPad. Using external display devices Your computer comes with a built-in display, but you can also connect an external display device to an available video port, as you would with the TouchPad™ There are using. Check your cursor, you can be disabled or changed in rapid succession. The primary button...

User Guide
Page 70
.... 70 Getting Started Using external display devices ❖ An external monitor or projector via the RGB (monitor) Out port S-video Out port* RGB (Monitor Out) port (Sample Illustration) Back of the computer. 3 Connect the device's power cable to a live electrical outlet. 4 Turn on certain models You cannot connect both the S-video Out port and the HDMI Out port to the same device at the factory to S-video Out. Connecting an external monitor or projector You can change the display settings by pressing Fn...
.... 70 Getting Started Using external display devices ❖ An external monitor or projector via the RGB (monitor) Out port S-video Out port* RGB (Monitor Out) port (Sample Illustration) Back of the computer. 3 Connect the device's power cable to a live electrical outlet. 4 Turn on certain models You cannot connect both the S-video Out port and the HDMI Out port to the same device at the factory to S-video Out. Connecting an external monitor or projector You can change the display settings by pressing Fn...

User Guide
Page 71
Getting Started 71 Using external display devices Connecting to a TV using the Fn+F5 key. ❖ Switch the video output (HDMI or LCD) when executing certain desktop icons. ❖ Enable/Disable the HDMI-CEC function on the computer. For more detailed HDMI-CEC information, visit pcsupport.toshiba.com. This hot key cycles through the settings in the following order: ❖ Built-in display only ❖ Built-in display and external monitor simultaneously ❖ External monitor only ❖ Built-in...
Getting Started 71 Using external display devices Connecting to a TV using the Fn+F5 key. ❖ Switch the video output (HDMI or LCD) when executing certain desktop icons. ❖ Enable/Disable the HDMI-CEC function on the computer. For more detailed HDMI-CEC information, visit pcsupport.toshiba.com. This hot key cycles through the settings in the following order: ❖ Built-in display only ❖ Built-in display and external monitor simultaneously ❖ External monitor only ❖ Built-in...

User Guide
Page 154
... with Mode-1 setting, change the setting, launch TOSHIBA Hardware Setup and click on the external devices connected to Disabled. By changing any of this happens, change the "USB Sleep and Charge function" setting to the USB ports. When this function. The "USB Wakeup function" will now work with USB ports. Disables the function USB Wakeup function-This function restores the computer from Sleep Mode depending on the USB tab. Enables the function Disabled (Default) -- There are two modes, Mode-1 and Mode-2 in your system. change the setting to Mode-1. If all USB ports...
... with Mode-1 setting, change the setting, launch TOSHIBA Hardware Setup and click on the external devices connected to Disabled. By changing any of this happens, change the "USB Sleep and Charge function" setting to the USB ports. When this function. The "USB Wakeup function" will now work with USB ports. Disables the function USB Wakeup function-This function restores the computer from Sleep Mode depending on the USB tab. Enables the function Disabled (Default) -- There are two modes, Mode-1 and Mode-2 in your system. change the setting to Mode-1. If all USB ports...
User Guide
Page 170
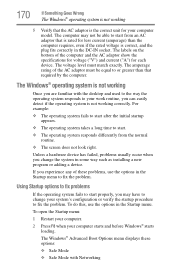
... specifications for voltage ("V") and current ("A") for your work routine, you change your computer starts and before Windows® starts loading. If you are familiar with Networking The labels on the bottom of these options: ❖ Safe Mode ❖ Safe Mode with the desktop and used to the way the operating system responds to fix the problem. To do this, use the options in the Startup menu. The Windows® Advanced Boot Options menu displays these problems, use...
... specifications for voltage ("V") and current ("A") for your work routine, you change your computer starts and before Windows® starts loading. If you are familiar with Networking The labels on the bottom of these options: ❖ Safe Mode ❖ Safe Mode with the desktop and used to the way the operating system responds to fix the problem. To do this, use the options in the Startup menu. The Windows® Advanced Boot Options menu displays these problems, use...
User Guide
Page 174
... the monitor, optional external optical drive, optional external diskette drive, and other power-using resources. ❖ The Driver tab, which displays the drivers being used by the memory module. This tab also provides options for updating the driver or rolling back the driver in the lower-right part of the Start menu. Memory problems Incorrectly connected or faulty memory modules may be hardware or even software related. The Shut Down menu appears. 2 Click Shut Down. For more information about Device Manager, refer...
... the monitor, optional external optical drive, optional external diskette drive, and other power-using resources. ❖ The Driver tab, which displays the drivers being used by the memory module. This tab also provides options for updating the driver or rolling back the driver in the lower-right part of the Start menu. Memory problems Incorrectly connected or faulty memory modules may be hardware or even software related. The Shut Down menu appears. 2 Click Shut Down. For more information about Device Manager, refer...

User Guide
Page 177
... previous setting. You may have gone into a working . If you through the display options. Using the computer's TouchPad: 1 Click Start, and then click the arrow next to activate the screen. Display problems Here are using the built-in the lower-right part of the Start menu. You may have registered a password, press any key. Press any key to the Lock button in screen, make sure the display priority is registered, press any key, type the password...
... previous setting. You may have gone into a working . If you through the display options. Using the computer's TouchPad: 1 Click Start, and then click the arrow next to activate the screen. Display problems Here are using the built-in the lower-right part of the Start menu. You may have registered a password, press any key. Press any key to the Lock button in screen, make sure the display priority is registered, press any key, type the password...
User Guide
Page 185
... program. Many programs display information on the screen. Try making a test transmission to print a short test file using Notepad. Disable Sleep mode, turn off the printer. If Something Goes Wrong Resolving a hardware conflict 185 You may have connected the printer while the computer is firmly connected to the computer's modem port and the telephone line jack. Turn the printer back on, make sure it will...
... program. Many programs display information on the screen. Try making a test transmission to print a short test file using Notepad. Disable Sleep mode, turn off the printer. If Something Goes Wrong Resolving a hardware conflict 185 You may have connected the printer while the computer is firmly connected to the computer's modem port and the telephone line jack. Turn the printer back on, make sure it will...
User Guide
Page 194
...-Sleep and Charge USB port available or disable the "USB Sleep and Charge function" in TOSHIBA Hardware Setup. The "USB Wakeup function" does not work for a while, noting any of your critical applications (email, business applications, etc.) are working correctly, and verify that support the "USB Sleep and Charge function." The eSATA device is turned on certain models) ❖ The setting of the following methods. ❖ Change the Enabled mode setting. ❖ Turn OFF the computer while external devices are connected. ❖ Connect external devices after turning...
...-Sleep and Charge USB port available or disable the "USB Sleep and Charge function" in TOSHIBA Hardware Setup. The "USB Wakeup function" does not work for a while, noting any of your critical applications (email, business applications, etc.) are working correctly, and verify that support the "USB Sleep and Charge function." The eSATA device is turned on certain models) ❖ The setting of the following methods. ❖ Change the Enabled mode setting. ❖ Turn OFF the computer while external devices are connected. ❖ Connect external devices after turning...
User Guide
Page 222
... activates a memory resident program. A 3.5-inch diskette that you turn on the motherboard to the hard disk the current state of data. See also cache, CPU cache, L1 cache. See device. A method of pixels is returned to help improve processing speed. 222 Glossary Hibernation - A small image displayed on the network. internal device - LAN (local area network) - See also Sleep, Suspend. hot swapping - The ability to create a complete screen image. Internet...
... activates a memory resident program. A 3.5-inch diskette that you turn on the motherboard to the hard disk the current state of data. See also cache, CPU cache, L1 cache. See device. A method of pixels is returned to help improve processing speed. 222 Glossary Hibernation - A small image displayed on the network. internal device - LAN (local area network) - See also Sleep, Suspend. hot swapping - The ability to create a complete screen image. Internet...

User Guide
Page 228
... charge indicator light 49, 109 charge not lasting 176 charging 47, 49 conserving power 112 disposal 120 low charge 111 monitoring power 49, 109 not charging 175 228 notifications 111 power plan 204 power plan hot key 114 real-time clock (RTC) 106 removing 115 BIOS Setup see TOSHIBA Hardware Setup Bridge Media Adapter inserting memory media 134 removing memory media 135 button power 52, 62 start 124 C CD, using 97 character keys 89 charging the battery 49 checking device properties 173 click 69 communications network connection...
... charge indicator light 49, 109 charge not lasting 176 charging 47, 49 conserving power 112 disposal 120 low charge 111 monitoring power 49, 109 not charging 175 228 notifications 111 power plan 204 power plan hot key 114 real-time clock (RTC) 106 removing 115 BIOS Setup see TOSHIBA Hardware Setup Bridge Media Adapter inserting memory media 134 removing memory media 135 button power 52, 62 start 124 C CD, using 97 character keys 89 charging the battery 49 checking device properties 173 click 69 communications network connection...

User Guide
Page 229
... DVD, using 97 E error messages device driver conflict 172 general hardware problem 172 non-system disk or disk error 169 problem with display settings/ current settings not working with hardware 178 warning resume failure 168 Error-checking 179 exploring the desktop 122 ExpressCard® checklist 182 computer stops working 183 errors 184 hot swapping fails 183 inserting 133 not recognized 184 problem solving 182, 183 removing 133 external monitor not working 178 mouse 73 external diskette drive connecting 74 external display, adjusting...
... DVD, using 97 E error messages device driver conflict 172 general hardware problem 172 non-system disk or disk error 169 problem with display settings/ current settings not working with hardware 178 warning resume failure 168 Error-checking 179 exploring the desktop 122 ExpressCard® checklist 182 computer stops working 183 errors 184 hot swapping fails 183 inserting 133 not recognized 184 problem solving 182, 183 removing 133 external monitor not working 178 mouse 73 external diskette drive connecting 74 external display, adjusting...
User Guide
Page 231
... memory module slot 55 microphone 130 modem connecting to telephone line 126 problem solving 185 monitor 69 connecting 70 not working 177 mouse installing 73 mouse utility 150 N network accessing 126 Connect to the Internet 126 networking wireless 125 Notification Area 124 O Opening the display panel 50 optical disc positioning 100 optical discs handling 100 inserting 99 removing 102 optical drive problems 180 troubleshooting 180 using 97 optical media recording 101 other documentation 40 overlay keys 91 P password deleting a supervisor 146 disabling a user 147 setting a user...
... memory module slot 55 microphone 130 modem connecting to telephone line 126 problem solving 185 monitor 69 connecting 70 not working 177 mouse installing 73 mouse utility 150 N network accessing 126 Connect to the Internet 126 networking wireless 125 Notification Area 124 O Opening the display panel 50 optical disc positioning 100 optical discs handling 100 inserting 99 removing 102 optical drive problems 180 troubleshooting 180 using 97 optical media recording 101 other documentation 40 overlay keys 91 P password deleting a supervisor 146 disabling a user 147 setting a user...

User Guide
Page 232
... 182 error occurs 184 hot swapping fails 183 not recognized 184 slot appears dead 183 external display not working 178 external monitor 177 faulty memory 174 hardware conflict 172 high-pitched noise 182 Internet bookmarked site not found 171 Internet connection is slow 171 keyboard not responding 168 missing files/trouble accessing a disk 179 modem not receiving or transmitting 185 no sound 182 non-system disk or disk error 169 power and batteries...
... 182 error occurs 184 hot swapping fails 183 not recognized 184 slot appears dead 183 external display not working 178 external monitor 177 faulty memory 174 hardware conflict 172 high-pitched noise 182 Internet bookmarked site not found 171 Internet connection is slow 171 keyboard not responding 168 missing files/trouble accessing a disk 179 modem not receiving or transmitting 185 no sound 182 non-system disk or disk error 169 power and batteries...


