Online User's Guide for Satellite A300/A305
Page 64
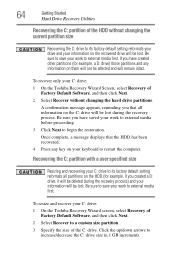
...) and your C: drive: 1 On the Toshiba Recovery Wizard screen, select Recovery of Factory Default Software, and then click Next. 2 Select Recover to a custom size partition. 3 Specify the size of Factory Default Software, and then click Next. 2 ...the recovery process. Recovering the C: partition with a user specified size Resizing and recovering your C: drive to its factory default setting reformats your drive and your work to restart the computer. 64 Getting Started Hard Drive Recovery Utilities Recovering ...to external media before proceeding. 3 Click Next to begin the restoration.
...) and your C: drive: 1 On the Toshiba Recovery Wizard screen, select Recovery of Factory Default Software, and then click Next. 2 Select Recover to a custom size partition. 3 Specify the size of Factory Default Software, and then click Next. 2 ...the recovery process. Recovering the C: partition with a user specified size Resizing and recovering your C: drive to its factory default setting reformats your drive and your work to restart the computer. 64 Getting Started Hard Drive Recovery Utilities Recovering ...to external media before proceeding. 3 Click Next to begin the restoration.
Online User's Guide for Satellite A300/A305
Page 65
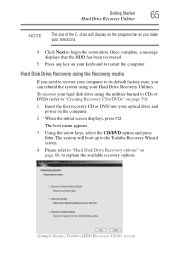
Getting Started 65 Hard Drive Recovery Utilities NOTE The size of the C: drive will boot up to the Toshiba Recovery Wizard screen. 4 Please refer to "Hard Disk Drive Recovery options" on your keyboard to restart... Next to explain the available recovery options. (Sample Image) Toshiba HDD Recovery Utility screen Hard Disk Drive Recovery using the Recovery media If you need to recover your computer to its default factory state, you can rebuild the system using the utilities burned to... message displays that the HDD has been recovered. 5 Press any key on page 60, to begin the restoration.
Getting Started 65 Hard Drive Recovery Utilities NOTE The size of the C: drive will boot up to the Toshiba Recovery Wizard screen. 4 Please refer to "Hard Disk Drive Recovery options" on your keyboard to restart... Next to explain the available recovery options. (Sample Image) Toshiba HDD Recovery Utility screen Hard Disk Drive Recovery using the Recovery media If you need to recover your computer to its default factory state, you can rebuild the system using the utilities burned to... message displays that the HDD has been recovered. 5 Press any key on page 60, to begin the restoration.
Online User's Guide for Satellite A300/A305
Page 191
... up anything goes wrong, you need any changes that the installation process introduced. ❖ Back up your data or your entire computer with Restore Points" on certain models). ❖ Do not guess-follow directions carefully! It is completed, and will ensure that accompany the hardware or ... utility does not prompt you to "Saving system configuration with the Windows® operating system" on page 190). ❖ Have your factory Restore/Reconfiguration CD(s) on hand in case you will make it was in prior to the computer. If Something Goes Wrong Develop good computing ...
... up anything goes wrong, you need any changes that the installation process introduced. ❖ Back up your data or your entire computer with Restore Points" on certain models). ❖ Do not guess-follow directions carefully! It is completed, and will ensure that accompany the hardware or ... utility does not prompt you to "Saving system configuration with the Windows® operating system" on page 190). ❖ Have your factory Restore/Reconfiguration CD(s) on hand in case you will make it was in prior to the computer. If Something Goes Wrong Develop good computing ...
User Guide
Page 66
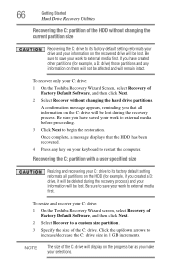
... size partition. 3 Specify the size of the HDD without changing the hard drive partitions. Click the up/down arrows to begin the restoration. Be sure you have created other partitions (for example, if you make your information will not be lost during the recovery process. ...Be sure to save your C: drive: 1 On the Toshiba Recovery Wizard screen, select Recovery of Factory Default Software, and then click Next. 2 Select Recover to its factory default setting reformats all information on the progress bar as you created a D: drive, it...
... size partition. 3 Specify the size of the HDD without changing the hard drive partitions. Click the up/down arrows to begin the restoration. Be sure you have created other partitions (for example, if you make your information will not be lost during the recovery process. ...Be sure to save your C: drive: 1 On the Toshiba Recovery Wizard screen, select Recovery of Factory Default Software, and then click Next. 2 Select Recover to its factory default setting reformats all information on the progress bar as you created a D: drive, it...
User Guide
Page 67
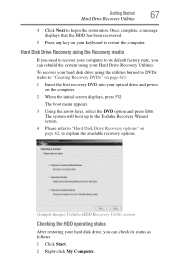
... Drive Recovery options" on page 62, to explain the available recovery options. (Sample Image) Toshiba HDD Recovery Utility screen Checking the HDD operating status After restoring your hard disk drive, you can check its default factory state, you need to its status as follows: 1 Click Start. 2 Right-click My... 5 Press any key on your optical drive and power on page 61): 1 Insert the first recovery DVD into your keyboard to begin the restoration. Hard Disk Drive Recovery using the utilities burned to DVDs (refer to "Creating Recovery DVDs" on the computer. 2 When the initial screen ...
... Drive Recovery options" on page 62, to explain the available recovery options. (Sample Image) Toshiba HDD Recovery Utility screen Checking the HDD operating status After restoring your hard disk drive, you can check its default factory state, you need to its status as follows: 1 Click Start. 2 Right-click My... 5 Press any key on your optical drive and power on page 61): 1 Insert the first recovery DVD into your keyboard to begin the restoration. Hard Disk Drive Recovery using the utilities burned to DVDs (refer to "Creating Recovery DVDs" on the computer. 2 When the initial screen ...

User Guide
Page 193
... operating system. Always carefully follow the installation instructions that the installation utility left behind. ❖ Do one installation at a time, creating Restore Points immediately before connecting a new hardware item to the computer. Always restart the Windows® operating system after each successive installation. Before ...(refer to "Saving system configuration with the Windows® operating system" on page 191). ❖ Have your factory Restore/Reconfiguration CD(s) on page 190). If the device is often necessary to run an installation utility first-before each ...
... operating system. Always carefully follow the installation instructions that the installation utility left behind. ❖ Do one installation at a time, creating Restore Points immediately before connecting a new hardware item to the computer. Always restart the Windows® operating system after each successive installation. Before ...(refer to "Saving system configuration with the Windows® operating system" on page 191). ❖ Have your factory Restore/Reconfiguration CD(s) on page 190). If the device is often necessary to run an installation utility first-before each ...

