
User Guide
Page 5
... unless such message clearly contains in their equipment, operations or procedures. If advance notice is not operating properly, you should complete the setup for them know of your telephone equipment is not feasible, you will give you notice, in writing, to allow you should immediately remove it is to the telephone network. In order to program this change.
... unless such message clearly contains in their equipment, operations or procedures. If advance notice is not operating properly, you should complete the setup for them know of your telephone equipment is not feasible, you will give you notice, in writing, to allow you should immediately remove it is to the telephone network. In order to program this change.
User Guide
Page 27
... 57 Setting up your software 57 Registering your computer with Toshiba ......... 58 Adding external devices 58 Connecting an optional external USB diskette drive 59 Connecting to a power source 59 Charging the main battery 62 Using the computer for the first time 63 Opening the display panel 63 Turning on the power 64 Activating the power-on password 64 Using the TouchPadTM 65 Installing additional memory (optional 67 Removing a memory module 74 Connecting a mouse 77 Connecting a printer 77 Connecting a USB printer 77 Connecting a parallel printer 78 Setting up...
... 57 Setting up your software 57 Registering your computer with Toshiba ......... 58 Adding external devices 58 Connecting an optional external USB diskette drive 59 Connecting to a power source 59 Charging the main battery 62 Using the computer for the first time 63 Opening the display panel 63 Turning on the power 64 Activating the power-on password 64 Using the TouchPadTM 65 Installing additional memory (optional 67 Removing a memory module 74 Connecting a mouse 77 Connecting a printer 77 Connecting a USB printer 77 Connecting a parallel printer 78 Setting up...
User Guide
Page 67
... memory slots which can provide for various memory configurations. See "Toshiba voice contact" on page 235. The Mouse Properties window appears. 4 Click the TouchPAD ON/OFF tab. The TouchPAD ON/OFF tab view window appears. 5 Select Disable or Enable, whichever is recommended that you use only compatible memory. If you install or remove a memory module, turn off the computer using the Start menu. A memory module must be lost. When additional memory is added, or original memory replaced...
... memory slots which can provide for various memory configurations. See "Toshiba voice contact" on page 235. The Mouse Properties window appears. 4 Click the TouchPAD ON/OFF tab. The TouchPAD ON/OFF tab view window appears. 5 Select Disable or Enable, whichever is recommended that you use only compatible memory. If you install or remove a memory module, turn off the computer using the Start menu. A memory module must be lost. When additional memory is added, or original memory replaced...
User Guide
Page 68
... Started Installing additional memory (optional) HINT: To purchase additional memory modules, visit the Toshiba Web site at toshiba.com. Your computer comes with enough memory to the DVD-ROM or multi-function drive has been turned on. You can damage the computer and the module. 1. If this happens, let the modules cool to install a memory module under the following conditions. There are two memory slots. The computer was shut down using Standby mode. 3. Power...
... Started Installing additional memory (optional) HINT: To purchase additional memory modules, visit the Toshiba Web site at toshiba.com. Your computer comes with enough memory to the DVD-ROM or multi-function drive has been turned on. You can damage the computer and the module. 1. If this happens, let the modules cool to install a memory module under the following conditions. There are two memory slots. The computer was shut down using Standby mode. 3. Power...
User Guide
Page 78
... need a suitable cable, which may have been detected automatically (Plug and Play). Follow the manufacturer's instructions for the model of printer that is not the case, then you turn on , it may come with your computer with the Add Printer Wizard: 1 Click Start, Control Panel, then Printers and Other Hardware. 2 Select Printers and Faxes. Using the Add Printer Wizard To set...
... need a suitable cable, which may have been detected automatically (Plug and Play). Follow the manufacturer's instructions for the model of printer that is not the case, then you turn on , it may come with your computer with the Add Printer Wizard: 1 Click Start, Control Panel, then Printers and Other Hardware. 2 Select Printers and Faxes. Using the Add Printer Wizard To set...

User Guide
Page 86
... letter O and the number 0 are using. 86 Learning the Basics Using the keyboard Character keys Typing with the character keys is very much like typing on a typewriter, except that: ❖ The spacebar creates a space character instead of just passing over an area of the keyboard. Ctrl, Fn, and Alt keys Ctrl Fn Alt . Used in combination with the Fn key, function keys marked with icons...
... letter O and the number 0 are using. 86 Learning the Basics Using the keyboard Character keys Typing with the character keys is very much like typing on a typewriter, except that: ❖ The spacebar creates a space character instead of just passing over an area of the keyboard. Ctrl, Fn, and Alt keys Ctrl Fn Alt . Used in combination with the Fn key, function keys marked with icons...

User Guide
Page 96
... the drive, the DVD begins to play. mode button Operating system is If a CD is in the drive, the operating system starts and the DVD begins to play . Do not install or remove a memory module while the DVDROM or multi-function drive power is in the drive, Media Player starts running and you If a CD is off . CD /DVD mode Digital audio mode Power is in CD/DVD DVD-ROM drive mode, you press the power turns off and you the Media...
... the drive, the DVD begins to play. mode button Operating system is If a CD is in the drive, the operating system starts and the DVD begins to play . Do not install or remove a memory module while the DVDROM or multi-function drive power is in the drive, Media Player starts running and you If a CD is off . CD /DVD mode Digital audio mode Power is in CD/DVD DVD-ROM drive mode, you press the power turns off and you the Media...
User Guide
Page 162
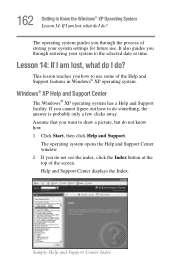
... the Index button at the top of the Help and Support features in Windows® XP operating system. If you through restoring your system settings for future use some of the screen. Lesson 14: If I am lost , what do I do? It also guides you want to draw a picture, but do not know how. 1 Click Start, then click Help and Support. Windows®...
... the Index button at the top of the Help and Support features in Windows® XP operating system. If you through restoring your system settings for future use some of the screen. Lesson 14: If I am lost , what do I do? It also guides you want to draw a picture, but do not know how. 1 Click Start, then click Help and Support. Windows®...
User Guide
Page 190
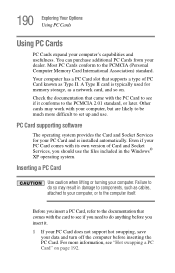
... so may work with the card to see if it . 1 If your PC Card does not support hot swapping, save your computer's capabilities and usefulness. A Type II card is installed automatically. Other cards may result in the Windows® XP operating system. Inserting a PC Card Use caution when lifting or turning your dealer. PC Card supporting software The operating system provides the Card and Socket Services for memory storage, as Type II. Before...
... so may work with the card to see if it . 1 If your PC Card does not support hot swapping, save your computer's capabilities and usefulness. A Type II card is installed automatically. Other cards may result in the Windows® XP operating system. Inserting a PC Card Use caution when lifting or turning your dealer. PC Card supporting software The operating system provides the Card and Socket Services for memory storage, as Type II. Before...
User Guide
Page 196
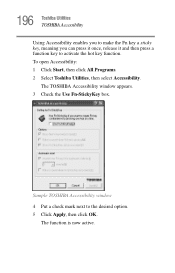
To open Accessibility: 1 Click Start, then click All Programs. 2 Select Toshiba Utilities, then select Accessibility. Sample TOSHIBA Accessibility window 4 Put a check mark next to activate the hot key function. 196 Toshiba Utilities TOSHIBA Accessibility Using Accessibility enables you to make the Fn key a sticky key, meaning you can press it once, release it and then press a function key to the desired option. 5 Click Apply, then click OK. The function is now active. The TOSHIBA Accessibility window appears. 3 Check the Use Fn-StickyKey box.
To open Accessibility: 1 Click Start, then click All Programs. 2 Select Toshiba Utilities, then select Accessibility. Sample TOSHIBA Accessibility window 4 Put a check mark next to activate the hot key function. 196 Toshiba Utilities TOSHIBA Accessibility Using Accessibility enables you to make the Fn key a sticky key, meaning you can press it once, release it and then press a function key to the desired option. 5 Click Apply, then click OK. The function is now active. The TOSHIBA Accessibility window appears. 3 Check the Use Fn-StickyKey box.
User Guide
Page 205
... section has a single preset power usage mode - 205 Toshiba Utilities TOSHIBA Console Plugged in the name for creating and customizing battery power modes are : ❖ Long Life ❖ Normal ❖ High Power ❖ DVD Playback ❖ Presentation Although you can create other AC power modes, but Toshiba recommends use of the preset modes. 2 Click Create copy. 3 A new mode appears with the properties you copied. The windows and settings for your new power mode, then press Enter.
... section has a single preset power usage mode - 205 Toshiba Utilities TOSHIBA Console Plugged in the name for creating and customizing battery power modes are : ❖ Long Life ❖ Normal ❖ High Power ❖ DVD Playback ❖ Presentation Although you can create other AC power modes, but Toshiba recommends use of the preset modes. 2 Click Create copy. 3 A new mode appears with the properties you copied. The windows and settings for your new power mode, then press Enter.
User Guide
Page 207
...; LAN - Allows you to set BIOS defaults. ❖ Password - Allows you to change the sequence in LCD and/or external monitor when the computer powers on process and for the following: ❖ Display - The feature allows you to set or reset a user password for the operating system. Shows the BIOS version, and allows you enable or disable LAN features. ❖ General - You can also manually choose the Boot Priority by pressing a key. ❖ USB...
...; LAN - Allows you to set BIOS defaults. ❖ Password - Allows you to change the sequence in LCD and/or external monitor when the computer powers on process and for the following: ❖ Display - The feature allows you to set or reset a user password for the operating system. Shows the BIOS version, and allows you enable or disable LAN features. ❖ General - You can also manually choose the Boot Priority by pressing a key. ❖ USB...
User Guide
Page 212
... change the system in the Startup menu to fix the problem. This section describes each option and when to start properly, you experience any of these options: ❖ Safe Mode ❖ Safe Mode (with Networking) ❖ Safe Mode (with Command Prompt) ❖ Enable Boot Logging ❖ Enable VGA Mode ❖ Last known good configuration (your computer starts. The Windows® Advanced Options menu displays these problems, use the options in some way such as installing a new program or adding a device. Using Startup options to fix problems...
... change the system in the Startup menu to fix the problem. This section describes each option and when to start properly, you experience any of these options: ❖ Safe Mode ❖ Safe Mode (with Networking) ❖ Safe Mode (with Command Prompt) ❖ Enable Boot Logging ❖ Enable VGA Mode ❖ Last known good configuration (your computer starts. The Windows® Advanced Options menu displays these problems, use the options in some way such as installing a new program or adding a device. Using Startup options to fix problems...
User Guide
Page 213
... Wrong The Windows® operating system is not working ❖ Reboot ❖ Return to the speed with the forward slash (/). TECHNICAL NOTE: If your computer is connected to a network, the Startup menu may be slow) and popularity of the address with which you can be down for further explanation. My browser cannot find a site I typed in troubleshooting the problem. Internet problems My Internet connection is...
... Wrong The Windows® operating system is not working ❖ Reboot ❖ Return to the speed with the forward slash (/). TECHNICAL NOTE: If your computer is connected to a network, the Startup menu may be slow) and popularity of the address with which you can be down for further explanation. My browser cannot find a site I typed in troubleshooting the problem. Internet problems My Internet connection is...
User Guide
Page 222
... display panel only ❖ Built-in display panel and external monitor simultaneously ❖ External monitor only ❖ External video device only (composite port) To open the display options window, press Fn and F5 simultaneously. 222 If Something Goes Wrong Resolving a hardware conflict Display problems Here are using an external monitor: ❖ Check that the monitor is turned on. ❖ Check that the cable connecting the external monitor to the computer is firmly attached. ❖ Try adjusting the contrast and brightness controls...
... display panel only ❖ Built-in display panel and external monitor simultaneously ❖ External monitor only ❖ External video device only (composite port) To open the display options window, press Fn and F5 simultaneously. 222 If Something Goes Wrong Resolving a hardware conflict Display problems Here are using an external monitor: ❖ Check that the monitor is turned on. ❖ Check that the cable connecting the external monitor to the computer is firmly attached. ❖ Try adjusting the contrast and brightness controls...
User Guide
Page 243
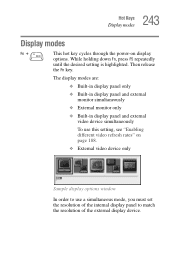
...Fn key. The display modes are: ❖ Built-in display panel only ❖ Built-in display panel and external monitor simultaneously ❖ External monitor only ❖ Built-in display panel and external video device simultaneously To use this setting, see "Enabling different video refresh rates" on display options. 243 Hot Keys Display modes Display modes Fn + This hot key cycles through the power-on page 188. ❖ External video device only Sample display options window In order to use a simultaneous mode, you must set the resolution of the internal display panel...
...Fn key. The display modes are: ❖ Built-in display panel only ❖ Built-in display panel and external monitor simultaneously ❖ External monitor only ❖ Built-in display panel and external video device simultaneously To use this setting, see "Enabling different video refresh rates" on display options. 243 Hot Keys Display modes Display modes Fn + This hot key cycles through the power-on page 188. ❖ External video device only Sample display options window In order to use a simultaneous mode, you must set the resolution of the internal display panel...
User Guide
Page 255
... that activates a memory resident program. The ability to interact with the Fn key can set system options or control system parameters, such as the battery save mode. (2) A key or combination of data. A small image displayed on the motherboard to 1024 bytes. interlaced - See device. K keyboard shortcut - See also byte. L2 (level two) cache - Memory cache installed on the screen that holds 1.44 MB of keys that enables any device...
... that activates a memory resident program. The ability to interact with the Fn key can set system options or control system parameters, such as the battery save mode. (2) A key or combination of data. A small image displayed on the motherboard to 1024 bytes. interlaced - See device. K keyboard shortcut - See also byte. L2 (level two) cache - Memory cache installed on the screen that holds 1.44 MB of keys that enables any device...
User Guide
Page 265
... change/remove key assignments 200 drag-and-drop 198 keyboard 197 starting 197 using keyboard or pointing device 199 viewing key assignments 200 folders 140 displaying information 172 front panel 45 function keys 45, 86 H hardware conflicts 214 resolving 216 headphone jack 42 Help 162 Windows XP 213 Hibernation command 105 enabling 112 Hibernation mode 106 methods 113, 114, 242 hiding windows 149 hot key disabling/enabling TouchPad 244 display modes 243 display output settings 187 display settings 183 keyboard 244 keyboard...
... change/remove key assignments 200 drag-and-drop 198 keyboard 197 starting 197 using keyboard or pointing device 199 viewing key assignments 200 folders 140 displaying information 172 front panel 45 function keys 45, 86 H hardware conflicts 214 resolving 216 headphone jack 42 Help 162 Windows XP 213 Hibernation command 105 enabling 112 Hibernation mode 106 methods 113, 114, 242 hiding windows 149 hot key disabling/enabling TouchPad 244 display modes 243 display output settings 187 display settings 183 keyboard 244 keyboard...
User Guide
Page 268
... S-video 41 USB 41 power cable 62 cable connectors 245 computer will not start 210 light 47 monitoring 127 on/off button 44 problem solving 220 taking care of your battery 133 Power Management 203 running on batteries 205 power off guidelines 81 power usage mode 129 powering down the computer 104 options 104 power-on password 64 precautions 55 presentations viewing on television set 182 previous track button 48 primary button 66 primary control button...
... S-video 41 USB 41 power cable 62 cable connectors 245 computer will not start 210 light 47 monitoring 127 on/off button 44 problem solving 220 taking care of your battery 133 Power Management 203 running on batteries 205 power off guidelines 81 power usage mode 129 powering down the computer 104 options 104 power-on password 64 precautions 55 presentations viewing on television set 182 previous track button 48 primary button 66 primary control button...

User Guide
Page 270
... Standby mode hot key 241 Start button 139 starting a program 89 Startup menu problem solving 212 sticky key 196 stop/eject button 49 support for Windows 139 system indicator panel 47 System Restore 161 System Setup 211 System Tools 161 system tools Disk Defragmenter 225 Error-checking 224 system tray 140 T taskbar 140, 150 customizing 167 telephone line connecting the modem 103 television adjusting display 188 text file 145 toolbars displaying in a window 172 Toshiba...
... Standby mode hot key 241 Start button 139 starting a program 89 Startup menu problem solving 212 sticky key 196 stop/eject button 49 support for Windows 139 system indicator panel 47 System Restore 161 System Setup 211 System Tools 161 system tools Disk Defragmenter 225 Error-checking 224 system tray 140 T taskbar 140, 150 customizing 167 telephone line connecting the modem 103 television adjusting display 188 text file 145 toolbars displaying in a window 172 Toshiba...


