User Guide
Page 31
... Viewing a Slide Show 203 Sorting your Pictures 203 Watching Your Digital Movies 204 Organizing Your Videos 204 Playing Digital Videos 205 Playing a Video in Full Screen Mode 206 Sorting Videos 206 Watching a DVD 207 Stopping a DVD Movie 208 Playing a DVD movie already in your drive .....208 Changing the Media Center Settings...
... Viewing a Slide Show 203 Sorting your Pictures 203 Watching Your Digital Movies 204 Organizing Your Videos 204 Playing Digital Videos 205 Playing a Video in Full Screen Mode 206 Sorting Videos 206 Watching a DVD 207 Stopping a DVD Movie 208 Playing a DVD movie already in your drive .....208 Changing the Media Center Settings...
User Guide
Page 46
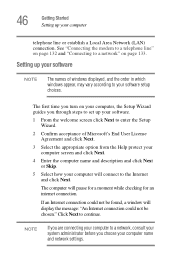
...your software NOTE The names of Microsoft's End User License Agreement and click Next. 3 Select the appropriate option from the Help protect your computer screen and click Next. 4 Enter the computer name and description and click Next or Skip. 5 Select how your computer will pause for a moment...you are connecting your computer to a network, consult your system administrator before you through steps to set up your software. 1 From the welcome screen click Next to enter the Setup Wizard. 2 Confirm acceptance of windows displayed, and the order in which windows appear, may vary according to ...
...your software NOTE The names of Microsoft's End User License Agreement and click Next. 3 Select the appropriate option from the Help protect your computer screen and click Next. 4 Enter the computer name and description and click Next or Skip. 5 Select how your computer will pause for a moment...you are connecting your computer to a network, consult your system administrator before you through steps to set up your software. 1 From the welcome screen click Next to enter the Setup Wizard. 2 Confirm acceptance of windows displayed, and the order in which windows appear, may vary according to ...
User Guide
Page 47
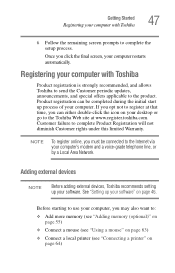
... site at that time, you must be completed during the initial start up your computer with Toshiba 47 6 Follow the remaining screen prompts to the product. See "Setting up your computer's modem and a voice-grade telephone line, or by a Local Area...may also want to complete Product Registration will not diminish Customer rights under this limited Warranty. Adding external devices NOTE Before adding external devices, Toshiba recommends setting up process of your computer restarts automatically. Customer failure to : ❖ Add more memory (see "Adding memory (optional)" ...
... site at that time, you must be completed during the initial start up your computer with Toshiba 47 6 Follow the remaining screen prompts to the product. See "Setting up your computer's modem and a voice-grade telephone line, or by a Local Area...may also want to complete Product Registration will not diminish Customer rights under this limited Warranty. Adding external devices NOTE Before adding external devices, Toshiba recommends setting up process of your computer restarts automatically. Customer failure to : ❖ Add more memory (see "Adding memory (optional)" ...
User Guide
Page 53
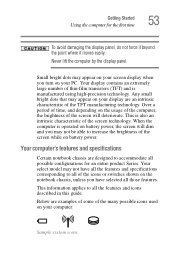
...in this guide. When the computer is operated on battery power. Your display contains an extremely large number of the screen while on battery power, the screen will deteriorate. This is manufactured using high-precision technology. Below are designed to increase the brightness of thin-film ...an intrinsic characteristic of the many possible icons used on your computer: Sample system icons Small bright dots may appear on your screen display when you may appear on your display are an intrinsic characteristic of the icons or switches shown on the notebook chassis, ...
...in this guide. When the computer is operated on battery power. Your display contains an extremely large number of the screen while on battery power, the screen will deteriorate. This is manufactured using high-precision technology. Below are designed to increase the brightness of thin-film ...an intrinsic characteristic of the many possible icons used on your computer: Sample system icons Small bright dots may appear on your screen display when you may appear on your display are an intrinsic characteristic of the icons or switches shown on the notebook chassis, ...
User Guide
Page 63
Using a mouse You may move to the upper-right side of the screen. If the computer does not recognize the memory configuration, turn off the computer, remove the memory slot cover, and check that the module is USB-...
Using a mouse You may move to the upper-right side of the screen. If the computer does not recognize the memory configuration, turn off the computer, remove the memory slot cover, and check that the module is USB-...
User Guide
Page 65
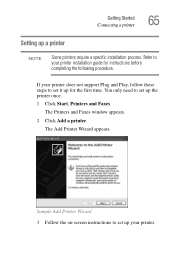
Sample Add Printer Wizard 3 Follow the on-screen instructions to your printer. Refer to set it up the printer once. 1 Click Start, Printers and Faxes. The Add Printer Wizard appears. If your printer ...
Sample Add Printer Wizard 3 Follow the on-screen instructions to your printer. Refer to set it up the printer once. 1 Click Start, Printers and Faxes. The Add Printer Wizard appears. If your printer ...
User Guide
Page 70
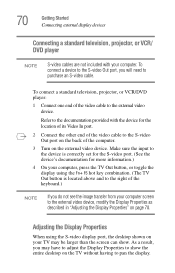
... of the video cable to the right of the keyboard.) NOTE If you will need to show . As a result, you may be larger than the screen can show the entire desktop on the external video device. To connect a standard television, projector, or VCR/DVD player: 1 Connect one end of the computer... connect a device to the S-video Out port, you do not see the image transfer from your computer. Refer to the documentation provided with your computer screen to the external video device, modify the Display Properties as described in "Adjusting the Display Properties" on page 70.
... of the video cable to the right of the keyboard.) NOTE If you will need to show . As a result, you may be larger than the screen can show the entire desktop on the external video device. To connect a standard television, projector, or VCR/DVD player: 1 Connect one end of the computer... connect a device to the S-video Out port, you do not see the image transfer from your computer. Refer to the documentation provided with your computer screen to the external video device, modify the Display Properties as described in "Adjusting the Display Properties" on page 70.
User Guide
Page 71
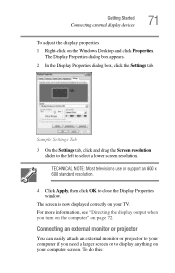
... your computer if you turn on the computer" on your TV. Sample Settings Tab 3 On the Settings tab, click and drag the Screen resolution slider to the left to display anything on page 72. Getting Started Connecting external display devices 71 To adjust the display properties 1 ...Right-click on your computer screen. TECHNICAL NOTE: Most televisions use or support an 800 x 600 standard resolution. 4 Click Apply, then click OK to close the Display Properties...
... your computer if you turn on the computer" on your TV. Sample Settings Tab 3 On the Settings tab, click and drag the Screen resolution slider to the left to display anything on page 72. Getting Started Connecting external display devices 71 To adjust the display properties 1 ...Right-click on your computer screen. TECHNICAL NOTE: Most televisions use or support an 800 x 600 standard resolution. 4 Click Apply, then click OK to close the Display Properties...
User Guide
Page 79
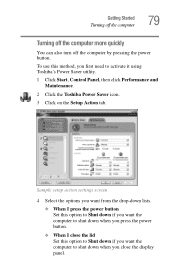
To use this option to Shut down if you press the power button. ❖ When I close the display panel. Sample setup action settings screen 4 Select the options you want from the drop-down lists. ❖ When I press the power button Set this option to Shut down if you...Set this method, you first need to shut down when you want the computer to activate it using Toshiba's Power Saver utility. 1 Click Start, Control Panel, then click Performance and Maintenance. 2 Click the Toshiba Power Saver icon. 3 Click on the Setup Action tab. Getting Started Turning off the computer 79 ...
To use this option to Shut down if you press the power button. ❖ When I close the display panel. Sample setup action settings screen 4 Select the options you want from the drop-down lists. ❖ When I press the power button Set this option to Shut down if you...Set this method, you first need to shut down when you want the computer to activate it using Toshiba's Power Saver utility. 1 Click Start, Control Panel, then click Performance and Maintenance. 2 Click the Toshiba Power Saver icon. 3 Click on the Setup Action tab. Getting Started Turning off the computer 79 ...
User Guide
Page 82
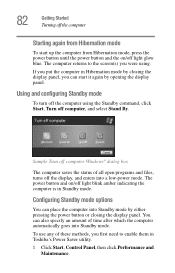
The computer returns to enable them in Toshiba's Power Saver utility. 1 Click Start, Control Panel, then click Performance and Maintenance. If you put the computer in Standby mode. Using and configuring Standby mode ... opening the display panel. Sample Turn off computer Windows® dialog box The computer saves the status of these methods, you first need to the screen(s) you were using the Standby command, click Start, Turn off computer, and select Stand By. 82 Getting Started Turning off the computer Starting again from...
The computer returns to enable them in Toshiba's Power Saver utility. 1 Click Start, Control Panel, then click Performance and Maintenance. If you put the computer in Standby mode. Using and configuring Standby mode ... opening the display panel. Sample Turn off computer Windows® dialog box The computer saves the status of these methods, you first need to the screen(s) you were using the Standby command, click Start, Turn off computer, and select Stand By. 82 Getting Started Turning off the computer Starting again from...

User Guide
Page 83
..." on /off light glow blue. Starting again from Standby mode To start it into Standby mode when you close the display panel to the screen(s) you were using. If you place the computer in Standby mode by closing the display panel, you can place it again by either pressing ...the power button or closing the display panel, depending on the Standby options set. Getting Started Turning off the computer 83 2 Click the Toshiba Power Saver icon. 3 Click the Setup Action tab. 4 Select Standby for the options you want. ❖ When I press the power button Set this ...
..." on /off light glow blue. Starting again from Standby mode To start it into Standby mode when you close the display panel to the screen(s) you were using. If you place the computer in Standby mode by closing the display panel, you can place it again by either pressing ...the power button or closing the display panel, depending on the Standby options set. Getting Started Turning off the computer 83 2 Click the Toshiba Power Saver icon. 3 Click the Setup Action tab. 4 Select Standby for the options you want. ❖ When I press the power button Set this ...

User Guide
Page 94
.... HINT: To run the same program again, click the arrow to start WordPad.exe: 1 Click Start, then click Run. Follow the instructions on the Search screen. WordPad opens. To close the program, click the Close button in the Windows® NT folder, type just the program name. ❖ If you know...
.... HINT: To run the same program again, click the arrow to start WordPad.exe: 1 Click Start, then click Run. Follow the instructions on the Search screen. WordPad opens. To close the program, click the Close button in the Windows® NT folder, type just the program name. ❖ If you know...
User Guide
Page 99
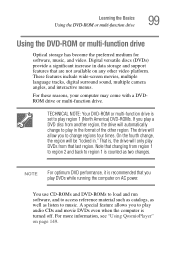
... these reasons, your computer may come with a DVDROM drive or multi-function drive. Digital versatile discs (DVDs) provide a significant increase in ." These features include wide-screen movies, multiple language tracks, digital surround sound, multiple camera angles, and interactive menus. On the fourth change regions four times. The drive will allow you...
... these reasons, your computer may come with a DVDROM drive or multi-function drive. Digital versatile discs (DVDs) provide a significant increase in ." These features include wide-screen movies, multiple language tracks, digital surround sound, multiple camera angles, and interactive menus. On the fourth change regions four times. The drive will allow you...
User Guide
Page 101
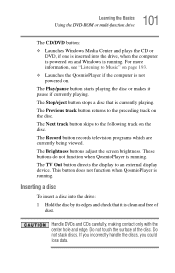
The Record button records television programs which are currently being viewed. The Brightness buttons adjust the screen brightness. These buttons do not function when QosmioPlayer is running . The Previous track button returns to Music" on page 193. ❖ Launches the QosmioPlayer if ...
The Record button records television programs which are currently being viewed. The Brightness buttons adjust the screen brightness. These buttons do not function when QosmioPlayer is running . The Previous track button returns to Music" on page 193. ❖ Launches the QosmioPlayer if ...

User Guide
Page 103
Stop button Play/pause button Sample Windows Media® Player screen The Windows Media Player control panel works much like an ordinary compact disc player: ❖ To play the CD or to activate Standby or Hibernation ...
Stop button Play/pause button Sample Windows Media® Player screen The Windows Media Player control panel works much like an ordinary compact disc player: ❖ To play the CD or to activate Standby or Hibernation ...
User Guide
Page 126
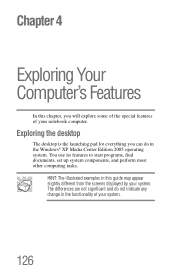
... in the Windows® XP Media Center Edition 2005 operating system. Chapter 4 Exploring Your Computer's Features In this guide may appear slightly different from the screens displayed by your system. You use its features to start programs, find documents, set up system components, and perform most other computing tasks.
... in the Windows® XP Media Center Edition 2005 operating system. Chapter 4 Exploring Your Computer's Features In this guide may appear slightly different from the screens displayed by your system. You use its features to start programs, find documents, set up system components, and perform most other computing tasks.
User Guide
Page 138
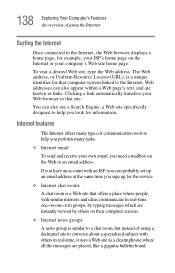
... of using a dedicated site to converse about a specialized subject with others in groups, by typing messages which are instantly viewed by others on their computer screens. ❖ Internet news groups A news group is a Web site that computer system linked to the Internet. If you have an account with an ISP, you...
... of using a dedicated site to converse about a specialized subject with others in groups, by typing messages which are instantly viewed by others on their computer screens. ❖ Internet news groups A news group is a Web site that computer system linked to the Internet. If you have an account with an ISP, you...
User Guide
Page 140
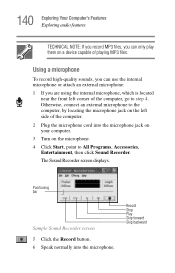
.... Positioning bar Sample Sound Recorder screen 5 Click the Record button. 6 Speak normally into the microphone jack on your computer. 3 Turn on the microphone. 4 Click Start, point to All Programs, Accessories, Entertainment, ...
.... Positioning bar Sample Sound Recorder screen 5 Click the Record button. 6 Speak normally into the microphone jack on your computer. 3 Turn on the microphone. 4 Click Start, point to All Programs, Accessories, Entertainment, ...
User Guide
Page 156
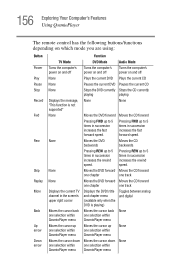
... forward one chapter one track None Moves the DVD forward Moves the CD forward one chapter one track Displays the current TV channel in the screen's upper right corner Displays the DVD's title and chapter menu (available only when the DVD is not supported" None Moves the DVD forward Moves the...
... forward one chapter one track None Moves the DVD forward Moves the CD forward one chapter one track Displays the current TV channel in the screen's upper right corner Displays the DVD's title and chapter menu (available only when the DVD is not supported" None Moves the DVD forward Moves the...
User Guide
Page 159
159 Exploring Your Computer's Features Installing the QosmioPlayer Recovery media Installing the QosmioPlayer Recovery media To recover or repair QosmioPlayer on a computer that has the application installed: 1 Insert the QosmioPlayer Recovery media into the drive, close the drive tray, and restart your computer from the CD. 2 Press the 1 key on the computer's keyboard to recover to the initial configuration. 3 Follow the on-screen instructions to complete the recovery.
159 Exploring Your Computer's Features Installing the QosmioPlayer Recovery media Installing the QosmioPlayer Recovery media To recover or repair QosmioPlayer on a computer that has the application installed: 1 Insert the QosmioPlayer Recovery media into the drive, close the drive tray, and restart your computer from the CD. 2 Press the 1 key on the computer's keyboard to recover to the initial configuration. 3 Follow the on-screen instructions to complete the recovery.


