User Guide
Page 18
... size partition 47 Creating recovery media 50 Restoring from recovery media 52 Erasing the Internal Storage Drive 54 Checking the internal storage drive operating status 56 Installing drivers and applications 56 Using the touch pad 57 Adjusting touch pad settings 60 Disabling or enabling the touch pad 61 Scrolling with the touch pad 61 Control buttons 61 Connecting an external device 62 Using external display devices 62 Selecting video cables 62 Connecting an HDMI™-compatible television or display device 63 Connecting an external monitor or projector.....63 Adjusting the...
... size partition 47 Creating recovery media 50 Restoring from recovery media 52 Erasing the Internal Storage Drive 54 Checking the internal storage drive operating status 56 Installing drivers and applications 56 Using the touch pad 57 Adjusting touch pad settings 60 Disabling or enabling the touch pad 61 Scrolling with the touch pad 61 Control buttons 61 Connecting an external device 62 Using external display devices 62 Selecting video cables 62 Connecting an HDMI™-compatible television or display device 63 Connecting an external monitor or projector.....63 Adjusting the...
User Guide
Page 20
... Memory card reader 93 Inserting memory media 93 Removing memory media 94 Chapter 5: Utilities 95 TOSHIBA Assist 96 Connect 97 Secure 98 Protect & Fix 99 Optimize 100 TOSHIBA Application Installer 101 Setting passwords 102 Using an instant password 102 Using a supervisor password 102 Using a user password 104 TOSHIBA Face Recognition Utility 106 TOSHIBA Security Assist 107 TOSHIBA PC Diagnostic Tool Utility 109 Mouse Utility 110 TOSHIBA Hardware Setup 111 TOSHIBA Sleep Utility 113 Starting the TOSHIBA Sleep Utility 113 USB Sleep and Charge 113 Enabling/Disabling USB Sleep...
... Memory card reader 93 Inserting memory media 93 Removing memory media 94 Chapter 5: Utilities 95 TOSHIBA Assist 96 Connect 97 Secure 98 Protect & Fix 99 Optimize 100 TOSHIBA Application Installer 101 Setting passwords 102 Using an instant password 102 Using a supervisor password 102 Using a user password 104 TOSHIBA Face Recognition Utility 106 TOSHIBA Security Assist 107 TOSHIBA PC Diagnostic Tool Utility 109 Mouse Utility 110 TOSHIBA Hardware Setup 111 TOSHIBA Sleep Utility 113 Starting the TOSHIBA Sleep Utility 113 USB Sleep and Charge 113 Enabling/Disabling USB Sleep...
User Guide
Page 25
.... ❖ Use the table of the information provided herein, product specifications, configurations, prices, system/component/options availability are designed for a product Series. Introduction 25 This guide NOTE The product specifications and configuration information are all the features and specifications listed or illustrated. This guide This guide introduces the computer's features as well as some basic procedures needed to change without notice. Your particular model may...
.... ❖ Use the table of the information provided herein, product specifications, configurations, prices, system/component/options availability are designed for a product Series. Introduction 25 This guide NOTE The product specifications and configuration information are all the features and specifications listed or illustrated. This guide This guide introduces the computer's features as well as some basic procedures needed to change without notice. Your particular model may...
User Guide
Page 62
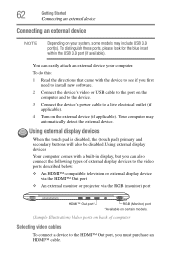
Using external display devices When the touch pad is disabled, the (touch pad) primary and secondary buttons will also be disabled.Using external display devices Your computer comes with the device to see if you first need to install new software. 2 Connect the device's video or USB cable to the port on the computer and to the device. 3 Connect the device's power cable to the HDMI™ Out port, you can easily attach an external device your system, some models may automatically detect the external device. To do this...
Using external display devices When the touch pad is disabled, the (touch pad) primary and secondary buttons will also be disabled.Using external display devices Your computer comes with the device to see if you first need to install new software. 2 Connect the device's video or USB cable to the port on the computer and to the device. 3 Connect the device's power cable to the HDMI™ Out port, you can easily attach an external device your system, some models may automatically detect the external device. To do this...
User Guide
Page 63
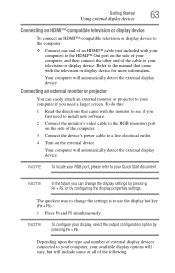
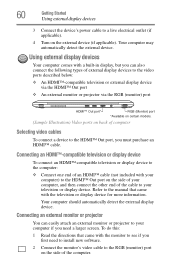
... you need a larger screen. Connecting an external monitor or projector You can change the settings is to your television or display device. To do this: 1 Read the directions that came with the monitor to see if you first need to install new software. 2 Connect the monitor's video cable to the RGB (monitor) port on the side of the computer. 3 Connect the device's power cable to your computer if you can easily attach an external monitor or...
... you need a larger screen. Connecting an external monitor or projector You can change the settings is to your television or display device. To do this: 1 Read the directions that came with the monitor to see if you first need to install new software. 2 Connect the monitor's video cable to the RGB (monitor) port on the side of the computer. 3 Connect the device's power cable to your computer if you can easily attach an external monitor or...

User Guide
Page 68
... bar creates a space character instead of just passing over an area of the page. ❖ The lowercase letter l (el) and the number 1 are not interchangeable. Using the keyboard Your computer's keyboard contains character keys, control keys, function keys, and special Windows® keys. (Sample Illustration) Keyboard Character keys Typing with the character keys is especially important for viruses. NOTE The Windows® operating system records information, such as new...
... bar creates a space character instead of just passing over an area of the page. ❖ The lowercase letter l (el) and the number 1 are not interchangeable. Using the keyboard Your computer's keyboard contains character keys, control keys, function keys, and special Windows® keys. (Sample Illustration) Keyboard Character keys Typing with the character keys is especially important for viruses. NOTE The Windows® operating system records information, such as new...
User Guide
Page 105
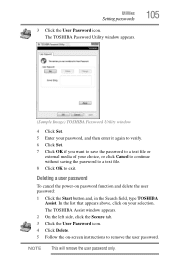
... without saving the password to a text file. 8 Click OK to remove the user password. The TOSHIBA Assist window appears. 2 On the left side, click the Secure tab. 3 Click the User Password icon. 4 Click Delete. 5 Follow the on password function and delete the user password: 1 Click the Start button and, in the Search field, type TOSHIBA Assist. Deleting a user password To cancel the power-on -screen instructions to exit. Utilities Setting passwords 3 Click the User Password icon.
... without saving the password to a text file. 8 Click OK to remove the user password. The TOSHIBA Assist window appears. 2 On the left side, click the Secure tab. 3 Click the User Password icon. 4 Click Delete. 5 Follow the on password function and delete the user password: 1 Click the Start button and, in the Search field, type TOSHIBA Assist. Deleting a user password To cancel the power-on -screen instructions to exit. Utilities Setting passwords 3 Click the User Password icon.
User Guide
Page 122
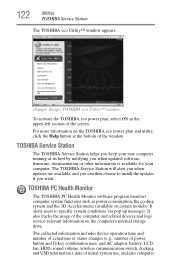
... number of actuations or status changes (e.g.: number of power button and Fn key combination uses, and AC adaptor, battery, LCD, fan, HDD, sound volume, wireless communication switch, docking and USB information), date of the window. For more information on the TOSHIBA eco power plan and utility, click the Help button at its best by notifying you wish. It also tracks the usage of the screen. It alerts users to install the updates if you when updated software, firmware...
... number of actuations or status changes (e.g.: number of power button and Fn key combination uses, and AC adaptor, battery, LCD, fan, HDD, sound volume, wireless communication switch, docking and USB information), date of the window. For more information on the TOSHIBA eco power plan and utility, click the Help button at its best by notifying you wish. It also tracks the usage of the screen. It alerts users to install the updates if you when updated software, firmware...
User Guide
Page 130
... to start after the initial startup appears. ❖ The operating system takes a long time to your computer. To do this, use the options in the Startup menu. Unless a hardware device has failed, problems usually occur when you may have to change the system in some way such as installing a new program or adding a device. The Windows® Advanced Boot Options menu displays these problems, use the options in the Startup menu to fix the problem. 130...
... to start after the initial startup appears. ❖ The operating system takes a long time to your computer. To do this, use the options in the Startup menu. Unless a hardware device has failed, problems usually occur when you may have to change the system in some way such as installing a new program or adding a device. The Windows® Advanced Boot Options menu displays these problems, use the options in the Startup menu to fix the problem. 130...

User Guide
Page 135
... a working . Refer to the documentation that the cable connecting the external monitor to the computer is firmly attached. ❖ Try adjusting the contrast and brightness controls on . ❖ Check that the monitor's power cord/cable is blank. Try using a different make sure the display priority is registered, press any key to make sure the display priority is not set for the built-in screen, make of keyboard. Display problems Here are using an external monitor: ❖...
... a working . Refer to the documentation that the cable connecting the external monitor to the computer is firmly attached. ❖ Try adjusting the contrast and brightness controls on . ❖ Check that the monitor's power cord/cable is blank. Try using a different make sure the display priority is registered, press any key to make sure the display priority is not set for the built-in screen, make of keyboard. Display problems Here are using an external monitor: ❖...

User Guide
Page 170
... every other services. Interlaced monitors take two passes to add or remove devices from a computer while the computer is refreshed. internal device-See device. interlaced-A method of using this function, if connected with the Fn key can control another while using a pointing device such as the battery save mode. (2) A key or combination of keys that saves to the internal storage drive the current state of your work , including all open files and...
... every other services. Interlaced monitors take two passes to add or remove devices from a computer while the computer is refreshed. internal device-See device. interlaced-A method of using this function, if connected with the Fn key can control another while using a pointing device such as the battery save mode. (2) A key or combination of keys that saves to the internal storage drive the current state of your work , including all open files and...
User Guide
Page 178
... computer to a network 91 HDMI™-compatible TV or display device 63 monitor 63 power cord/cable 38 power source 37 cooling fan adequate ventilation 35 customize computer settings 64 D data/entire system backup troubleshooting 142 desktop creating new icon 88 exploring the 87 icons 88 recycle bin 88 standard features 88 Windows® operating system 87 Device Manager fixing a problem 132 disabling touch pad 61, 159 display troubleshooting 136 display devices external 62 display output settings 63 display, external adjusting 64 disposal...
... computer to a network 91 HDMI™-compatible TV or display device 63 monitor 63 power cord/cable 38 power source 37 cooling fan adequate ventilation 35 customize computer settings 64 D data/entire system backup troubleshooting 142 desktop creating new icon 88 exploring the 87 icons 88 recycle bin 88 standard features 88 Windows® operating system 87 Device Manager fixing a problem 132 disabling touch pad 61, 159 display troubleshooting 136 display devices external 62 display output settings 63 display, external adjusting 64 disposal...
User Guide
Page 182
... USB Sleep and Charge cannot use 144 USB Wakeup function does not work 145 Windows® operating system not working 130 wireless networking 138 Trusted Platform Module (TPM) 118 U USB Sleep and Charge cannot use 144 USB Wakeup function does not work 145 user password, deleting 105 user password, setting 104 using a microphone 91 computer lock 66 hot key to set a power plan 82 Memory card reader 93 TOSHIBA eco power plan 83 touch pad 57 Web Camera 92 using the keyboard 68 Utilities 95 V video projector adjusting display 64 W warranty standard limited warranty 27 Web Camera using...
... USB Sleep and Charge cannot use 144 USB Wakeup function does not work 145 Windows® operating system not working 130 wireless networking 138 Trusted Platform Module (TPM) 118 U USB Sleep and Charge cannot use 144 USB Wakeup function does not work 145 user password, deleting 105 user password, setting 104 using a microphone 91 computer lock 66 hot key to set a power plan 82 Memory card reader 93 TOSHIBA eco power plan 83 touch pad 57 Web Camera 92 using the keyboard 68 Utilities 95 V video projector adjusting display 64 W warranty standard limited warranty 27 Web Camera using...
User Guide 2
Page 21
... Connecting your computer to a network ...........88 Exploring audio features 89 Recording sounds 89 Using external speakers or headphones............89 Using the Web Camera 90 Using the Memory card reader 91 Inserting memory media 91 Removing memory media 92 Chapter 5: Utilities 93 Desktop Assist 94 Media & Entertainment 95 Tools & Utilities 96 Support & Recovery 97 eco Utility 98 Setting passwords 99 Using a supervisor password 99 Using a user password 101 Deleting a user password 101 System Settings 102 Sleep and Charge 104 USB Sleep and Charge 104 Enabling/Disabling USB...
... Connecting your computer to a network ...........88 Exploring audio features 89 Recording sounds 89 Using external speakers or headphones............89 Using the Web Camera 90 Using the Memory card reader 91 Inserting memory media 91 Removing memory media 92 Chapter 5: Utilities 93 Desktop Assist 94 Media & Entertainment 95 Tools & Utilities 96 Support & Recovery 97 eco Utility 98 Setting passwords 99 Using a supervisor password 99 Using a user password 101 Deleting a user password 101 System Settings 102 Sleep and Charge 104 USB Sleep and Charge 104 Enabling/Disabling USB...
User Guide 2
Page 26
... to stay current with the various computer software or hardware options, visit Toshiba's Web site at support.toshiba.com. 26 Introduction This guide NOTE The product specifications and configuration information are all the features and specifications listed or illustrated. For more detailed information about your particular model, please visit Toshiba's Web site at support.toshiba.com. Your particular model may not have all subject to find...
... to stay current with the various computer software or hardware options, visit Toshiba's Web site at support.toshiba.com. 26 Introduction This guide NOTE The product specifications and configuration information are all the features and specifications listed or illustrated. For more detailed information about your particular model, please visit Toshiba's Web site at support.toshiba.com. Your particular model may not have all subject to find...
User Guide 2
Page 60
... also connect the following types of external display devices to the video ports described below: ❖ An HDMI™-compatible television or external display device via the HDMI™ Out port ❖ An external monitor or projector via the RGB (monitor) port HDMI™ Out port* RGB (Monitor) port *Available on certain models. (Sample Illustration) Video ports on back of computer Selecting video cables To connect a device to the HDMI™ Out port, you first need a larger screen. 60 Getting Started Using external display devices 3 Connect the device's power cable to...
... also connect the following types of external display devices to the video ports described below: ❖ An HDMI™-compatible television or external display device via the HDMI™ Out port ❖ An external monitor or projector via the RGB (monitor) port HDMI™ Out port* RGB (Monitor) port *Available on certain models. (Sample Illustration) Video ports on back of computer Selecting video cables To connect a device to the HDMI™ Out port, you first need a larger screen. 60 Getting Started Using external display devices 3 Connect the device's power cable to...

User Guide 2
Page 127
... the display options. You may need to activate the screen. Display problems Here are using an external monitor: ❖ Check that the monitor is turned on. ❖ Check that the monitor's power cord/cable is firmly plugged into effect. If you connected may have connected an external keyboard and the operating system displays one or more information on maintaining battery power, see "Changing the main battery" on the external monitor. ❖ Press Fn+F5 to its previous setting...
... the display options. You may need to activate the screen. Display problems Here are using an external monitor: ❖ Check that the monitor is turned on. ❖ Check that the monitor's power cord/cable is firmly plugged into effect. If you connected may have connected an external keyboard and the operating system displays one or more information on maintaining battery power, see "Changing the main battery" on the external monitor. ❖ Press Fn+F5 to its previous setting...
User Guide 2
Page 158
... . hot swapping-The ability to the internal storage drive the current state of many Toshiba computers that represents a function, file, or application. See also cache, CPU cache, L2 cache. HDMI (High-Definition Multimedia Interface)-An interface used to create a complete screen image. Compare software. See also World Wide Web. Interlaced monitors take two passes to transmit high quality audio and video signal via a single cable...
... . hot swapping-The ability to the internal storage drive the current state of many Toshiba computers that represents a function, file, or application. See also cache, CPU cache, L2 cache. HDMI (High-Definition Multimedia Interface)-An interface used to create a complete screen image. Compare software. See also World Wide Web. Interlaced monitors take two passes to transmit high quality audio and video signal via a single cable...
User Guide 2
Page 165
... 84, 85 Desktop Assist 94 Media & Entertainment tab 95 Support & Recovery tab 97 Tools & Utilities tab 96 Device Manager fixing a problem 124 directing display output 61 disabling touch pad 59 display troubleshooting 128 display devices external 60 display output settings 61 display, external adjusting 62 disposal information 17 disposing of your computer 81 double-click 59 E eco power plan 79 eco Utility® 98 enabling touch pad 59 enabling/disabling cursor control overlay 146 enabling/disabling numeric overlay 147 enabling/disabling scroll lock 147 enabling/disabling touch pad 146 eSATA
... 84, 85 Desktop Assist 94 Media & Entertainment tab 95 Support & Recovery tab 97 Tools & Utilities tab 96 Device Manager fixing a problem 124 directing display output 61 disabling touch pad 59 display troubleshooting 128 display devices external 60 display output settings 61 display, external adjusting 62 disposal information 17 disposing of your computer 81 double-click 59 E eco power plan 79 eco Utility® 98 enabling touch pad 59 enabling/disabling cursor control overlay 146 enabling/disabling numeric overlay 147 enabling/disabling scroll lock 147 enabling/disabling touch pad 146 eSATA
User Guide 2
Page 168
... from Start screen 68 Startup menu problem solving 121 supervisor password, deleting 100 supervisor password, set up 99 system indicator lights AC power 37 LEDs 39, 40, 74, 75, 90 System Settings 102 T taking care of battery 80 taskbar 86 television adjusting display 62 Tiles Start screen 85 tips for computing 65 Toshiba online resources 70 registering computer Toshiba Web site 41 worldwide offices 141 TOSHIBA Application Installer 113 TOSHIBA Function Keys functions 143 touch pad control buttons 59 primary button...
... from Start screen 68 Startup menu problem solving 121 supervisor password, deleting 100 supervisor password, set up 99 system indicator lights AC power 37 LEDs 39, 40, 74, 75, 90 System Settings 102 T taking care of battery 80 taskbar 86 television adjusting display 62 Tiles Start screen 85 tips for computing 65 Toshiba online resources 70 registering computer Toshiba Web site 41 worldwide offices 141 TOSHIBA Application Installer 113 TOSHIBA Function Keys functions 143 touch pad control buttons 59 primary button...


