
User Guide
Page 5
... to make changes in a margin at (949) 859-4273. If Problems Arise If this , it may request that temporary discontinuance of service may not be advised of your modem from its present line, please call the telephone company and let them to use a computer or other number for repair or standard limited warranty information, please contact Toshiba Corporation, Toshiba...
... to make changes in a margin at (949) 859-4273. If Problems Arise If this , it may request that temporary discontinuance of service may not be advised of your modem from its present line, please call the telephone company and let them to use a computer or other number for repair or standard limited warranty information, please contact Toshiba Corporation, Toshiba...
User Guide
Page 30
... software with user's data 54 Recovering without changing the internal storage drive partitions 57 Recovering to a custom size partition 60 Creating recovery media 62 Restoring from recovery media 65 Erasing the Internal Storage Drive 67 Checking the internal storage drive operating status 69 Installing drivers and applications 69 Using the touch pad 69 Adjusting touch pad settings 73 Disabling or enabling the touch pad 73 Using external display devices 74 Selecting video cables 74 Connecting an HDMI™-compatible television or display device 74 Connecting an external monitor...
... software with user's data 54 Recovering without changing the internal storage drive partitions 57 Recovering to a custom size partition 60 Creating recovery media 62 Restoring from recovery media 65 Erasing the Internal Storage Drive 67 Checking the internal storage drive operating status 69 Installing drivers and applications 69 Using the touch pad 69 Adjusting touch pad settings 73 Disabling or enabling the touch pad 73 Using external display devices 74 Selecting video cables 74 Connecting an HDMI™-compatible television or display device 74 Connecting an external monitor...
User Guide
Page 32
... battery 115 Disposing of your computer 115 Traveling tips 116 Chapter 4: Exploring Your Computer's Features 117 Exploring the desktop 117 Finding your way around the desktop 118 Setting up for communications 120 Connecting your computer to a network .........121 Exploring audio features 121 Recording sounds 121 Using external speakers or headphones..........122 Using the Web Camera 123 Using the Memory card reader 123 Inserting memory media 124 Removing memory media...
... battery 115 Disposing of your computer 115 Traveling tips 116 Chapter 4: Exploring Your Computer's Features 117 Exploring the desktop 117 Finding your way around the desktop 118 Setting up for communications 120 Connecting your computer to a network .........121 Exploring audio features 121 Recording sounds 121 Using external speakers or headphones..........122 Using the Web Camera 123 Using the Memory card reader 123 Inserting memory media 124 Removing memory media...
User Guide
Page 33
... 127 Connect 128 Secure 129 Protect & Fix 130 Optimize 131 TOSHIBA Recovery Media Creator 132 TOSHIBA Application Installer 132 Setting passwords 133 Using an instant password 133 Using a supervisor password 134 Using a user password 135 TOSHIBA Face Recognition Utility 137 TOSHIBA Security Assist 138 TOSHIBA PC Diagnostic Tool Utility 140 Mouse Utility 141 TOSHIBA Hardware Setup 142 TOSHIBA Sleep Utility 144 Starting the TOSHIBA Sleep Utility 144 USB Sleep and Charge 144 Enabling/Disabling USB Sleep and Charge 146 Power supply mode settings 146 TOSHIBA Button Support 147...
... 127 Connect 128 Secure 129 Protect & Fix 130 Optimize 131 TOSHIBA Recovery Media Creator 132 TOSHIBA Application Installer 132 Setting passwords 133 Using an instant password 133 Using a supervisor password 134 Using a user password 135 TOSHIBA Face Recognition Utility 137 TOSHIBA Security Assist 138 TOSHIBA PC Diagnostic Tool Utility 140 Mouse Utility 141 TOSHIBA Hardware Setup 142 TOSHIBA Sleep Utility 144 Starting the TOSHIBA Sleep Utility 144 USB Sleep and Charge 144 Enabling/Disabling USB Sleep and Charge 146 Power supply mode settings 146 TOSHIBA Button Support 147...
User Guide
Page 38
... the features and specifications on your computer, or to perform tasks in Windows® 7. For more detailed information about your particular model, please visit Toshiba's Web site at support.toshiba.com. This guide This guide introduces the computer's features as well as some basic procedures needed to stay current with the various computer software or hardware options, visit Toshiba's Web site at support.toshiba.com.
... the features and specifications on your computer, or to perform tasks in Windows® 7. For more detailed information about your particular model, please visit Toshiba's Web site at support.toshiba.com. This guide This guide introduces the computer's features as well as some basic procedures needed to stay current with the various computer software or hardware options, visit Toshiba's Web site at support.toshiba.com.
User Guide
Page 50
... optional external devices NOTE Before adding external devices or memory, Toshiba recommends setting up your software" on adding memory to your computer. Toshiba will not diminish Customer rights under the Toshiba standard limited Warranty. Contact the location you must be connected to the Internet. NOTE To register online, you purchased the computer at register.toshiba.com, or by improper installation of a memory module. See "Setting up your software. 50 Getting Started Registering...
... optional external devices NOTE Before adding external devices or memory, Toshiba recommends setting up your software" on adding memory to your computer. Toshiba will not diminish Customer rights under the Toshiba standard limited Warranty. Contact the location you must be connected to the Internet. NOTE To register online, you purchased the computer at register.toshiba.com, or by improper installation of a memory module. See "Setting up your software. 50 Getting Started Registering...
User Guide
Page 73
... touch pad. The touch pad settings are typing, the on -screen pointer may seem to move the pointer by itself" to accidental light taps and lighter finger pressure. The on -screen pointer may also seem to touch or button presses while you type. Getting Started 73 Using the touch pad Adjusting touch pad settings While you are accessible through the Mouse Properties option of the Windows Control Panel. If you disable tapping only, you can still use the touch pad's control buttons...
... touch pad. The touch pad settings are typing, the on -screen pointer may seem to move the pointer by itself" to accidental light taps and lighter finger pressure. The on -screen pointer may also seem to touch or button presses while you type. Getting Started 73 Using the touch pad Adjusting touch pad settings While you are accessible through the Mouse Properties option of the Windows Control Panel. If you disable tapping only, you can still use the touch pad's control buttons...

User Guide
Page 75
... change the display output settings is connected): ❖ Built-in display only ❖ Built-in display and external monitor simultaneously ❖ External monitor only ❖ Built-in the following order (the last two options are only available with the monitor to see if you need to install new software. 2 Connect the monitor's video cable to the RGB (monitor) port on . Getting Started 75 Using external display devices Connecting an external monitor or projector You can easily attach an external monitor or projector to use...
... change the display output settings is connected): ❖ Built-in display only ❖ Built-in display and external monitor simultaneously ❖ External monitor only ❖ Built-in the following order (the last two options are only available with the monitor to see if you need to install new software. 2 Connect the monitor's video cable to the RGB (monitor) port on . Getting Started 75 Using external display devices Connecting an external monitor or projector You can easily attach an external monitor or projector to use...
User Guide
Page 135
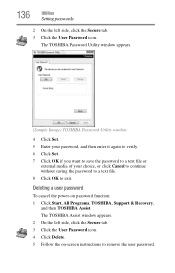
... Enter the password, then click OK. Deleting a supervisor password To delete a supervisor password: 1 Click Start, All Programs, TOSHIBA, Tools & Utilities, Password Utility, and then TOSHIBA Assist. To register a password for the power-on password protection. Using a user password A user password provides instant password and power-on password functions: 1 Click Start, All Programs, TOSHIBA, Support & Recovery, and then TOSHIBA Assist. Utilities Setting passwords 135 6 Click Set. 7 Click OK if you not remember it. The TOSHIBA Assist window appears. The TOSHIBA Assist window...
... Enter the password, then click OK. Deleting a supervisor password To delete a supervisor password: 1 Click Start, All Programs, TOSHIBA, Tools & Utilities, Password Utility, and then TOSHIBA Assist. To register a password for the power-on password protection. Using a user password A user password provides instant password and power-on password functions: 1 Click Start, All Programs, TOSHIBA, Support & Recovery, and then TOSHIBA Assist. Utilities Setting passwords 135 6 Click Set. 7 Click OK if you not remember it. The TOSHIBA Assist window appears. The TOSHIBA Assist window...
User Guide
Page 136
... password to a text file or external media of your choice, or click Cancel to continue without saving the password to a text file. 8 Click OK to remove the user password. 136 Utilities Setting passwords 2 On the left side, click the Secure tab. 3 Click the User Password icon. 4 Click Delete. 5 Follow the on password function: 1 Click Start, All Programs, TOSHIBA, Support & Recovery, and then TOSHIBA Assist. Deleting a user password To cancel the power-on -screen instructions...
... password to a text file or external media of your choice, or click Cancel to continue without saving the password to a text file. 8 Click OK to remove the user password. 136 Utilities Setting passwords 2 On the left side, click the Secure tab. 3 Click the User Password icon. 4 Click Delete. 5 Follow the on password function: 1 Click Start, All Programs, TOSHIBA, Support & Recovery, and then TOSHIBA Assist. Deleting a user password To cancel the power-on -screen instructions...
User Guide
Page 142
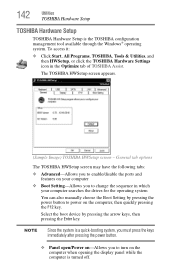
... boot device by pressing the power button to turn on the computer, then quickly pressing the F12 key. 142 Utilities TOSHIBA Hardware Setup TOSHIBA Hardware Setup TOSHIBA Hardware Setup is a quick-booting system, you must press the keys immediately after pressing the power button. ❖ Panel open/Power on-Allows you to change the sequence in the Optimize tab of TOSHIBA Assist. General tab options The TOSHIBA HWSetup screen may have the following tabs: ❖ Advanced-Allows you to enable/disable the ports...
... boot device by pressing the power button to turn on the computer, then quickly pressing the F12 key. 142 Utilities TOSHIBA Hardware Setup TOSHIBA Hardware Setup TOSHIBA Hardware Setup is a quick-booting system, you must press the keys immediately after pressing the power button. ❖ Panel open/Power on-Allows you to change the sequence in the Optimize tab of TOSHIBA Assist. General tab options The TOSHIBA HWSetup screen may have the following tabs: ❖ Advanced-Allows you to enable/disable the ports...

User Guide
Page 145
... to the computer when using the "USB Sleep and Charge function." ❖ External devices connected to the USB bus power (DC 5V) function that interfaces with USB ports. The "USB Wakeup function" will now work for compatible port. As such, we recommend that does not have the USB Sleep and Charge function-compatible icon ( ), attach the mouse or keyboard to it. Utilities TOSHIBA Sleep Utility 145 NOTE ❖ When "USB Sleep and Charge function" is set to Enabled, USB bus power (DC 5V) will be...
... to the computer when using the "USB Sleep and Charge function." ❖ External devices connected to the USB bus power (DC 5V) function that interfaces with USB ports. The "USB Wakeup function" will now work for compatible port. As such, we recommend that does not have the USB Sleep and Charge function-compatible icon ( ), attach the mouse or keyboard to it. Utilities TOSHIBA Sleep Utility 145 NOTE ❖ When "USB Sleep and Charge function" is set to Enabled, USB bus power (DC 5V) will be...
User Guide
Page 156
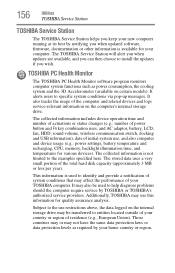
... or status changes (e.g.: number of power button and Fn key combination uses, and AC adaptor, battery, LCD, fan, HDD, sound volume, wireless communication switch, docking and USB information), date of initial system use this information for quality assurance analysis. The collected information is not limited to specific system conditions via pop-up messages. Those countries may or may use , and also computer and device usage (e.g.: power settings, battery temperature and recharging, CPU, memory, backlight...
... or status changes (e.g.: number of power button and Fn key combination uses, and AC adaptor, battery, LCD, fan, HDD, sound volume, wireless communication switch, docking and USB information), date of initial system use this information for quality assurance analysis. The collected information is not limited to specific system conditions via pop-up messages. Those countries may or may use , and also computer and device usage (e.g.: power settings, battery temperature and recharging, CPU, memory, backlight...
User Guide
Page 161
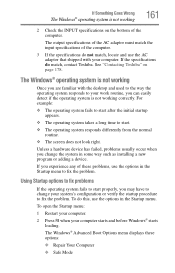
... time to start . ❖ The operating system responds differently from the normal routine. ❖ The screen does not look right. See "Contacting Toshiba" on the bottom of the computer. 3 If the specifications do not match, locate and use the options in the Startup menu to fix the problem. To do match, contact Toshiba. The Windows® Advanced Boot Options menu displays these problems, use the options in the Startup menu. The output specifications of...
... time to start . ❖ The operating system responds differently from the normal routine. ❖ The screen does not look right. See "Contacting Toshiba" on the bottom of the computer. 3 If the specifications do not match, locate and use the options in the Startup menu to fix the problem. To do match, contact Toshiba. The Windows® Advanced Boot Options menu displays these problems, use the options in the Startup menu. The output specifications of...

User Guide
Page 166
... screen, make sure the display priority is not remapping the keyboard. Display problems Here are using is not set for an external monitor. The screen reactivates and allows you are using a different make sure the software you have connected an external keyboard and the operating system displays one or more keyboard error messages. If the numlock light or cursor control overlay light is registered, press any key, type the password and press Enter. Refer to turn off , make of the keys...
... screen, make sure the display priority is not remapping the keyboard. Display problems Here are using is not set for an external monitor. The screen reactivates and allows you are using a different make sure the software you have connected an external keyboard and the operating system displays one or more keyboard error messages. If the numlock light or cursor control overlay light is registered, press any key, type the password and press Enter. Refer to turn off , make of the keys...
User Guide
Page 175
... easy installation of new hardware (printers, pointing devices, external hard drives, optical disc drive writers, scanners, etc.) and software (applications like Microsoft® Office and Adobe® Photoshop®, or utility software such as special toolbars for "back up files." Always carefully follow directions carefully! If the device is often necessary to back up your backup target by connecting it was in the drive. 2 Click Start. 3 Click Control Panel...
... easy installation of new hardware (printers, pointing devices, external hard drives, optical disc drive writers, scanners, etc.) and software (applications like Microsoft® Office and Adobe® Photoshop®, or utility software such as special toolbars for "back up files." Always carefully follow directions carefully! If the device is often necessary to back up your backup target by connecting it was in the drive. 2 Click Start. 3 Click Control Panel...
User Guide
Page 204
... function, if connected with HDMI cables. internal device-See device. L L1 (level one) cache-Memory cache built into the processor to the internal storage drive the current state of keys that provides electronic mail, the World Wide Web, and other line of refreshing a computer screen, in combination with the Fn key can control another while using a pointing device such as the battery save mode. (2) A key or combination of your work...
... function, if connected with HDMI cables. internal device-See device. L L1 (level one) cache-Memory cache built into the processor to the internal storage drive the current state of keys that provides electronic mail, the World Wide Web, and other line of refreshing a computer screen, in combination with the Fn key can control another while using a pointing device such as the battery save mode. (2) A key or combination of your work...
User Guide
Page 212
... TV or display device 74 monitor 75 power cord/cable 46 power source 46 connection set up 121 cooling fan adequate ventilation 44 customize computer settings 89 D data/entire system backup troubleshooting 174 desktop creating new icon 118 exploring the 117 icons 118 recycle bin 118 standard features 118 Windows® operating system 117 Device Manager fixing a problem 163 directing display output 75 disabling touch pad 73, 191 display troubleshooting 167 display devices external 74 display output settings 75 display panel opening 48 display, external adjusting 76...
... TV or display device 74 monitor 75 power cord/cable 46 power source 46 connection set up 121 cooling fan adequate ventilation 44 customize computer settings 89 D data/entire system backup troubleshooting 174 desktop creating new icon 118 exploring the 117 icons 118 recycle bin 118 standard features 118 Windows® operating system 117 Device Manager fixing a problem 163 directing display output 75 disabling touch pad 73, 191 display troubleshooting 167 display devices external 74 display output settings 75 display panel opening 48 display, external adjusting 76...
User Guide
Page 213
... enabling wireless devices 190 display brightness 189 Hibernation mode 187 keyboard overlays 194 Lock (Instant security) 184 Output (Display switch) 188 power plan 185 Sleep mode 186 using to set a power plan 112 volume mute 183 Zoom (Display resolution) 192 zooming in 194 zooming out 194 Hot Key Cards 181 Hot key functions 183 I icon desktop 118 moving to desktop 118 recycle bin 118 safety 39 installing memory modules 50 mouse 76 Instruction Manual for Safety and Comfort 41 internal storage drive recovery...
... enabling wireless devices 190 display brightness 189 Hibernation mode 187 keyboard overlays 194 Lock (Instant security) 184 Output (Display switch) 188 power plan 185 Sleep mode 186 using to set a power plan 112 volume mute 183 Zoom (Display resolution) 192 zooming in 194 zooming out 194 Hot Key Cards 181 Hot key functions 183 I icon desktop 118 moving to desktop 118 recycle bin 118 safety 39 installing memory modules 50 mouse 76 Instruction Manual for Safety and Comfort 41 internal storage drive recovery...
User Guide
Page 217
... computer more quickly 81 options 79 turning on power 49 U USB Sleep and Charge cannot use 176 USB Wakeup function does not work 177 USB-compatible printer 77 user password, deleting 136 user password, setting 135 using a microphone 121 computer lock 90 Hibernation mode 83 hot key to set a power plan 112 Memory card reader 123 Shut down command 81 Sleep mode 86 TOSHIBA eco power plan 113 touch pad 69 Web Camera 123 using the keyboard 92 using the overlay for cursor control 95 Utilities 126 V video projector adjusting display 76 W warranty...
... computer more quickly 81 options 79 turning on power 49 U USB Sleep and Charge cannot use 176 USB Wakeup function does not work 177 USB-compatible printer 77 user password, deleting 136 user password, setting 135 using a microphone 121 computer lock 90 Hibernation mode 83 hot key to set a power plan 112 Memory card reader 123 Shut down command 81 Sleep mode 86 TOSHIBA eco power plan 113 touch pad 69 Web Camera 123 using the keyboard 92 using the overlay for cursor control 95 Utilities 126 V video projector adjusting display 76 W warranty...


