

User Manual
Page 20
... 48 Recovering the Internal Storage Drive 48 Recovering to out-of-box state (recommended recovery method 50 Recovering without changing the internal storage drive partitions 52 Recovering to a custom size partition 55 Creating recovery DVDs/media 57 Restoring from recovery DVDs/media 60 Erasing the Internal Storage Drive 62 Checking the internal storage drive operating status 63 Installing drivers and applications 64 Using the TouchPad 64 Adjusting TouchPad™ settings 67 Disabling or enabling the TouchPad 68 Using external display devices 68 Connecting an external monitor or...
... 48 Recovering the Internal Storage Drive 48 Recovering to out-of-box state (recommended recovery method 50 Recovering without changing the internal storage drive partitions 52 Recovering to a custom size partition 55 Creating recovery DVDs/media 57 Restoring from recovery DVDs/media 60 Erasing the Internal Storage Drive 62 Checking the internal storage drive operating status 63 Installing drivers and applications 64 Using the TouchPad 64 Adjusting TouchPad™ settings 67 Disabling or enabling the TouchPad 68 Using external display devices 68 Connecting an external monitor or...
User Manual
Page 22
... way around the desktop 113 Setting up for communications 115 Connecting your computer to a network .........116 Exploring audio features 116 Recording sounds 116 Using external speakers or headphones..........117 Using the Web Camera 118 Using the Memory card reader 118 Inserting memory media 119 Removing memory media 119 Chapter 5: Utilities 121 TOSHIBA Assist 122 Secure 123 Protect & Fix 124 Optimize 125 TOSHIBA Recovery Media Creator 126 TOSHIBA Application Installer 126 Setting passwords 127 Using an instant password 127 Using a supervisor password 128
... way around the desktop 113 Setting up for communications 115 Connecting your computer to a network .........116 Exploring audio features 116 Recording sounds 116 Using external speakers or headphones..........117 Using the Web Camera 118 Using the Memory card reader 118 Inserting memory media 119 Removing memory media 119 Chapter 5: Utilities 121 TOSHIBA Assist 122 Secure 123 Protect & Fix 124 Optimize 125 TOSHIBA Recovery Media Creator 126 TOSHIBA Application Installer 126 Setting passwords 127 Using an instant password 127 Using a supervisor password 128

User Manual
Page 40
... the computer's memory if you install or remove a memory module, turn off the computer using the Start menu. 40 Getting Started Adding memory (optional) ❖ Connect an optional external optical disc drive Adding memory (optional) HINT: To purchase additional memory modules, see the accessories information packaged with your software" on page 39. See "Setting up your software. If the computer has been running recently, the memory module(s) may also be hot. Installing a memory module with the computer's power on the underside...
... the computer's memory if you install or remove a memory module, turn off the computer using the Start menu. 40 Getting Started Adding memory (optional) ❖ Connect an optional external optical disc drive Adding memory (optional) HINT: To purchase additional memory modules, see the accessories information packaged with your software" on page 39. See "Setting up your software. If the computer has been running recently, the memory module(s) may also be hot. Installing a memory module with the computer's power on the underside...

User Manual
Page 42
.... 10 Carefully remove the new memory module from its antistatic packaging, without touching its connector. 42 Getting Started Adding memory (optional) 6 Using a small Phillips screwdriver, loosen the captive screws that you may cause memory access problems. 9 If replacing an existing memory module, remove this memory module by performing steps 2-3 of computer (Sample Illustration) Removing the memory module slot cover 7 Remove the memory module slot cover. 8 Place the screws and the cover in a safe place so that secures the memory module slot cover. Grease or...
.... 10 Carefully remove the new memory module from its antistatic packaging, without touching its connector. 42 Getting Started Adding memory (optional) 6 Using a small Phillips screwdriver, loosen the captive screws that you may cause memory access problems. 9 If replacing an existing memory module, remove this memory module by performing steps 2-3 of computer (Sample Illustration) Removing the memory module slot cover 7 Remove the memory module slot cover. 8 Place the screws and the cover in a safe place so that secures the memory module slot cover. Grease or...

User Manual
Page 46
... Sleep configuration will be a sign that you may need to remove a memory module: 1 Complete steps 1-8 in Sleep or Hibernation mode. 46 Getting Started Adding memory (optional) Removing a memory module If you need to scan your internal storage drive for errors or defragment the drive. If so, consult Windows® Help and Support. 2 Pull the latches away from the memory module. Do not try to go into Safe Mode, then shut down the computer and open the memory module slot cover...
... Sleep configuration will be a sign that you may need to remove a memory module: 1 Complete steps 1-8 in Sleep or Hibernation mode. 46 Getting Started Adding memory (optional) Removing a memory module If you need to scan your internal storage drive for errors or defragment the drive. If so, consult Windows® Help and Support. 2 Pull the latches away from the memory module. Do not try to go into Safe Mode, then shut down the computer and open the memory module slot cover...

User Manual
Page 47
... computer. Getting Started 47 Adding memory (optional) 3 Gently lift the memory module to a 30-degree angle and slide it out of computer Memory slot (Sample Illustration) Removing the memory module 4 Replace the memory module slot cover and secure it using the screws. 5 Re-insert the main battery. Using your computer or AC adaptor could cause system failure, computer or AC adaptor damage or a fire, possibly resulting in Sleep mode). For...
... computer. Getting Started 47 Adding memory (optional) 3 Gently lift the memory module to a 30-degree angle and slide it out of computer Memory slot (Sample Illustration) Removing the memory module 4 Replace the memory module slot cover and secure it using the screws. 5 Re-insert the main battery. Using your computer or AC adaptor could cause system failure, computer or AC adaptor damage or a fire, possibly resulting in Sleep mode). For...
User Manual
Page 48
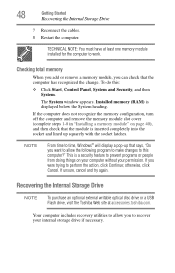
... the computer does not recognize the memory configuration, turn off the computer and remove the memory module slot cover (complete steps 1-8 in "Installing a memory module" on your computer without your internal storage drive if necessary. Recovering the Internal Storage Drive NOTE To purchase an optional external writable optical disc drive or a USB Flash drive, visit the Toshiba Web site at least one memory module installed for the computer to this : ❖ Click Start, Control Panel, System and Security, and then...
... the computer does not recognize the memory configuration, turn off the computer and remove the memory module slot cover (complete steps 1-8 in "Installing a memory module" on your computer without your internal storage drive if necessary. Recovering the Internal Storage Drive NOTE To purchase an optional external writable optical disc drive or a USB Flash drive, visit the Toshiba Web site at least one memory module installed for the computer to this : ❖ Click Start, Control Panel, System and Security, and then...

User Manual
Page 68
... enable/disable the TouchPad, press Fn + F9. NOTE Alternately, you need to install new software. 2 Connect the monitor's video cable to the RGB (monitor) port on the side of the Windows Control Panel. To do this: 1 Read the directions that came with a built-in the Windows® Control Panel. NOTE In the future you can also connect an external display device via the RGB (monitor) port. To disable tapping only, use the TouchPad's control buttons and move the pointer by default...
... enable/disable the TouchPad, press Fn + F9. NOTE Alternately, you need to install new software. 2 Connect the monitor's video cable to the RGB (monitor) port on the side of the Windows Control Panel. To do this: 1 Read the directions that came with a built-in the Windows® Control Panel. NOTE In the future you can also connect an external display device via the RGB (monitor) port. To disable tapping only, use the TouchPad's control buttons and move the pointer by default...
User Manual
Page 130
... User Password icon. 4 Click Not Registered. 5 Follow the on-screen instructions to exit. 130 Utilities Setting passwords To register a password for the power-on password function: 1 Click Start, All Programs, TOSHIBA, Utilities, and then TOSHIBA Assist. The TOSHIBA Assist window appears. 2 On the left side, click the Secure tab. 3 Click the User Password icon. 4 Click Registered. 5 Enter your password, and then enter it again to verify. 6 Click OK. 7 Click OK to remove the user password...
... User Password icon. 4 Click Not Registered. 5 Follow the on-screen instructions to exit. 130 Utilities Setting passwords To register a password for the power-on password function: 1 Click Start, All Programs, TOSHIBA, Utilities, and then TOSHIBA Assist. The TOSHIBA Assist window appears. 2 On the left side, click the Secure tab. 3 Click the User Password icon. 4 Click Registered. 5 Enter your password, and then enter it again to verify. 6 Click OK. 7 Click OK to remove the user password...
User Manual
Page 142
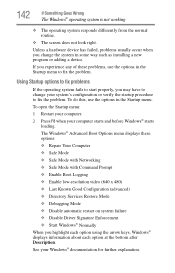
... change your computer starts and before Windows® starts loading. Unless a hardware device has failed, problems usually occur when you experience any of these options: ❖ Repair Your Computer ❖ Safe Mode ❖ Safe Mode with Networking ❖ Safe Mode with Command Prompt ❖ Enable Boot Logging ❖ Enable low-resolution video (640 x 480) ❖ Last Known Good Configuration (advanced) ❖ Directory Services Restore Mode ❖ Debugging Mode ❖ Disable automatic restart on system failure ❖ Disable Driver...
... change your computer starts and before Windows® starts loading. Unless a hardware device has failed, problems usually occur when you experience any of these options: ❖ Repair Your Computer ❖ Safe Mode ❖ Safe Mode with Networking ❖ Safe Mode with Command Prompt ❖ Enable Boot Logging ❖ Enable low-resolution video (640 x 480) ❖ Last Known Good Configuration (advanced) ❖ Directory Services Restore Mode ❖ Debugging Mode ❖ Disable automatic restart on system failure ❖ Disable Driver...

User Manual
Page 145
... Start menu. For example, a faulty AC adaptor or power cord/cable will neither power the computer nor recharge the batteries. If the AC power light/battery light still does not come on , check that seem to work. If the error recurs without the memory module installed, the error is not caused by plugging in a lamp or other appliance. If Something Goes Wrong Memory problems 145 Memory problems Incorrectly connected or faulty memory modules...
... Start menu. For example, a faulty AC adaptor or power cord/cable will neither power the computer nor recharge the batteries. If the AC power light/battery light still does not come on , check that seem to work. If the error recurs without the memory module installed, the error is not caused by plugging in a lamp or other appliance. If Something Goes Wrong Memory problems 145 Memory problems Incorrectly connected or faulty memory modules...

User Manual
Page 147
... advance you are off the numlock light. If the numlock light or cursor control overlay light is blank. If the problem occurs when both the keypad overlays are using the built-in screen, make sure the software you through the display options. You have registered a password, press any key. Refer to its previous setting. Display Auto Off may need to the keyboard manufacturer's Web site. You may...
... advance you are off the numlock light. If the numlock light or cursor control overlay light is blank. If the problem occurs when both the keypad overlays are using the built-in screen, make sure the software you through the display options. You have registered a password, press any key. Refer to its previous setting. Display Auto Off may need to the keyboard manufacturer's Web site. You may...

User Manual
Page 186
... than some computers have secondary hard disks that activates a memory resident program. 186 Glossary file extension-The three characters following the period (pronounced "dot") at the end of a file folder. When you turn on the disk so the operating system can set system options or control system parameters, such as the battery save mode. (2) A key or combination of many Toshiba computers that can contain...
... than some computers have secondary hard disks that activates a memory resident program. 186 Glossary file extension-The three characters following the period (pronounced "dot") at the end of a file folder. When you turn on the disk so the operating system can set system options or control system parameters, such as the battery save mode. (2) A key or combination of many Toshiba computers that can contain...

User Manual
Page 187
... transparent electrode panels. internal device-See device. L2 (level two) cache-Memory cache installed on the network. See also cache, CPU cache, L1 cache. See also cache, CPU cache, L2 cache. LCD (Liquid Crystal Display)-A type of the display, creating light and dark pixels. A filter over a relatively limited area and connected by individual light-emitting diodes is running and have the operating system automatically recognize the change. Compare non...
... transparent electrode panels. internal device-See device. L2 (level two) cache-Memory cache installed on the network. See also cache, CPU cache, L1 cache. See also cache, CPU cache, L2 cache. LCD (Liquid Crystal Display)-A type of the display, creating light and dark pixels. A filter over a relatively limited area and connected by individual light-emitting diodes is running and have the operating system automatically recognize the change. Compare non...

User Manual
Page 193
... adaptor 34 AC power 97 AC power light 34 AC power/battery indicator light 100 AC power/battery indicator light 100 accessing network 116 adding memory check total memory 48 memory (optional) 40 optional external devices 39 adequate ventilation cooling fan 33 adjusting TouchPad™ settings 67 Application Cards 164 audio features 116 B backing up files 85, 93 battery battery life 96 Call2Recycle™ 111 care 108, 109 changing 105 charge indicator light 36 charge time 97 charger 97 charging 36, 97 charging the real...
... adaptor 34 AC power 97 AC power light 34 AC power/battery indicator light 100 AC power/battery indicator light 100 accessing network 116 adding memory check total memory 48 memory (optional) 40 optional external devices 39 adequate ventilation cooling fan 33 adjusting TouchPad™ settings 67 Application Cards 164 audio features 116 B backing up files 85, 93 battery battery life 96 Call2Recycle™ 111 care 108, 109 changing 105 charge indicator light 36 charge time 97 charger 97 charging 36, 97 charging the real...
User Manual
Page 194
... power cord/cable 35 power source 35 cooling fan adequate ventilation 33 customize computer settings 82 D data/entire system backup troubleshooting 156 desktop creating new icon 113 exploring the 112 icons 113 recycle bin 113 standard features 113 Windows® operating system 112 Device Manager fixing a problem 144 directing display output 69 disabling TouchPad™ 68, 174 display troubleshooting 148 display devices external 68 display output settings 69 display panel opening 37 display, external adjusting 70 disposal information 18 disposing of used batteries...
... power cord/cable 35 power source 35 cooling fan adequate ventilation 33 customize computer settings 82 D data/entire system backup troubleshooting 156 desktop creating new icon 113 exploring the 112 icons 113 recycle bin 113 standard features 113 Windows® operating system 112 Device Manager fixing a problem 144 directing display output 69 disabling TouchPad™ 68, 174 display troubleshooting 148 display devices external 68 display output settings 69 display panel opening 37 display, external adjusting 70 disposal information 18 disposing of used batteries...
User Manual
Page 195
... hot key disabling or enabling wireless devices 173 display brightness 172 Hibernation mode 170 keyboard overlays 177 Index 195 Lock (Instant security) 167 Output (Display switch) 171 power plan 168 Sleep mode 169 using to set a power plan 104 volume mute 166 Zoom (Display resolution) 176 zooming in 177 zooming out 177 Hot Key Cards 162 Hot key functions 166 I icon desktop 113 moving to desktop 113 recycle bin 113 safety 28 installation memory module 40 installing a charged battery 107 battery 105 memory modules 40 mouse 70 Instruction Manual...
... hot key disabling or enabling wireless devices 173 display brightness 172 Hibernation mode 170 keyboard overlays 177 Index 195 Lock (Instant security) 167 Output (Display switch) 171 power plan 168 Sleep mode 169 using to set a power plan 104 volume mute 166 Zoom (Display resolution) 176 zooming in 177 zooming out 177 Hot Key Cards 162 Hot key functions 166 I icon desktop 113 moving to desktop 113 recycle bin 113 safety 28 installation memory module 40 installing a charged battery 107 battery 105 memory modules 40 mouse 70 Instruction Manual...
User Manual
Page 196
...overlay keys 87 overlay to type numeric data 88 L LEDs system indicator lights 100 AC adaptor light 99 AC power light 34, 35 battery light 36 ON/OFF light 38, 77, 79, 82 Web Camera light 118 lock computer, using 83 M maintaining your battery 109 memory adding (optional) 40 check total memory 48 removing memory module slot cover 42 Memory card reader inserting memory media 119 removing memory media 119 using 118 memory module installation 40 inserting into socket 43 removing 46, 47 microphone using 116 monitor connecting 68 monitor problems troubleshooting 148 monitoring battery power 99 mouse...
...overlay keys 87 overlay to type numeric data 88 L LEDs system indicator lights 100 AC adaptor light 99 AC power light 34, 35 battery light 36 ON/OFF light 38, 77, 79, 82 Web Camera light 118 lock computer, using 83 M maintaining your battery 109 memory adding (optional) 40 check total memory 48 removing memory module slot cover 42 Memory card reader inserting memory media 119 removing memory media 119 using 118 memory module installation 40 inserting into socket 43 removing 46, 47 microphone using 116 monitor connecting 68 monitor problems troubleshooting 148 monitoring battery power 99 mouse...
User Manual
Page 198
... TOSHIBA eco Utility™ 137 TOSHIBA Hardware Setup 133 TOSHIBA PC Diagnostic Tool Utility 131 TOSHIBA Recovery Media Creator 126 TOSHIBA Service Station 137 TOSHIBA Zooming Utility 135 TouchPad™ using 64 traveling tips 111 troubleshooting 147 AC power light is blinking 140 battery light is blinking 141 bookmarked site not found 143 computer will not start 139 contacting Toshiba 158 corrupted/damaged data files 150 data/entire system backup 156 Device Manager 144 Disk Defragmenter 150 display error message 148 display problems screen...
... TOSHIBA eco Utility™ 137 TOSHIBA Hardware Setup 133 TOSHIBA PC Diagnostic Tool Utility 131 TOSHIBA Recovery Media Creator 126 TOSHIBA Service Station 137 TOSHIBA Zooming Utility 135 TouchPad™ using 64 traveling tips 111 troubleshooting 147 AC power light is blinking 140 battery light is blinking 141 bookmarked site not found 143 computer will not start 139 contacting Toshiba 158 corrupted/damaged data files 150 data/entire system backup 156 Device Manager 144 Disk Defragmenter 150 display error message 148 display problems screen...

User Manual
Page 199
... 143 Windows® operating system not working 141 wireless networking 152 turning off computer 72 computer more quickly 75 options 72 turning on power 38 U USB-compatible printer 70 user password, deleting 130 user password, setting 129 using a microphone 116 computer lock 83 external display devices 68 Hibernation mode 77 hot key to set a power plan 104 Memory card reader 118 Shut down command 74 Sleep mode 79 TouchPad™ 64 Web Camera 118 using the keyboard 85 using the overlay for cursor control 88 Utilities 121 V video projector adjusting display 70...
... 143 Windows® operating system not working 141 wireless networking 152 turning off computer 72 computer more quickly 75 options 72 turning on power 38 U USB-compatible printer 70 user password, deleting 130 user password, setting 129 using a microphone 116 computer lock 83 external display devices 68 Hibernation mode 77 hot key to set a power plan 104 Memory card reader 118 Shut down command 74 Sleep mode 79 TouchPad™ 64 Web Camera 118 using the keyboard 85 using the overlay for cursor control 88 Utilities 121 V video projector adjusting display 70...


