
User Manual
Page 4
...Improper disposal may form on the lenses. This is normal, especially when the unit is NOT COVERED BY YOUR WARRANTY. Never attempt to a Toshiba Authorized Service Center. Never locate the antenna near overhead power lines or other hazards. For example, viewing letterbox style (16:9) media on ...Images, such as a ladder or screwdriver) can become frequent or continuous, unplug the power cord and contact a Toshiba Authorized Service Center. 23) Always operate this happens, turn off to check for reflections on the screen, and then remove the source of reflections while viewing the TV. ...
...Improper disposal may form on the lenses. This is normal, especially when the unit is NOT COVERED BY YOUR WARRANTY. Never attempt to a Toshiba Authorized Service Center. Never locate the antenna near overhead power lines or other hazards. For example, viewing letterbox style (16:9) media on ...Images, such as a ladder or screwdriver) can become frequent or continuous, unplug the power cord and contact a Toshiba Authorized Service Center. 23) Always operate this happens, turn off to check for reflections on the screen, and then remove the source of reflections while viewing the TV. ...

User Manual
Page 5
Important safety information 2-5 Introduction 7 Welcome to Toshiba 7 Exploring your new TV 7 Note regarding Quick Connect Guide 7 Connecting your TV 8 Note regarding picture quality 8 Connecting a VCR 8 Connecting a cable converter box 9 Connecting a cable converter ... Using the WOW™ surround sound feature 54 Adjusting the sound quality 54 Resetting your audio adjustments 55 Using the sub-bass system (SBS 55 Turning off the built-in speakers 56 Selecting the Audio OUT sound 56 Using the StableSound® feature 57 Selecting the background of the menu display...
Important safety information 2-5 Introduction 7 Welcome to Toshiba 7 Exploring your new TV 7 Note regarding Quick Connect Guide 7 Connecting your TV 8 Note regarding picture quality 8 Connecting a VCR 8 Connecting a cable converter box 9 Connecting a cable converter ... Using the WOW™ surround sound feature 54 Adjusting the sound quality 54 Resetting your audio adjustments 55 Using the sub-bass system (SBS 55 Turning off the built-in speakers 56 Selecting the Audio OUT sound 56 Using the StableSound® feature 57 Selecting the background of the menu display...

User Manual
Page 6
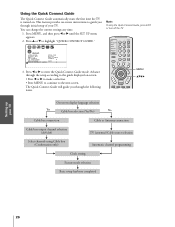
...Connect Guide automatically appears on the remote control. This feature provides on-screen instructions to guide you through setting up your TV Introduction Welcome to Toshiba Congratulations! Front Remote control sensor (Behind the screen) Behind the door Menu x •zy ALS (Automatic Light Sensor VIDEO-3 IN S-VIDEO... the front panel or the remote control. To stop the Quick Connect Guide, either press EXIT or turn off the TV. This manual applies to models 42HDX82, 50HDX82, 57HDX82, and 65HDX82. Exploring your new TV You can use the controls on using the buttons on the market...
...Connect Guide automatically appears on the remote control. This feature provides on-screen instructions to guide you through setting up your TV Introduction Welcome to Toshiba Congratulations! Front Remote control sensor (Behind the screen) Behind the door Menu x •zy ALS (Automatic Light Sensor VIDEO-3 IN S-VIDEO... the front panel or the remote control. To stop the Quick Connect Guide, either press EXIT or turn off the TV. This manual applies to models 42HDX82, 50HDX82, 57HDX82, and 65HDX82. Exploring your new TV You can use the controls on using the buttons on the market...
User Manual
Page 13
... OUT AUDIO PR R COLOR STREAM HD 2 IN ANT-1 OUT ANT-2 Setting up your electronic components, turn on the TV first, and then the DVI/HDCP device. • When turning off the DVI/HDCP device first, and then the TV. Introduction Connecting your TV Using the Remote Control...is designed for best performance with high-bandwidth digital content protection, which is recommended that you follow these procedures: • When turning on your electronic components, turn off your TV Using the TV's Features Appendix Index 14 The recommended length is 2m (6.6 ft). • one DVI-D digital...
... OUT AUDIO PR R COLOR STREAM HD 2 IN ANT-1 OUT ANT-2 Setting up your electronic components, turn on the TV first, and then the DVI/HDCP device. • When turning off the DVI/HDCP device first, and then the TV. Introduction Connecting your TV Using the Remote Control...is designed for best performance with high-bandwidth digital content protection, which is recommended that you follow these procedures: • When turning on your electronic components, turn off your TV Using the TV's Features Appendix Index 14 The recommended length is 2m (6.6 ft). • one DVI-D digital...

User Manual
Page 15
... trademark of standard A/V cables • one set the Audio Center Channel ON/OFF switch to the TV's Audio Center Channel IN. To control the audio, turn on page 56). R AUDIO IN DVI/HDCP R L VIDEO Y VIDEO Y ANT( 75 ) L/ MONO L/ PB L MONO PB L AUDIO R PR R R COLOR VIDEO-1 VIDEO-2 STREAM AUDIO HD 1... IN IN AUDIO OUT AUDIO PR R COLOR STREAM HD 2 IN ANT-1 OUT ANT-2 Caution: To avoid damaging the speakers: • Turn off the TV off the built-in the ON position, the TV speakers will need : • one pair of audio cables Note: To hear sound...
... trademark of standard A/V cables • one set the Audio Center Channel ON/OFF switch to the TV's Audio Center Channel IN. To control the audio, turn on page 56). R AUDIO IN DVI/HDCP R L VIDEO Y VIDEO Y ANT( 75 ) L/ MONO L/ PB L MONO PB L AUDIO R PR R R COLOR VIDEO-1 VIDEO-2 STREAM AUDIO HD 1... IN IN AUDIO OUT AUDIO PR R COLOR STREAM HD 2 IN ANT-1 OUT ANT-2 Caution: To avoid damaging the speakers: • Turn off the TV off the built-in the ON position, the TV speakers will need : • one pair of audio cables Note: To hear sound...
User Manual
Page 19
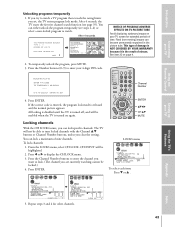
... the previous code. If no key is entered, the mode indicator will exit the program mode and return to test the code. If the device turns on, you want to set the switch to find the code for the brand of your audio/video devices Device code setup 1. If the device...
... the previous code. If no key is entered, the mode indicator will exit the program mode and return to test the code. If the device turns on, you want to set the switch to find the code for the brand of your audio/video devices Device code setup 1. If the device...

User Manual
Page 23
...VCR, DVD, AUDIO1, and AUDIO2. With the Illumination mode on and off ) function (page 52) LIGHT The first press of the LIGHT button toggle between turning the Illumination mode on the Illumination mode. PIC SIZE cycles through the five picture sizes: Normal, Theater Wide 1, 2, 3 and Full (page 35) FAVORITE ...) MENU allows access to the last viewed channels (page 32) PIP CH yz selects the POP (picture-out-picture) channel (page 38) PIP turns the POP feature on , pressing any other key lights the keypad for 10 seconds (page 17). Introduction Connecting your TV Using the TV's Features ...
...VCR, DVD, AUDIO1, and AUDIO2. With the Illumination mode on and off ) function (page 52) LIGHT The first press of the LIGHT button toggle between turning the Illumination mode on the Illumination mode. PIC SIZE cycles through the five picture sizes: Normal, Theater Wide 1, 2, 3 and Full (page 35) FAVORITE ...) MENU allows access to the last viewed channels (page 32) PIP CH yz selects the POP (picture-out-picture) channel (page 38) PIP turns the POP feature on , pressing any other key lights the keypad for 10 seconds (page 17). Introduction Connecting your TV Using the TV's Features ...
User Manual
Page 24
... Learning about the menu system After you have installed the batteries and programmed the remote control, you will remain open until a button is turned on -screen the first time the TV is pressed). • To close automatically; See page 26 for details. 25 Index the other... the menu system. Note Regarding Quick Connect Guide The Quick Connect Guide automatically appears on . To stop the Quick Connect Guide, either press EXIT or turn off the TV. P I CTURE ANTENNA MODE SPORTS CONTRAST 100 BR I GHTNESS 50 COLOR 50 T I NT 0 SHARPNESS 50 RESET SAVE NEW PREFERENCE ALS ON ...
... Learning about the menu system After you have installed the batteries and programmed the remote control, you will remain open until a button is turned on -screen the first time the TV is pressed). • To close automatically; See page 26 for details. 25 Index the other... the menu system. Note Regarding Quick Connect Guide The Quick Connect Guide automatically appears on . To stop the Quick Connect Guide, either press EXIT or turn off the TV. P I CTURE ANTENNA MODE SPORTS CONTRAST 100 BR I GHTNESS 50 COLOR 50 T I NT 0 SHARPNESS 50 RESET SAVE NEW PREFERENCE ALS ON ...
User Manual
Page 25
... 21 22 23 24 25 26 27 28 29 30 31 32 33 34 35 Note: To stop the Quick Connect Guide, press EXIT or turn off the TV. Press y or z to the next screen. Introduction Connecting your TV Using the TV's Features Appendix Index 26 Press x or • to guide... Setting up your TV Using the Remote Control Using the Quick Connect Guide The Quick Connect Guide automatically starts the first time the TV is turned on -screen instructions to enter the Quick Connect Guide mode.
... 21 22 23 24 25 26 27 28 29 30 31 32 33 34 35 Note: To stop the Quick Connect Guide, press EXIT or turn off the TV. Press y or z to the next screen. Introduction Connecting your TV Using the TV's Features Appendix Index 26 Press x or • to guide... Setting up your TV Using the Remote Control Using the Quick Connect Guide The Quick Connect Guide automatically starts the first time the TV is turned on -screen instructions to enter the Quick Connect Guide mode.
User Manual
Page 30
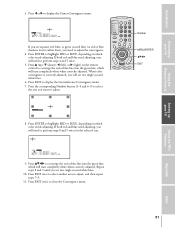
... 13 14 15 16 17 18 32 33 34 35 9. Press ENTER to converge the red or blue line into the green line, which will turn completely white when correctly adjusted. Press EXIT once to select another area to adjust. 1 2 3 4 5 6 7 8 9 10 11 12 13 14 15 16 17 18 19 20... 14 15 16 17 18 19 20 21 22 23 24 25 26 27 28 29 30 31 32 33 34 35 If you will turn completely white when correctly adjusted. If both red and blue need adjusting, you see two single crossed white lines. 10. Repeat steps 8 and 9 until you...
... 13 14 15 16 17 18 32 33 34 35 9. Press ENTER to converge the red or blue line into the green line, which will turn completely white when correctly adjusted. Press EXIT once to select another area to adjust. 1 2 3 4 5 6 7 8 9 10 11 12 13 14 15 16 17 18 19 20... 14 15 16 17 18 19 20 21 22 23 24 25 26 27 28 29 30 31 32 33 34 35 If you will turn completely white when correctly adjusted. If both red and blue need adjusting, you see two single crossed white lines. 10. Repeat steps 8 and 9 until you...
User Manual
Page 32
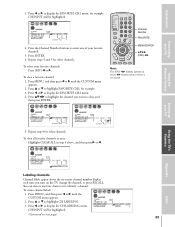
... a channel. Press MENU, and then press x or • until the 4 5 6 CUSTOM menu appears. 7 8 9 2. To create channel labels: 1 2 3 1. Press yzx • to highlight the channel you turn on next page) 33 Introduction 3. Press x or • to display the FAVORITE CH1 menu, for other channels. Setting up your TV Using the TV's Features...
... a channel. Press MENU, and then press x or • until the 4 5 6 CUSTOM menu appears. 7 8 9 2. To create channel labels: 1 2 3 1. Press yzx • to highlight the channel you turn on next page) 33 Introduction 3. Press x or • to display the FAVORITE CH1 menu, for other channels. Setting up your TV Using the TV's Features...
User Manual
Page 36
... 34 35 PIC SIZE Connecting your TV Using the TV's Features Appendix • To raise the picture, press y . • To lower the picture, press z. To turn off the CINEMA MODE: Select VIDEO in step 3 above. 1 2 3 4 5 6 7 8 9 10 11 12 13 14 15 16 17 18 19 20 21 22 23 24 25...
... 34 35 PIC SIZE Connecting your TV Using the TV's Features Appendix • To raise the picture, press y . • To lower the picture, press z. To turn off the CINEMA MODE: Select VIDEO in step 3 above. 1 2 3 4 5 6 7 8 9 10 11 12 13 14 15 16 17 18 19 20 21 22 23 24 25...
User Manual
Page 42
... 24 25 26 27 28 29 30 31 3 To select each item: Press z or y . If the correct code is entered, the program lock mode is turned on page 4. 2. Press x or • to watch a TV program that exceeds the rating limits you can either unlock the program temporarily (see page 39). ...All locking is disabled until the TV is turned off, and will be enabled when the TV is released and the normal picture appears. CH INPUT will be highlighted. 2. You can lock specific channels...
... 24 25 26 27 28 29 30 31 3 To select each item: Press z or y . If the correct code is entered, the program lock mode is turned on page 4. 2. Press x or • to watch a TV program that exceeds the rating limits you can either unlock the program temporarily (see page 39). ...All locking is disabled until the TV is turned off, and will be enabled when the TV is released and the normal picture appears. CH INPUT will be highlighted. 2. You can lock specific channels...

User Manual
Page 46
... your new preferences: 1. ALS is energized when the ALS menu is set to display more natural flesh tones. Press y or z to highlight FLESH TONE. 3. To turn on the front panel of the TV. Press y or z to highlight SAVE NEW PREFERENCE. 3. Introduction Connecting your TV Using the Remote Control Saving your new...
... your new preferences: 1. ALS is energized when the ALS menu is set to display more natural flesh tones. Press y or z to highlight FLESH TONE. 3. To turn on the front panel of the TV. Press y or z to highlight SAVE NEW PREFERENCE. 3. Introduction Connecting your TV Using the Remote Control Saving your new...

User Manual
Page 47
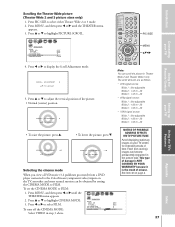
To turn off CableClear™ DNR: Highlight OFF in step 3 above. Selecting the Scan Velocity Modulation (SVM) The SVM feature enhances picture contrast and sharpness. Press y or z ... by repeated use. P I CTURE ANTENNA MODE PREFERENCE FLESH TONE ON CableClear DNR AUTO / OFF SVM HIGH COLOR TEMPERATURE MEDI UM CONVERGENCE SAVE NEW PREFERENCE To turn on CableClear™ DNR: 1. This is not required when viewing some high-quality video material. Introduction Connecting your TV Using the Remote Control Using CableClear...
To turn off CableClear™ DNR: Highlight OFF in step 3 above. Selecting the Scan Velocity Modulation (SVM) The SVM feature enhances picture contrast and sharpness. Press y or z ... by repeated use. P I CTURE ANTENNA MODE PREFERENCE FLESH TONE ON CableClear DNR AUTO / OFF SVM HIGH COLOR TEMPERATURE MEDI UM CONVERGENCE SAVE NEW PREFERENCE To turn on CableClear™ DNR: 1. This is not required when viewing some high-quality video material. Introduction Connecting your TV Using the Remote Control Using CableClear...

User Manual
Page 50
... WEATHER Temps F C LONDON 51 11 MOSCOW 57 14 PARIS 53 12 ROME 66 19 TOKYO 65 18 Current Weather Clear Cloudy Clear Cloudy Rain To turn the Closed Caption feature OFF. Setting up your area, a black rectangle may appear on the screen. To view captions or text: 1. Note: If the program...; when a videotape has been dubbed • when the signal reception is weak • when the signal reception is not available in step 4. If this happens, turn off the Closed Caption feature: Highlight OFF in your TV Using the TV's Features Appendix Index 51
... WEATHER Temps F C LONDON 51 11 MOSCOW 57 14 PARIS 53 12 ROME 66 19 TOKYO 65 18 Current Weather Clear Cloudy Clear Cloudy Rain To turn the Closed Caption feature OFF. Setting up your area, a black rectangle may appear on the screen. To view captions or text: 1. Note: If the program...; when a videotape has been dubbed • when the signal reception is weak • when the signal reception is not available in step 4. If this happens, turn off the Closed Caption feature: Highlight OFF in your TV Using the TV's Features Appendix Index 51
User Manual
Page 51
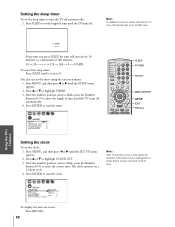
... yzx • EXIT RECALL Setting up your TV Using the Remote Control Setting the sleep timer To set the length of time until the TV turns off automatically: 1. Index Press MENU, and then press x or • until the SETUP menu appears. 2. The clock operates on -screen: ... until the SET UP menu appears. 2. Press y or z to highlight TIMER. 3. After the number position starts to blink, press the Number buttons (0-9) to turn the TV off automatically. 4. You also can set the clock: 1. Press y or z to highlight CLOCK SET. 3. Introduction Connecting your TV Using the TV's ...
... yzx • EXIT RECALL Setting up your TV Using the Remote Control Setting the sleep timer To set the length of time until the TV turns off automatically: 1. Index Press MENU, and then press x or • until the SETUP menu appears. 2. The clock operates on -screen: ... until the SET UP menu appears. 2. Press y or z to highlight TIMER. 3. After the number position starts to blink, press the Number buttons (0-9) to turn the TV off automatically. 4. You also can set the clock: 1. Press y or z to highlight CLOCK SET. 3. Introduction Connecting your TV Using the TV's ...
User Manual
Page 52
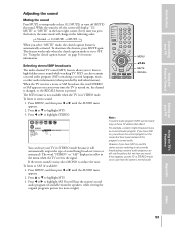
... heard only on , and the station you are watching is not currently broadcasting a second audio program, you select "MUTE" mode, the closed caption feature is turned on the screen but not hear any sound. Press MENU, and then press x or • until the AUDIO menu appears. 2. Press y or z to...the program's normal audio. Introduction Connecting your TV Using the Remote Control Adjusting the sound Muting the sound Press MUTE to temporarily reduce (1/2 MUTE) or turn off , the screen will display "1/2 MUTE" or "MUTE" in the lower right corner. While the sound is in the menu when the TV...
... heard only on , and the station you are watching is not currently broadcasting a second audio program, you select "MUTE" mode, the closed caption feature is turned on the screen but not hear any sound. Press MENU, and then press x or • until the AUDIO menu appears. 2. Press y or z to...the program's normal audio. Introduction Connecting your TV Using the Remote Control Adjusting the sound Muting the sound Press MUTE to temporarily reduce (1/2 MUTE) or turn off , the screen will display "1/2 MUTE" or "MUTE" in the lower right corner. While the sound is in the menu when the TV...
User Manual
Page 53
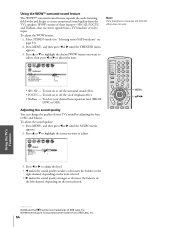
...___________ WOW and the symbol are trademarks of three features-SRS 3D, FOCUS and TruBass-that use stereo signals from SRS Labs, Inc. 54 To turn on page 53). 2. Select STEREO mode (see "Selecting stereo/SAP broadcasts" on or off the surround sound effect. • FOCUS - To... adjust the sound quality: 1. To turn on the item selected. Press y or z to highlight the item you want to adjust the level. • x makes the sound quality weaker or decreases...
...___________ WOW and the symbol are trademarks of three features-SRS 3D, FOCUS and TruBass-that use stereo signals from SRS Labs, Inc. 54 To turn on page 53). 2. Select STEREO mode (see "Selecting stereo/SAP broadcasts" on or off the surround sound effect. • FOCUS - To... adjust the sound quality: 1. To turn on the item selected. Press y or z to highlight the item you want to adjust the level. • x makes the sound quality weaker or decreases...
User Manual
Page 54
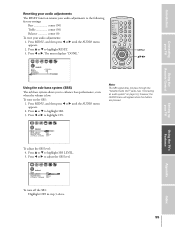
... 12 13 14 15 16 17 18 19 20 21 22 23 24 25 26 27 28 29 30 31 32 33 34 35 To turn on page 16); Press y or z to the following factory settings: Bass center (50) Treble center (50) Balance center (0) To reset your audio adjustments: 1. Using the.... Press MENU, and then press x or • until the AUDIO menu appears. 2. Press MENU, and then press x or • until the AUDIO menu appears. 2. To turn off the SBS: Highlight OFF in step 3 above.
... 12 13 14 15 16 17 18 19 20 21 22 23 24 25 26 27 28 29 30 31 32 33 34 35 To turn on page 16); Press y or z to the following factory settings: Bass center (50) Treble center (50) Balance center (0) To reset your audio adjustments: 1. Using the.... Press MENU, and then press x or • until the AUDIO menu appears. 2. Press MENU, and then press x or • until the AUDIO menu appears. 2. To turn off the SBS: Highlight OFF in step 3 above.


