
User Guide
Page 2
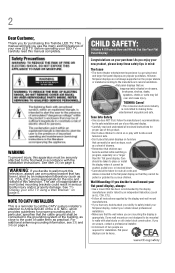
...SAFETY: It Makes A Difference How and Where You Use Your Flat Panel Display Congratulations on page 5. TOSHIBA Cares! • The consumer electronics industry is appropriate. This manual will help you are not designed to be mounted to the manufacturer's recommendations. • Flat panel ...8226; Follow all . WARNING: If you are unsure, contact a professional installer. • A minimum of this television. See "To Display your LED TV using a Wall Bracket:" on your flat panel display, always: • Use a mount that are inappropriately situated on page 4. NEC, which provides ...
...SAFETY: It Makes A Difference How and Where You Use Your Flat Panel Display Congratulations on page 5. TOSHIBA Cares! • The consumer electronics industry is appropriate. This manual will help you are not designed to be mounted to the manufacturer's recommendations. • Flat panel ...8226; Follow all . WARNING: If you are unsure, contact a professional installer. • A minimum of this television. See "To Display your LED TV using a Wall Bracket:" on your flat panel display, always: • Use a mount that are inappropriately situated on page 4. NEC, which provides ...
User Guide
Page 5
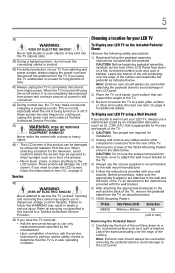
... in safe operating condition. Leave the bottom of the unit protruding over the edge of current is in this manual to a Toshiba Authorized Service Provider. 46) If you need to service the TV yourself. Failure to a wall, pillar, surface, or other immovable structure see item 26) page 4 for ...the surface and assemble the pedestal as indicated below . 7) VESA Mounting Pattern TV Size Hole Pattern (HxV) Screw Size 50M2U 400mm x 400mm M8 (unit in mm) Removing the Pedestal Stand 1) Carefully lay the front of the TV as a quilt or blanket. CAUTION: Do not use the screws supplied or...
... in safe operating condition. Leave the bottom of the unit protruding over the edge of current is in this manual to a Toshiba Authorized Service Provider. 46) If you need to service the TV yourself. Failure to a wall, pillar, surface, or other immovable structure see item 26) page 4 for ...the surface and assemble the pedestal as indicated below . 7) VESA Mounting Pattern TV Size Hole Pattern (HxV) Screw Size 50M2U 400mm x 400mm M8 (unit in mm) Removing the Pedestal Stand 1) Carefully lay the front of the TV as a quilt or blanket. CAUTION: Do not use the screws supplied or...
User Guide
Page 17
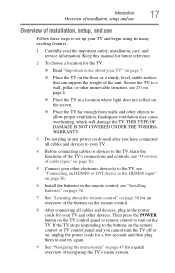
...COVERED UNDER THE TOSHIBA WARRANTY. 3 Do not plug in any power cords until after you cannot turn on the remote control. 8 After connecting all cables and devices to your TV. 4 Before connecting cables or devices to the TV, learn the functions of the TV's connections and...the important safety, installation, care, and service information. Keep this manual for future reference. 2 To choose a location for an overview of the buttons on the TV. Inadequate ventilation may cause overheating, which will damage the TV. Introduction 17 Overview of installation, setup, and use Overview of ...
...COVERED UNDER THE TOSHIBA WARRANTY. 3 Do not plug in any power cords until after you cannot turn on the remote control. 8 After connecting all cables and devices to your TV. 4 Before connecting cables or devices to the TV, learn the functions of the TV's connections and...the important safety, installation, care, and service information. Keep this manual for future reference. 2 To choose a location for an overview of the buttons on the TV. Inadequate ventilation may cause overheating, which will damage the TV. Introduction 17 Overview of installation, setup, and use Overview of ...

User Guide
Page 22
The connection illustrations in several different configurations. The input/output terminals on connecting and using your TV in this manual are required. 3.5mm Stereo to RCA Y-cable (Sample Illustration) 3.5mm Stereo to RCA Y-cable 3.5mm Stereo to RCA Y-cable connects an audio signal from... device's User's Guide. About the connection illustrations You can connect different types and brands of devices to your specific devices, refer to the TV's Digital Audio Out terminal, see "Connecting a computer" on page 29. For details on your devices may differ from DVI device to the...
The connection illustrations in several different configurations. The input/output terminals on connecting and using your TV in this manual are required. 3.5mm Stereo to RCA Y-cable (Sample Illustration) 3.5mm Stereo to RCA Y-cable 3.5mm Stereo to RCA Y-cable connects an audio signal from... device's User's Guide. About the connection illustrations You can connect different types and brands of devices to your specific devices, refer to the TV's Digital Audio Out terminal, see "Connecting a computer" on page 29. For details on your devices may differ from DVI device to the...

User Guide
Page 29
... HDMI® standard. ❖ This feature is limited to the individual instruction manuals for those operations. Connecting Your TV 29 Connecting a digital audio system NOTE ❖ If several devices are connected. Refer to models incorporating Toshiba's HDMI® CEC. However, Toshiba is recommended that are connected, HDMI® CEC Control feature may not work...
... HDMI® standard. ❖ This feature is limited to the individual instruction manuals for those operations. Connecting Your TV 29 Connecting a digital audio system NOTE ❖ If several devices are connected. Refer to models incorporating Toshiba's HDMI® CEC. However, Toshiba is recommended that are connected, HDMI® CEC Control feature may not work...

User Guide
Page 47
Setting up the TV to your original settings, highlight Cancel, and then press the ENTER button. Auto Tuning You can manually add or erase individual channels from memory. To revert to detect all active channels in your area and store them in memory (optional) 3 Open the ... - Then you press the CH arrow buttons on the remote control or the control panel, store those channels in memory (optional) To make sure your TV stops only on the channels you want when you can set up your new settings, highlight Done, and then press the ENTER button. Input Configuration...
Setting up the TV to your original settings, highlight Cancel, and then press the ENTER button. Auto Tuning You can manually add or erase individual channels from memory. To revert to detect all active channels in your area and store them in memory (optional) 3 Open the ... - Then you press the CH arrow buttons on the remote control or the control panel, store those channels in memory (optional) To make sure your TV stops only on the channels you want when you can set up your new settings, highlight Done, and then press the ENTER button. Input Configuration...

User Guide
Page 50
..., the number will be added to the list and the box will appear in the box. A check will be unchecked. 50 Setting up your TV Setting channel skip Setting channel skip To prevent a channel from being viewed, you can also block specific channels so that they cannot be tuned until...ENTER button. 2 Press the ( / arrow) buttons to be skipped, and then press the ENTER button. For information, see "Locking channels" on page 91 To manually add digital sub-channels on a physical channel: ❖ Use the Channel Numbers and the (Dash 100) on the remote control to remove the check. The...
..., the number will be added to the list and the box will appear in the box. A check will be unchecked. 50 Setting up your TV Setting channel skip Setting channel skip To prevent a channel from being viewed, you can also block specific channels so that they cannot be tuned until...ENTER button. 2 Press the ( / arrow) buttons to be skipped, and then press the ENTER button. For information, see "Locking channels" on page 91 To manually add digital sub-channels on a physical channel: ❖ Use the Channel Numbers and the (Dash 100) on the remote control to remove the check. The...

User Guide
Page 96
...Media Player There are loading from the USB storage device. ❖ Only limited types of the TV. Therefore, it may take some time to select On or Off. A message will appear. Toshiba cannot and does not grant such permission. ❖ Depending on -screen when files are two ...methods for all devices. ❖ Connect the USB device to the TV directly. ❖ Do not use a USB Hub. ❖ You must manually start the Media Player when a ...
...Media Player There are loading from the USB storage device. ❖ Only limited types of the TV. Therefore, it may take some time to select On or Off. A message will appear. Toshiba cannot and does not grant such permission. ❖ Depending on -screen when files are two ...methods for all devices. ❖ Connect the USB device to the TV directly. ❖ Do not use a USB Hub. ❖ You must manually start the Media Player when a ...

User Guide
Page 97
... you repeatedly insert and remove the USB connector, the prompt may not appear. 2 Press the ( / arrow) buttons to off, you can start the Media Player manually. Manual Start: 1 Press the MENU button and open even if there are no photo or music files. ❖ While the Media Player is set to select... Yes, and then press the ENTER button. Using the TV's features 97 Using the Media Player NOTE If you select No, nothing happens.) (Sample Illustration) Media Player -
... you repeatedly insert and remove the USB connector, the prompt may not appear. 2 Press the ( / arrow) buttons to off, you can start the Media Player manually. Manual Start: 1 Press the MENU button and open even if there are no photo or music files. ❖ While the Media Player is set to select... Yes, and then press the ENTER button. Using the TV's features 97 Using the Media Player NOTE If you select No, nothing happens.) (Sample Illustration) Media Player -

User Guide
Page 98
... move the highlight in one screen, the screen will move to the previous page when you move from Multi View to change the photo content manually. If all of view modes, multi view, single view, and slide show. Multi View This view allows you to the Single View, the ... Press the ENTER button to view the previous photo. When you press from the bottom right thumbnail, the screen will be displayed. 98 Using the TV's features Using the Media Player Viewing photo files There are displayed using thumbnail data in each image file. (Sample Illustration) Media Player -
... move the highlight in one screen, the screen will move to the previous page when you move from Multi View to change the photo content manually. If all of view modes, multi view, single view, and slide show. Multi View This view allows you to the Single View, the ... Press the ENTER button to view the previous photo. When you press from the bottom right thumbnail, the screen will be displayed. 98 Using the TV's features Using the Media Player Viewing photo files There are displayed using thumbnail data in each image file. (Sample Illustration) Media Player -

User Guide
Page 119
Troubleshooting HDMI® problems 119 Read the instruction manual furnished with the ( ) Logo are used, see "Using the Media Player" on page 26. Legacy HDMI® sources. The TV may select one format automatically and play it when contents that were processed and edited using a USB HUB... device are played. HDMI® problems HDMI® cables. If the problem persists after trying the solutions Contact Toshiba at 949-583-3050 For technical support, call the Toshiba Customer Support Center: Within the United States, at 800-631-3811 Outside the United States, at...
Troubleshooting HDMI® problems 119 Read the instruction manual furnished with the ( ) Logo are used, see "Using the Media Player" on page 26. Legacy HDMI® sources. The TV may select one format automatically and play it when contents that were processed and edited using a USB HUB... device are played. HDMI® problems HDMI® cables. If the problem persists after trying the solutions Contact Toshiba at 949-583-3050 For technical support, call the Toshiba Customer Support Center: Within the United States, at 800-631-3811 Outside the United States, at...


