Quick Installation Guide
Page 5
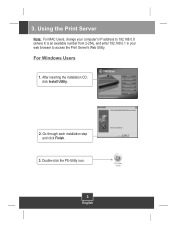
Go through each installation step and click Finish. 3. PS-Utility V3.00 3 English For Windows Users 1. Double-click the PS-Utility icon. 3. After inserting the installation CD, click Install Utility. 2. Using the Print Server Note: For MAC Users, change your computer's IP address to 192.168.0.X (where X is an available number from 2-254), and enter 192.168.0.1 in your web browser to access the Print Server's Web Utility.
Go through each installation step and click Finish. 3. PS-Utility V3.00 3 English For Windows Users 1. Double-click the PS-Utility icon. 3. After inserting the installation CD, click Install Utility. 2. Using the Print Server Note: For MAC Users, change your computer's IP address to 192.168.0.X (where X is an available number from 2-254), and enter 192.168.0.1 in your web browser to access the Print Server's Web Utility.
Quick Installation Guide
Page 7
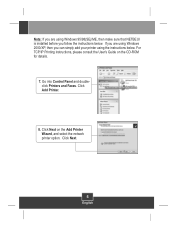
Note: If you are using Windows 2000/XP, then you can simply add your printer using Windows 95/98(SE)/ME, then make sure that NETBEUI is installed before you are using the instructions below . Click Next on the CD-ROM for details. 7. For TCP/IP Printing instructions, please consult the User's Guide on the Add Printer Wizard, and select the network printer option. Click Next. 5 English Go into Control Panel and doubleclick Printers and Faxes. If you follow the instructions below . Click Add Printer. 8.
Note: If you are using Windows 2000/XP, then you can simply add your printer using Windows 95/98(SE)/ME, then make sure that NETBEUI is installed before you are using the instructions below . Click Next on the CD-ROM for details. 7. For TCP/IP Printing instructions, please consult the User's Guide on the Add Printer Wizard, and select the network printer option. Click Next. 5 English Go into Control Panel and doubleclick Printers and Faxes. If you follow the instructions below . Click Add Printer. 8.
Quick Installation Guide
Page 8
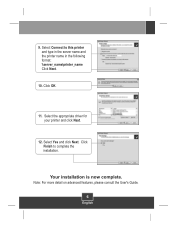
Click Finish to this printer and type in the server name and the printer name in the following format: \\server_name\printer_name Click Next. 10. Click OK. 11. 9. Your installation is now complete. Select Yes and click Next. Select the appropriate driver for your printer and click Next. 12. Note: For more detail on advanced features, please consult the User's Guide. 6 English Select Connect to complete the installation.
Click Finish to this printer and type in the server name and the printer name in the following format: \\server_name\printer_name Click Next. 10. Click OK. 11. 9. Your installation is now complete. Select Yes and click Next. Select the appropriate driver for your printer and click Next. 12. Note: For more detail on advanced features, please consult the User's Guide. 6 English Select Connect to complete the installation.
Quick Installation Guide
Page 9
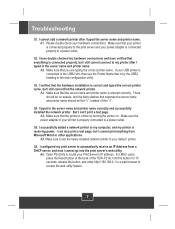
... Address from a DHCP server, and now I cannot print anything from Microsoft Word or other applications. A4. Make sure the power adapter of the TEW-P21G, hold the button for 15 seconds, release the button, and enter http://192.168.0.1 in the server name and printer name. Make sure to set the newly installed network printer to...
... Address from a DHCP server, and now I cannot print anything from Microsoft Word or other applications. A4. Make sure the power adapter of the TEW-P21G, hold the button for 15 seconds, release the button, and enter http://192.168.0.1 in the server name and printer name. Make sure to set the newly installed network printer to...