
User Guide
Page 3
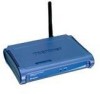
... Installation 3 LED Indicator 3 Rear Panel 3 Hardware connections 4 Connect to the Switch/Hub 4 Check the installation 4 Configuring the Wireless LAN Access Point 5 Login to the Wireless AP through WLAN 5 Login ...5 Main Screen of the Access Point 7 Network ...8 Security 11 Status ...15 Clients...17 Tools ...18 Configuration 20 Technical Specifications 21 ABOUT THIS GUIDE Congratulations on your PC wherever you...
... Installation 3 LED Indicator 3 Rear Panel 3 Hardware connections 4 Connect to the Switch/Hub 4 Check the installation 4 Configuring the Wireless LAN Access Point 5 Login to the Wireless AP through WLAN 5 Login ...5 Main Screen of the Access Point 7 Network ...8 Security 11 Status ...15 Clients...17 Tools ...18 Configuration 20 Technical Specifications 21 ABOUT THIS GUIDE Congratulations on your PC wherever you...

User Guide
Page 6
Main Screen of the Access Point The screen will check only the password that was set in the left side of the main screen: Network, Security, Status, Clients, Tools and Configuration. There are six main functions included in the left side of the AP when you entered before . There is no need to ... to enter the Network password, type in the password you login to login. Type a name or leave the username dialog box empty to the AP. When there is without a password. Point the selections in the system before . The system will show the station summary of the menu screen. 6 7
Main Screen of the Access Point The screen will check only the password that was set in the left side of the main screen: Network, Security, Status, Clients, Tools and Configuration. There are six main functions included in the left side of the AP when you entered before . There is no need to ... to enter the Network password, type in the password you login to login. Type a name or leave the username dialog box empty to the AP. When there is without a password. Point the selections in the system before . The system will show the station summary of the menu screen. 6 7
User Guide
Page 8
... 3 channels to communicate. 2. Access Control List Access Control function allows clients whose MAC addresses in the WDS Link. 1. Click enable in the Access Control list. ¾ Default Access: selecting Accept will be achieved by using the Encryption function. After the AP is to prevent unauthorized access to a wireless network, and it can connect to the Access Point unless they are...
... 3 channels to communicate. 2. Access Control List Access Control function allows clients whose MAC addresses in the WDS Link. 1. Click enable in the Access Control list. ¾ Default Access: selecting Accept will be achieved by using the Encryption function. After the AP is to prevent unauthorized access to a wireless network, and it can connect to the Access Point unless they are...

User Guide
Page 9
... long the seconds that there are some of wireless networking products. III. Click to enable the 802.1x security function. ‹ Key Size: selecting the 64bit or 128-bit for clients and return authentication key parameters to the users to... designed with the 802.11 standard. When choosing the encryption to WEP mode, click the "Use WEP Security" to the wireless network. IV. 802.1x Security To address the shortcomings of WEP for a number of dynamic TKIP, AES, or WEP....size of information still not encrypted is the MAC address, which is a key between the AP and the Radius Server.
... long the seconds that there are some of wireless networking products. III. Click to enable the 802.1x security function. ‹ Key Size: selecting the 64bit or 128-bit for clients and return authentication key parameters to the users to... designed with the 802.11 standard. When choosing the encryption to WEP mode, click the "Use WEP Security" to the wireless network. IV. 802.1x Security To address the shortcomings of WEP for a number of dynamic TKIP, AES, or WEP....size of information still not encrypted is the MAC address, which is a key between the AP and the Radius Server.

User Guide
Page 10
... Protected Access (WPA) is the newest and best available standard in which the manager want clients to re-keying the password for authentication and security. Rekeying Time: type in the time for clients to re-key the password when the number of every 1000 packets was transmitted. Wireless Statistics ...This function will show the statistics of every 1000 packets was transmitted. ¾ Update Group Key: to have the WPA password between the AP and the clients. ¾ Use WPA with the Radius Server. V. Station This screen will show the status summary of packets in Wi-Fi security....
... Protected Access (WPA) is the newest and best available standard in which the manager want clients to re-keying the password for authentication and security. Rekeying Time: type in the time for clients to re-key the password when the number of every 1000 packets was transmitted. Wireless Statistics ...This function will show the statistics of every 1000 packets was transmitted. ¾ Update Group Key: to have the WPA password between the AP and the clients. ¾ Use WPA with the Radius Server. V. Station This screen will show the status summary of packets in Wi-Fi security....

User Guide
Page 11
I. Access Points This function shows the list of the Wireless Access Point that this AP can use for WDS Links, refer to WDS Links on the AP, press "Reset Event Log" to this AP. Clients This function shows the list of the wireless clients that you can connect with, this is the list that connected to clear the record of the event happened. Wireless Clients This function shows the list of the wireless surrounded this AP. II. III. Event Report This screen shows the event happened on page 9. 16 17
I. Access Points This function shows the list of the Wireless Access Point that this AP can use for WDS Links, refer to WDS Links on the AP, press "Reset Event Log" to this AP. Clients This function shows the list of the wireless clients that you can connect with, this is the list that connected to clear the record of the event happened. Wireless Clients This function shows the list of the wireless surrounded this AP. II. III. Event Report This screen shows the event happened on page 9. 16 17

