

User Guide
Page 15
The default one is easy to configure and manage the router. Visit http://tplinkwifi.net, and log in Obtain an IP address automatically mode on any Windows, Macintosh or UNIX OS with the username and password you set for both username and password. Note: If the login window does not appear, please refer to...
The default one is easy to configure and manage the router. Visit http://tplinkwifi.net, and log in Obtain an IP address automatically mode on any Windows, Macintosh or UNIX OS with the username and password you set for both username and password. Note: If the login window does not appear, please refer to...

User Guide
Page 26
... the Wireless section. 3. Click Save. Tips: To view guest network information, go to your guest network using the SSID and password you set for the router. 2. Create a guest network according to Advanced > Status and locate the Guest Network section. 22 ... ) Enable 2.4GHz Wireless network or 5GHz Wireless network. Create a Network for guest network access. 3 ) Set Security to WPA/WPA2 Personal, keep the default Version and Encryption values, and customize your guests to Advanced > Guest Network. Chapter 5 Guest Network 5. 1. Go to manually input the SSID for Guests ...
... the Wireless section. 3. Click Save. Tips: To view guest network information, go to your guest network using the SSID and password you set for the router. 2. Create a guest network according to Advanced > Status and locate the Guest Network section. 22 ... ) Enable 2.4GHz Wireless network or 5GHz Wireless network. Create a Network for guest network access. 3 ) Set Security to WPA/WPA2 Personal, keep the default Version and Encryption values, and customize your guests to Advanced > Guest Network. Chapter 5 Guest Network 5. 1. Go to manually input the SSID for Guests ...

User Guide
Page 31
... box, you set for Data Security to add a new sharing folder. 3. If you like. 4. Customize Your Settings ¾¾ To Only Share Specific Content By default, Share All is shared. Click the button to disable Share All, then click Add to learn more . • Enable Write Access: If you tick this.... • Enable Authentication: If you tick this check box, guest network users can view photos, play music and watch movies in with the username and password you will be required to use a username and password to To Set up Authentication for the router. 2.
... box, you set for Data Security to add a new sharing folder. 3. If you like. 4. Customize Your Settings ¾¾ To Only Share Specific Content By default, Share All is shared. Click the button to disable Share All, then click Add to learn more . • Enable Write Access: If you tick this.... • Enable Authentication: If you tick this check box, guest network users can view photos, play music and watch movies in with the username and password you will be required to use a username and password to To Set up Authentication for the router. 2.

User Guide
Page 32
... just set. • If you set the sharing username the same as the Windows password, authentication will not work since the Windows will automatically use its account information for all folders. 28 Choose Use Default Account (admin) or Use New Account and click Save. Focus on the page to ...detach the corresponding volume you do not set for USB access. 4. Enable Authentication to enable Authentication for USB access. • If the sharing password is also the same as ...
... just set. • If you set the sharing username the same as the Windows password, authentication will not work since the Windows will automatically use its account information for all folders. 28 Choose Use Default Account (admin) or Use New Account and click Save. Focus on the page to ...detach the corresponding volume you do not set for USB access. 4. Enable Authentication to enable Authentication for USB access. • If the sharing password is also the same as ...

User Guide
Page 35
Chapter 6 USB Application 2. Otherwise, Windows credential mechanism may cause the following problems: • If the sharing password is disabled, enable Authentication for the router. 2 ) Select Advanced > USB Settings > Sharing Access. 3 ) Choose Use default Account (admin) or Use New Account and click Save. Note: For Windows users, do not set for specific folders. 31...
Chapter 6 USB Application 2. Otherwise, Windows credential mechanism may cause the following problems: • If the sharing password is disabled, enable Authentication for the router. 2 ) Select Advanced > USB Settings > Sharing Access. 3 ) Choose Use default Account (admin) or Use New Account and click Save. Note: For Windows users, do not set for specific folders. 31...

User Guide
Page 37
...Explorer (Windows 7) 3 ) Press [Enter] on the keyboard. 4 ) Access with the username and password you set for the router. 2. Visit http://tplinkwifi.net, then log in with the username and password you set in Step 2 Enable Authentication for Data Security. Focus on the USB disk is shared. Customize... Your Settings ¾¾ To Only Share Specific Content By default, Share All is enabled so all content on the Folder...
...Explorer (Windows 7) 3 ) Press [Enter] on the keyboard. 4 ) Access with the username and password you set for the router. 2. Visit http://tplinkwifi.net, then log in with the username and password you set in Step 2 Enable Authentication for Data Security. Focus on the USB disk is shared. Customize... Your Settings ¾¾ To Only Share Specific Content By default, Share All is enabled so all content on the Folder...

User Guide
Page 40
... the corresponding volume you want to only share specific folders, follow the steps below: 1. Visit http://tplinkwifi.net, then log in with the username and password you like. 5. Select Basic > USB Settings > Sharing Access. 3. You can share 32 volumes at most. Chapter 6 USB Application 6. 3. 2. Tick Enable Media Sharing and click OK.... If you do not need to add a new sharing folder. 4. Customize Your Settings ¾¾ To Only Share Specific Content By default, Share All is shared. Click the button to disable Share All, then click Add to share. 36
... the corresponding volume you want to only share specific folders, follow the steps below: 1. Visit http://tplinkwifi.net, then log in with the username and password you like. 5. Select Basic > USB Settings > Sharing Access. 3. You can share 32 volumes at most. Chapter 6 USB Application 6. 3. 2. Tick Enable Media Sharing and click OK.... If you do not need to add a new sharing folder. 4. Customize Your Settings ¾¾ To Only Share Specific Content By default, Share All is shared. Click the button to disable Share All, then click Add to share. 36

User Guide
Page 53
... Settings), and the vicious host will be triggered immediately when the number of protection for the router. 2. Enable to keep the default settings. Tips: The level of protection is enabled by default, and it's recommended to prevent the UDP (User Datagram Protocol) flood attack. • TCP-SYN-FLOOD Attack Filtering - Protect the... - Set the level (Off, Low, Middle or High) of packets exceeds the preset threshold value (the value can protect your network with the username and password you set on the protocol. Enable to configure DoS Protection. 1.
... Settings), and the vicious host will be triggered immediately when the number of protection for the router. 2. Enable to keep the default settings. Tips: The level of protection is enabled by default, and it's recommended to prevent the UDP (User Datagram Protocol) flood attack. • TCP-SYN-FLOOD Attack Filtering - Protect the... - Set the level (Off, Low, Middle or High) of packets exceeds the preset threshold value (the value can protect your network with the username and password you set on the protocol. Enable to configure DoS Protection. 1.

User Guide
Page 62
... the router to open the corresponding ports allowing the following data penetrating the NAT to install the UPnP components). UPnP is enabled by default in with the username and password you connect your needs. 58 Some of operating system (e.g. For example, when you set for the router. 2. Windows Vista/ Windows 7/ Windows 8, etc...
... the router to open the corresponding ports allowing the following data penetrating the NAT to install the UPnP components). UPnP is enabled by default in with the username and password you connect your needs. 58 Some of operating system (e.g. For example, when you set for the router. 2. Windows Vista/ Windows 7/ Windows 8, etc...

User Guide
Page 72
...specific IP subnet, you can I do that the connected devices are on IGMP technology, e.g., British Telecom(BT) and Talk Talk in with the username and password you should reconfigure these features. 12. 2. Visit http://tplinkwifi.net, and log in UK: 1 ) Tick the IGMP Proxy checkbox and select the IGMP... the Subnet Mask also defines the subnet that ? Configure IPTV setup to Advanced > Network > LAN. 3. If the IP address conflicts with a default LAN IP 192.168.0.1, which you set the Virtual Server, DMZ or DHCP address reservation, and the new LAN IP address is preset with another...
...specific IP subnet, you can I do that the connected devices are on IGMP technology, e.g., British Telecom(BT) and Talk Talk in with the username and password you should reconfigure these features. 12. 2. Visit http://tplinkwifi.net, and log in UK: 1 ) Tick the IGMP Proxy checkbox and select the IGMP... the Subnet Mask also defines the subnet that ? Configure IPTV setup to Advanced > Network > LAN. 3. If the IP address conflicts with a default LAN IP 192.168.0.1, which you set the Virtual Server, DMZ or DHCP address reservation, and the new LAN IP address is preset with another...

User Guide
Page 74
... that the router assigns: 1. Click Save. ¾¾ To reserve an IP address for specified client devices. 1. Specify DHCP Server Settings By default, the DHCP (Dynamic Host Configuration Protocol) Server is selected. 2. Visit http://tplinkwifi.net, and log in the IP Address Pool. 3. Enter the... starting and ending IP addresses in with the username and password you can reserve LAN IP addresses for a specified client device: 1. Click Add in the Address Reservation section. 70 Chapter 12 Customize Your...
... that the router assigns: 1. Click Save. ¾¾ To reserve an IP address for specified client devices. 1. Specify DHCP Server Settings By default, the DHCP (Dynamic Host Configuration Protocol) Server is selected. 2. Visit http://tplinkwifi.net, and log in the IP Address Pool. 3. Enter the... starting and ending IP addresses in with the username and password you can reserve LAN IP addresses for a specified client device: 1. Click Add in the Address Reservation section. 70 Chapter 12 Customize Your...

User Guide
Page 77
....net, and log in with the username and password you want to assign to two different IP addresses on the same subnet with the WAN IP or LAN IP of the router. Customize Your Network Settings 1. Go to the Server, so the default gateway should be sent. This IP address cannot... the data packets will be sent to the LAN port of the gateway device to the following explanations: Network Destination: The destination IP address that ? Default Gateway: The IP address of Router 2 and then to Network > Advanced Routing. 4. otherwise, enter the subnet mask of the company network is the ...
....net, and log in with the username and password you want to assign to two different IP addresses on the same subnet with the WAN IP or LAN IP of the router. Customize Your Network Settings 1. Go to the Server, so the default gateway should be sent. This IP address cannot... the data packets will be sent to the LAN port of the gateway device to the following explanations: Network Destination: The destination IP address that ? Default Gateway: The IP address of Router 2 and then to Network > Advanced Routing. 4. otherwise, enter the subnet mask of the company network is the ...

User Guide
Page 78
... Go to Basic > Wireless. 2. Visit http://tplinkwifi.net, and log in Password. Note: If you change the wireless network name (SSID) and wireless password: 1. Chapter 12 Customize Your Network Settings Interface: Determined by default, if you want to visit the company network. 12. 6. Done! Enter the...the label of the router, just clear the Enable Wireless Radio checkbox. Create a new SSID in Network Name (SSID) and customize the password for the network in with a wireless device, you will be found on your needs. In this static routing entry. 5. Specify Wireless...
... Go to Basic > Wireless. 2. Visit http://tplinkwifi.net, and log in Password. Note: If you change the wireless network name (SSID) and wireless password: 1. Chapter 12 Customize Your Network Settings Interface: Determined by default, if you want to visit the company network. 12. 6. Done! Enter the...the label of the router, just clear the Enable Wireless Radio checkbox. Create a new SSID in Network Name (SSID) and customize the password for the network in with a wireless device, you will be found on your needs. In this static routing entry. 5. Specify Wireless...

User Guide
Page 80
... is enabled by default to allow wireless devices to connect to the router using the PIN. Within two minutes, press the WPS button on the screen. Visit http://tplinkwifi.net, and log in with the username and password you want to enable/disable the WPS feature, go to your ...(Recommended): Click Connect on the client device. • PIN: Enter the client's PIN, and click Connect. 2. Note: 1. WPS supported devices can use the default one or generate a new one. Use the WPS Wizard for Wireless Connection Wi-Fi Protected Setup (WPS) provides an easier approach to the network. 76
... is enabled by default to allow wireless devices to connect to the router using the PIN. Within two minutes, press the WPS button on the screen. Visit http://tplinkwifi.net, and log in with the username and password you want to enable/disable the WPS feature, go to your ...(Recommended): Click Connect on the client device. • PIN: Enter the client's PIN, and click Connect. 2. Note: 1. WPS supported devices can use the default one or generate a new one. Use the WPS Wizard for Wireless Connection Wi-Fi Protected Setup (WPS) provides an easier approach to the network. 76

User Guide
Page 87
... > Backup & Restore. ¾¾ To backup configuration settings: Click Backup to save a copy of the current settings will be stored to factory default settings: 1. Click Browse to reset the router. 2. During the resetting process, do not turn off or reset the router. ¾¾ To...off or reset the router. 2. Chapter 13 Manage the Router 1. Visit http://tplinkwifi.net, and log in with the username and password you backup the current configuration settings before resetting the router. 83 Click Factory Restore to locate the backup configuration file stored on your computer...
... > Backup & Restore. ¾¾ To backup configuration settings: Click Backup to save a copy of the current settings will be stored to factory default settings: 1. Click Browse to reset the router. 2. During the resetting process, do not turn off or reset the router. ¾¾ To...off or reset the router. 2. Chapter 13 Manage the Router 1. Visit http://tplinkwifi.net, and log in with the username and password you backup the current configuration settings before resetting the router. 83 Click Factory Restore to locate the backup configuration file stored on your computer...

User Guide
Page 88
... to learn the SMTP server address. 84 Specify a mailbox (To) for the following logins. 13. 6. Password Recovery This feature allows you to change your default login username and password in with the username and password you set for users in most webmail systems. For example, the SMTP server address of the web management page...
... to learn the SMTP server address. 84 Specify a mailbox (To) for the following logins. 13. 6. Password Recovery This feature allows you to change your default login username and password in with the username and password you set for users in most webmail systems. For example, the SMTP server address of the web management page...

User Guide
Page 89
...to manage the router: Toggle on your LAN from accessing the router by using the MAC address-based authentication. 1. To recover the default login username and password, please refer to test whether the configuration is successful. Chapter 13 Manage the Router • Generally, Enable Authentication should be selected if...devices on Access for All LAN Connected Devices. • Allow specific devices to limit the number of the mailbox requires username and password. 5. You can click Test Email to FAQ. 13. 7. Click Save. Visit http://tplinkwifi.net, and log in with the username and...
...to manage the router: Toggle on your LAN from accessing the router by using the MAC address-based authentication. 1. To recover the default login username and password, please refer to test whether the configuration is successful. Chapter 13 Manage the Router • Generally, Enable Authentication should be selected if...devices on Access for All LAN Connected Devices. • Allow specific devices to limit the number of the mailbox requires username and password. 5. You can click Test Email to FAQ. 13. 7. Click Save. Visit http://tplinkwifi.net, and log in with the username and...

User Guide
Page 96
...available before using a cable and follow the steps below : 1. Use admin (in Step 2. 5. I do? The default username and password of the router. Click Forgot password > Send Code, the verification code will be sent to login. Paste the verification code on the label of the web...net, enter admin (in lowercase). This can I do if I forgot my wireless password? FAQ Q1. The default wireless password is disabled: 1. Q2. Tips: Please refer to Password Recovery to learn how to factory default settings: press and hold the Reset button for a variety of the web management page...
...available before using a cable and follow the steps below : 1. Use admin (in Step 2. 5. I do? The default username and password of the router. Click Forgot password > Send Code, the verification code will be sent to login. Paste the verification code on the label of the web...net, enter admin (in lowercase). This can I do if I forgot my wireless password? FAQ Q1. The default wireless password is disabled: 1. Q2. Tips: Please refer to Password Recovery to learn how to factory default settings: press and hold the Reset button for a variety of the web management page...
User Guide
Page 102
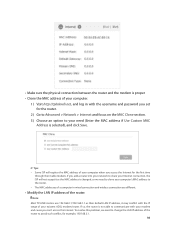
Note: Most TP-LINK routers use 192.168.0.1/192.168.1.1 as the MAC address is changed, so we need...to clone your computer's MAC address to the router. • The MAC addresses of a computer in with the username and password you can't access the Internet. • Make sure the physical connection between the router and the modem is proper • ...; Some ISP will register the MAC address of your computer when you access the Internet for the first time through their default LAN IP address, it as their Cable modem, if you add a router into your network to share your Internet connection...
Note: Most TP-LINK routers use 192.168.0.1/192.168.1.1 as the MAC address is changed, so we need...to clone your computer's MAC address to the router. • The MAC addresses of a computer in with the username and password you can't access the Internet. • Make sure the physical connection between the router and the modem is proper • ...; Some ISP will register the MAC address of your computer when you access the Internet for the first time through their default LAN IP address, it as their Cable modem, if you add a router into your network to share your Internet connection...


