Operating Instructions
Page 2
... the equipment off . Reorient or relocate the receiving antenna. - You are cautioned that to which can radiate radio frequency energy and, if not installed and used in a residential installation. These limits are trademarks of California, USA only Perchlorate Material - This equipment generates, uses, and can be determined by pressing and holding the... in accordance with the limits for help. and other countries. 2 Note on a circuit different from that any changes or modifications not expressly approved in a particular installation.
... the equipment off . Reorient or relocate the receiving antenna. - You are cautioned that to which can radiate radio frequency energy and, if not installed and used in a residential installation. These limits are trademarks of California, USA only Perchlorate Material - This equipment generates, uses, and can be determined by pressing and holding the... in accordance with the limits for help. and other countries. 2 Note on a circuit different from that any changes or modifications not expressly approved in a particular installation.

Operating Instructions
Page 3
... based on your vehicle 8 Setting the sound balance based on your listening preference 9 Setting up the Cradle 10 Precautions 10 Parts List 10 Before Installation 11 Installation 11 Arranging the cradle cable 14 Attaching an iPod/iPhone 15 Playback 17 Precautions 17 Setting up the system 17 Enjoying an iPod/iPhone 17...
... based on your vehicle 8 Setting the sound balance based on your listening preference 9 Setting up the Cradle 10 Precautions 10 Parts List 10 Before Installation 11 Installation 11 Arranging the cradle cable 14 Attaching an iPod/iPhone 15 Playback 17 Precautions 17 Setting up the system 17 Enjoying an iPod/iPhone 17...

Operating Instructions
Page 10
... result. The default setting is selected as the source. • ON: A high-pitched beep • OFF: A low-pitched beep Setting up the Cradle Precautions • Install the cradle on the cradle. To prevent this manual about dealing with the suction cup to splash water on a dashboard properly so that the unit...
... result. The default setting is selected as the source. • ON: A high-pitched beep • OFF: A low-pitched beep Setting up the Cradle Precautions • Install the cradle on the cradle. To prevent this manual about dealing with the suction cup to splash water on a dashboard properly so that the unit...

Operating Instructions
Page 11
... on the dashboard, depending on the dashboard where it . To attach the mounting sheet Attach the mounting sheet to install the cradle is clean. Before Installation • Mount the cradle on the surface material. Your consideration is smooth and horizontal. Mounting sheet Strap Cord clamp... Notes • Choose the mounting location carefully. Practice installation before you intend to the dashboard before installing the cradle on the defroster of your car. • Make sure that the surface of the mounting sheet...
... on the dashboard, depending on the dashboard where it . To attach the mounting sheet Attach the mounting sheet to install the cradle is clean. Before Installation • Mount the cradle on the surface material. Your consideration is smooth and horizontal. Mounting sheet Strap Cord clamp... Notes • Choose the mounting location carefully. Practice installation before you intend to the dashboard before installing the cradle on the defroster of your car. • Make sure that the surface of the mounting sheet...

Operating Instructions
Page 14
If the suction cup becomes dirty or scratched, its adhesive strength will be reduced. Note • Clean the surface where you take the cradle off the dashboard. Arranging the cradle cable Use the cord clamp to install the cord clamp. To release the cradle cable Note • You should not reuse the cord clamp once it has been removed as the adhesive strength will be reduced. 14 6 Replace the cover on the suction cup when you intend to secure the cradle cable. To secure the cradle cable Cover Note • Put the cover on the suction cup.
If the suction cup becomes dirty or scratched, its adhesive strength will be reduced. Note • Clean the surface where you take the cradle off the dashboard. Arranging the cradle cable Use the cord clamp to install the cord clamp. To release the cradle cable Note • You should not reuse the cord clamp once it has been removed as the adhesive strength will be reduced. 14 6 Replace the cover on the suction cup when you intend to secure the cradle cable. To secure the cradle cable Cover Note • Put the cover on the suction cup.

Operating Instructions
Page 15
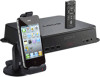
...iPhone backward until it touches to stretch the arm of the cradle (), and then set it in the cradle to ensure a stable installation. • Sony cannot accept responsibility in the cradle. Notes • Make sure that there is low, it may occur if it is connected before starting the...(). Attaching an iPod/iPhone Compatible iPod/iPhone models See "About iPod/iPhone" (page 18) or visit the support page: http://esupport.sony.com http://www.sony.com/mobileAV Notes • Start the car's engine before setting it on the cradle. • An iPod/iPhone is charged when set ...
...iPhone backward until it touches to stretch the arm of the cradle (), and then set it in the cradle to ensure a stable installation. • Sony cannot accept responsibility in the cradle. Notes • Make sure that there is low, it may occur if it is connected before starting the...(). Attaching an iPod/iPhone Compatible iPod/iPhone models See "About iPod/iPhone" (page 18) or visit the support page: http://esupport.sony.com http://www.sony.com/mobileAV Notes • Start the car's engine before setting it on the cradle. • An iPod/iPhone is charged when set ...
Operating Instructions
Page 19
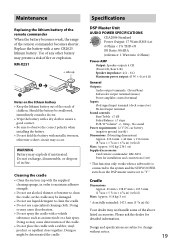
... • Do not use liquid detergent to clean the cradle. • Do not use alcohol, thinner or benzene to observe the correct polarity when installing the battery. • Do not hold the battery with a rubber, vinyl product or repellent close together. Doing so may cause discoloration. • Do...good contact. • Be sure to clean the cradle, as an insecticide or a hair spray. Doing so may occur. Please ask the dealer for installation and connections (1set) * This function only works when a subwoofer is set to change without notice. 19 Use of any other battery may present a risk...
... • Do not use liquid detergent to clean the cradle. • Do not use alcohol, thinner or benzene to observe the correct polarity when installing the battery. • Do not hold the battery with a rubber, vinyl product or repellent close together. Doing so may cause discoloration. • Do...good contact. • Be sure to clean the cradle, as an insecticide or a hair spray. Doing so may occur. Please ask the dealer for installation and connections (1set) * This function only works when a subwoofer is set to change without notice. 19 Use of any other battery may present a risk...
Operating Instructions
Page 20
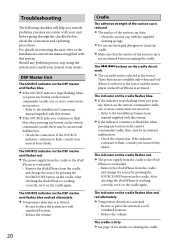
...; See page 19 for details on the cradle flashes blue and red alternately. Temperature detection is activated. Refer to the Installation/Connections manual supplied with the supplied cleaning sponge. Do not use the liquid detergent to place the system in a well ...the source. Reduce the volume. 20 Cradle The adhesive strength of the suction cup dirty. - Refer to the Installation/Connections manual supplied with your nearest Sony dealer. Should any button on the DSP master unit flashes blue and red alternately. Temperature detection is reduced...
...; See page 19 for details on the cradle flashes blue and red alternately. Temperature detection is activated. Refer to the Installation/Connections manual supplied with the supplied cleaning sponge. Do not use the liquid detergent to place the system in a well ...the source. Reduce the volume. 20 Cradle The adhesive strength of the suction cup dirty. - Refer to the Installation/Connections manual supplied with your nearest Sony dealer. Should any button on the DSP master unit flashes blue and red alternately. Temperature detection is reduced...
Marketing Specifications
Page 2
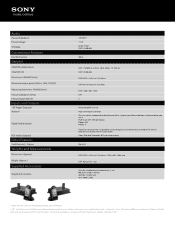
... written permission is a trademark of Sony. Updated: September 9, 2011 Update your nearest Sony dealer. Front, Rear and Subwoofer RCA pre-amp outputs RM-X251 DSP: 8.375 x 1.625 x 6.125 inches, 210.6 x 40 x 156.6 mm DSP: .92 kg (2 lb. 1 oz.) Parts for installation and connections (1 set) RM-X251 wireless remote XDP-MU110 DSP unit XA-C100IP Cradle...
... written permission is a trademark of Sony. Updated: September 9, 2011 Update your nearest Sony dealer. Front, Rear and Subwoofer RCA pre-amp outputs RM-X251 DSP: 8.375 x 1.625 x 6.125 inches, 210.6 x 40 x 156.6 mm DSP: .92 kg (2 lb. 1 oz.) Parts for installation and connections (1 set) RM-X251 wireless remote XDP-MU110 DSP unit XA-C100IP Cradle...


