Operating Instructions
Page 2
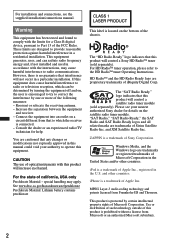
... receiving antenna. - Connect the equipment into an outlet on the satellite radio tuner module. The "HD Radio Ready" logo indicates that any changes or modifications not expressly approved in accordance with this product is a trademark of this product will control a satellite radio tuner module (sold separately). For HD RadioTM tuner operation, please refer to which can radiate radio frequency energy and, if not installed and used in this manual...
... receiving antenna. - Connect the equipment into an outlet on the satellite radio tuner module. The "HD Radio Ready" logo indicates that any changes or modifications not expressly approved in accordance with this product is a trademark of this product will control a satellite radio tuner module (sold separately). For HD RadioTM tuner operation, please refer to which can radiate radio frequency energy and, if not installed and used in this manual...
Operating Instructions
Page 4
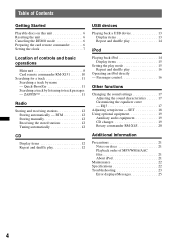
... 12 Storing manually 12 Receiving the stored stations 12 Tuning automatically 12 CD Display items 12 Repeat and shuffle play 12 USB devices Playing back a USB device 13 Display items 13 Repeat and shuffle play 14 iPod Playing back iPod 14 Display items 15 Setting the play mode 15 Repeat and shuffle play 16 Operating an iPod directly - EQ3 17 Adjusting setup items - ZAPPIN 11 Radio Storing and receiving stations 12 Storing automatically - Passenger control 16 Other functions Changing the sound settings 17 Adjusting the sound characteristics...
... 12 Storing manually 12 Receiving the stored stations 12 Tuning automatically 12 CD Display items 12 Repeat and shuffle play 12 USB devices Playing back a USB device 13 Display items 13 Repeat and shuffle play 14 iPod Playing back iPod 14 Display items 15 Setting the play mode 15 Repeat and shuffle play 16 Operating an iPod directly - EQ3 17 Adjusting setup items - ZAPPIN 11 Radio Storing and receiving stations 12 Storing automatically - Passenger control 16 Other functions Changing the sound settings 17 Adjusting the sound characteristics...

Operating Instructions
Page 6
... RESET button (page 8) with a pointed object, such as a ball-point pen. Getting Started Playable discs on the disc CD-DA MP3 WMA AAC Resetting the unit Before operating the unit for the first time, or after replacing the car battery or changing the connections, you must reset the unit. Type of discs Label on this unit This unit can cancel the demonstration display which appears during turning off. 1 Press and hold the select button...
... RESET button (page 8) with a pointed object, such as a ball-point pen. Getting Started Playable discs on the disc CD-DA MP3 WMA AAC Resetting the unit Before operating the unit for the first time, or after replacing the car battery or changing the connections, you must reset the unit. Type of discs Label on this unit This unit can cancel the demonstration display which appears during turning off. 1 Press and hold the select button...
Operating Instructions
Page 8
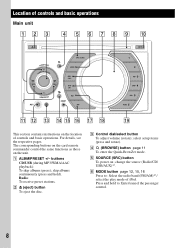
... basic operations. The corresponding buttons on the card remote commander control the same functions as those on the unit. A ALBM/PRESET +/- D (BROWSE) button page 11 To enter the Quick-BrowZer mode. Press and hold ). Location of iPod. F MODE button page 12, 15, 16 Press to : Enter/cancel the passenger control. 8 buttons CD/USB (during MP3/WMA/AAC playback): To skip albums (press); C Control dial/select button To adjust volume (rotate); change the source (Radio/CD/ USB/AUX)*1. Radio: To receive preset stations.
... basic operations. The corresponding buttons on the card remote commander control the same functions as those on the unit. A ALBM/PRESET +/- D (BROWSE) button page 11 To enter the Quick-BrowZer mode. Press and hold ). Location of iPod. F MODE button page 12, 15, 16 Press to : Enter/cancel the passenger control. 8 buttons CD/USB (during MP3/WMA/AAC playback): To skip albums (press); C Control dial/select button To adjust volume (rotate); change the source (Radio/CD/ USB/AUX)*1. Radio: To receive preset stations.

Operating Instructions
Page 9
... change display items (press); J OFF button To power off; skip tracks continuously (press, then press again within about 1 second and hold ). Radio: To tune in the display, depending on which device is connected. 9 find a station manually (press and hold ); O RESET button page 6 P ZAP button page 11 To enter ZAPPIN™ mode. S Number buttons CD/USB: (3): REP page 12, 14, 16 (4): SHUF page 12, 14, 16 (5): DM+ Improves digitally compressed sound...
... change display items (press); J OFF button To power off; skip tracks continuously (press, then press again within about 1 second and hold ). Radio: To tune in the display, depending on which device is connected. 9 find a station manually (press and hold ); O RESET button page 6 P ZAP button page 11 To enter ZAPPIN™ mode. S Number buttons CD/USB: (3): REP page 12, 14, 16 (4): SHUF page 12, 14, 16 (5): DM+ Improves digitally compressed sound...

Operating Instructions
Page 10
... M (+)/m (-) buttons To control CD/USB, the same as (ALBM/PRESET) +/- wj Number buttons To receive stored stations (press); To cancel, press again. Remove the insulation film before use (page 6). store stations (press and hold). wa DSPL (display) button page 12, 13, 15 To change display items. ws VOL (volume) +/- Setup, sound setting, etc., can be operated by < ,. on the card remote commander have also different buttons/functions from the unit. The following buttons on the unit. Setup, sound setting, etc...
... M (+)/m (-) buttons To control CD/USB, the same as (ALBM/PRESET) +/- wj Number buttons To receive stored stations (press); To cancel, press again. Remove the insulation film before use (page 6). store stations (press and hold). wa DSPL (display) button page 12, 13, 15 To change display items. ws VOL (volume) +/- Setup, sound setting, etc., can be operated by < ,. on the card remote commander have also different buttons/functions from the unit. The following buttons on the unit. Setup, sound setting, etc...
Operating Instructions
Page 12
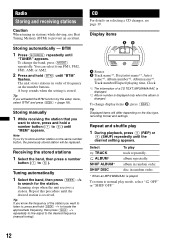
... number/Elapsed playing time, Clock *1 The information of the station you activated the BTM function by the setup menu, select "BTM" and press (SEEK) + (page 18). album repeatedly. To return to prevent an accident. A beep sounds when the setting is changed. album in random order. * When an MP3/WMA/AAC is received. OFF" 12 Radio Storing and receiving stations Caution When tuning in stations while driving, use Best Tuning Memory (BTM) to normal play mode, select...
... number/Elapsed playing time, Clock *1 The information of the station you activated the BTM function by the setup menu, select "BTM" and press (SEEK) + (page 18). album repeatedly. To return to prevent an accident. A beep sounds when the setting is changed. album in random order. * When an MP3/WMA/AAC is received. OFF" 12 Radio Storing and receiving stations Caution When tuning in stations while driving, use Best Tuning Memory (BTM) to normal play mode, select...
Operating Instructions
Page 13
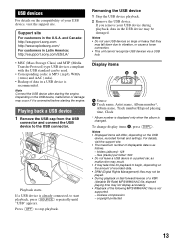
... a loose connection. • This unit cannot recognize USB devices via a USB hub. Notes • Do not use USB devices so large or heavy that they may fall down due to begin, depending on the USB device, malfunction or damage may be used. • Corresponding codec is not supported. - Display items A Source B Track name, Artist name, Album number*, Album name, Track number/Elapsed playing time, Clock * Album number is displayed only when...
... a loose connection. • This unit cannot recognize USB devices via a USB hub. Notes • Do not use USB devices so large or heavy that they may fall down due to begin, depending on the USB device, malfunction or damage may be used. • Corresponding codec is not supported. - Display items A Source B Track name, Artist name, Album number*, Album name, Track number/Elapsed playing time, Clock * Album number is displayed only when...
Operating Instructions
Page 14
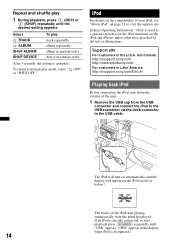
... these Operating Instructions, "iPod" is complete. album in random order. After 3 seconds, the setting is used as below.* The tracks on the compatibility of the unit. 1 Remove the USB cap from the point last played. album repeatedly. " iPod For details on the iPod start playback press (SOURCE) repeatedly until the desired setting appears. If an iPod is already connected, to start playing automatically from the USB connector and connect the iPod...
... these Operating Instructions, "iPod" is complete. album in random order. After 3 seconds, the setting is used as below.* The tracks on the compatibility of the unit. 1 Remove the USB cap from the point last played. album repeatedly. " iPod For details on the iPod start playback press (SOURCE) repeatedly until the desired setting appears. If an iPod is already connected, to start playing automatically from the USB connector and connect the iPod...
Operating Instructions
Page 15
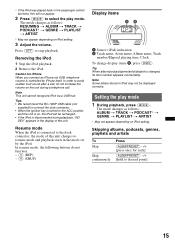
... display of this unit changes to select the play mode 1 During playback, press (MODE). Tips • We recommend the RC-100IP USB cable (not supplied) to connect the dock connector. • When the ignition key is turned to avoid sudden loud sound after a call, do not function. - (3) (REP) - (4) (SHUF) Display items A Source (iPod) indication B Track name, Artist name, Album name, Track number/Elapsed playing time, Clock To change display items B, press (DSPL). Setting the play mode...
... display of this unit changes to select the play mode 1 During playback, press (MODE). Tips • We recommend the RC-100IP USB cable (not supplied) to connect the dock connector. • When the ignition key is turned to avoid sudden loud sound after a call, do not function. - (3) (REP) - (4) (SHUF) Display items A Source (iPod) indication B Track name, Artist name, Album name, Track number/Elapsed playing time, Clock To change display items B, press (DSPL). Setting the play mode...
Operating Instructions
Page 16
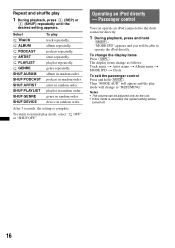
.... To return to normal play track repeatedly. Repeat and shuffle play mode will change to "RESUMING." album repeatedly. "MODE IPD" appears and you will appear and the play 1 During playback, press (3) (REP) or (4) (SHUF) repeatedly until the desired setting appears. Then "MODE AUD" will be turned off. 16 Notes • The volume can operate an iPod connected to the dock connector directly. 1 During playback, press...
.... To return to normal play track repeatedly. Repeat and shuffle play mode will change to "RESUMING." album repeatedly. "MODE IPD" appears and you will appear and the play 1 During playback, press (3) (REP) or (4) (SHUF) repeatedly until the desired setting appears. Then "MODE AUD" will be turned off. 16 Notes • The volume can operate an iPod connected to the dock connector directly. 1 During playback, press...
Operating Instructions
Page 17
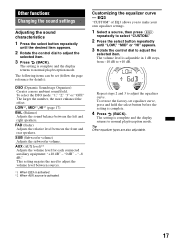
... sound balance between the front and rear speakers. "0 dB" - Tip Other equalizer types are also adjustable. 17 The larger the number, the more ambient sound field. This setting negates the need to +10 dB. Customizing the equalizer curve - The volume level is adjustable in 1 dB steps, from -10 dB to adjust the volume level between sources. *1 When EQ3 is activated. *2 When AUX source is complete and the display returns to adjust the selected item. AUX (AUX level)*2 Adjusts...
... sound balance between the front and rear speakers. "0 dB" - Tip Other equalizer types are also adjustable. 17 The larger the number, the more ambient sound field. This setting negates the need to +10 dB. Customizing the equalizer curve - The volume level is adjustable in 1 dB steps, from -10 dB to adjust the volume level between sources. *1 When EQ3 is activated. *2 When AUX source is complete and the display returns to adjust the selected item. AUX (AUX level)*2 Adjusts...
Operating Instructions
Page 18
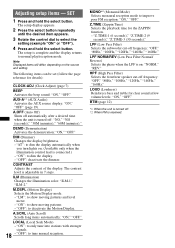
DIM (Dimmer) Changes the display brightness. - CONTRAST Adjusts the contrast of the display. M.DSPL (Motion Display) Selects the Motion Display mode. - "Z.TIME-1 (6 seconds)," "Z.TIME-2 (9 seconds)," "Z.TIME-3 (30 seconds)." LPF (Low Pass Filter) Selects the subwoofer cut -off frequency: "OFF," "80Hz," "100Hz," "120Hz," "140Hz," "160Hz." The setup display appears. 2 Press the select button repeatedly until the desired item appears. 3 Rotate the control dial to normal play/reception mode. AUX-A*1 (AUX Audio) Activates the AUX source display: "ON," "OFF" (page 19). DEMO (...
DIM (Dimmer) Changes the display brightness. - CONTRAST Adjusts the contrast of the display. M.DSPL (Motion Display) Selects the Motion Display mode. - "Z.TIME-1 (6 seconds)," "Z.TIME-2 (9 seconds)," "Z.TIME-3 (30 seconds)." LPF (Low Pass Filter) Selects the subwoofer cut -off frequency: "OFF," "80Hz," "100Hz," "120Hz," "140Hz," "160Hz." The setup display appears. 2 Press the select button repeatedly until the desired item appears. 3 Rotate the control dial to normal play/reception mode. AUX-A*1 (AUX Audio) Activates the AUX source display: "ON," "OFF" (page 19). DEMO (...
Operating Instructions
Page 19
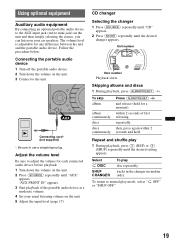
... listen on your usual listening volume on the unit. 5 Adjust the input level (page 17). CD changer Selecting the changer 1 Press (SOURCE) repeatedly until "CD" appears. 2 Press (MODE) repeatedly until the desired setting appears. To return to use a straight type plug. Skipping albums and discs 1 During playback, press (ALBM/PRESET) -/+. then, press again within 2 seconds of the portable audio device at a moderate volume. 4 Set your car speakers. Select DISC SHUF CHANGER To play mode, select " OFF" or "SHUF OFF...
... listen on your usual listening volume on the unit. 5 Adjust the input level (page 17). CD changer Selecting the changer 1 Press (SOURCE) repeatedly until "CD" appears. 2 Press (MODE) repeatedly until the desired setting appears. To return to use a straight type plug. Skipping albums and discs 1 During playback, press (ALBM/PRESET) -/+. then, press again within 2 seconds of the portable audio device at a moderate volume. 4 Set your car speakers. Select DISC SHUF CHANGER To play mode, select " OFF" or "SHUF OFF...

Operating Instructions
Page 20
Changing the operative direction The operative direction of the controls is factoryset as those on the rotary commander require a different operation from the unit. • ATT (attenuate) button To attenuate the sound. Radio: To receive stored stations (push in and rotate). To cancel, press again. • PRESET/DISC control CD/USB: The same as (ALBM/PRESET) -/+ on the unit (push in and rotate). • VOL (volume) control The same as the control dial on the...
Changing the operative direction The operative direction of the controls is factoryset as those on the rotary commander require a different operation from the unit. • ATT (attenuate) button To attenuate the sound. Radio: To receive stored stations (push in and rotate). To cancel, press again. • PRESET/DISC control CD/USB: The same as (ALBM/PRESET) -/+ on the unit (push in and rotate). • VOL (volume) control The same as the control dial on the...
Operating Instructions
Page 21
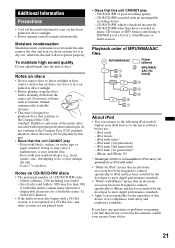
... can connect to the Compact Disc (CD) standard. Additional Information Precautions • Cool off the unit beforehand if your iPod devices to ISO9660 Level 1/Level 2, Joliet/Romeo or multi-session. files (tracks) and folders: 300 (may less than those recorded in direct sunlight. • Before playing, wipe the discs with copyright protection technologies do so may ruin the disc. - otherwise the unit will not operate properly...
... can connect to the Compact Disc (CD) standard. Additional Information Precautions • Cool off the unit beforehand if your iPod devices to ISO9660 Level 1/Level 2, Joliet/Romeo or multi-session. files (tracks) and folders: 300 (may less than those recorded in direct sunlight. • Before playing, wipe the discs with copyright protection technologies do so may ruin the disc. - otherwise the unit will not operate properly...
Operating Instructions
Page 22
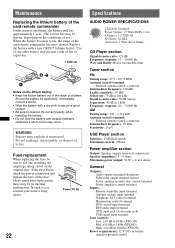
...;V USB Player section Interface: USB (Full-speed) Maximum current: 500mA Power amplifier section Output: Speaker outputs (sure seal connectors) Speaker impedance: 4 - 8 ohms Maximum power output: 52 W × 4 (at 4 ohms) General Outputs: Audio outputs terminal (front/rear) Subwoofer output terminal (mono) Power antenna (aerial) relay control terminal Power amplifier control terminal Inputs: Remote controller input terminal Antenna (aerial) input terminal Telephone ATT control terminal Illumination control terminal BUS control input terminal BUS audio input terminal AUX input jack (stereo mini...
...;V USB Player section Interface: USB (Full-speed) Maximum current: 500mA Power amplifier section Output: Speaker outputs (sure seal connectors) Speaker impedance: 4 - 8 ohms Maximum power output: 52 W × 4 (at 4 ohms) General Outputs: Audio outputs terminal (front/rear) Subwoofer output terminal (mono) Power antenna (aerial) relay control terminal Power amplifier control terminal Inputs: Remote controller input terminal Antenna (aerial) input terminal Telephone ATT control terminal Illumination control terminal BUS control input terminal BUS audio input terminal AUX input jack (stereo mini...

Operating Instructions
Page 23
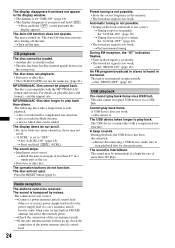
... 4 oz) Supplied accessories: Card remote commander: RM-X151 Parts for installation and connections (1 set) Optional accessories/equipment: Rotary commander: RM-X4S BUS cable (supplied with an RCA pin cord): RC-61 (1 m), RC-62 (2 m) CD changer (10 discs): CDX-757MX CD changer (6 discs): CDX-T69 Source selector: XA-C40 AUX-IN selector: XA-300 USB connection cable for detailed information. Makes noise when the position of the above listed accessories. t Set "DEMO-OFF" (page 18). Dimensions...
... 4 oz) Supplied accessories: Card remote commander: RM-X151 Parts for installation and connections (1 set) Optional accessories/equipment: Rotary commander: RM-X4S BUS cable (supplied with an RCA pin cord): RC-61 (1 m), RC-62 (2 m) CD changer (10 discs): CDX-757MX CD changer (6 discs): CDX-T69 Source selector: XA-C40 AUX-IN selector: XA-300 USB connection cable for detailed information. Makes noise when the position of the above listed accessories. t Set "DEMO-OFF" (page 18). Dimensions...
Operating Instructions
Page 24
... the unit until the display appears. The Auto Off function activates after turning off the unit. MP3/WMA/AAC files cannot be received. a disc recorded in the wrong way. Press the RESET button (page 6). t If the auto antenna (aerial) will not eject. a disc recorded with the MP3/WMA/AAC format and version. An FM program broadcast in stereo is heard in the rear/side glass). The USB device contains files...
... the unit until the display appears. The Auto Off function activates after turning off the unit. MP3/WMA/AAC files cannot be received. a disc recorded in the wrong way. Press the RESET button (page 6). t If the auto antenna (aerial) will not eject. a disc recorded with the MP3/WMA/AAC format and version. An FM program broadcast in stereo is heard in the rear/side glass). The USB device contains files...
Operating Instructions
Page 25
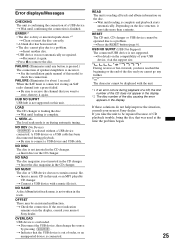
... time the problem began. 25 t Insert a music CD in the CD changer. FAILURE (Illuminates until confirming the connection is complete and playback starts automatically. A USB device or a USB cable has been disconnected during playback of a CD, the disc number of the CD does not appear in the display. *2 The disc number of a USB device. Error displays/Messages CHECKING The unit is incorrect. OFFSET There may take the unit to be operated due to remove the disc. OVERLOAD USB device...
... time the problem began. 25 t Insert a music CD in the CD changer. FAILURE (Illuminates until confirming the connection is complete and playback starts automatically. A USB device or a USB cable has been disconnected during playback of a CD, the disc number of the CD does not appear in the display. *2 The disc number of a USB device. Error displays/Messages CHECKING The unit is incorrect. OFFSET There may take the unit to be operated due to remove the disc. OVERLOAD USB device...


