

Operating Instructions
Page 5
... 7 Unsuitable Conditions 7 Usage in High Altitude 8 Features 8 Location and Function of Controls .10 Top/Front/Left Side 10 Rear/Right Side/Bottom 10 Control Panel 12 Connector Panel 12 Remote Commander 13 Setting Up and Projecting Installing the Projector 17 Connecting the Projector 18 Connecting with a Computer ......18 Connecting with a VCR or 15k RGB/Component...
... 7 Unsuitable Conditions 7 Usage in High Altitude 8 Features 8 Location and Function of Controls .10 Top/Front/Left Side 10 Rear/Right Side/Bottom 10 Control Panel 12 Connector Panel 12 Remote Commander 13 Setting Up and Projecting Installing the Projector 17 Connecting the Projector 18 Connecting with a Computer ......18 Connecting with a VCR or 15k RGB/Component...

Operating Instructions
Page 9
... Sony Corporation. 9 Features GB Security lock By setting a password, you can enable the security lock to approx. 2.7 kg (5 lb 15 oz) in the United States and/or other countries. • IBM PC/AT, VGA, SVGA, XGA and SXGA are trademarks of input signals. 4) The Remote Commander available for video input. Memory Stick slot (VPL-CX6...
... Sony Corporation. 9 Features GB Security lock By setting a password, you can enable the security lock to approx. 2.7 kg (5 lb 15 oz) in the United States and/or other countries. • IBM PC/AT, VGA, SVGA, XGA and SXGA are trademarks of input signals. 4) The Remote Commander available for video input. Memory Stick slot (VPL-CX6...

Operating Instructions
Page 10
... off the power, see "How to use the powered tilt adjuster" on the projector when the projector is in standby mode, you press the key, the input signal switches as follows: INPUT A t MS t VIDEO t S VIDEO (VPL-CX6 only) 5 Lens protector (lens cover) The lens protector automatically opens when the ... 60 seconds. During this time, you cannot light up or flashes under the following the message on . 6 Front remote control detector 7 Ventilation holes (exhaust) 10 GB Location and Function of Controls Top/Front/Left Side TILT Rear/Right Side/Bottom 1 I / 1 key. For details on the LAMP/COVER and...
... off the power, see "How to use the powered tilt adjuster" on the projector when the projector is in standby mode, you press the key, the input signal switches as follows: INPUT A t MS t VIDEO t S VIDEO (VPL-CX6 only) 5 Lens protector (lens cover) The lens protector automatically opens when the ... 60 seconds. During this time, you cannot light up or flashes under the following the message on . 6 Front remote control detector 7 Ventilation holes (exhaust) 10 GB Location and Function of Controls Top/Front/Left Side TILT Rear/Right Side/Bottom 1 I / 1 key. For details on the LAMP/COVER and...

Operating Instructions
Page 11
...Security lock Connects to use the powered tilt adjuster To adjust the height Adjust the height of the projector. For details, see "Control Panel" and "Connector Panel" on page 12. 9 Rear remote control detector 0 Ventilation holes (intake) qa Ventilation holes (intake)/Lamp cover qs Powered tilt adjuster qd Adjuster...adjuster 2 Press f or F of the TILT key to adjust the tilt of the projector as it may press the KEYSTONE key (VPL-CS6/CX6) or the D KEYSTONE key (VPL-EX1) on the Remote Commander to the right or left for minor tilt adjustment of the projected picture. The adjuster...
...Security lock Connects to use the powered tilt adjuster To adjust the height Adjust the height of the projector. For details, see "Control Panel" and "Connector Panel" on page 12. 9 Rear remote control detector 0 Ventilation holes (intake) qa Ventilation holes (intake)/Lamp cover qs Powered tilt adjuster qd Adjuster...adjuster 2 Press f or F of the TILT key to adjust the tilt of the projector as it may press the KEYSTONE key (VPL-CS6/CX6) or the D KEYSTONE key (VPL-EX1) on the Remote Commander to the right or left for minor tilt adjustment of the projected picture. The adjuster...

Operating Instructions
Page 13
... input from a computer. When you connect the projector to the computer, you can control the mouse function with the supplied Remote Commander. (When you use the VPL-EX1, an optional Remote Commander is required to control the mouse function with a Remote Commander.) The supplied application software (VPL-CX6 only) can be inserted. Remote Commander The keys that have the same...
... input from a computer. When you connect the projector to the computer, you can control the mouse function with the supplied Remote Commander. (When you use the VPL-EX1, an optional Remote Commander is required to control the mouse function with a Remote Commander.) The supplied application software (VPL-CX6 only) can be inserted. Remote Commander The keys that have the same...

Operating Instructions
Page 14
...item back to its factory preset value or returns the enlarged image back to its original size. This icon indicates the point you connect the projector with the application software. b) Joystick c) R Click key: Functions as the left button on the screen. 8 D ZOOM (Digital Zoom) ...the value of a computer connected via USB with the projector. Note Connect a computer to the projector using the supplied application software. For details, see "To control the computer using the supplied Remote Commander" on page 26. 6 FUNCTION 1, 2 keys (VPL-CX6 only) When you want to the FUNCTION key by...
...item back to its factory preset value or returns the enlarged image back to its original size. This icon indicates the point you connect the projector with the application software. b) Joystick c) R Click key: Functions as the left button on the screen. 8 D ZOOM (Digital Zoom) ...the value of a computer connected via USB with the projector. Note Connect a computer to the projector using the supplied application software. For details, see "To control the computer using the supplied Remote Commander" on page 26. 6 FUNCTION 1, 2 keys (VPL-CX6 only) When you want to the FUNCTION key by...

Operating Instructions
Page 16
... battery be swallowed, immediately consult a doctor. To replace battery 1 Release the lock of Controls Direct the Remote Commander toward the front or rear remote control detector. • The operation range is , the wider the angle within which the commander can control the projector becomes. 2 Install the lithium battery. + side facing upward 16 GB Location and Function...
... battery be swallowed, immediately consult a doctor. To replace battery 1 Release the lock of Controls Direct the Remote Commander toward the front or rear remote control detector. • The operation range is , the wider the angle within which the commander can control the projector becomes. 2 Install the lithium battery. + side facing upward 16 GB Location and Function...

Operating Instructions
Page 19
... following devices automatically. 1 USB hub (general use) (VPL-CX6 only) 2 USB human interface device (wireless mouse function) 3 USB human interface device (projector control function) (VPL-CX6 only) Recommended operating environment When you use a wireless mouse or the Projector Station.) a) Use a no-resistance cable. When you ... the projector to the projector via the USB cable. This application software and the USB function can be used on the computer. • An optional Remote Commander and USB cable are required when controlling the mouse of the computer from the VPL-EX1....
... following devices automatically. 1 USB hub (general use) (VPL-CX6 only) 2 USB human interface device (wireless mouse function) 3 USB human interface device (projector control function) (VPL-CX6 only) Recommended operating environment When you use a wireless mouse or the Projector Station.) a) Use a no-resistance cable. When you ... the projector to the projector via the USB cable. This application software and the USB function can be used on the computer. • An optional Remote Commander and USB cable are required when controlling the mouse of the computer from the VPL-EX1....

Operating Instructions
Page 22
... remote control detector PRO AUDIO ACCESS INPUT A POWER SAVING MENU VIDEO S VIDEO TEMP/FAN PUSH ENTER LAMP/COVER FREEZE MS SLIDE I / 1 KEYSTONE INPUT APA MENU PIC ENTER MUTING For VPL-CS6/CX6 For VPL-EX1 1 Open the connector panel, then plug the AC power cord into a wall outlet. 2 Press the I / 1 key to turn on the projector...
... remote control detector PRO AUDIO ACCESS INPUT A POWER SAVING MENU VIDEO S VIDEO TEMP/FAN PUSH ENTER LAMP/COVER FREEZE MS SLIDE I / 1 KEYSTONE INPUT APA MENU PIC ENTER MUTING For VPL-CS6/CX6 For VPL-EX1 1 Open the connector panel, then plug the AC power cord into a wall outlet. 2 Press the I / 1 key to turn on the projector...

Operating Instructions
Page 24
... the projector by pressing certain keys (e.g., / LCD VGA , / , etc.), or by changing your computer's settings. Depending on the type of your computer, for Memory Stick". 3 Turn on , the Startup screen is projected (VPL-CX6 only). The ON/STANDBY indicator lights in green and the Intelligent Auto-setup starts. GB 24 Projecting Projecting 5 TILT 6 Rear remote control...
... the projector by pressing certain keys (e.g., / LCD VGA , / , etc.), or by changing your computer's settings. Depending on the type of your computer, for Memory Stick". 3 Turn on , the Startup screen is projected (VPL-CX6 only). The ON/STANDBY indicator lights in green and the Intelligent Auto-setup starts. GB 24 Projecting Projecting 5 TILT 6 Rear remote control...
Operating Instructions
Page 26
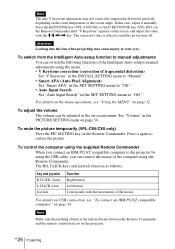
Note The auto V keystone adjustment may not correct the trapezoidal distortion perfectly, depending on the screen, and adjust the value with the M/m/ In this case, adjust it manually. Press the KEYSTONE key (VPL-CS6/CX6) or the D KEYSTONE key (VPL-EX1) on the Remote Commander until "V Keystone" appears on the room temperature or the screen angle.
Note The auto V keystone adjustment may not correct the trapezoidal distortion perfectly, depending on the screen, and adjust the value with the M/m/ In this case, adjust it manually. Press the KEYSTONE key (VPL-CS6/CX6) or the D KEYSTONE key (VPL-EX1) on the Remote Commander until "V Keystone" appears on the room temperature or the screen angle.
Operating Instructions
Page 38
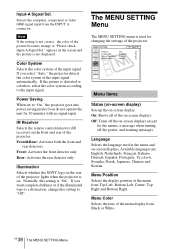
... the SONY logo on . Menu Position Selects the display position of the menu display from Black or White. Menu Color Selects the tone of the menu from the INPUT A connector. GB 38 The MENU SETTING Menu If the picture is on the rear of the projector lights when the projector is ... GBR signal input from Top Left, Bottom Left, Center, Top Right and Bottom Right. Note If the setting is not displayed. IR Receiver Selects the remote control detectors (IR receiver) on -screen displays. appears on -screen displays except for 10 minutes with no signal input. Off: Turns off the power, and...
... the SONY logo on . Menu Position Selects the display position of the menu display from Black or White. Menu Color Selects the tone of the menu from the INPUT A connector. GB 38 The MENU SETTING Menu If the picture is on the rear of the projector lights when the projector is ... GBR signal input from Top Left, Bottom Left, Center, Top Right and Bottom Right. Note If the setting is not displayed. IR Receiver Selects the remote control detectors (IR receiver) on -screen displays. appears on -screen displays except for 10 minutes with no signal input. Off: Turns off the power, and...
Operating Instructions
Page 54
...Language 38 selecting the menu language 22 Lens protector 10 Lithium battery 16 Location and function of controls connector panel .......... 12 control panel 12 rear/right side/bottom . 10 Remote Commander .. 13 top/front/left side ........ 10 M Menu clearing the menu display 33 ...Pin assignment 51 Power turn on 24 Power Saving 12, 38 Powered tilt adjuster ...... 11 Precautions 6 R Remote Commander 13, 15 location and function of controls ......... 13, 15 Remote control detector front 10 rear 11 Reset resettable items 33 resetting the item ........ 33 RGB Enhancer 35 S Scan ...
...Language 38 selecting the menu language 22 Lens protector 10 Lithium battery 16 Location and function of controls connector panel .......... 12 control panel 12 rear/right side/bottom . 10 Remote Commander .. 13 top/front/left side ........ 10 M Menu clearing the menu display 33 ...Pin assignment 51 Power turn on 24 Power Saving 12, 38 Powered tilt adjuster ...... 11 Precautions 6 R Remote Commander 13, 15 location and function of controls ......... 13, 15 Remote control detector front 10 rear 11 Reset resettable items 33 resetting the item ........ 33 RGB Enhancer 35 S Scan ...

