Operating Instructions
Page 7
On LCD projector • The LCD projector is a normal result of the manufacturing process and does not indicate a malfunction. These installations may cause malfunction or damage to prevent internal heat build-up , ... automatically after one minute. • Leave space of more than 30 cm (11 7/8 inches) around the unit. • Be careful that continuously appear on the LCD projector. This is manufactured using high-precision technology. Highly heated and humid • Avoid installing the unit in a location where the temperature or humidity is very...
On LCD projector • The LCD projector is a normal result of the manufacturing process and does not indicate a malfunction. These installations may cause malfunction or damage to prevent internal heat build-up , ... automatically after one minute. • Leave space of more than 30 cm (11 7/8 inches) around the unit. • Be careful that continuously appear on the LCD projector. This is manufactured using high-precision technology. Highly heated and humid • Avoid installing the unit in a location where the temperature or humidity is very...
Operating Instructions
Page 27
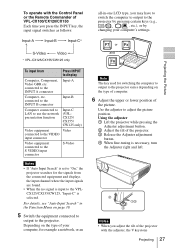
For details, see "Auto Input Search" in -one LCD type, you adjust the tilt of the projector with the Control Panel or the Remote Commander of the projector. 3 Release the Adjuster adjustment button. 4 When fine-tuning is necessary, turn the Adjuster right and left. 2 13 4 Notes • When ... the computer to output to display Computer, Component, Video GBR etc. Using the adjuster 1 Lift the projector while pressing the Adjuster adjustment button. 2 Adjust the tilt of VPL-CX100/CX120/CX150 Each time you press the INPUT key, the input signal switches as follows: all-in the Function...
For details, see "Auto Input Search" in -one LCD type, you adjust the tilt of the projector with the Control Panel or the Remote Commander of the projector. 3 Release the Adjuster adjustment button. 4 When fine-tuning is necessary, turn the Adjuster right and left. 2 13 4 Notes • When ... the computer to output to display Computer, Component, Video GBR etc. Using the adjuster 1 Lift the projector while pressing the Adjuster adjustment button. 2 Adjust the tilt of VPL-CX100/CX120/CX150 Each time you press the INPUT key, the input signal switches as follows: all-in the Function...
Operating Instructions
Page 38
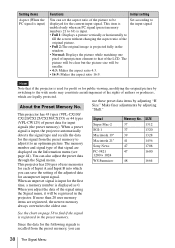
...aspect ratio of the LCD. When you can 38 The Signal Menu Signal Super Mac-2 SGI-1 Macintosh 19" Macintosh 21" Sony News PC-9821 1280 × 1024 WS Sunmicro Memory No. Since the data for input signals (the preset memory). This projector has 43 types (VPL-CX100/ CX120/CX125/CX150/CX155) or... 44 types (VPL-CW125) of Input A and Input B into which are...
...aspect ratio of the LCD. When you can 38 The Signal Menu Signal Super Mac-2 SGI-1 Macintosh 19" Macintosh 21" Sony News PC-9821 1280 × 1024 WS Sunmicro Memory No. Since the data for input signals (the preset memory). This projector has 43 types (VPL-CX100/ CX120/CX125/CX150/CX155) or... 44 types (VPL-CW125) of Input A and Input B into which are...

Operating Instructions
Page 49
...(see page 23). • The connections are wrong. c Check that the proper connections have been made (see page 48). c This projector is compatible with qualified Sony personnel. c Use a TBC (Time Base Corrector) to try to an external monitor (see page 24). • Noise may appear on... The picture is not secured. c Press the PIC MUTING key to an external monitor and a LCD monitor of dots input from the INPUT A connector is colored strangely. The setting of pixels on the LCD panel. c Select "Computer," "Video GBR" or "Component" correctly according to the input signal ...
...(see page 23). • The connections are wrong. c Check that the proper connections have been made (see page 48). c This projector is compatible with qualified Sony personnel. c Use a TBC (Time Base Corrector) to try to an external monitor (see page 24). • Noise may appear on... The picture is not secured. c Press the PIC MUTING key to an external monitor and a LCD monitor of dots input from the INPUT A connector is colored strangely. The setting of pixels on the LCD panel. c Select "Computer," "Video GBR" or "Component" correctly according to the input signal ...
Operating Instructions
Page 54
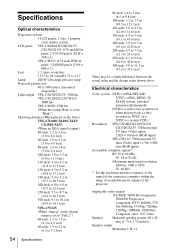
... × 20 mm (1 5/8 × 2 7/8 inches) Speaker output Maximum 1 W × 1 Specifications Optical characteristics Projection system 3 LCD panels, 1 lens, 3 primary color shutter system LCD panel VPL-CX100/CX120/CX125/ CX150/CX155: 0.79-inch XGA panel, 2,359,296 pixels (1024 × 768 × 3) VPL-CW125: 0.74-inch WXGA panel, 3,280,000 pixels (1366 × 800 × 3) Lens 1.2 times zoom... fV: 60 Hz) 1) Set the resolution and the frequency of the signal of the connected computer within the range of acceptable preset signals of the projector.
... × 20 mm (1 5/8 × 2 7/8 inches) Speaker output Maximum 1 W × 1 Specifications Optical characteristics Projection system 3 LCD panels, 1 lens, 3 primary color shutter system LCD panel VPL-CX100/CX120/CX125/ CX150/CX155: 0.79-inch XGA panel, 2,359,296 pixels (1024 × 768 × 3) VPL-CW125: 0.74-inch WXGA panel, 3,280,000 pixels (1366 × 800 × 3) Lens 1.2 times zoom... fV: 60 Hz) 1) Set the resolution and the frequency of the signal of the connected computer within the range of acceptable preset signals of the projector.


