

Help - Hard Disk Drive Replacement Instructions
Page 1
... these instructions. * Sony is disconnected. Lift here to remove the battery Battery Pack Removal Step 2: 1) Slide the left battery tab to the unlock position. 2) With your right thumb, slide the right battery tab to do so can result in the procedure. P/N 989201342 Rev. Before you through the Hard Drive replacement process. Step...
... these instructions. * Sony is disconnected. Lift here to remove the battery Battery Pack Removal Step 2: 1) Slide the left battery tab to the unlock position. 2) With your right thumb, slide the right battery tab to do so can result in the procedure. P/N 989201342 Rev. Before you through the Hard Drive replacement process. Step...

Help - Hard Disk Drive Replacement Instructions
Page 2
... bracket to the new Hard Drive. Step 5. Re-install the four (4) Hard Drive Bracket screws to secure the Hard Drive Bracket to the Hard Drive. Step 11. Step 9. Prepare the new Hard Drive for assembly. Place the Hard Drive bracket over the new Hard Drive. B 2/3 Old Hard Drive Lift To Remove Step 7. Hard Drive Bracket Transfer (Steps 8-12) Step...
... bracket to the new Hard Drive. Step 5. Re-install the four (4) Hard Drive Bracket screws to secure the Hard Drive Bracket to the Hard Drive. Step 11. Step 9. Prepare the new Hard Drive for assembly. Place the Hard Drive bracket over the new Hard Drive. B 2/3 Old Hard Drive Lift To Remove Step 7. Hard Drive Bracket Transfer (Steps 8-12) Step...

Help - Hard Disk Drive Replacement Instructions
Page 3
... the unit. B 3/3 Re-install the battery pack and reconnect the AC Adaptor. Re-install the three (3) Hard Drive screws holding the Hard Drive assembly in place. Re-install the two (2) Hard Drive Door Screws to Sony using the included shipping instructions. P/N 989201342 Rev. Power on the sides to prevent damage. Step 18. Return the...
... the unit. B 3/3 Re-install the battery pack and reconnect the AC Adaptor. Re-install the three (3) Hard Drive screws holding the Hard Drive assembly in place. Re-install the two (2) Hard Drive Door Screws to Sony using the included shipping instructions. P/N 989201342 Rev. Power on the sides to prevent damage. Step 18. Return the...

Help - Optical Disk Drive Replacement Instructions
Page 1
... you through the replacement process. B 1/4 o Do not walk around excessively as this promotes static build-up. Hard Drive Door Door 3. Place the computer upside down on a protected surface with your notebook computer on a clean or covered surface...the accuracy of the notebook computer. Using the enclosed magnetic screwdriver, remove the two (2) screws securing the Hard Drive Door. Step 1. CAUTION: Make sure the computer is turned off, the lid is closed, and the AC ...) damage prevention instructions: o Hold parts by incorrect handling of these instructions. * Sony is disconnected.
... you through the replacement process. B 1/4 o Do not walk around excessively as this promotes static build-up. Hard Drive Door Door 3. Place the computer upside down on a protected surface with your notebook computer on a clean or covered surface...the accuracy of the notebook computer. Using the enclosed magnetic screwdriver, remove the two (2) screws securing the Hard Drive Door. Step 1. CAUTION: Make sure the computer is turned off, the lid is closed, and the AC ...) damage prevention instructions: o Hold parts by incorrect handling of these instructions. * Sony is disconnected.

Help - Optical Disk Drive Replacement Instructions
Page 2
...Step 7. that secure the ODD brackets to remove the ODD. bezel provided in the notch exposing the ODD Bracket the unit. Locate the Optical Disk Drive (ODD) Bay. Remove the screws & Step 11. Step 6. ODD. screws as shown above, and then set Step 12. Step 5. Insert the... enclosed screwdriver Step 8. R B ODD Assembly Step 10. Arrange the brackets & (Steps 12-15) brackets. VPCS1 Series Optical Disk Drive Replacement Instructions Step 4. Carefully remove the ODD from the unit, and lift to remove. Identify the (4) side screws in the CRU kit and ...
...Step 7. that secure the ODD brackets to remove the ODD. bezel provided in the notch exposing the ODD Bracket the unit. Locate the Optical Disk Drive (ODD) Bay. Remove the screws & Step 11. Step 6. ODD. screws as shown above, and then set Step 12. Step 5. Insert the... enclosed screwdriver Step 8. R B ODD Assembly Step 10. Arrange the brackets & (Steps 12-15) brackets. VPCS1 Series Optical Disk Drive Replacement Instructions Step 4. Carefully remove the ODD from the unit, and lift to remove. Identify the (4) side screws in the CRU kit and ...

Help - Optical Disk Drive Replacement Instructions
Page 3
... be secured. Reinstall the two (2) ODD Bay screws to be facing the same direction. .ODD Installation (Steps 16-20) Step 16. Re-attach the Hard Drive Door by sliding it towards the unit. Using the ODD screws, install the ODD Brackets onto the new ODD. VPCS1 Series Optical Disk...
... be secured. Reinstall the two (2) ODD Bay screws to be facing the same direction. .ODD Installation (Steps 16-20) Step 16. Re-attach the Hard Drive Door by sliding it towards the unit. Using the ODD screws, install the ODD Brackets onto the new ODD. VPCS1 Series Optical Disk...

Help - Optical Disk Drive Replacement Instructions
Page 4
Power on your computer and continue with the recovery process by following the included shipping instructions. Step 20. Re-install the two (2) Hard Drive Door Screws to secure the Door Return the old ODD to Sony following the instructions described on the back of the recovery disk's case. . B 4/4 Reinstall the battery pack and AC Adaptor. P/N 989201343 Rev. VPCS1 Series Optical Disk Drive Replacement Instructions Step 21.
Power on your computer and continue with the recovery process by following the included shipping instructions. Step 20. Re-install the two (2) Hard Drive Door Screws to secure the Door Return the old ODD to Sony following the instructions described on the back of the recovery disk's case. . B 4/4 Reinstall the battery pack and AC Adaptor. P/N 989201343 Rev. VPCS1 Series Optical Disk Drive Replacement Instructions Step 21.

Safety Information
Page 3
... All products with an i.LINK connection may not communicate with applicable product activation procedures. Sony, VAIO, and the VAIO logo are trademarks or registered trademarks of Sony Corporation. All other . Use of the software product(s) requires agreement to U.S. Reverse ...on operating conditions and proper connection. Certain product(s) included with your system, such as a CD-RW or hard disk drive, confirm their respective owners. Financial services may require prior arrangements with the interoperability specifications established by Internet or telephone (toll...
... All products with an i.LINK connection may not communicate with applicable product activation procedures. Sony, VAIO, and the VAIO logo are trademarks or registered trademarks of Sony Corporation. All other . Use of the software product(s) requires agreement to U.S. Reverse ...on operating conditions and proper connection. Certain product(s) included with your system, such as a CD-RW or hard disk drive, confirm their respective owners. Financial services may require prior arrangements with the interoperability specifications established by Internet or telephone (toll...
Safety Information
Page 5
... in hazardous radiation exposure. Use of controls or adjustments or performance of your nearest Sony Service Center. The optical disc drive of procedures other than those specified herein may arise from the use of this device. Caution - Sony assumes no responsibility for any security problems that may result in this device is extremely...
... in hazardous radiation exposure. Use of controls or adjustments or performance of your nearest Sony Service Center. The optical disc drive of procedures other than those specified herein may arise from the use of this device. Caution - Sony assumes no responsibility for any security problems that may result in this device is extremely...

Users Guide
Page 2
... 32 Using the Keyboard 33 Using the Touch Pad 36 Using Special-function Buttons 37 Using the Built-in Camera 38 Using the Optical Disc Drive 39 Using "Memory Stick 46 Using Other Modules / Memory Cards 52 Using the Internet 59 Using the Network (LAN 60 Using the Wireless LAN 61...
... 32 Using the Keyboard 33 Using the Touch Pad 36 Using Special-function Buttons 37 Using the Built-in Camera 38 Using the Optical Disc Drive 39 Using "Memory Stick 46 Using Other Modules / Memory Cards 52 Using the Internet 59 Using the Network (LAN 60 Using the Wireless LAN 61...
Users Guide
Page 5
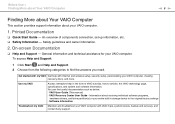
...computer, creating recovery discs, and more. Use my VAIO Access interactive help with VAIO Care, system restore, backup and recovery, and contact Sony support. VAIO User Guide (This manual) - Before Use > Finding More about Your VAIO Computer n5 N Finding More about Your VAIO... Computer This section provides support information about restoring individual software programs, hardware drivers, and drive partition(s) or your entire built-in the form of components connection, set-up information, etc. ❑ Safety Information - On-screen ...
...computer, creating recovery discs, and more. Use my VAIO Access interactive help with VAIO Care, system restore, backup and recovery, and contact Sony support. VAIO User Guide (This manual) - Before Use > Finding More about Your VAIO Computer n5 N Finding More about Your VAIO... Computer This section provides support information about restoring individual software programs, hardware drivers, and drive partition(s) or your entire built-in the form of components connection, set-up information, etc. ❑ Safety Information - On-screen ...

Users Guide
Page 11
... not connect any other hardware that did not originally come with your VAIO computer. ! Before starting your computer for example, a printer, an external hard disk drive, a scanner, and so on) at a time, following the manufacturer's instructions. ❑ Locating Controls and Ports (page 12) ❑ About the Indicator Lights (page 17) ❑...
... not connect any other hardware that did not originally come with your VAIO computer. ! Before starting your computer for example, a printer, an external hard disk drive, a scanner, and so on) at a time, following the manufacturer's instructions. ❑ Locating Controls and Ports (page 12) ❑ About the Indicator Lights (page 17) ❑...

Users Guide
Page 13
Getting Started > Locating Controls and Ports n 13 N A Num lock indicator (page 17) B Caps lock indicator (page 17) C Scroll lock indicator (page 17) D SD memory card slot (page 55) E Media Access indicator (page 17) F "Memory Stick Duo" slot* (page 46) G WIRELESS indicator (page 17) H Charge indicator (page 17) I Disc drive indicator (page 17) J WIRELESS switch (page 61), (page 65) K Headphones jack (page 86) L Microphone jack (page 95) M Drive eject button (page 37), (page 39) * Your computer supports only Duo-size "Memory Stick".
Getting Started > Locating Controls and Ports n 13 N A Num lock indicator (page 17) B Caps lock indicator (page 17) C Scroll lock indicator (page 17) D SD memory card slot (page 55) E Media Access indicator (page 17) F "Memory Stick Duo" slot* (page 46) G WIRELESS indicator (page 17) H Charge indicator (page 17) I Disc drive indicator (page 17) J WIRELESS switch (page 61), (page 65) K Headphones jack (page 86) L Microphone jack (page 95) M Drive eject button (page 37), (page 39) * Your computer supports only Duo-size "Memory Stick".

Users Guide
Page 14
Getting Started > Locating Controls and Ports Right n 14 N A Optical disc drive (page 39) B Manual eject hole (page 162) C ExpressCard/34 slot (page 52) D USB ports* (page 96) E Network (LAN) port (page 60) F Power button/Power indicator (page 17) * Compliant with the USB 2.0 standard and support high-/full-/low- speeds.
Getting Started > Locating Controls and Ports Right n 14 N A Optical disc drive (page 39) B Manual eject hole (page 162) C ExpressCard/34 slot (page 52) D USB ports* (page 96) E Network (LAN) port (page 60) F Power button/Power indicator (page 17) * Compliant with the USB 2.0 standard and support high-/full-/low- speeds.

Users Guide
Page 17
... more wireless options are using and does not work with the following indicator lights: Indicator Power 1 Charge Media Access Built-in MOTION EYE camera Disc drive Num lock Caps lock Scroll lock WIRELESS Functions Illuminates in green while the computer is on, blinks slowly in orange while the computer is in... turn it off . Illuminates while data access to the built-in progress. Illuminates while the battery pack is in storage device or the optical disc drive is charging.
... more wireless options are using and does not work with the following indicator lights: Indicator Power 1 Charge Media Access Built-in MOTION EYE camera Disc drive Num lock Caps lock Scroll lock WIRELESS Functions Illuminates in green while the computer is on, blinks slowly in orange while the computer is in... turn it off . Illuminates while data access to the built-in progress. Illuminates while the battery pack is in storage device or the optical disc drive is charging.

Users Guide
Page 32
... the Touch Pad (page 36) ❑ Using Special-function Buttons (page 37) ❑ Using the Built-in Camera (page 38) ❑ Using the Optical Disc Drive (page 39) ❑ Using "Memory Stick" (page 46) ❑ Using Other Modules / Memory Cards (page 52) ❑ Using the Internet (page 59) ❑ Using the...
... the Touch Pad (page 36) ❑ Using Special-function Buttons (page 37) ❑ Using the Built-in Camera (page 38) ❑ Using the Optical Disc Drive (page 39) ❑ Using "Memory Stick" (page 46) ❑ Using Other Modules / Memory Cards (page 52) ❑ Using the Internet (page 59) ❑ Using the...

Users Guide
Page 37
... ASSIST button* Intel® Wireless Display button* Functions Launches the Media Gallery or turns the volume on your computer with a TV or projector. Z Drive eject button Ejects the drive tray. * Your computer is equipped with special buttons to help you can wirelessly connect your model. Launches the VAIO Care while the computer...
... ASSIST button* Intel® Wireless Display button* Functions Launches the Media Gallery or turns the volume on your computer with a TV or projector. Z Drive eject button Ejects the drive tray. * Your computer is equipped with special buttons to help you can wirelessly connect your model. Launches the VAIO Care while the computer...

Users Guide
Page 39
Some features and options in this section may not be available on the computer. 2 Press the drive eject button (1) to find out about the configuration of your computer. To insert a disc 1 Turn on your computer. n 39 N The drive tray slides out. See the specifications to open the drive. Using Your VAIO Computer > Using the Optical Disc Drive Using the Optical Disc Drive Your computer is equipped with an optical disc drive.
Some features and options in this section may not be available on the computer. 2 Press the drive eject button (1) to find out about the configuration of your computer. To insert a disc 1 Turn on your computer. n 39 N The drive tray slides out. See the specifications to open the drive. Using Your VAIO Computer > Using the Optical Disc Drive Using the Optical Disc Drive Your computer is equipped with an optical disc drive.

Users Guide
Page 40
Do not remove the optical disc while your computer is in gently. ! Do not exert pressure on the drive tray. Using Your VAIO Computer > Using the Optical Disc Drive n 40 N 3 Place a disc in the middle of the drive tray when placing/removing a disc onto/from the tray. 4 Close the drive tray by pushing it down until the disc clicks into Normal mode before removing the disc. Be sure to bring the computer back into place. ! Be sure to hold the bottom of the drive tray with the label side facing upward and gently push it in a power saving mode (Sleep or Hibernate).
Do not remove the optical disc while your computer is in gently. ! Do not exert pressure on the drive tray. Using Your VAIO Computer > Using the Optical Disc Drive n 40 N 3 Place a disc in the middle of the drive tray when placing/removing a disc onto/from the tray. 4 Close the drive tray by pushing it down until the disc clicks into Normal mode before removing the disc. Be sure to bring the computer back into place. ! Be sure to hold the bottom of the drive tray with the label side facing upward and gently push it in a power saving mode (Sleep or Hibernate).

Users Guide
Page 41
...PR*5 P P PR PR PR PR PR P PR*4 Blu-ray Disc P P P P PR*5 P P PR PR PR PR PR P P Combo *1 The DVD±RW/RAM disc drive on the model you purchased. PR: playable and recordable P: playable but not recordable -: not playable or recordable CD- Using Your VAIO Computer > Using the Optical... Disc Drive n 41 N Supported Disc Media Your computer plays and records CDs, DVDs, and Blu-ray Disc™ media, depending on your computer does...
...PR*5 P P PR PR PR PR PR P PR*4 Blu-ray Disc P P P P PR*5 P P PR PR PR PR PR P P Combo *1 The DVD±RW/RAM disc drive on the model you purchased. PR: playable and recordable P: playable but not recordable -: not playable or recordable CD- Using Your VAIO Computer > Using the Optical... Disc Drive n 41 N Supported Disc Media Your computer plays and records CDs, DVDs, and Blu-ray Disc™ media, depending on your computer does...


