User Guide
Page 24
... of your screen. C S1 button By default, the S1 button opens the Media Center Start menu. ✍ The default S1 button assignment... The task associated with each function key varies among software applications except the following combinations with the VAIO Control Center. B Sleep button Provides for more in ). Fn+F6: Increases lighting intensity of power...Power Saving Mode (page 72). See Setting Up Your Computer with the VAIO Control Center for the lower level of the LCD screen. See the help file included with VAIO Control Center (page 71) and find out more information....
... of your screen. C S1 button By default, the S1 button opens the Media Center Start menu. ✍ The default S1 button assignment... The task associated with each function key varies among software applications except the following combinations with the VAIO Control Center. B Sleep button Provides for more in ). Fn+F6: Increases lighting intensity of power...Power Saving Mode (page 72). See Setting Up Your Computer with the VAIO Control Center for the lower level of the LCD screen. See the help file included with VAIO Control Center (page 71) and find out more information....

User Guide
Page 29
... the tray with one hand, place a disc in the middle of the drive tray when placing/removing a disc onto/from the tray. 4 Close the tray by pushing it toward the tray until the disc clicks into place. ! n 29 N Using Your VAIO Computer Using the Optical Disc Drive Your computer is equipped with ...the label side facing toward you, and gently push it in gently. To insert a disc 1 Turn on the drive tray. Be sure to open the drive. Do not exert pressure on the...
... the tray with one hand, place a disc in the middle of the drive tray when placing/removing a disc onto/from the tray. 4 Close the tray by pushing it toward the tray until the disc clicks into place. ! n 29 N Using Your VAIO Computer Using the Optical Disc Drive Your computer is equipped with ...the label side facing toward you, and gently push it in gently. To insert a disc 1 Turn on the drive tray. Be sure to open the drive. Do not exert pressure on the...
User Guide
Page 35
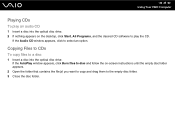
... CDs To copy files to a disc 1 Insert a disc into the optical disc drive. 2 If nothing appears on -screen instructions until the empty disc folder appears. 2 Open the folder that contains the file(s) you want to copy and drag them to the empty disc folder. 3 Close the disc folder. If the AutoPlay... window appears, click Burn files to disc and follow the on the desktop, click Start, All Programs, and the desired CD software to select an option. n 35 N Using Your VAIO Computer Playing CDs To play the CD.
... CDs To copy files to a disc 1 Insert a disc into the optical disc drive. 2 If nothing appears on -screen instructions until the empty disc folder appears. 2 Open the folder that contains the file(s) you want to copy and drag them to the empty disc folder. 3 Close the disc folder. If the AutoPlay... window appears, click Burn files to disc and follow the on the desktop, click Start, All Programs, and the desired CD software to select an option. n 35 N Using Your VAIO Computer Playing CDs To play the CD.
User Guide
Page 41
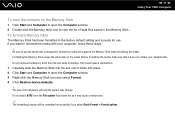
...reformat the media with your valuable data. Formatting the Memory Stick erases the entire data on the Memory Stick 1 Click Start and Computer to open the Computer window. 3 Right-click the Memory Stick icon and select Format. 4 Click Restore device defaults. ! Before formatting the media,... make sure that is ready for use the device that it does not contain your computer, follow these steps. ! n 41 N Using Your VAIO Computer To view...
...reformat the media with your valuable data. Formatting the Memory Stick erases the entire data on the Memory Stick 1 Click Start and Computer to open the Computer window. 3 Right-click the Memory Stick icon and select Format. 4 Click Restore device defaults. ! Before formatting the media,... make sure that is ready for use the device that it does not contain your computer, follow these steps. ! n 41 N Using Your VAIO Computer To view...
User Guide
Page 51
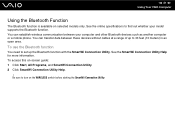
... Bluetooth function You need to set up to 33 feet (10 meters) in an open area. Be sure to find out whether your computer and other Bluetooth devices such as another computer or a mobile phone. See the SmartWi Connection Utility Help for more information. You can... transfer data between your model supports the Bluetooth function. n 51 N Using Your VAIO Computer Using the Bluetooth Function The Bluetooth function is available on selected models only. See the online specifications to turn on -screen guide: 1 Click...
... Bluetooth function You need to set up to 33 feet (10 meters) in an open area. Be sure to find out whether your computer and other Bluetooth devices such as another computer or a mobile phone. See the SmartWi Connection Utility Help for more information. You can... transfer data between your model supports the Bluetooth function. n 51 N Using Your VAIO Computer Using the Bluetooth Function The Bluetooth function is available on selected models only. See the online specifications to turn on -screen guide: 1 Click...

User Guide
Page 55
To open Windows Help and Support, click Start and Help and Support. To communicate with another Bluetooth device To communicate with Another Bluetooth Device You can connect your computer to a Bluetooth device such as another Bluetooth device, you first need to set up and using the Bluetooth function, search for Bluetooth information using Windows Help and Support. For setting up the Bluetooth function. n 55 N Using Your VAIO Computer Communicating with another computer, a mobile phone, a PDA, a headset, a mouse, or a digital camera without the use of any cables.
To open Windows Help and Support, click Start and Help and Support. To communicate with another Bluetooth device To communicate with Another Bluetooth Device You can connect your computer to a Bluetooth device such as another Bluetooth device, you first need to set up and using the Bluetooth function, search for Bluetooth information using Windows Help and Support. For setting up the Bluetooth function. n 55 N Using Your VAIO Computer Communicating with another computer, a mobile phone, a PDA, a headset, a mouse, or a digital camera without the use of any cables.

User Guide
Page 71
...VAIO Control Center 1 Click Start, All Programs, and VAIO Control Center. 2 Select the desired control item and change the settings. 3 Once finished, click OK. The setting of the control items will not be visible if you to access system information and to specify preferences for system behavior. n 71 N Customizing Your VAIO Computer... Setting Up Your Computer with the VAIO Control Center. Some of the desired item has been changed. ✍ For more information about each...
...VAIO Control Center 1 Click Start, All Programs, and VAIO Control Center. 2 Select the desired control item and change the settings. 3 Once finished, click OK. The setting of the control items will not be visible if you to access system information and to specify preferences for system behavior. n 71 N Customizing Your VAIO Computer... Setting Up Your Computer with the VAIO Control Center. Some of the desired item has been changed. ✍ For more information about each...

User Guide
Page 74
n 74 N Upgrading Your VAIO Computer Upgrading Your VAIO Computer Your VAIO computer and memory modules use high precision components and electronic connectors technology. To find the nearest center or agent, see the online specifications. For assistance, contact an authorized Sony Service Center. For the type of module ...and the amount of the warranty during your product warranty period, we recommend that: ❑ You should not touch the connectors or open the memory module compartment cover. To...
n 74 N Upgrading Your VAIO Computer Upgrading Your VAIO Computer Your VAIO computer and memory modules use high precision components and electronic connectors technology. To find the nearest center or agent, see the online specifications. For assistance, contact an authorized Sony Service Center. For the type of module ...and the amount of the warranty during your product warranty period, we recommend that: ❑ You should not touch the connectors or open the memory module compartment cover. To...

User Guide
Page 75
...of memory by maintaining contact with an unpainted metal portion of the chassis while performing the procedure. ❑ Do not open the memory module package before you are compatible with the safety practice and regulatory compliance requirements for example). Ground yourself by... document assume user familiarity with the general terminology associated with personal computers and with your computer. n 75 N Upgrading Your VAIO Computer Adding and Removing Memory If you want to expand the functionality of your computer, you can damage electronic components. Install the memory module only ...
...of memory by maintaining contact with an unpainted metal portion of the chassis while performing the procedure. ❑ Do not open the memory module package before you are compatible with the safety practice and regulatory compliance requirements for example). Ground yourself by... document assume user familiarity with the general terminology associated with personal computers and with your computer. n 75 N Upgrading Your VAIO Computer Adding and Removing Memory If you want to expand the functionality of your computer, you can damage electronic components. Install the memory module only ...

User Guide
Page 79
n 79 N Upgrading Your VAIO Computer 7 Slide the memory module into the memory module slot and push it in until it ...Replace the memory module compartment cover and tighten the screw. 9 Connect the AC adapter and the peripheral devices to the computer, and then plug them to the power source. 10 Turn on the motherboard. Do not force the memory module into the... slot in the open slot. Do not touch any other components on all peripheral devices and then the computer. Be sure to use the lower slot. If you want to install only one memory module, be sure to insert the...
n 79 N Upgrading Your VAIO Computer 7 Slide the memory module into the memory module slot and push it in until it ...Replace the memory module compartment cover and tighten the screw. 9 Connect the AC adapter and the peripheral devices to the computer, and then plug them to the power source. 10 Turn on the motherboard. Do not force the memory module into the... slot in the open slot. Do not touch any other components on all peripheral devices and then the computer. Be sure to use the lower slot. If you want to install only one memory module, be sure to insert the...

User Guide
Page 87
... case. ❑ If the floppy disk comes with a label, make sure that the label is properly affixed. n 87 N Precautions Handling Floppy Disks ❑ Do not open the shutter manually and touch the internal components of the floppy disk. ❑ Keep floppy disks away from magnets. ❑ Keep floppy disks away from...
... case. ❑ If the floppy disk comes with a label, make sure that the label is properly affixed. n 87 N Precautions Handling Floppy Disks ❑ Do not open the shutter manually and touch the internal components of the floppy disk. ❑ Keep floppy disks away from magnets. ❑ Keep floppy disks away from...

User Guide
Page 97
To restore your computer to normal mode 1 Close all open programs. 2 Click Start, the arrow next to the Lock button, and Restart. 3 If your computer does not restart, press the Ctrl+Alt+Delete keys and click the arrow next to the Shut down button and Restart. 4 If this procedure ... I do if Windows does not start and a message appears, when I start . When entering the password, check that the power indicator light turns off your computer and enter the correct password. If both or either of unsaved data. If you enter a wrong power-on password three times consecutively, the Enter Onetime...
To restore your computer to normal mode 1 Close all open programs. 2 Click Start, the arrow next to the Lock button, and Restart. 3 If your computer does not restart, press the Ctrl+Alt+Delete keys and click the arrow next to the Shut down button and Restart. 4 If this procedure ... I do if Windows does not start and a message appears, when I start . When entering the password, check that the power indicator light turns off your computer and enter the correct password. If both or either of unsaved data. If you enter a wrong power-on password three times consecutively, the Enter Onetime...

User Guide
Page 109
...is connected. ❑ Note that large files may also stop communications altogether. ❑ Connection capability is affected by the computer with the Bluetooth function. To open Windows Help and Support, click Start and Help and Support. n 109 N Troubleshooting Why is my Bluetooth connection slow? &#...10065; The data transfer speed depends on the obstructions and/or the distance between your computer and the device to ...
...is connected. ❑ Note that large files may also stop communications altogether. ❑ Connection capability is affected by the computer with the Bluetooth function. To open Windows Help and Support, click Start and Help and Support. n 109 N Troubleshooting Why is my Bluetooth connection slow? &#...10065; The data transfer speed depends on the obstructions and/or the distance between your computer and the device to ...
User Guide
Page 111
... disc from the optical disc drive. 3 Check the disc for instructions. n 111 N Troubleshooting Optical Discs Why does my computer freeze when I do if the drive tray does not open? ❑ Make sure your computer is on. ❑ Press the drive eject button or the Fn+E keys. ❑ If the drive eject button or... the Fn+E keys do not work, click Start and Computer, right-click the optical disc drive icon, and select ...
... disc from the optical disc drive. 3 Check the disc for instructions. n 111 N Troubleshooting Optical Discs Why does my computer freeze when I do if the drive tray does not open? ❑ Make sure your computer is on. ❑ Press the drive eject button or the Fn+E keys. ❑ If the drive eject button or... the Fn+E keys do not work, click Start and Computer, right-click the optical disc drive icon, and select ...
User Guide
Page 112
...several times or keep pressing the button to turn up the volume loud enough. ❑ Right-click the volume icon on the taskbar and click Open Volume Mixer to check the settings. ❑ Check the volume setting in the audio mixer. ❑ If you are playing a disc and cannot... disc for instructions. ❑ If you are using external speakers, check the volume settings on the speakers and the connections between the speakers and your computer will stop responding. n 112 N Troubleshooting What should I do any of the following: ❑ The volume may have been turned off by the volume...
...several times or keep pressing the button to turn up the volume loud enough. ❑ Right-click the volume icon on the taskbar and click Open Volume Mixer to check the settings. ❑ Check the volume setting in the audio mixer. ❑ If you are playing a disc and cannot... disc for instructions. ❑ If you are using external speakers, check the volume settings on the speakers and the connections between the speakers and your computer will stop responding. n 112 N Troubleshooting What should I do any of the following: ❑ The volume may have been turned off by the volume...

User Guide
Page 113
...drivers. 5 Double-click the optical disc drive device to malfunction. n 113 N Troubleshooting 4 Click Device Manager on your computer, do not use the computer for at least one hour. If an "X" or an exclamation point appears on the listed device, you notice condensation on the left pane.... The Device Manager window appears with the optical disc drive. ❑ If you may be incompatible with the optical disc drive. Adhesive labels can cause the computer to open...
...drivers. 5 Double-click the optical disc drive device to malfunction. n 113 N Troubleshooting 4 Click Device Manager on your computer, do not use the computer for at least one hour. If an "X" or an exclamation point appears on the listed device, you notice condensation on the left pane.... The Device Manager window appears with the optical disc drive. ❑ If you may be incompatible with the optical disc drive. Adhesive labels can cause the computer to open...

User Guide
Page 116
...run Windows Aero, follow these steps: 1 Click Start and Control Panel. 2 Click Customize colors under Appearance and Personalization. 3 Click Open classic appearance properties for more color options. 4 Select Windows Aero from the Color scheme options on and the power indicator light is...Using the Power Saving Mode (page 72) for more information. ❑ Make sure your computer screen. Press the Fn+F6 keys to selected models only. This Q & A entry applies to brighten your computer is securely plugged into Normal mode. For information about the Windows Aero features, such as...
...run Windows Aero, follow these steps: 1 Click Start and Control Panel. 2 Click Customize colors under Appearance and Personalization. 3 Click Open classic appearance properties for more color options. 4 Select Windows Aero from the Color scheme options on and the power indicator light is...Using the Power Saving Mode (page 72) for more information. ❑ Make sure your computer screen. Press the Fn+F6 keys to selected models only. This Q & A entry applies to brighten your computer is securely plugged into Normal mode. For information about the Windows Aero features, such as...

User Guide
Page 118
...If you are using an external microphone, make sure the microphone is turned on and is properly plugged into the microphone jack on your computer. ❑ Your sound input device may have been incorrectly configured. Microphone feedback occurs when the microphone receives the sound from a sound output...device. ❑ Turn down the volume of the speakers and the microphone. To configure the sound input device, follow these steps: 1 Close all open programs. 2 Click Start and Control Panel. 3 Click Hardware and Sound. 4 Click Manage audio devices under Sound. 5 On the Recording tab, select...
...If you are using an external microphone, make sure the microphone is turned on and is properly plugged into the microphone jack on your computer. ❑ Your sound input device may have been incorrectly configured. Microphone feedback occurs when the microphone receives the sound from a sound output...device. ❑ Turn down the volume of the speakers and the microphone. To configure the sound input device, follow these steps: 1 Close all open programs. 2 Click Start and Control Panel. 3 Click Hardware and Sound. 4 Click Manage audio devices under Sound. 5 On the Recording tab, select...

User Guide
Page 125
... connected to the OPTICAL OUT port, you do not hear the sound from the device connected to change the device for sound output. 1 Close all open programs. 2 Click Start and Control Panel. 3 Click Hardware and Sound. 4 Click Manage audio devices under Sound. 5 On the Playback tab, select the desired device for...
... connected to the OPTICAL OUT port, you do not hear the sound from the device connected to change the device for sound output. 1 Close all open programs. 2 Click Start and Control Panel. 3 Click Hardware and Sound. 4 Click Manage audio devices under Sound. 5 On the Playback tab, select the desired device for...
User Guide
Page 130
... : http://support.microsoft.com/directory/. 4 Sony Computing Support This service provides instant access to open the VAIO Support web site and view the information. Click the VAIO Update notice to information on your computer may be supplied with individual help menu for the specific program. 3 Operating System Online Support Your computer comes preinstalled with a Microsoft Windows operating...
... : http://support.microsoft.com/directory/. 4 Sony Computing Support This service provides instant access to open the VAIO Support web site and view the information. Click the VAIO Update notice to information on your computer may be supplied with individual help menu for the specific program. 3 Operating System Online Support Your computer comes preinstalled with a Microsoft Windows operating...


