Operating Instructions
Page 2
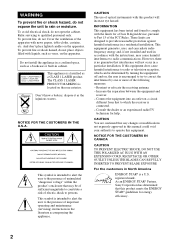
...be determined by turning the equipment off and on a circuit different from that any changes or modifications not expressly approved in this manual could void your authority to operate this equipment does cause harmful interference to persons. If this equipment. Reorient or relocate the ...the ventilation of the following measures: - Increase the separation between the equipment and receiver. - As an ENERGY STAR® Partner, Sony Corporation has determined that interference will increase eye hazard. However, there is located on the rear exterior. CAUTION You are designed to...
...be determined by turning the equipment off and on a circuit different from that any changes or modifications not expressly approved in this manual could void your authority to operate this equipment does cause harmful interference to persons. If this equipment. Reorient or relocate the ...the ventilation of the following measures: - Increase the separation between the equipment and receiver. - As an ENERGY STAR® Partner, Sony Corporation has determined that interference will increase eye hazard. However, there is located on the rear exterior. CAUTION You are designed to...
Operating Instructions
Page 3
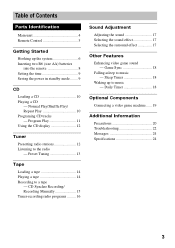
...Play 10 Programing CD tracks - Daily Timer 18 Optional Components Connecting a video game machine ...... 19 Additional Information Precautions 20 Troubleshooting 22 Messages 24 Specifications 24 3 CD Synchro Recording/ Recording Manually 15 Timer-recording radio programs ......... 16 Sound Adjustment Adjusting ...Table of Contents Parts Identification Main unit 4 Remote Control 5 Getting Started Hooking up to music - Sleep Timer 18 Waking up the system 6 Inserting two R6 (size AA) batteries into the remote 8 Setting the time 9 Saving the power in standby mode ........ 9...
...Play 10 Programing CD tracks - Daily Timer 18 Optional Components Connecting a video game machine ...... 19 Additional Information Precautions 20 Troubleshooting 22 Messages 24 Specifications 24 3 CD Synchro Recording/ Recording Manually 15 Timer-recording radio programs ......... 16 Sound Adjustment Adjusting ...Table of Contents Parts Identification Main unit 4 Remote Control 5 Getting Started Hooking up to music - Sleep Timer 18 Waking up the system 6 Inserting two R6 (size AA) batteries into the remote 8 Setting the time 9 Saving the power in standby mode ........ 9...
Operating Instructions
Page 12
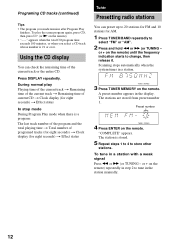
... + on the remote) repeatedly in a station. 3 Press TUNER MEMORY on the remote) until the frequency indication starts to tune in the station manually. 12 Scanning stops automatically when the system tunes in step 2 to change, then release it. Programing CD tracks (continued) Tips • The program you select a CD track whose number...
... + on the remote) repeatedly in a station. 3 Press TUNER MEMORY on the remote) until the frequency indication starts to tune in the station manually. 12 Scanning stops automatically when the system tunes in step 2 to change, then release it. Programing CD tracks (continued) Tips • The program you select a CD track whose number...
Operating Instructions
Page 13
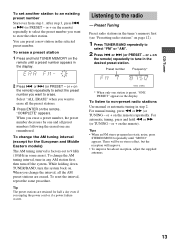
...) repeatedly to tune in the desired preset station. "COMPLETE" appears. To change the AM tuning interval, tune in any AM station first, then turn the system back on the remote). To listen to the radio - or + on page 12). 1 Press TUNER/BAND repeatedly to select "FM" or "AM". 2 Press . ...For manual tuning, press m or M (or TUNING - or + on . or > (or PRESET - When you change the interval, all preset numbers following the erased one station is factory...
...) repeatedly to tune in the desired preset station. "COMPLETE" appears. To change the AM tuning interval, tune in any AM station first, then turn the system back on the remote). To listen to the radio - or + on page 12). 1 Press TUNER/BAND repeatedly to select "FM" or "AM". 2 Press . ...For manual tuning, press m or M (or TUNING - or + on . or > (or PRESET - When you change the interval, all preset numbers following the erased one station is factory...
Operating Instructions
Page 15
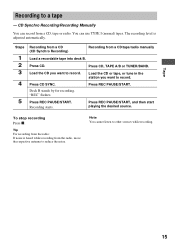
You can record from a CD/tape/radio manually Load a recordable tape into deck B. Deck B stands by for recording. To stop recording Press x. Load the CD you want to other sources while recording. 15 ... playing the desired source. Press CD SYNC. Note You cannot listen to record. Tape Recording to record. Press REC PAUSE/START. CD Synchro Recording/Recording Manually You can use TYPE I (normal) tapes. Press CD, TAPE A/B or TUNER/BAND. The recording level is heard while recording from the radio: If noise is...
You can record from a CD/tape/radio manually Load a recordable tape into deck B. Deck B stands by for recording. To stop recording Press x. Load the CD you want to other sources while recording. 15 ... playing the desired source. Press CD SYNC. Note You cannot listen to record. Tape Recording to record. Press REC PAUSE/START. CD Synchro Recording/Recording Manually You can use TYPE I (normal) tapes. Press CD, TAPE A/B or TUNER/BAND. The recording level is heard while recording from the radio: If noise is...


