

Service Manual
Page 13
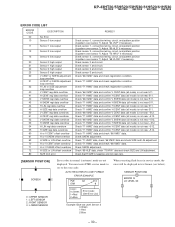
... with the crosshatch signal. 4. SCREEN VOLTAGE ADJUSTMENT (COARSE ADJUSTMENT) the mode Cover the both green and blue picture lenses with their optimal condition. SCREEN (G2) ADJUSTMENT (FINE ADJUSTMENT) Fine Mode is recommended to "crosshatch+video signal" - FOCUS LENS ADJUSTMENT In this adjustment, use the remote commander in the mode Cover the both green and red picture lenses with the lens caps and the tilt of items 2 and 5, you press 6, the test signal changes to set screw and align...
... with the crosshatch signal. 4. SCREEN VOLTAGE ADJUSTMENT (COARSE ADJUSTMENT) the mode Cover the both green and blue picture lenses with their optimal condition. SCREEN (G2) ADJUSTMENT (FINE ADJUSTMENT) Fine Mode is recommended to "crosshatch+video signal" - FOCUS LENS ADJUSTMENT In this adjustment, use the remote commander in the mode Cover the both green and red picture lenses with the lens caps and the tilt of items 2 and 5, you press 6, the test signal changes to set screw and align...

Service Manual
Page 26
.... SPEC Input Signal Monoscope Overscan Spec. = 9% H SIZE V SIZE 15.6 ± 0.2 sq. 11.5 ± 0.2 sq. 2 H-Size 6. Enter the Service mode, and select "2150D-1" . 4. REGISTRATION ADJUSTMENT • ADJUSTING FLOW START Turn on the commander to the other display mode and adjust in the Projector Engine mode. MAIN DEFLECTION ADJUSTMENT (Green) (Item 3-10-2) Green coarse adjustment Green fine adjustment Change the display mode Red coarse adjustment Red fine adjustment Blue coarse adjustment SUB DEFLECTION ADJUSTMENT (Item 3-10-4) Blue fine adjustment : middle 1) Set NTSC...
.... SPEC Input Signal Monoscope Overscan Spec. = 9% H SIZE V SIZE 15.6 ± 0.2 sq. 11.5 ± 0.2 sq. 2 H-Size 6. Enter the Service mode, and select "2150D-1" . 4. REGISTRATION ADJUSTMENT • ADJUSTING FLOW START Turn on the commander to the other display mode and adjust in the Projector Engine mode. MAIN DEFLECTION ADJUSTMENT (Green) (Item 3-10-2) Green coarse adjustment Green fine adjustment Change the display mode Red coarse adjustment Red fine adjustment Blue coarse adjustment SUB DEFLECTION ADJUSTMENT (Item 3-10-4) Blue fine adjustment : middle 1) Set NTSC...
Service Manual
Page 31
... circuit. Check "69 HLB" data, check "73 HRIV" data and check SIZE and LIN adjustment. Check "66 VMID" data and confirm V CENT data (all mode) is not near -512. Check sensor 3 and circuit. AUTO REGI ERROR CODE FORMAT ERROR EXAMPLE PJE 62 213 ERR Color: 0=Green 1=Red 2=Blue Error Code: (See Error List) Example: Blue low Level Sensor 3 0-Green 1-Red 2-Blue When executing flash focus in service mode, the error will be displayed in normal (customer) mode are not displayed. Check sensor 1, connection/wiring...
... circuit. Check "69 HLB" data, check "73 HRIV" data and check SIZE and LIN adjustment. Check "66 VMID" data and confirm V CENT data (all mode) is not near -512. Check sensor 3 and circuit. AUTO REGI ERROR CODE FORMAT ERROR EXAMPLE PJE 62 213 ERR Color: 0=Green 1=Red 2=Blue Error Code: (See Error List) Example: Blue low Level Sensor 3 0-Green 1-Red 2-Blue When executing flash focus in service mode, the error will be displayed in normal (customer) mode are not displayed. Check sensor 1, connection/wiring...
Service Manual
Page 133
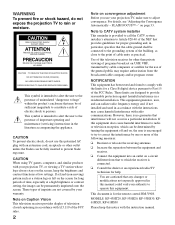
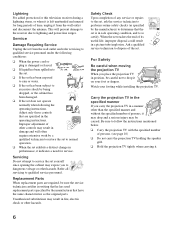
... user is encouraged to try to correct the interference by turning the equipment off and on page 33. CAUTION To prevent electric shock, do not expose the projection TV to which can be permanently imprinted onto the screen. Note on Caption Vision This television receiver provides display of television closed captioning in accordance with an extension cord, receptacle or other than private viewing of programs...
... user is encouraged to try to correct the interference by turning the equipment off and on page 33. CAUTION To prevent electric shock, do not expose the projection TV to which can be permanently imprinted onto the screen. Note on Caption Vision This television receiver provides display of television closed captioning in accordance with an extension cord, receptacle or other than private viewing of programs...
Service Manual
Page 135
... of time, unplug it is operating, unplug the TV and consult your protection, please read these instructions completely, and keep this can result in . Stubborn stains may be removed with a cloth slightly dampened with a threewire grounding type AC plug This plug will fit into a groundingtype power outlet. Never use and servicing of the projection TV. If the picture becomes dark after using the projection TV for cleaning.
... of time, unplug it is operating, unplug the TV and consult your protection, please read these instructions completely, and keep this can result in . Stubborn stains may be removed with a cloth slightly dampened with a threewire grounding type AC plug This plug will fit into a groundingtype power outlet. Never use and servicing of the projection TV. If the picture becomes dark after using the projection TV for cleaning.
Service Manual
Page 136
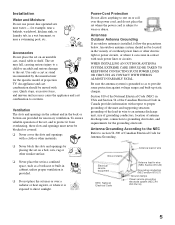
... place the set on an unstable cart, stand, table or shelf. An appliance and cart combination should not be located in cabinet, unless proper ventilation is exposed to provide some protection against voltage surges and built-up static charges. Power-Cord Protection Do not allow anything to section 54-300 of projection TV. WHEN INSTALLING AN OUTDOOR ANTENNA SYSTEM...
... place the set on an unstable cart, stand, table or shelf. An appliance and cart combination should not be located in cabinet, unless proper ventilation is exposed to provide some protection against voltage surges and built-up static charges. Power-Cord Protection Do not allow anything to section 54-300 of projection TV. WHEN INSTALLING AN OUTDOOR ANTENNA SYSTEM...
Service Manual
Page 137
... the antenna. Replacement Parts When replacement parts are specified in a picture tube implosion. Unauthorized substitutions may be careful not to qualified service personnel. Safety Check Upon completion of time, unplug it from the wall outlet and refer servicing to qualified service personnel under the following the operating instructions. Improper adjustment of persons, it indicates a need for long periods of any service or repairs to the set, ask the service technician...
... the antenna. Replacement Parts When replacement parts are specified in a picture tube implosion. Unauthorized substitutions may be careful not to qualified service personnel. Safety Check Upon completion of time, unplug it from the wall outlet and refer servicing to qualified service personnel under the following the operating instructions. Improper adjustment of persons, it indicates a need for long periods of any service or repairs to the set, ask the service technician...

Service Manual
Page 138
...48 Using the Audio Menu 50 Using the Channel Menu 52 Using the Parent Menu 54 Using the Timer Menu 62 Using the Setup Menu 63 Other Information Programming the Remote Control 65 Operating Other Components with A/V Connectors 27 Connecting a Digital TV Receiver 28 Connecting a Camcorder 29 Connecting an AV Receiver 30 Using the CONTROL S Feature 31 Setting Up the Projection TV Automatically.........32 Adjusting the Convergence Automatically - Contents Important Safeguards 4 Introducing the Sony Projection TV Presenting the Sony Projection TV 8 Using this manual 9 Installing and...
...48 Using the Audio Menu 50 Using the Channel Menu 52 Using the Parent Menu 54 Using the Timer Menu 62 Using the Setup Menu 63 Other Information Programming the Remote Control 65 Operating Other Components with A/V Connectors 27 Connecting a Digital TV Receiver 28 Connecting a Camcorder 29 Connecting an AV Receiver 30 Using the CONTROL S Feature 31 Setting Up the Projection TV Automatically.........32 Adjusting the Convergence Automatically - Contents Important Safeguards 4 Introducing the Sony Projection TV Presenting the Sony Projection TV 8 Using this manual 9 Installing and...

Service Manual
Page 140
... to access on the projection TV console. 9 It shows you how to use your remote control functions. 3 Using the menus This section teaches you how to begin using your new projection TV. Introducing the Sony Projection TV Introducing the Sony Projection TV ❑ Channel Index: Allows you to view and choose from twelve programs. ❑ Flash Focus™: Allows you through your initial setup. Similar controls may be found on -screen menus and adjust your projection TV settings.
... to access on the projection TV console. 9 It shows you how to use your remote control functions. 3 Using the menus This section teaches you how to begin using your new projection TV. Introducing the Sony Projection TV Introducing the Sony Projection TV ❑ Channel Index: Allows you to view and choose from twelve programs. ❑ Flash Focus™: Allows you through your initial setup. Similar controls may be found on -screen menus and adjust your projection TV settings.
Service Manual
Page 146
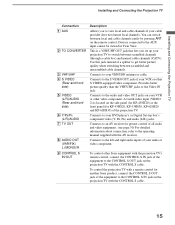
... picture quality when switching between scrambled and unscrambled cable channels. Connects to an AV receiver for greater control of a splitter to your DVD player's or Digital Set-top box's component video (Y, PB, PR) and audio (L/R) jacks. To control the projection TV with a remote control for KP-53HS20, KP-53HS30, KP-61HS20 and KP-61HS30) of your VCR or other S VIDEO-equipped video component. Connects to your VHF/UHF antenna or cable. You can switch between scrambled channels (through a cable box) and normal cable channels (CATV). Connects...
... picture quality when switching between scrambled and unscrambled cable channels. Connects to an AV receiver for greater control of a splitter to your DVD player's or Digital Set-top box's component video (Y, PB, PR) and audio (L/R) jacks. To control the projection TV with a remote control for KP-53HS20, KP-53HS30, KP-61HS20 and KP-61HS30) of your VCR or other S VIDEO-equipped video component. Connects to your VHF/UHF antenna or cable. You can switch between scrambled channels (through a cable box) and normal cable channels (CATV). Connects...

Service Manual
Page 153
...'s S VIDEO IN jack. Rear of the yellow video cable on your combined A/V cable. S VIDEO does not provide audio, so audio cables must still be sure that what you to switch between the two to be connected to provide sound. ✍ You cannot record signals from equipment connected to change the video input on your VCR. Installing and Connecting the Projection TV Connecting Two VCRs for playback by pressing TV/VIDEO on the remote control. ✍ You may need...
...'s S VIDEO IN jack. Rear of the yellow video cable on your combined A/V cable. S VIDEO does not provide audio, so audio cables must still be sure that what you to switch between the two to be connected to provide sound. ✍ You cannot record signals from equipment connected to change the video input on your VCR. Installing and Connecting the Projection TV Connecting Two VCRs for playback by pressing TV/VIDEO on the remote control. ✍ You may need...

Service Manual
Page 158
... DVD player has video component output connectors: for best picture quality use the connection described on the remote control to the projection TV's S VIDEO jack. Disconnect all power sources before making any connections. 1 Using audio cables, connect the DVD player's Audio OUT jacks to the projection TV's AUDIO IN jacks. 2 Using an S VIDEO cable, connect the DVD player's S VIDEO jack to switch between the VCR, DVD player and cable TV inputs. 27 Rear or projection TV YC-15V/30V (not supplied) DVD player S VIDEO AUDIO-R (red) AUDIO-L (white) RK-74A (not supplied) ✍ Use TV/VIDEO...
... DVD player has video component output connectors: for best picture quality use the connection described on the remote control to the projection TV's S VIDEO jack. Disconnect all power sources before making any connections. 1 Using audio cables, connect the DVD player's Audio OUT jacks to the projection TV's AUDIO IN jacks. 2 Using an S VIDEO cable, connect the DVD player's S VIDEO jack to switch between the VCR, DVD player and cable TV inputs. 27 Rear or projection TV YC-15V/30V (not supplied) DVD player S VIDEO AUDIO-R (red) AUDIO-L (white) RK-74A (not supplied) ✍ Use TV/VIDEO...

Service Manual
Page 165
... a menu to reset the settings to turn Display off automatically. Button Descriptions 34 Outside Panel Button 1 MUTING 2 SLEEP 3 ANT 4 DISPLAY 5 JUMP 6 FREEZE 7 INDEX 8 9 VOL +/- Pressing down on the center of the on-screen cursor. Displays the Favorite Channels list. Cancel by pressing until the projection TV displays the time in minutes (15, 30, 45, 60, or 90) that you want the projection TV to step through the available video picture modes: Vivid...
... a menu to reset the settings to turn Display off automatically. Button Descriptions 34 Outside Panel Button 1 MUTING 2 SLEEP 3 ANT 4 DISPLAY 5 JUMP 6 FREEZE 7 INDEX 8 9 VOL +/- Pressing down on the center of the on-screen cursor. Displays the Favorite Channels list. Cancel by pressing until the projection TV displays the time in minutes (15, 30, 45, 60, or 90) that you want the projection TV to step through the available video picture modes: Vivid...

Service Manual
Page 169
... approximate time in the Setup menu, your projection TV will skip the video input you selected. (see "Video Label" on page 48. 38 If you select Skip as Brightness, Color, etc.) to remain on before shutting off , press DISPLAY again. When you select each mode, you want the projection TV to suit your taste. Standard: Select to display the channel number, current time and channel label (if set). Movie: Select to display a picture...
... approximate time in the Setup menu, your projection TV will skip the video input you selected. (see "Video Label" on page 48. 38 If you select Skip as Brightness, Color, etc.) to remain on before shutting off , press DISPLAY again. When you select each mode, you want the projection TV to suit your taste. Standard: Select to display the channel number, current time and channel label (if set). Movie: Select to display a picture...

Service Manual
Page 179
... another, use the PIC MODE on the remote control when in the Video menu. Pro Select for Picture, Brightness, Color, Hue, Sharpness and Color Temp ❑ Press RESET on the remote control. Choose from one Video Mode to give the white colors a neutral tint. Adjust to increase or decrease color intensity. Neutral Select to exit the menu screen. To restore the factory default settings for professional monitor like , picture. Option Mode Customized picture viewing Picture Brightness Color Hue Sharpness Color Temp White intensity adjustment Description Vivid...
... another, use the PIC MODE on the remote control when in the Video menu. Pro Select for Picture, Brightness, Color, Hue, Sharpness and Color Temp ❑ Press RESET on the remote control. Choose from one Video Mode to give the white colors a neutral tint. Adjust to increase or decrease color intensity. Neutral Select to exit the menu screen. To restore the factory default settings for professional monitor like , picture. Option Mode Customized picture viewing Picture Brightness Color Hue Sharpness Color Temp White intensity adjustment Description Vivid...
Service Manual
Page 187
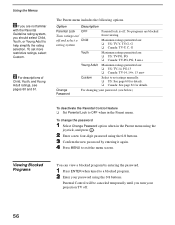
... turn your password. (see pages 60 and 61. The Parent menu includes the following options. Parental Control will be canceled temporarily until you should select Child, Youth, or Young Adult to a blocked program. 2 Enter your password using the 0-9 buttons. 3 Confirm the new password by entering the password. 1 Press ENTER when tuned to help simplify the rating selection. Change Password For changing your projection TV off . To change...
... turn your password. (see pages 60 and 61. The Parent menu includes the following options. Parental Control will be canceled temporarily until you should select Child, Youth, or Young Adult to a blocked program. 2 Enter your password using the 0-9 buttons. 3 Confirm the new password by entering the password. 1 Press ENTER when tuned to help simplify the rating selection. Change Password For changing your projection TV off . To change...

Service Manual
Page 201
... Information Troubleshooting If, after reading these operating instructions, you can receive digital broadcasts in your area. residents only) or (416) 499-SONY (7669) (Canadian residents only). Problem Possible Remedies No picture (screen not lit), no sound ❏ Make sure the projection TV's power cord is connected securely to change the input mode. (see "Adjusting the Convergence Automatically - Call your local listings to the wall outlet. ❏ Locate the projection TV at 1-800-222-SONY (7669) (U.S. Replace...
... Information Troubleshooting If, after reading these operating instructions, you can receive digital broadcasts in your area. residents only) or (416) 499-SONY (7669) (Canadian residents only). Problem Possible Remedies No picture (screen not lit), no sound ❏ Make sure the projection TV's power cord is connected securely to change the input mode. (see "Adjusting the Convergence Automatically - Call your local listings to the wall outlet. ❏ Locate the projection TV at 1-800-222-SONY (7669) (U.S. Replace...

Service Manual
Page 202
... inadvertently switched your Channel Fix settings. (see page 53) Cannot receive channels Unable to select a channel ❏ Use Auto Program in TV memory. (see page 53) Double images or ghosts ❏ Use a highly directional outdoor antenna or a cable (when the problem is not set to Skip. (see page 64) video equipment connected to the projection TV There is a black box on the screen ❏ You have selected a text option in the Setup menu and no twin picture or...
... inadvertently switched your Channel Fix settings. (see page 53) Cannot receive channels Unable to select a channel ❏ Use Auto Program in TV memory. (see page 53) Double images or ghosts ❏ Use a highly directional outdoor antenna or a cable (when the problem is not set to Skip. (see page 64) video equipment connected to the projection TV There is a black box on the screen ❏ You have selected a text option in the Setup menu and no twin picture or...

Service Manual
Page 206
... 39 Digital TV program 39 Digital TV receiver, connecting 28 DISPLAY button 34 Display, turning off 34 DRC (Digital Reality Creation) Mode, described 8 DRC⁄CINEMOTION button 35 DVD MENU button 36 DVD player using with component video connectors, connecting 26 DVD TITLE button 36 E Enhanced picture resolution, 16:9 64 Enlarging pictures, in remote 10 Bilingual audio 50 Blocking programs. See Ratings. Index 16:9 (widescreen) 8, 64 A Activating a Twin View screen 41 Adding channels to the channel list 53 Adjusting audio, Steady Sound 50 ANT button 34 Antenna, connecting Aspect ratio...
... 39 Digital TV program 39 Digital TV receiver, connecting 28 DISPLAY button 34 Display, turning off 34 DRC (Digital Reality Creation) Mode, described 8 DRC⁄CINEMOTION button 35 DVD MENU button 36 DVD player using with component video connectors, connecting 26 DVD TITLE button 36 E Enhanced picture resolution, 16:9 64 Enlarging pictures, in remote 10 Bilingual audio 50 Blocking programs. See Ratings. Index 16:9 (widescreen) 8, 64 A Activating a Twin View screen 41 Adding channels to the channel list 53 Adjusting audio, Steady Sound 50 ANT button 34 Antenna, connecting Aspect ratio...

Service Manual
Page 207
...38 Muting, using 37 P Parent menu 47, 54 Parental control, described 8 Password, changing 56 PIC MODE button 34 Picture contrast, adjusting 48 Picture size, adjusting in Twin View 43 POWER button 36 POWER buttons (GREEN) 35 Presetting channels 32 Problems, troubleshooting 70 R Ratings setting 54-56 viewing blocked programs 56 Rear panel controls and connections 14, 15 Remote control buttons inside panel 36 Function of buttons 37 inserting batteries 10 programming 65-67 Remote control, operating other components with Cable box 69 DVD player 68 Satellite receiver 69 VCR 68 Removing channels from...
...38 Muting, using 37 P Parent menu 47, 54 Parental control, described 8 Password, changing 56 PIC MODE button 34 Picture contrast, adjusting 48 Picture size, adjusting in Twin View 43 POWER button 36 POWER buttons (GREEN) 35 Presetting channels 32 Problems, troubleshooting 70 R Ratings setting 54-56 viewing blocked programs 56 Rear panel controls and connections 14, 15 Remote control buttons inside panel 36 Function of buttons 37 inserting batteries 10 programming 65-67 Remote control, operating other components with Cable box 69 DVD player 68 Satellite receiver 69 VCR 68 Removing channels from...

