
Operating Instructions
Page 2
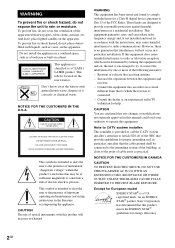
... the user to provide reasonable protection against harmful interference in a particular installation. As an ENERGY STAR® partner, Sony Corporation has determined that any changes or modifications not expressly approved in this manual could void your authority to operate this equipment does cause harmful interference to radio or television reception, which the...
... the user to provide reasonable protection against harmful interference in a particular installation. As an ENERGY STAR® partner, Sony Corporation has determined that any changes or modifications not expressly approved in this manual could void your authority to operate this equipment does cause harmful interference to radio or television reception, which the...
Operating Instructions
Page 3
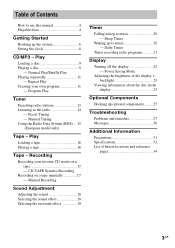
...program 11 - Repeat Play Creating your favorite CD tracks on a tape manually 17 - Manual Tuning Using the Radio Data System (RDS).... 15 (European model only) Tape - Preset Tuning - Manual Recording Sound Adjustment Adjusting the sound 18 Selecting the sound effect 18 ...the brightness of the display's backlight 23 Viewing information about the disc in the display 23 Optional Components Hooking up optional components......... 25 Troubleshooting Problems and remedies 27 Messages 30 Additional Information Precautions 31 Specifications 32 List of Contents How to...
...program 11 - Repeat Play Creating your favorite CD tracks on a tape manually 17 - Manual Tuning Using the Radio Data System (RDS).... 15 (European model only) Tape - Preset Tuning - Manual Recording Sound Adjustment Adjusting the sound 18 Selecting the sound effect 18 ...the brightness of the display's backlight 23 Viewing information about the disc in the display 23 Optional Components Hooking up optional components......... 25 Troubleshooting Problems and remedies 27 Messages 30 Additional Information Precautions 31 Specifications 32 List of Contents How to...
Operating Instructions
Page 4
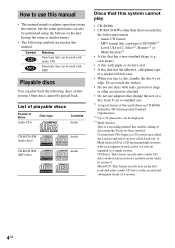
... Organization) *2 Up to 31 characters can play • CD-ROMs • CD-Rs/CD-RWs other accessories attached. • Do not use this manual • This manual mainly explains operations using the remote, but the same operations can also be used in this system. List of playable discs Format of data... using the buttons on this manual. Do not touch the surface. • Do not use discs with paper or stickers on it. • A disc that can be performed using the...
... Organization) *2 Up to 31 characters can play • CD-ROMs • CD-Rs/CD-RWs other accessories attached. • Do not use this manual • This manual mainly explains operations using the remote, but the same operations can also be used in this system. List of playable discs Format of data... using the buttons on this manual. Do not touch the surface. • Do not use discs with paper or stickers on it. • A disc that can be performed using the...
Operating Instructions
Page 13
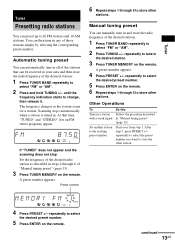
...Press TUNING +/- Preset number 6 Repeat steps 1 through 5 to store other stations. Tuner Tuner Presetting radio stations You can then tune in any of "Manual tuning preset" (page 13). 3 Press TUNER MEMORY on the remote. 6 Repeat steps 1 through 5 to store other stations. Automatic tuning preset You ... "FM" or "AM". 2 Press and hold TUNING +/- Scanning stops automatically when a station is tuned in "Manual tuning preset" (page 13). A preset number appears. Manual tuning preset You can be received in and store the radio frequency of the desired stations. 1 Press TUNER BAND ...
...Press TUNING +/- Preset number 6 Repeat steps 1 through 5 to store other stations. Tuner Tuner Presetting radio stations You can then tune in any of "Manual tuning preset" (page 13). 3 Press TUNER MEMORY on the remote. 6 Repeat steps 1 through 5 to store other stations. Automatic tuning preset You ... "FM" or "AM". 2 Press and hold TUNING +/- Scanning stops automatically when a station is tuned in "Manual tuning preset" (page 13). A preset number appears. Manual tuning preset You can be received in and store the radio frequency of the desired stations. 1 Press TUNER BAND ...
Operating Instructions
Page 14
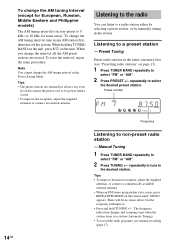
... 1 Press TUNER BAND repeatedly to a radio station either by selecting a preset station, or by manually tuning in the desired station. The frequency indication changes and scanning stops when the system tunes in any AM station first, then turn off the ... in the Power Saving Mode. Note You cannot change the AM tuning interval, tune in a station (Automatic Tuning). • To record the radio programs, use manual recording (page 17). repeatedly to select the desired preset station. While holding TUNER/ BAND on the unit, press ?/1 on the remote until "MONO" appears. When...
... 1 Press TUNER BAND repeatedly to a radio station either by selecting a preset station, or by manually tuning in the desired station. The frequency indication changes and scanning stops when the system tunes in any AM station first, then turn off the ... in the Power Saving Mode. Note You cannot change the AM tuning interval, tune in a station (Automatic Tuning). • To record the radio programs, use manual recording (page 17). repeatedly to select the desired preset station. While holding TUNER/ BAND on the unit, press ?/1 on the remote until "MONO" appears. When...
Operating Instructions
Page 17
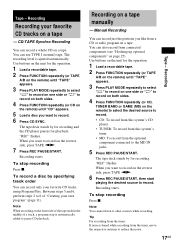
...like from a CD or radio program on a tape. "REC" flashes. Note You cannot listen to reduce the noise. 17GB Tape - Recording starts. Manual Recording You can record only your own program" (page 11). You can use TYPE I (normal) tape. The tape deck stands by for recording and... When recording on the reverse side, press TAPE nN. 7 Press REC PAUSE/START. Recording starts. Recording You can also record from connected components (see "Hooking up optional components" on the remote) to select the desired source to record. • CD: To record from this system's CD player. • ...
...like from a CD or radio program on a tape. "REC" flashes. Note You cannot listen to reduce the noise. 17GB Tape - Recording starts. Manual Recording You can record only your own program" (page 11). You can use TYPE I (normal) tape. The tape deck stands by for recording and... When recording on the reverse side, press TAPE nN. 7 Press REC PAUSE/START. Recording starts. Recording You can also record from connected components (see "Hooking up optional components" on the remote) to select the desired source to record. • CD: To record from this system's CD player. • ...
Operating Instructions
Page 26
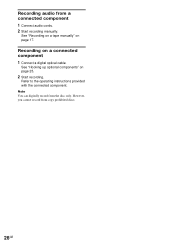
See "Hooking up optional components" on a connected component 1 Connect a digital optical cable. Recording on page 25. 2 Start recording. However, you cannot record from the disc only. Refer to the operating instructions provided with the connected component. Note You can digitally record from copy prohibited discs. 26GB Recording audio from a connected component 1 Connect audio cords. 2 Start recording manually. See "Recording on a tape manually" on page 17.
See "Hooking up optional components" on a connected component 1 Connect a digital optical cable. Recording on page 25. 2 Start recording. However, you cannot record from the disc only. Refer to the operating instructions provided with the connected component. Note You can digitally record from copy prohibited discs. 26GB Recording audio from a connected component 1 Connect audio cords. 2 Start recording manually. See "Recording on a tape manually" on page 17.

