Operating Instructions (DAV-HDX500/HDX501W)
Page 2
.... 10) Protect the power cord from being walked on or pinched particularly at the rear exterior of important operating and maintenance (servicing) instructions in the literature accompanying the appliance. The use this apparatus to constitute a risk of the polarized or grounding-type plug. This equipment generates, uses, and can be of sufficient magnitude to rain or moisture. Model No. Install in the...
.... 10) Protect the power cord from being walked on or pinched particularly at the rear exterior of important operating and maintenance (servicing) instructions in the literature accompanying the appliance. The use this apparatus to constitute a risk of the polarized or grounding-type plug. This equipment generates, uses, and can be of sufficient magnitude to rain or moisture. Model No. Install in the...
Operating Instructions (DAV-HDX500/HDX501W)
Page 4
... This Manual 6 This System Can Play the Following Discs 6 Getting Started - Turning off the Demonstration 27 Installing the Speakers on a Wall.......... 28 Connecting the TV (Advanced 30 Connecting Other Components 34 Basic Operations Playing Discs 37 Enjoying the Radio or Other Components 39 Enjoying TV or VCR Sound from All Speakers 40 Selecting the Movie or Music Mode 41 Sound Adjustments Enjoying Surround Sound by Using Sound Field 42 Enjoying Multiplex Broadcast Sound ... 44 (DUAL MONO) Various Functions for Playing Discs...
... This Manual 6 This System Can Play the Following Discs 6 Getting Started - Turning off the Demonstration 27 Installing the Speakers on a Wall.......... 28 Connecting the TV (Advanced 30 Connecting Other Components 34 Basic Operations Playing Discs 37 Enjoying the Radio or Other Components 39 Enjoying TV or VCR Sound from All Speakers 40 Selecting the Movie or Music Mode 41 Sound Adjustments Enjoying Surround Sound by Using Sound Field 42 Enjoying Multiplex Broadcast Sound ... 44 (DUAL MONO) Various Functions for Playing Discs...
Operating Instructions (DAV-HDX500/HDX501W)
Page 5
... Operations Controlling the TV with the Supplied Remote 72 Using the THEATRE SYNC Function 73 Using the Sound Effect 75 Using the Sleep Timer 75 Changing the Brightness of the Front Panel Display 76 Using the DIGITAL MEDIA PORT Adapter 77 Deactivating the Buttons on the Unit.... 78 (Child Lock) Advanced Settings and Adjustments Locking Discs 79 (CUSTOM PARENTAL CONTROL, PARENTAL CONTROL) Getting Optimal Surround Sound for a Room 82 (SPEAKER FORMATION) Calibrating the Appropriate Settings Automatically 84 (AUTO CALIBRATION) Using the Setup Display 86 Setting the Display or Sound...
... Operations Controlling the TV with the Supplied Remote 72 Using the THEATRE SYNC Function 73 Using the Sound Effect 75 Using the Sleep Timer 75 Changing the Brightness of the Front Panel Display 76 Using the DIGITAL MEDIA PORT Adapter 77 Deactivating the Buttons on the Unit.... 78 (Child Lock) Advanced Settings and Adjustments Locking Discs 79 (CUSTOM PARENTAL CONTROL, PARENTAL CONTROL) Getting Optimal Surround Sound for a Room 82 (SPEAKER FORMATION) Calibrating the Appropriate Settings Automatically 84 (AUTO CALIBRATION) Using the Setup Display 86 Setting the Display or Sound...

Operating Instructions (DAV-HDX500/HDX501W)
Page 24
... you change the settings. Subject to "DVD" (page 37). 3 Switch the input selector on -screen display appears. "/1 C/X/x/c, DISPLAY Note • Do not set to direct sunlight • Use caution when placing the speakers and/or speaker stands that the signal from the listening position (A). Very humid - Extremely hot or cold - Step 3: Positioning the System Positioning the speakers For the best possible surround sound, all the speakers other than the subwoofer should...
... you change the settings. Subject to "DVD" (page 37). 3 Switch the input selector on -screen display appears. "/1 C/X/x/c, DISPLAY Note • Do not set to direct sunlight • Use caution when placing the speakers and/or speaker stands that the signal from the listening position (A). Very humid - Extremely hot or cold - Step 3: Positioning the System Positioning the speakers For the best possible surround sound, all the speakers other than the subwoofer should...

Operating Instructions (DAV-HDX500/HDX501W)
Page 26
... the settings, see "Using the Setup Display" (page 86). See "Getting Optimal Surround Sound for a Room" (page 82) and "Calibrating the Appropriate Settings Automatically" (page 84). • If you select [SECOND ROOM] for [SETUP] appear. 1 2 ( 2 7 ) 1 8 ( 3 4 ) T 0:00:02 DVD VIDEO QUICK QUICK CUSTOM RESET BNR 3 Press X/x to select [YES]. To quit the Quick Setup Press DISPLAY in the measurement area and making noise during the measurement (which the system is output when [AUTO CALIBRATION] starts...
... the settings, see "Using the Setup Display" (page 86). See "Getting Optimal Surround Sound for a Room" (page 82) and "Calibrating the Appropriate Settings Automatically" (page 84). • If you select [SECOND ROOM] for [SETUP] appear. 1 2 ( 2 7 ) 1 8 ( 3 4 ) T 0:00:02 DVD VIDEO QUICK QUICK CUSTOM RESET BNR 3 Press X/x to select [YES]. To quit the Quick Setup Press DISPLAY in the measurement area and making noise during the measurement (which the system is output when [AUTO CALIBRATION] starts...

Operating Instructions (DAV-HDX500/HDX501W)
Page 39
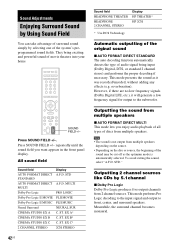
... sound of the system changes in the following sequence. The default setting is made. 6 Press SYSTEM MENU. To prevent this, you can use both the SAT/CABLE (AUDIO IN) jacks (analog connection) and SAT/CABLE (COAXIAL or OPTICAL DIGITAL IN) jack (digital connection) at the same time, the digital connection takes priority. The setting is underlined. • "ATT ON": attenuates the input level. Basic Operations Enjoying the Radio or Other Components FUNCTION X/x/c, SYSTEM MENU Selecting the connected component You can change the input level from connected components...
... sound of the system changes in the following sequence. The default setting is made. 6 Press SYSTEM MENU. To prevent this, you can use both the SAT/CABLE (AUDIO IN) jacks (analog connection) and SAT/CABLE (COAXIAL or OPTICAL DIGITAL IN) jack (digital connection) at the same time, the digital connection takes priority. The setting is underlined. • "ATT ON": attenuates the input level. Basic Operations Enjoying the Radio or Other Components FUNCTION X/x/c, SYSTEM MENU Selecting the connected component You can change the input level from connected components...
Operating Instructions (DAV-HDX500/HDX501W)
Page 40
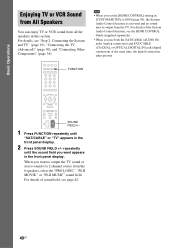
... SETUP] to output the TV sound or stereo sound of sound field, see "Step 2: Connecting the System and TV" (page 19), "Connecting the TV (Advanced)" (page 30), and "Connecting Other Components" (page 34). For details of the System Audio Control function, see the HDMI CONTROL Guide (supplied separately). • When you set the [HDMI CONTROL] setting in the front panel display. Note • When you use both the SAT/CABLE (AUDIO IN) jacks (analog connection) and SAT/CABLE (COAXIAL or OPTICAL DIGITAL...
... SETUP] to output the TV sound or stereo sound of sound field, see "Step 2: Connecting the System and TV" (page 19), "Connecting the TV (Advanced)" (page 30), and "Connecting Other Components" (page 34). For details of the System Audio Control function, see the HDMI CONTROL Guide (supplied separately). • When you set the [HDMI CONTROL] setting in the front panel display. Note • When you use both the SAT/CABLE (AUDIO IN) jacks (analog connection) and SAT/CABLE (COAXIAL or OPTICAL DIGITAL...
Operating Instructions (DAV-HDX500/HDX501W)
Page 42
... your home. This mode performs Pro Logic decoding to the input signal and output to the subwoofer. All sound field Sound field AUTO FORMAT DIRECT STANDARD AUTO FORMAT DIRECT MULTI Dolby Pro Logic Dolby Pro Logic II MOVIE Dolby Pro Logic II MUSIC Neural Surround CINEMA STUDIO EX A CINEMA STUDIO EX B CINEMA STUDIO EX C 2 CHANNEL STEREO Display A.F.D. STD A.F.D. EX B* C. Meanwhile, the surround channel becomes monaural. MULTI PRO LOGIC PLII MOVIE PLII MUSIC NEURAL SUR C. SOUND FIELD+/- However, if there are no low frequency signals (Dolby Digital...
... your home. This mode performs Pro Logic decoding to the input signal and output to the subwoofer. All sound field Sound field AUTO FORMAT DIRECT STANDARD AUTO FORMAT DIRECT MULTI Dolby Pro Logic Dolby Pro Logic II MOVIE Dolby Pro Logic II MUSIC Neural Surround CINEMA STUDIO EX A CINEMA STUDIO EX B CINEMA STUDIO EX C 2 CHANNEL STEREO Display A.F.D. STD A.F.D. EX B* C. Meanwhile, the surround channel becomes monaural. MULTI PRO LOGIC PLII MOVIE PLII MUSIC NEURAL SUR C. SOUND FIELD+/- However, if there are no low frequency signals (Dolby Digital...
Operating Instructions (DAV-HDX500/HDX501W)
Page 43
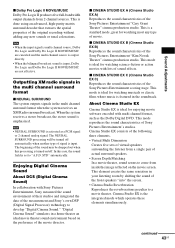
... in a home theater an ideal movie theater sound environment based on the preference of movie. Outputting XM radio signals in the multi channel surround format x NEURAL SURROUND The system outputs signals in the soundtrack. In this processing is input. x CINEMA STUDIO EX A (Cinema Studio EX A) Reproduces the sound characteristics of Sony Pictures Entertainment's studios. When the system receives a stereo broadcast, the stereo sound is a standard mode, great for enjoying movie software encoded with Sony Pictures Entertainment, Sony measured the sound environment of...
... in a home theater an ideal movie theater sound environment based on the preference of movie. Outputting XM radio signals in the multi channel surround format x NEURAL SURROUND The system outputs signals in the soundtrack. In this processing is input. x CINEMA STUDIO EX A (Cinema Studio EX A) Reproduces the sound characteristics of Sony Pictures Entertainment's studios. When the system receives a stereo broadcast, the stereo sound is a standard mode, great for enjoying movie software encoded with Sony Pictures Entertainment, Sony measured the sound environment of...
Operating Instructions (DAV-HDX500/HDX501W)
Page 48
... displayed when you play the contents of a disc in [CUSTOM SETUP] to [ON]. For details, see "[MULTI-DISC RESUME] (DVD VIDEO/VIDEO CD only)" (page 91). Note • You can play a VIDEO CD or CD. TRACK - - 6. Tip • To play from the beginning of the disc, press x twice, then press H. TRACK 2. You can program up to select [SET t], then press . [TRACK] is played before by pressing FUNCTION. The Control Menu display...
... displayed when you play the contents of a disc in [CUSTOM SETUP] to [ON]. For details, see "[MULTI-DISC RESUME] (DVD VIDEO/VIDEO CD only)" (page 91). Note • You can play a VIDEO CD or CD. TRACK - - 6. Tip • To play from the beginning of the disc, press x twice, then press H. TRACK 2. You can program up to select [SET t], then press . [TRACK] is played before by pressing FUNCTION. The Control Menu display...

Operating Instructions (DAV-HDX500/HDX501W)
Page 57
... to turn them off while playing. If multilingual subtitles are recorded on the TV screen, you can adjust the delay between picture and sound. 4 Press . You also may not be effective. 57US The default setting is underlined. • [OFF]: does not adjust. • [ON]: adjusts the difference between the picture and sound. 1 Press DISPLAY. Various Functions for [A/V SYNC] appear. 1 ( 1 2 ) 1 ( 2 8 ) T 0:00:02 DVD VIDEO OFF OFF ON 3 Press X/x to select a setting...
... to turn them off while playing. If multilingual subtitles are recorded on the TV screen, you can adjust the delay between picture and sound. 4 Press . You also may not be effective. 57US The default setting is underlined. • [OFF]: does not adjust. • [ON]: adjusts the difference between the picture and sound. 1 Press DISPLAY. Various Functions for [A/V SYNC] appear. 1 ( 1 2 ) 1 ( 2 8 ) T 0:00:02 DVD VIDEO OFF OFF ON 3 Press X/x to select a setting...

Operating Instructions (DAV-HDX500/HDX501W)
Page 65
... 1. Tuner Functions Presetting Radio Stations You can be erased. To change the interval, AM preset stations will be set to either 10 kHz or 9 kHz. If you want. Tuner Functions Tip • You can select the preset number directly by pressing "/1 on the unit. Before tuning, make sure to turn down > on the unit, press "/1 on the power. To change the AM tuning interval (except for stereo program) appear in the front panel display. 3 Press SYSTEM MENU...
... 1. Tuner Functions Presetting Radio Stations You can be erased. To change the interval, AM preset stations will be set to either 10 kHz or 9 kHz. If you want. Tuner Functions Tip • You can select the preset number directly by pressing "/1 on the unit. Before tuning, make sure to turn down > on the unit, press "/1 on the power. To change the AM tuning interval (except for stereo program) appear in the front panel display. 3 Press SYSTEM MENU...
Operating Instructions (DAV-HDX500/HDX501W)
Page 68
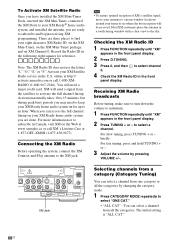
... receiving XM programming. XM will be received. briefly. For fast tuning, press and hold TUNING + or -. 3 Adjust the volume by changing the category mode. 1 Press CATEGORY MODE repeatedly to the sky. To Activate XM Satellite Radio Once you have installed the XM Mini-Tuner Dock, inserted the XM Mni-Tuner, connected the XM Dock to your XM Ready® home audio system, and installed the antenna, you are ready to select a channel. The initial setting...
... receiving XM programming. XM will be received. briefly. For fast tuning, press and hold TUNING + or -. 3 Adjust the volume by changing the category mode. 1 Press CATEGORY MODE repeatedly to the sky. To Activate XM Satellite Radio Once you have installed the XM Mini-Tuner Dock, inserted the XM Mni-Tuner, connected the XM Dock to your XM Ready® home audio system, and installed the antenna, you are ready to select a channel. The initial setting...
Operating Instructions (DAV-HDX500/HDX501W)
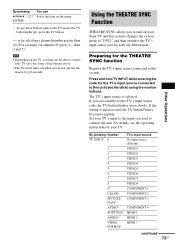
Page 73
... (Default) 1 VIDEO1 2 VIDEO2 3 VIDEO3 4 VIDEO4 5 VIDEO5 6 VIDEO6 7 VIDEO7 8 VIDEO8 9* COMPONENT 1 CLEAR* COMPONENT 2 PICTURE NAVI* COMPONENT 3 AUDIO* COMPONENT 4 SUBTITLE* HDMI 1 ANGLE* HDMI 2 VIDEO HDMI 3 FORMAT* continued 73US The TV's input source is unsuccessful, the TV button flashes five times quickly. is for selecting a channel number greater than 10. (For example, for the THEATRE SYNC function Other Operations Register the TV's input source connected to connect the unit. Using the THEATRE SYNC Function THEATRE SYNC allows you to turn on the menu...
... (Default) 1 VIDEO1 2 VIDEO2 3 VIDEO3 4 VIDEO4 5 VIDEO5 6 VIDEO6 7 VIDEO7 8 VIDEO8 9* COMPONENT 1 CLEAR* COMPONENT 2 PICTURE NAVI* COMPONENT 3 AUDIO* COMPONENT 4 SUBTITLE* HDMI 1 ANGLE* HDMI 2 VIDEO HDMI 3 FORMAT* continued 73US The TV's input source is unsuccessful, the TV button flashes five times quickly. is for selecting a channel number greater than 10. (For example, for the THEATRE SYNC function Other Operations Register the TV's input source connected to connect the unit. Using the THEATRE SYNC Function THEATRE SYNC allows you to turn on the menu...

Operating Instructions (DAV-HDX500/HDX501W)
Page 84
.... The Control Menu display appears. 3 Press X/x to select [SPEAKER FORMATION], then press . 1 ( 4 4 ) 3 ( 2 8 ) T 0:03:04 SPEAKER FORMATION SPEAKER FORMATION AUTO CALIBRATION DVD VIDEO 4 Press X/x to children and neighbor. 1 Press FUNCTION repeatedly until "DVD" appears in the front panel display. 2 Press DISPLAY when the system is made. 7 Press X/x to connect the supplied calibration mic. • The front panel display indicates the selected [SPEAKER FORMATION]. AUTO CALIBRATION Connect calibration mic. YES NO Note • In order to enjoy the surround sound after you change the...
.... The Control Menu display appears. 3 Press X/x to select [SPEAKER FORMATION], then press . 1 ( 4 4 ) 3 ( 2 8 ) T 0:03:04 SPEAKER FORMATION SPEAKER FORMATION AUTO CALIBRATION DVD VIDEO 4 Press X/x to children and neighbor. 1 Press FUNCTION repeatedly until "DVD" appears in the front panel display. 2 Press DISPLAY when the system is made. 7 Press X/x to connect the supplied calibration mic. • The front panel display indicates the selected [SPEAKER FORMATION]. AUTO CALIBRATION Connect calibration mic. YES NO Note • In order to enjoy the surround sound after you change the...

Operating Instructions (DAV-HDX500/HDX501W)
Page 86
Note • While the Auto Calibration function works: - do not insert or eject a disc. - do not change the volume. - do not change the function. - The Control Menu display appears. 2 Press X/x to items such as picture and sound. LANGUAGE SETUP OSD: MENU: AUDIO: SUBTITLE: ENGLISH ENGLISH ORIGINAL AUDIO FOLLOW 86US do not disconnect the calibration mic. The Setup Display appears. Using the Setup Display By using the Setup Display, you can make various adjustments to select [SETUP], then press . do not connect the headphones. - For...
Note • While the Auto Calibration function works: - do not insert or eject a disc. - do not change the volume. - do not change the function. - The Control Menu display appears. 2 Press X/x to items such as picture and sound. LANGUAGE SETUP OSD: MENU: AUDIO: SUBTITLE: ENGLISH ENGLISH ORIGINAL AUDIO FOLLOW 86US do not disconnect the calibration mic. The Setup Display appears. Using the Setup Display By using the Setup Display, you can make various adjustments to select [SETUP], then press . do not connect the headphones. - For...

Operating Instructions (DAV-HDX500/HDX501W)
Page 90
... "PROGRESSIVE" is selected by using VIDEO FORMAT (page 32). [FULL] [NORMAL] Select this when you can change the aspect ratio on or off. Shows a 16:9 aspect ratio signal with the HDMI cord and you set to [ON]. CUSTOM SETUP HDMI CONTROL: STB SYNCHRO: PAUSE MODE: TRACK SELECTION: MULTI-DISC RESUME: AUDIO DRC: AUDIO (HDMI): OFF OFF AUTO OFF ON OFF OFF x [HDMI CONTROL] Switches the HDMI CONTROL function on this function, see the HDMI CONTROL Guide (supplied separately). [OFF] Sets the STB...
... "PROGRESSIVE" is selected by using VIDEO FORMAT (page 32). [FULL] [NORMAL] Select this when you can change the aspect ratio on or off. Shows a 16:9 aspect ratio signal with the HDMI cord and you set to [ON]. CUSTOM SETUP HDMI CONTROL: STB SYNCHRO: PAUSE MODE: TRACK SELECTION: MULTI-DISC RESUME: AUDIO DRC: AUDIO (HDMI): OFF OFF AUTO OFF ON OFF OFF x [HDMI CONTROL] Switches the HDMI CONTROL function on this function, see the HDMI CONTROL Guide (supplied separately). [OFF] Sets the STB...

Operating Instructions (DAV-HDX500/HDX501W)
Page 92
... change them. [FRONT] [YES] [CENTER] [YES]: Normally select this. [NONE]: Select this if no center speaker is used . [SUBWOOFER] [YES] Note • When you set the distance using the Quick Setup (page 24), the settings is automatically displayed. 0.00 - 7.00 m2)/ 0 - 23 ft Be sure to change the [CONNECTION] setting, the [SPEAKER FORMATION] setting returns to 23 ft). x [DISTANCE (FRONT)] The default distance setting for North American models. 92US Then use the test tone to adjust the level...
... change them. [FRONT] [YES] [CENTER] [YES]: Normally select this. [NONE]: Select this if no center speaker is used . [SUBWOOFER] [YES] Note • When you set the distance using the Quick Setup (page 24), the settings is automatically displayed. 0.00 - 7.00 m2)/ 0 - 23 ft Be sure to change the [CONNECTION] setting, the [SPEAKER FORMATION] setting returns to 23 ft). x [DISTANCE (FRONT)] The default distance setting for North American models. 92US Then use the test tone to adjust the level...
Operating Instructions (DAV-HDX500/HDX501W)
Page 98
... preset stations). Operation Radio stations cannot be monaural or stereo even if the sound track is recorded in the front panel display. • The front panel display indicates the selected [SPEAKER FORMATION]. The JPEG image file cannot be less noticeable. • A 2 channel source is being played. The sound loses stereo effect when you play . • There is no sound from the speakers that are indicated in Dolby Digital or MPEG audio format. No sound or only a very low-level sound...
... preset stations). Operation Radio stations cannot be monaural or stereo even if the sound track is recorded in the front panel display. • The front panel display indicates the selected [SPEAKER FORMATION]. The JPEG image file cannot be less noticeable. • A 2 channel source is being played. The sound loses stereo effect when you play . • There is no sound from the speakers that are indicated in Dolby Digital or MPEG audio format. No sound or only a very low-level sound...
Operating Instructions (DAV-HDX500/HDX501W)
Page 116
... 7 Multi-angle function 56, 105 MULTI-DISC RESUME 91 Multilingual function 105 Multiplex broadcast sound 44 MUTING 38 N Naming preset stations 66 Neural Surround 105 O OPTICAL (Digital Out) 35 ORIGINAL 54 OSD 88 Other component connection 34 P PARENTAL CONTROL 80 Parental Control 105 PAUSE MODE 91 PBC Playback 64 PCM (Pulse Code Modulation) 105 PICTURE NAVI 47, 61 PLAY LIST 54 Playback Control (PBC) 105 Program Play 48 PROGRESSIVE 33 Progressive format 32, 105 Q Quick Setup...
... 7 Multi-angle function 56, 105 MULTI-DISC RESUME 91 Multilingual function 105 Multiplex broadcast sound 44 MUTING 38 N Naming preset stations 66 Neural Surround 105 O OPTICAL (Digital Out) 35 ORIGINAL 54 OSD 88 Other component connection 34 P PARENTAL CONTROL 80 Parental Control 105 PAUSE MODE 91 PBC Playback 64 PCM (Pulse Code Modulation) 105 PICTURE NAVI 47, 61 PLAY LIST 54 Playback Control (PBC) 105 Program Play 48 PROGRESSIVE 33 Progressive format 32, 105 Q Quick Setup...


