Operating Instructions
Page 2
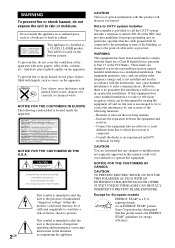
.... Reorient or relocate the receiving antenna. - Increase the separation between the equipment and receiver. - As an ENERGY STAR® partner, Sony Corporation has determined that any changes or modifications not expressly approved in a particular installation. WARNING To prevent fire or shock hazard, do not...fire or shock hazard, do not place objects filled with the instructions, may be connected to the grounding system of the building, as close to operate this manual could void your authority to the point of the following caution label is located on the apparatus. NOTICE ...
.... Reorient or relocate the receiving antenna. - Increase the separation between the equipment and receiver. - As an ENERGY STAR® partner, Sony Corporation has determined that any changes or modifications not expressly approved in a particular installation. WARNING To prevent fire or shock hazard, do not...fire or shock hazard, do not place objects filled with the instructions, may be connected to the grounding system of the building, as close to operate this manual could void your authority to the point of the following caution label is located on the apparatus. NOTICE ...
Operating Instructions
Page 3
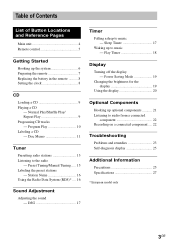
... Remote control 5 Getting Started Hooking up optional components 21 Listening to audio from a connected component 22 Recording on a connected component .... 22 Troubleshooting Problems and remedies 23 Self-diagnosis...Power Saving Mode 19 Changing the brightness for the display 19 Using the display 20 Optional Components Hooking up the system 6 Preparing the remote 7 Replacing the battery in the remote .......... 8 Setting the clock... Name 16 Using the Radio Data System (RDS)* .... 16 Sound Adjustment Adjusting the sound - Normal Play/Shuffle Play/ Repeat Play 9 Programing ...
... Remote control 5 Getting Started Hooking up optional components 21 Listening to audio from a connected component 22 Recording on a connected component .... 22 Troubleshooting Problems and remedies 23 Self-diagnosis...Power Saving Mode 19 Changing the brightness for the display 19 Using the display 20 Optional Components Hooking up the system 6 Preparing the remote 7 Replacing the battery in the remote .......... 8 Setting the clock... Name 16 Using the Radio Data System (RDS)* .... 16 Sound Adjustment Adjusting the sound - Normal Play/Shuffle Play/ Repeat Play 9 Programing ...
Operating Instructions
Page 13
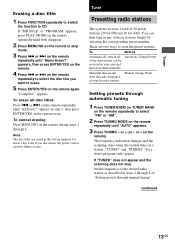
... the remote repeatedly until "AUTO" appears. 3 Press TUNING - appears in stop Set the frequency of the desired radio station as described in steps 2 through manual tuning". or + on the remote. 4 Press . If "TUNED" does not appear and the scanning does not stop mode. 3 Press . "Complete!"...the remote). or > on the remote repeatedly until "Name Erase?" There are saved in a station. continued 13GB Tuner Presetting radio stations The system can store a total of "Setting presets through 8 of 30 preset stations (20 for FM and 10 for AM). The frequency indication changes ...
... the remote repeatedly until "AUTO" appears. 3 Press TUNING - appears in stop Set the frequency of the desired radio station as described in steps 2 through manual tuning". or + on the remote. 4 Press . If "TUNED" does not appear and the scanning does not stop mode. 3 Press . "Complete!"...the remote). or > on the remote repeatedly until "Name Erase?" There are saved in a station. continued 13GB Tuner Presetting radio stations The system can store a total of "Setting presets through 8 of 30 preset stations (20 for FM and 10 for AM). The frequency indication changes ...
Operating Instructions
Page 14
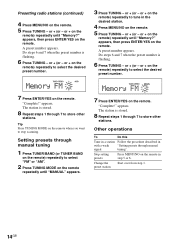
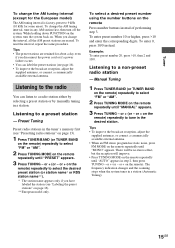
...Start over from step 1. 14GB A preset number appears. appears, then press ENTER/YES on the remote in with a weak "Setting presets through manual tuning 1 Press TUNER/BAND (or TUNER BAND on the remote) repeatedly to select the desired preset number. 3 Press TUNING - appears. The station...or + (or - Tip Press TUNING MODE on the remote) repeatedly to select "FM" or "AM". 2 Press TUNING MODE on the remote repeatedly until "MANUAL" appears. 7 Press ENTER/YES on the remote. 5 Press TUNING - or + on the remote. Presetting radio stations (continued) 4 Press MENU/NO on the...
...Start over from step 1. 14GB A preset number appears. appears, then press ENTER/YES on the remote in with a weak "Setting presets through manual tuning 1 Press TUNER/BAND (or TUNER BAND on the remote) repeatedly to select the desired preset number. 3 Press TUNING - appears. The station...or + (or - Tip Press TUNING MODE on the remote) repeatedly to select "FM" or "AM". 2 Press TUNING MODE on the remote repeatedly until "MANUAL" appears. 7 Press ENTER/YES on the remote. 5 Press TUNING - or + on the remote. Presetting radio stations (continued) 4 Press MENU/NO on the...
Operating Instructions
Page 15
...To reset the interval, repeat the same procedure. To select a desired preset number using the number buttons on the remote repeatedly until "MANUAL" appears. 3 Press TUNING - Manual Tuning 1 Press TUNER/BAND (or TUNER BAND on the remote) repeatedly to select "FM" or "AM". 2 Press TUNING MODE ...page 13). 1 Press TUNER/BAND (or TUNER BAND on the remote) repeatedly to tune in a station (Automatic Tuning). 15GB or + on the system, turn off the system. or + (or - While holding down FUNCTION on the remote) repeatedly to select "FM" or "AM". 2 Press TUNING MODE on . The...
...To reset the interval, repeat the same procedure. To select a desired preset number using the number buttons on the remote repeatedly until "MANUAL" appears. 3 Press TUNING - Manual Tuning 1 Press TUNER/BAND (or TUNER BAND on the remote) repeatedly to select "FM" or "AM". 2 Press TUNING MODE ...page 13). 1 Press TUNER/BAND (or TUNER BAND on the remote) repeatedly to tune in a station (Automatic Tuning). 15GB or + on the system, turn off the system. or + (or - While holding down FUNCTION on the remote) repeatedly to select "FM" or "AM". 2 Press TUNING MODE on . The...
Marketing Specifications
Page 2
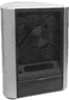
....0MHz Antenna: FM Lead Antenna Antenna Terminals: 75 ohms Unbalanced ©2002 Sony Electronics Inc. Dolby Digital is a registered trademark of 6 to your favorite music. Product Information CMT-EX5 Micro System KEY TECHNOLOGY Radio Presets Finding your favorite radio stations over and over again can...Tape, or Radio Station, or wake up to 16 ohms. General • Power Requirements: AC120V, 60Hz Accessories Supplied Accessories • Instruction Manual • Remote Commander® Remote Control RM-SCEX5 • AM Loop Antenna • FM Lead Antenna Weights & Measures • Main ...
....0MHz Antenna: FM Lead Antenna Antenna Terminals: 75 ohms Unbalanced ©2002 Sony Electronics Inc. Dolby Digital is a registered trademark of 6 to your favorite music. Product Information CMT-EX5 Micro System KEY TECHNOLOGY Radio Presets Finding your favorite radio stations over and over again can...Tape, or Radio Station, or wake up to 16 ohms. General • Power Requirements: AC120V, 60Hz Accessories Supplied Accessories • Instruction Manual • Remote Commander® Remote Control RM-SCEX5 • AM Loop Antenna • FM Lead Antenna Weights & Measures • Main ...

