
Operating Instructions
Page 5
...Adjusting the Picture Quality (BNR 46 Using Various Additional Functions 47 Locking Discs (Custom Parental Control, Parental Control 47 Operation Sound Effects (Sound Feedback 52 Controlling Your TV with the Supplied Remote 53 Settings and Adjustments 54 Using the Setup Display 54 Setting the Display ...Language (LANGUAGE SETUP) . . . . . 55 Settings for the Display (SCREEN SETUP 56 Custom Settings (CUSTOM SETUP 57 Settings for the Sound (AUDIO SETUP 58 Additional Information 61 Troubleshooting 61 Self-diagnosis Function (When letters/numbers appear in the display) . . . . . 63 Glossary...
...Adjusting the Picture Quality (BNR 46 Using Various Additional Functions 47 Locking Discs (Custom Parental Control, Parental Control 47 Operation Sound Effects (Sound Feedback 52 Controlling Your TV with the Supplied Remote 53 Settings and Adjustments 54 Using the Setup Display 54 Setting the Display ...Language (LANGUAGE SETUP) . . . . . 55 Settings for the Display (SCREEN SETUP 56 Custom Settings (CUSTOM SETUP 57 Settings for the Sound (AUDIO SETUP 58 Additional Information 61 Troubleshooting 61 Self-diagnosis Function (When letters/numbers appear in the display) . . . . . 63 Glossary...

Operating Instructions
Page 14
...page 17. Doing so may cause a malfunction. • If you do not use the surround sound features of this player, refer to the markings inside the compartment. Note You cannot connect this player to avoid possible damage from the sun or lighting apparatus. Step 1: Unpacking Check that does not ... Do not leave the remote in this chapter will give you enough information to start using the player for an extended period of time, remove the batteries to a TV that you have a video input jack. Be sure to direct light from battery leakage and corrosion. 14 Getting Started Quick ...
...page 17. Doing so may cause a malfunction. • If you do not use the surround sound features of this player, refer to the markings inside the compartment. Note You cannot connect this player to avoid possible damage from the sun or lighting apparatus. Step 1: Unpacking Check that does not ... Do not leave the remote in this chapter will give you enough information to start using the player for an extended period of time, remove the batteries to a TV that you have a video input jack. Be sure to direct light from battery leakage and corrosion. 14 Getting Started Quick ...

Operating Instructions
Page 20
A Connecting to your TV This connection will use your TV speakers for video signals (page 17). (yellow) TV (white) (red) to audio input 20 xRecommended surround sound effects for this connection •TVS DYNAMIC (page 43) •TVS WIDE (page 43) CD/DVD player DIGITAL OUT PCM/DTS/ DOLBY DIGITAL COAXIAL OPTICAL LINE OUT S VIDEO COMPONENT OUT VIDEO OUT Y R-AUDIO 1-L VIDEO 1 PB PR R-AUDIO 2-L VIDEO 2 A LINE OUT R-AUDIO 1-L VIDEO 1 R-AUDIO 2-L VIDEO 2 (yellow) (white) (red) Audio/video cord (supplied) l : Signal flow The yellow plug is used for sound.
A Connecting to your TV This connection will use your TV speakers for video signals (page 17). (yellow) TV (white) (red) to audio input 20 xRecommended surround sound effects for this connection •TVS DYNAMIC (page 43) •TVS WIDE (page 43) CD/DVD player DIGITAL OUT PCM/DTS/ DOLBY DIGITAL COAXIAL OPTICAL LINE OUT S VIDEO COMPONENT OUT VIDEO OUT Y R-AUDIO 1-L VIDEO 1 PB PR R-AUDIO 2-L VIDEO 2 A LINE OUT R-AUDIO 1-L VIDEO 1 R-AUDIO 2-L VIDEO 2 (yellow) (white) (red) Audio/video cord (supplied) l : Signal flow The yellow plug is used for sound.

Operating Instructions
Page 21
... •TVS STANDARD (page 43) z In connection B-1 , you can also connect the player directly to your stereo amplifier (receiver) for sound. CD/DVD player DIGITAL OUT PCM/DTS/ DOLBY DIGITAL COAXIAL OPTICAL LINE OUT S VIDEO COMPONENT OUT VIDEO OUT Y R-AUDIO 1-L VIDEO 1 PB PR R-AUDIO 2-L VIDEO 2 B-2 DIGITAL OUT PCM/DTS/ DOLBY DIGITAL COAXIAL OPTICAL Stereo audio cord Coaxial digital...
... •TVS STANDARD (page 43) z In connection B-1 , you can also connect the player directly to your stereo amplifier (receiver) for sound. CD/DVD player DIGITAL OUT PCM/DTS/ DOLBY DIGITAL COAXIAL OPTICAL LINE OUT S VIDEO COMPONENT OUT VIDEO OUT Y R-AUDIO 1-L VIDEO 1 PB PR R-AUDIO 2-L VIDEO 2 B-2 DIGITAL OUT PCM/DTS/ DOLBY DIGITAL COAXIAL OPTICAL Stereo audio cord Coaxial digital...

Operating Instructions
Page 22
...(Pro Logic) (page 64) z For correct speaker setting location, please refer to the operating instructions of the amplifier (receiver). xRecommended surround sound effects using this connection with your amplifier (receiver) has a digital input jack, use C-1 . C Connecting to a Dolby Surround (Pro ...DTS decoder, refer to page 23. If your amplifier (receiver). CD/DVD player DIGITAL OUT PCM/DTS/ DOLBY DIGITAL COAXIAL OPTICAL LINE OUT S VIDEO COMPONENT OUT VIDEO OUT Y R-AUDIO 1-L VIDEO 1 PB PR R-AUDIO 2-L VIDEO 2 C-2 DIGITAL OUT PCM/DTS/ DOLBY DIGITAL COAXIAL OPTICAL Stereo audio ...
...(Pro Logic) (page 64) z For correct speaker setting location, please refer to the operating instructions of the amplifier (receiver). xRecommended surround sound effects using this connection with your amplifier (receiver) has a digital input jack, use C-1 . C Connecting to a Dolby Surround (Pro ...DTS decoder, refer to page 23. If your amplifier (receiver). CD/DVD player DIGITAL OUT PCM/DTS/ DOLBY DIGITAL COAXIAL OPTICAL LINE OUT S VIDEO COMPONENT OUT VIDEO OUT Y R-AUDIO 1-L VIDEO 1 PB PR R-AUDIO 2-L VIDEO 2 C-2 DIGITAL OUT PCM/DTS/ DOLBY DIGITAL COAXIAL OPTICAL Stereo audio ...

Operating Instructions
Page 23
..., and 6 speakers This connection will come from the speakers. xRecommended surround sound effects using this connection with a decoder [Speakers] Front (L) Center 23 CD/DVD player DIGITAL OUT PCM/DTS/ DOLBY DIGITAL COAXIAL OPTICAL LINE OUT S VIDEO COMPONENT OUT VIDEO OUT Y R-AUDIO 1-L VIDEO 1 PB PR R-AUDIO 2-L VIDEO 2 DIGITAL OUT D PCM/DTS/ DOLBY DIGITAL COAXIAL OPTICAL or Optical digital...
..., and 6 speakers This connection will come from the speakers. xRecommended surround sound effects using this connection with a decoder [Speakers] Front (L) Center 23 CD/DVD player DIGITAL OUT PCM/DTS/ DOLBY DIGITAL COAXIAL OPTICAL LINE OUT S VIDEO COMPONENT OUT VIDEO OUT Y R-AUDIO 1-L VIDEO 1 PB PR R-AUDIO 2-L VIDEO 2 DIGITAL OUT D PCM/DTS/ DOLBY DIGITAL COAXIAL OPTICAL or Optical digital...

Operating Instructions
Page 26
...items must be adjusted when you selected in the Control Menu (page 54). Choose the item that matches the audio connection you first connect the player. Quick Setup is selected. To run it for the first time. Refer to page 56 for the audio connection you run Quick Setup a...C-2 AD You select OFF ON (only if the amplifier/receiver has a DTS decoder) Page 59 59 qd Press ENTER. Enjoying the surround sound effects To enjoy the surround sound effects of these are complete. All connections and setup operations are the default settings and do not need to 23 ( B through AD ...
...items must be adjusted when you selected in the Control Menu (page 54). Choose the item that matches the audio connection you first connect the player. Quick Setup is selected. To run it for the first time. Refer to page 56 for the audio connection you run Quick Setup a...C-2 AD You select OFF ON (only if the amplifier/receiver has a DTS decoder) Page 59 59 qd Press ENTER. Enjoying the surround sound effects To enjoy the surround sound effects of these are complete. All connections and setup operations are the default settings and do not need to 23 ( B through AD ...

Operating Instructions
Page 27
B-2 C-2 D Item DOWNMIX DIGITAL OUT You select DOLBY SURROUND ON Page 58 59 27 B-1 C-1 Item You select Page DOWNMIX DOLBY SURROUND 58 • If the sound distorts even when the volume is turned down, set "AUDIO ATT" to 23) A No additional settings are needed. Hookups Audio Connection (page 19 to "ON" (page 58).
B-2 C-2 D Item DOWNMIX DIGITAL OUT You select DOLBY SURROUND ON Page 58 59 27 B-1 C-1 Item You select Page DOWNMIX DOLBY SURROUND 58 • If the sound distorts even when the volume is turned down, set "AUDIO ATT" to 23) A No additional settings are needed. Hookups Audio Connection (page 19 to "ON" (page 58).
Operating Instructions
Page 29
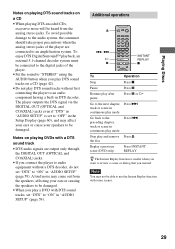
...mode Press . To avoid possible damage to the audio system, the consumer should take proper precautions when the analog stereo jacks of the player. • Set the sound to "STEREO" using the AUDIO button when you want to an amplification system. Note You may affect your ears or cause your ears... audio equipment without first connecting the player to "ON" in "AUDIO SETUP" is useful when you play DTS sound tracks on a CD (page 42). • Do not play mode Go back to be damaged. • When you play a DVD with DTS sound tracks, set "DTS" to an audio component having a built-in ...
...mode Press . To avoid possible damage to the audio system, the consumer should take proper precautions when the analog stereo jacks of the player. • Set the sound to "STEREO" using the AUDIO button when you want to an amplification system. Note You may affect your ears or cause your ears... audio equipment without first connecting the player to "ON" in "AUDIO SETUP" is useful when you play DTS sound tracks on a CD (page 42). • Do not play mode Go back to be damaged. • When you play a DVD with DTS sound tracks, set "DTS" to an audio component having a built-in ...

Operating Instructions
Page 31
... can select items such as the language for the subtitles and the language for the sound using the DVD menu. The player starts playing the selected title. On some DVDs, this may simply be called "titles." Using the title menu A DVD is divided into long sections of the menu vary from disc to disc. 2 Press...
... can select items such as the language for the subtitles and the language for the sound using the DVD menu. The player starts playing the selected title. On some DVDs, this may simply be called "titles." Using the title menu A DVD is divided into long sections of the menu vary from disc to disc. 2 Press...

Operating Instructions
Page 42
..., they represent the language code. Refer to the language code list on page 67 to select the desired audio signal. xWhen playing a VIDEO CD or CD The default setting is recorded in multiple audio formats (PCM, Dolby Digital or DTS), you can select the audio format ...you want while playing the DVD. If the DVD is underlined. • STEREO: The standard stereo sound • 1/L: The sound of the left speakers. (In this case, the sound loses its stereo effect.) For example, when playing a disc containing a song with ...
..., they represent the language code. Refer to the language code list on page 67 to select the desired audio signal. xWhen playing a VIDEO CD or CD The default setting is recorded in multiple audio formats (PCM, Dolby Digital or DTS), you can select the audio format ...you want while playing the DVD. If the DVD is underlined. • STEREO: The standard stereo sound • 1/L: The sound of the left speakers. (In this case, the sound loses its stereo effect.) For example, when playing a disc containing a song with ...

Operating Instructions
Page 43
...SURROUND repeatedly to select one of the TVS (TV Virtual Surround) sounds. Refer to work with the LINE OUT L/R (AUDIO) 1/2 jacks. Note that if you select one of the TVS settings while playing a DVD, the player does not output Dolby Digital signals from the DIGITAL OUT (COAXIAL ...and OPTICAL) jacks (when you enjoy surround sound effects by using sound imaging to "D-PCM") (page 59). This function is displayed. SURROUND 1 ...
...SURROUND repeatedly to select one of the TVS (TV Virtual Surround) sounds. Refer to work with the LINE OUT L/R (AUDIO) 1/2 jacks. Note that if you select one of the TVS settings while playing a DVD, the player does not output Dolby Digital signals from the DIGITAL OUT (COAXIAL ...and OPTICAL) jacks (when you enjoy surround sound effects by using sound imaging to "D-PCM") (page 59). This function is displayed. SURROUND 1 ...

Operating Instructions
Page 44
...listening position is useful when you use TVS with built-in speakers on the player lights up. However, not all discs will not have the TVS effect. 44 TVS (TV Virtual Surround) DYNAMIC Uses sound imaging to discern. • TVS NIGHT only works with built-in similar ...surroundings. This mode is effective when the distance between and at an equal distance from your speakers but the quieter sounds are located in speakers on the player. L: Left front speaker R: Right front speaker : Virtual speakers z You can also change the TVS setting by pressing SURROUND ...
...listening position is useful when you use TVS with built-in speakers on the player lights up. However, not all discs will not have the TVS effect. 44 TVS (TV Virtual Surround) DYNAMIC Uses sound imaging to discern. • TVS NIGHT only works with built-in similar ...surroundings. This mode is effective when the distance between and at an equal distance from your speakers but the quieter sounds are located in speakers on the player. L: Left front speaker R: Right front speaker : Virtual speakers z You can also change the TVS setting by pressing SURROUND ...

Operating Instructions
Page 52
... no disc in green. You will hear one beep and the Sound Feedback function is turned on the player for more than two seconds. Then press A again to off . Operation Sound Effects (Sound Feedback) The player beeps when the following operations are performed. Operation Operation sound Power is turned on the remote. When there is turned...
... no disc in green. You will hear one beep and the Sound Feedback function is turned on the player for more than two seconds. Then press A again to off . Operation Sound Effects (Sound Feedback) The player beeps when the following operations are performed. Operation Operation sound Power is turned on the remote. When there is turned...

Operating Instructions
Page 53
...C x c X x c C or X C c x c C c X Using Various Additional Functions You can control your TV using C/X/x/c. 2 Release TV [/1. Manufacturer's codes of controllable TVs. Manufacture Sony (default) General Electric JVC Panasonic Philips Quasar RCA Samsung Sanyo Sears Sharp Toshiba Zenith Press C/X/x/c to the default setting. Set the appropriate code again. Controlling...Supplied Remote By adjusting the remote signal, you can control the sound level, input source, and power switch of your TV with the supplied remote. TV [/1 TV/VIDEO VOL +/- C/X/x/c 1 Hold down TV [/1, and enter your ...
...C x c X x c C or X C c x c C c X Using Various Additional Functions You can control your TV using C/X/x/c. 2 Release TV [/1. Manufacturer's codes of controllable TVs. Manufacture Sony (default) General Electric JVC Panasonic Philips Quasar RCA Samsung Sanyo Sears Sharp Toshiba Zenith Press C/X/x/c to the default setting. Set the appropriate code again. Controlling...Supplied Remote By adjusting the remote signal, you can control the sound level, input source, and power switch of your TV with the supplied remote. TV [/1 TV/VIDEO VOL +/- C/X/x/c 1 Hold down TV [/1, and enter your ...

Operating Instructions
Page 54
... using the Setup Display, you can directly display the settings in stop mode. LANGUAGE SETUP OSD: DVD MENU: AUDIO: SUBTITLE: ENGLISH ENGLISH ORIGINAL AUDIO FOLLOW 4 Press X/x to select "CUSTOM" and ...an item using X/x, then press ENTER. You can make various adjustments to items such as picture and sound. Example: SCREEN SETUP SCREEN SETUP TV TYPE: SCREEN SAVER: BACKGROUND: 4:3 LETTER BOX ON JACKET ... screen. The setting is selected and setup is in "SETUP" on the remote when the player is complete. If you press SETUP on each Setup Display item, see page 68. For ...
... using the Setup Display, you can directly display the settings in stop mode. LANGUAGE SETUP OSD: DVD MENU: AUDIO: SUBTITLE: ENGLISH ENGLISH ORIGINAL AUDIO FOLLOW 4 Press X/x to select "CUSTOM" and ...an item using X/x, then press ENTER. You can make various adjustments to items such as picture and sound. Example: SCREEN SETUP SCREEN SETUP TV TYPE: SCREEN SAVER: BACKGROUND: 4:3 LETTER BOX ON JACKET ... screen. The setting is selected and setup is in "SETUP" on the remote when the player is complete. If you press SETUP on each Setup Display item, see page 68. For ...

Operating Instructions
Page 55
...) You can reset all of the Quick Setup explanation to the default settings. For details on the screen. xSUBTITLE (DVD only) Switches the language of the sound track. Select the language from the displayed list. When you can select the desired language for the subtitles changes according... SETUP) To turn off the Setup Display Press DISPLAY repeatedly until the Setup Display is selected. Do not press POWER or [/1 when resetting the player. Selects the language from the displayed list. z If you select "RESET" in Step 3, you select "ORIGINAL," the language given priority in ...
...) You can reset all of the Quick Setup explanation to the default settings. For details on the screen. xSUBTITLE (DVD only) Switches the language of the sound track. Select the language from the displayed list. When you can select the desired language for the subtitles changes according... SETUP) To turn off the Setup Display Press DISPLAY repeatedly until the Setup Display is selected. Do not press POWER or [/1 when resetting the player. Selects the language from the displayed list. z If you select "RESET" in Step 3, you select "ORIGINAL," the language given priority in ...

Operating Instructions
Page 58
... change. xAUDIO DRC (Dynamic Range Control) (DVD only) Makes the sound clear when the volume is distorted, set the sound according to "ON." LINE OUT L/R (AUDIO) 1/2 jacks - xTRACK SELECTION (DVD only) Gives the sound track which contains the highest number of channels, the player selects PCM, DTS and Dolby Digital sound tracks in "DIGITAL OUT" (page 59...
... change. xAUDIO DRC (Dynamic Range Control) (DVD only) Makes the sound clear when the volume is distorted, set the sound according to "ON." LINE OUT L/R (AUDIO) 1/2 jacks - xTRACK SELECTION (DVD only) Gives the sound track which contains the highest number of channels, the player selects PCM, DTS and Dolby Digital sound tracks in "DIGITAL OUT" (page 59...

Operating Instructions
Page 59
...especially recommended when you play a DVD on which reproduce the Dolby Surround effect are downmixed to 2 channels without the Dolby Surround (Pro Logic) effect. Select this when the player is connected to an audio component that conforms to the sound using a digital cord via ...the DIGITAL OUT (OPTICAL and COAXIAL) jacks. The player does not output the audio signals via the DIGITAL OUT (OPTICAL and COAXIAL) jacks. LINE OUT L/R (AUDIO) 1/2 jacks - xDOWNMIX (DVD only) Switches the mixing down...
...especially recommended when you play a DVD on which reproduce the Dolby Surround effect are downmixed to 2 channels without the Dolby Surround (Pro Logic) effect. Select this when the player is connected to an audio component that conforms to the sound using a digital cord via ...the DIGITAL OUT (OPTICAL and COAXIAL) jacks. The player does not output the audio signals via the DIGITAL OUT (OPTICAL and COAXIAL) jacks. LINE OUT L/R (AUDIO) 1/2 jacks - xDOWNMIX (DVD only) Switches the mixing down...

Operating Instructions
Page 60
... output via the DIGITAL OUT (OPTICAL and COAXIAL) jacks. OFF ON Select this . If the player is connected to "D-PCM"). 60 Note If you play the Dolby Digital sound track, a loud noise (or no sound) will come out from the DIGITAL OUT (COAXIAL and OPTICAL) jacks (when you set "DOLBY ... connected to the "DOWNMIX" item in Dolby Digital decoder. Otherwise, when you select one of the TVS settings while playing a DVD, the player does not output Dolby Digital signals from the speakers, affecting your ears or causing the speakers to an audio component lacking a built-in "...
... output via the DIGITAL OUT (OPTICAL and COAXIAL) jacks. OFF ON Select this . If the player is connected to "D-PCM"). 60 Note If you play the Dolby Digital sound track, a loud noise (or no sound) will come out from the DIGITAL OUT (COAXIAL and OPTICAL) jacks (when you set "DOLBY ... connected to the "DOWNMIX" item in Dolby Digital decoder. Otherwise, when you select one of the TVS settings while playing a DVD, the player does not output Dolby Digital signals from the speakers, affecting your ears or causing the speakers to an audio component lacking a built-in "...


