
Operating Instructions
Page 3
... not use power-line operated sets near or over a radiator or heat register, or where it is exposed to protect it from overheating, these slots and openings must never be sure the service technician has used replacement parts specified by being dropped, or the cabinet has been damaged. - Use a cloth lightly dampened with a cloth or other hazards. [ Safety Check Upon completion of time...
... not use power-line operated sets near or over a radiator or heat register, or where it is exposed to protect it from overheating, these slots and openings must never be sure the service technician has used replacement parts specified by being dropped, or the cabinet has been damaged. - Use a cloth lightly dampened with a cloth or other hazards. [ Safety Check Upon completion of time...
Operating Instructions
Page 7
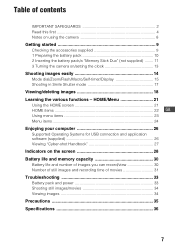
...30 Number of still images and recording time of movies 31 Troubleshooting 33 Battery pack and power 33 Shooting still images/movies 34 Viewing images 34 Precautions 35 Specifications 36 7 HOME/Menu 21 Using the HOME screen 21 HOME items 22 GB Using menu items 23 Menu items 24 Enjoying your computer 26 Supported Operating Systems for USB connection and application software (supplied 26 Viewing "Cyber-shot Handbook 27 Indicators on /setting the clock 13 Shooting images easily 14 Mode dial/Zoom/Flash/Macro/Self-timer/Display 15 Shooting in Smile Shutter mode 17 Viewing/deleting...
...30 Number of still images and recording time of movies 31 Troubleshooting 33 Battery pack and power 33 Shooting still images/movies 34 Viewing images 34 Precautions 35 Specifications 36 7 HOME/Menu 21 Using the HOME screen 21 HOME items 22 GB Using menu items 23 Menu items 24 Enjoying your computer 26 Supported Operating Systems for USB connection and application software (supplied 26 Viewing "Cyber-shot Handbook 27 Indicators on /setting the clock 13 Shooting images easily 14 Mode dial/Zoom/Flash/Macro/Self-timer/Display 15 Shooting in Smile Shutter mode 17 Viewing/deleting...
Operating Instructions
Page 8
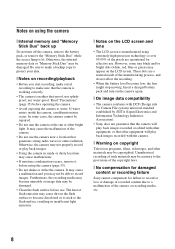
... of the camera or recording media, etc. 8 Otherwise, the internal memory data or "Memory Stick Duo" may appear on the LCD screen. In some tiny black and/or bright dots (white, red, blue or green) may be damaged. • Clean the flash surface before use. Be sure to make a backup copy to protect your data. [ Notes on the flash surface to become unusable or image data may not be repaired. • Do...
... of the camera or recording media, etc. 8 Otherwise, the internal memory data or "Memory Stick Duo" may appear on the LCD screen. In some tiny black and/or bright dots (white, red, blue or green) may be damaged. • Clean the flash surface before use. Be sure to make a backup copy to protect your data. [ Notes on the flash surface to become unusable or image data may not be repaired. • Do...

Operating Instructions
Page 11
... indicator flashes.) • If you use and circumstances. • The Clock Set screen appears when you turn on and check the remaining battery charge on conditions of the battery pack. 1 Open the battery/"Memory Stick Duo" cover. GB 2 Insert the "Memory Stick Duo" (not supplied). 3 Insert the battery pack. 4 Close the battery/"Memory Stick Duo" cover. [ When there is no "Memory Stick Duo" inserted The camera records/plays back images using the internal memory...
... indicator flashes.) • If you use and circumstances. • The Clock Set screen appears when you turn on and check the remaining battery charge on conditions of the battery pack. 1 Open the battery/"Memory Stick Duo" cover. GB 2 Insert the "Memory Stick Duo" (not supplied). 3 Insert the battery pack. 4 Close the battery/"Memory Stick Duo" cover. [ When there is no "Memory Stick Duo" inserted The camera records/plays back images using the internal memory...

Operating Instructions
Page 22
... Copy Function Guide COMPONENT Wide Zoom Display Grid Line Digital Zoom Auto Review * DSC-W120/W125/W130 only. 22 Folder Internal Memory Tool Format Main Settings Main Settings 1 Beep Initialize Main Settings 2 USB Connect Video Out Shooting Settings Shooting Settings 1 AF Illuminator AF Mode Conversion Lens Shooting Settings 2 Auto Orientation* Clock Settings Language Setting Format Music Create REC. For details on the operation 1 page 21 HOME items Pressing HOME displays the following items. Details on the items are displayed on the screen by the guide. Categories Shooting View Images...
... Copy Function Guide COMPONENT Wide Zoom Display Grid Line Digital Zoom Auto Review * DSC-W120/W125/W130 only. 22 Folder Internal Memory Tool Format Main Settings Main Settings 1 Beep Initialize Main Settings 2 USB Connect Video Out Shooting Settings Shooting Settings 1 AF Illuminator AF Mode Conversion Lens Shooting Settings 2 Auto Orientation* Clock Settings Language Setting Format Music Create REC. For details on the operation 1 page 21 HOME items Pressing HOME displays the following items. Details on the items are displayed on the screen by the guide. Categories Shooting View Images...
Operating Instructions
Page 30
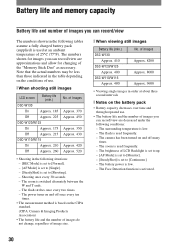
... power turns on and off many times. - Battery life and memory capacity Battery life and number of images you can record/view The numbers shown in the following tables assume a fully charged battery pack (supplied) is used at about three second intervals [ Notes on the battery pack • Battery capacity decreases over time and through repeated use . [ When shooting still images LCD screen Battery life (min.) DSC-W130 On Approx. 185 Off Approx. 225 DSC-W120/W125...
... power turns on and off many times. - Battery life and memory capacity Battery life and number of images you can record/view The numbers shown in the following tables assume a fully charged battery pack (supplied) is used at about three second intervals [ Notes on the battery pack • Battery capacity decreases over time and through repeated use . [ When shooting still images LCD screen Battery life (min.) DSC-W130 On Approx. 185 Off Approx. 225 DSC-W120/W125...

Operating Instructions
Page 33
... insert the battery pack. • Insert the battery pack correctly to "Cyber-shot Handbook" (PDF). Cannot turn on the screen, refer to "Cyber-shot Handbook". 2 Remove the battery pack, wait for about three minutes while the power is dead. Be aware that the contents of the GB internal memory, Music files may take a few moments for about one minute, re-insert the battery pack, then turn on , the camera turns off suddenly...
... insert the battery pack. • Insert the battery pack correctly to "Cyber-shot Handbook" (PDF). Cannot turn on the screen, refer to "Cyber-shot Handbook". 2 Remove the battery pack, wait for about three minutes while the power is dead. Be aware that the contents of the GB internal memory, Music files may take a few moments for about one minute, re-insert the battery pack, then turn on , the camera turns off suddenly...
Operating Instructions
Page 36
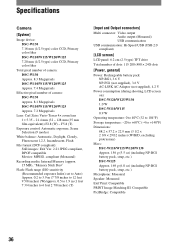
F5.8 (T) Exposure control: Automatic exposure, Scene Selection (9 modes) White balance: Automatic, Daylight, Cloudy, Fluorescent 1,2,3, Incandescent, Flash File format (DCF compliant): Still images: Exif Ver. 2.21 JPEG compliant, DPOF compatible Movies: MPEG1 compliant (Monaural) Recording media: Internal Memory (approx. 15 MB), "Memory Stick Duo" Flash: Flash range (ISO sensitivity (Recommended exposure Index) set to Auto): Approx. 0.2 to 3.9 m (7 7/8 inches to 12 feet 9 5/8 inches) (W)/approx. 0.5 to 1.9 m (1 feet 7 3/4 inches to +140°F) Dimensions: 88.2 × 57.2 × 22...
F5.8 (T) Exposure control: Automatic exposure, Scene Selection (9 modes) White balance: Automatic, Daylight, Cloudy, Fluorescent 1,2,3, Incandescent, Flash File format (DCF compliant): Still images: Exif Ver. 2.21 JPEG compliant, DPOF compatible Movies: MPEG1 compliant (Monaural) Recording media: Internal Memory (approx. 15 MB), "Memory Stick Duo" Flash: Flash range (ISO sensitivity (Recommended exposure Index) set to Auto): Approx. 0.2 to 3.9 m (7 7/8 inches to 12 feet 9 5/8 inches) (W)/approx. 0.5 to 1.9 m (1 feet 7 3/4 inches to +140°F) Dimensions: 88.2 × 57.2 × 22...

Cyber-shot® Handbook
Page 42
Folder Copy Internal Memory Tool (page 68) Format Settings Main settings Main Settings 1 (page 69) Beep Initialize Function Guide Main Settings 2 (page 70) USB Connect Video Out COMPONENT Wide Zoom Display Shooting Settings Shooting Settings 1 (page 72) AF Illuminator AF Mode Conversion Lens Grid Line Digital Zoom Shooting Settings 2 (page 75) Auto Orientation*2 Auto Review Clock Settings (page 76) Language Setting (page 77) *1 Shooting mode selected with the mode dial will be applied. *2 DSC-W120/W125/W130 only. 42 Learning the various functions - HOME/Menu HOME items ...
Folder Copy Internal Memory Tool (page 68) Format Settings Main settings Main Settings 1 (page 69) Beep Initialize Function Guide Main Settings 2 (page 70) USB Connect Video Out COMPONENT Wide Zoom Display Shooting Settings Shooting Settings 1 (page 72) AF Illuminator AF Mode Conversion Lens Grid Line Digital Zoom Shooting Settings 2 (page 75) Auto Orientation*2 Auto Review Clock Settings (page 76) Language Setting (page 77) *1 Shooting mode selected with the mode dial will be applied. *2 DSC-W120/W125/W130 only. 42 Learning the various functions - HOME/Menu HOME items ...

Cyber-shot® Handbook
Page 85
... first time. Or, from the camera more . • Still images can be printed or saved with the date. • You can create a data disc using the service. • To view the website, you will be redirected by a server run by Sony (hereon after referred to as e-mail attachments, change the setting later. On the "Picture Motion Browser" (supplied) You can use still images and movies from the Start menu: Click [Start] t [All...
... first time. Or, from the camera more . • Still images can be printed or saved with the date. • You can create a data disc using the service. • To view the website, you will be redirected by a server run by Sony (hereon after referred to as e-mail attachments, change the setting later. On the "Picture Motion Browser" (supplied) You can use still images and movies from the Start menu: Click [Start] t [All...

Cyber-shot® Handbook
Page 93
Viewing image files stored on a computer with the camera first, then copy the image files. 2 Copy the image file to the "Memory Stick Duo" folder in the following order. 1Right-click the image file, then click [Copy]. 2Double-click [Removable Disk] or [SonyMemoryStick] in [Computer] (in Windows XP, [My Computer]). 3Right-click the [sssMSDCF] folder in the [DCIM] folder, then click [Paste]. • sss stands for any number within the range from...
Viewing image files stored on a computer with the camera first, then copy the image files. 2 Copy the image file to the "Memory Stick Duo" folder in the following order. 1Right-click the image file, then click [Copy]. 2Double-click [Removable Disk] or [SonyMemoryStick] in [Computer] (in Windows XP, [My Computer]). 3Right-click the [sssMSDCF] folder in the [DCIM] folder, then click [Paste]. • sss stands for any number within the range from...

Cyber-shot® Handbook
Page 96
... transfer with "Music Transfer" are preset at the Sony Customer Support Website. Adding/Changing Music using "Music Transfer"" on the hard disk drive of the software starts. The installation of your Macintosh computer, and insert the CD-ROM (supplied) into the camera after copying images from the internal memory. • Turning off the camera. To delete the USB connection Drag and drop the drive icon or the icon of the "Memory Stick Duo" to open...
... transfer with "Music Transfer" are preset at the Sony Customer Support Website. Adding/Changing Music using "Music Transfer"" on the hard disk drive of the software starts. The installation of your Macintosh computer, and insert the CD-ROM (supplied) into the camera after copying images from the internal memory. • Turning off the camera. To delete the USB connection Drag and drop the drive icon or the icon of the "Memory Stick Duo" to open...

Cyber-shot® Handbook
Page 106
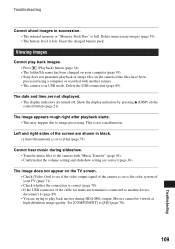
Delete unnecessary images (page 39). - Change the "Memory Stick Duo". • You cannot record images while charging the flash. • When shooting a still image, set the mode dial to a position other than [640(Fine)]. - Press recording mode (page 34). (Playback) button to change to the Anti-blur function does not work (DSC-W120/W125/W130 only). • The anti-blur function does not work when appears on the screen. • The camera is set to "If the subject...
Delete unnecessary images (page 39). - Change the "Memory Stick Duo". • You cannot record images while charging the flash. • When shooting a still image, set the mode dial to a position other than [640(Fine)]. - Press recording mode (page 34). (Playback) button to change to the Anti-blur function does not work (DSC-W120/W125/W130 only). • The anti-blur function does not work when appears on the screen. • The camera is set to "If the subject...
Cyber-shot® Handbook
Page 109
... the cable for multi-use terminal is full. Movies cannot be viewed at high-definition image quality. Insert the charged battery pack. This is low. Set [COMPONENT] to image processing. Troubleshooting Cannot shoot images in USB mode. Delete the USB connection (page 89). Cannot hear music during HD(1080i) output. The date and time are not displayed. • The display indicators are trying to play back images. • Press (Playback) button (page 34). • The folder/file name...
... the cable for multi-use terminal is full. Movies cannot be viewed at high-definition image quality. Insert the charged battery pack. This is low. Set [COMPONENT] to image processing. Troubleshooting Cannot shoot images in USB mode. Delete the USB connection (page 89). Cannot hear music during HD(1080i) output. The date and time are not displayed. • The display indicators are trying to play back images. • Press (Playback) button (page 34). • The folder/file name...

Cyber-shot® Handbook
Page 114
... data on the printer. Cannot operate the camera after connecting the printer to change the date or time. • Set the date and time again (page 76). 114 You want to the camera, disconnect and then reconnect the cable for multi-use it with the power left off. Others Cannot reset the file-number. • If you replace a recording medium, you turn on the camera. • Set the date and time again (page 76). • The internal...
... data on the printer. Cannot operate the camera after connecting the printer to change the date or time. • Set the date and time again (page 76). 114 You want to the camera, disconnect and then reconnect the cable for multi-use it with the power left off. Others Cannot reset the file-number. • If you replace a recording medium, you turn on the camera. • Set the date and time again (page 76). • The internal...

Cyber-shot® Handbook
Page 115
... internal memory has experienced a format error, or an unformatted "Memory Stick Duo" is dirty. C:32:ss • There is trouble with the camera, or the data is working. Initialize the camera (page 69), then turn the power on the "Memory Stick Duo". Troubleshooting 115 Messages If the following corrective actions a few times, the camera may flash even though there are still 5 to 10 minutes of the camera. Contact your Sony dealer...
... internal memory has experienced a format error, or an unformatted "Memory Stick Duo" is dirty. C:32:ss • There is trouble with the camera, or the data is working. Initialize the camera (page 69), then turn the power on the "Memory Stick Duo". Troubleshooting 115 Messages If the following corrective actions a few times, the camera may flash even though there are still 5 to 10 minutes of the camera. Contact your Sony dealer...

Cyber-shot® Handbook
Page 117
... another camera. Flash settings cannot be completed yet. Turn the power off and on the printer. Remove the checkmark. Printer error • Check the printer. • Check if the image you want to print is connected to 100 images. Maximum number of the camera cannot be able to retouch the redeye phenomenon depending on image files that have selected a function that were recorded with a normal Music file. • Execute [Format Music], then download...
... another camera. Flash settings cannot be completed yet. Turn the power off and on the printer. Remove the checkmark. Printer error • Check the printer. • Check if the image you want to print is connected to 100 images. Maximum number of the camera cannot be able to retouch the redeye phenomenon depending on image files that have selected a function that were recorded with a normal Music file. • Execute [Format Music], then download...
Cyber-shot® Handbook
Page 125
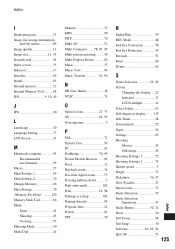
... 102 Print 62, 98 Printing at a shop 102 Printing directly 99 Program Auto 24 Protect 61 PTP 70 R Radial Blur 59 REC Mode 48 Red Eye Correction 58 Red Eye Reduction 55 Retouch 57 Retro 60 Rotate 62 S Scene Selection 29, 45 Screen Changing the display.....21 Indicator 17 LCD backlight 21 Select Folder 63 Self-diagnosis display.........115 Self-Timer 28 Semi manual 52 Sepia 56 Settings 69 Shooting Movies 25 Still image 25 Shooting Settings 1 72 Shooting Settings 2 75 Shutter speed...
... 102 Print 62, 98 Printing at a shop 102 Printing directly 99 Program Auto 24 Protect 61 PTP 70 R Radial Blur 59 REC Mode 48 Red Eye Correction 58 Red Eye Reduction 55 Retouch 57 Retro 60 Rotate 62 S Scene Selection 29, 45 Screen Changing the display.....21 Indicator 17 LCD backlight 21 Select Folder 63 Self-diagnosis display.........115 Self-Timer 28 Semi manual 52 Sepia 56 Settings 69 Shooting Movies 25 Still image 25 Shooting Settings 1 72 Shooting Settings 2 75 Shutter speed...
Marketing Specifications (Blue Model)
Page 1
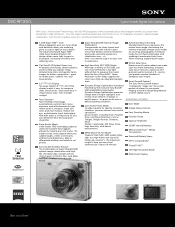
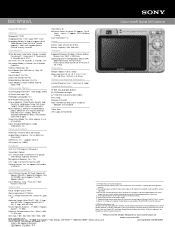
... your photo, helping avoid the image degradation of interest in difficult lighting conditions. Automatic Macro Shooting Standard Auto Focus now covers the macro focus range, eliminating the need to help reveal faces in gyro sensor that can degrade low-light shots. Smart Zoom® Feature5 The Sony Smart Zoom® feature 5 intelligently "crops into" the central portion of other digital zooms. ADDITIONAL FEATURES Burst Mode Simple Setup Controls Easy Shooting Mode Function Guide Optical Viewfinder 15 MB2 Internal Memory Memory...
... your photo, helping avoid the image degradation of interest in difficult lighting conditions. Automatic Macro Shooting Standard Auto Focus now covers the macro focus range, eliminating the need to help reveal faces in gyro sensor that can degrade low-light shots. Smart Zoom® Feature5 The Sony Smart Zoom® feature 5 intelligently "crops into" the central portion of other digital zooms. ADDITIONAL FEATURES Burst Mode Simple Setup Controls Easy Shooting Mode Function Guide Optical Viewfinder 15 MB2 Internal Memory Memory...
Marketing Specifications (Blue Model)
Page 2
... Battery Capacity: 3.6V, 960 mAh Convenience Software White Balance: Automatic, Cloudy, Daylight, Fluorescent 1, Fluorescent 2, Fluorescent 3, Incandescent, Flash Self Timer: Yes (10 seconds, 2 seconds, Off) Still Image Mode(s): Normal, Burst, Bracket Exposure Red-Eye Reduction: No Burst Mode: Max 100 Shots at 1.5fps (All resolutions) Erase/Protect: Yes/Yes Date/Time Stamp: No/ No Media/Battery Indicator: Yes/Yes Color Mode(s): Black & White, Natural, Sepia, Vivid Convenience Features Real Imaging Processor™ Technology: BIONZ AF Illuminator Light: Yes PictBridge Compatible...
... Battery Capacity: 3.6V, 960 mAh Convenience Software White Balance: Automatic, Cloudy, Daylight, Fluorescent 1, Fluorescent 2, Fluorescent 3, Incandescent, Flash Self Timer: Yes (10 seconds, 2 seconds, Off) Still Image Mode(s): Normal, Burst, Bracket Exposure Red-Eye Reduction: No Burst Mode: Max 100 Shots at 1.5fps (All resolutions) Erase/Protect: Yes/Yes Date/Time Stamp: No/ No Media/Battery Indicator: Yes/Yes Color Mode(s): Black & White, Natural, Sepia, Vivid Convenience Features Real Imaging Processor™ Technology: BIONZ AF Illuminator Light: Yes PictBridge Compatible...


