
Operating Instructions (primary manual)
Page 61
... Transfer". If the necessary driver is needed in order to use the "Image Transfer" software to copy images to install the driver will appear. Click here 6 , Click [Next]. Follow the instructions that asks if you connect the camera to your computer automatically when you want to your computer with installation. 61 You...
... Transfer". If the necessary driver is needed in order to use the "Image Transfer" software to copy images to install the driver will appear. Click here 6 , Click [Next]. Follow the instructions that asks if you connect the camera to your computer automatically when you want to your computer with installation. 61 You...
Operating Instructions (primary manual)
Page 64
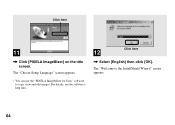
Click here 11 , Click [PIXELA ImageMixer] on the title screen. The "Welcome to copy, view and edit images. The "Choose Setup Language" screen appears. • You can use the "PIXELA ImageMixer for Sony" software to the InstallShield Wizard" screen appears. 64 Click here 12 , Select [English] then click [OK]. For details, see the software's help files.
Click here 11 , Click [PIXELA ImageMixer] on the title screen. The "Welcome to copy, view and edit images. The "Choose Setup Language" screen appears. • You can use the "PIXELA ImageMixer for Sony" software to the InstallShield Wizard" screen appears. 64 Click here 12 , Select [English] then click [OK]. For details, see the software's help files.

Operating Instructions (primary manual)
Page 75
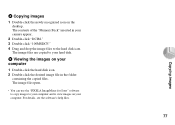
For details, see the software's help files. 2 , Double-click the desired image file. The image is displayed. 75 5 Viewing the images on your computer Copying images 1 , Double-click [My Documents] on your computer. The "My Documents" folder contents are displayed. • This section describes the procedure for copying images to the "My Documents" folder on pages 70 and 72. • When using Windows XP, double-click [Start] t [My Documents] in that order. • You can use the "PIXELA ImageMixer for Sony" software to view images on the desktop.
For details, see the software's help files. 2 , Double-click the desired image file. The image is displayed. 75 5 Viewing the images on your computer Copying images 1 , Double-click [My Documents] on your computer. The "My Documents" folder contents are displayed. • This section describes the procedure for copying images to the "My Documents" folder on pages 70 and 72. • When using Windows XP, double-click [Start] t [My Documents] in that order. • You can use the "PIXELA ImageMixer for Sony" software to view images on the desktop.
Operating Instructions (primary manual)
Page 77
... "Memory Stick" inserted in the folder containing the copied files. The image files are copied to the hard disk icon. For details, see the software's help files. 77 Copying images 4 Copying images 1 Double-click the newly recognized icon on your computer 1 Double-click the hard disk icon. ... the desired image file in your computer. The image file opens. • You can use the "PIXELA ImageMixer for Sony" software to copy images to your computer and to view images on your camera appear. 2 Double-click "DCIM." 3 Double-click "100MSDCF." 4 Drag and drop the image files to your hard ...
... "Memory Stick" inserted in the folder containing the copied files. The image files are copied to the hard disk icon. For details, see the software's help files. 77 Copying images 4 Copying images 1 Double-click the newly recognized icon on your computer 1 Double-click the hard disk icon. ... the desired image file in your computer. The image file opens. • You can use the "PIXELA ImageMixer for Sony" software to copy images to your computer and to view images on your camera appear. 2 Double-click "DCIM." 3 Double-click "100MSDCF." 4 Drag and drop the image files to your hard ...
Operating Instructions (primary manual)
Page 82
... USB driver, so the device was not recognized by the computer. • No "Memory Stick" is inserted. • The camera is not correctly connected to install the USB driver on a machine that "USB MODE" is displayed on your computer are connected to...the "PIXELA ImageMixer for the ones connected to [NORMAL] (page 89). p Disconnect the USB cables except for Sony" application software, click on as Administrators (authorized Administrators) (page 59). p Connect the camera and your camera. p Install the USB driver (page 58). p Insert a "Memory Stick." p Use the supplied USB ...
... USB driver, so the device was not recognized by the computer. • No "Memory Stick" is inserted. • The camera is not correctly connected to install the USB driver on a machine that "USB MODE" is displayed on your computer are connected to...the "PIXELA ImageMixer for the ones connected to [NORMAL] (page 89). p Disconnect the USB cables except for Sony" application software, click on as Administrators (authorized Administrators) (page 59). p Connect the camera and your camera. p Install the USB driver (page 58). p Insert a "Memory Stick." p Use the supplied USB ...
Operating Instructions (primary manual)
Page 83
Cause • The camera and your computer are using the "PIXELA ImageMixer for Sony" application software. • The computer display is ...pages 70, 72 and 77). - p Click on the HELP files for the "PIXELA ImageMixer for Sony" application software, click on the "Memory p Set it from the "Memory Stick." p If you are connected through...error message appears when you view a movie on the "Memory p Set it backwards. p Consult the computer or software manufacturer. • You are inserting it to the recording position (page 92). You cannot format a "Memory ...
Cause • The camera and your computer are using the "PIXELA ImageMixer for Sony" application software. • The computer display is ...pages 70, 72 and 77). - p Click on the HELP files for the "PIXELA ImageMixer for Sony" application software, click on the "Memory p Set it from the "Memory Stick." p If you are connected through...error message appears when you view a movie on the "Memory p Set it backwards. p Consult the computer or software manufacturer. • You are inserting it to the recording position (page 92). You cannot format a "Memory ...


