
Limited Warranty (U.S. Only)
Page 1
...OR FITNESS FOR A PARTICULAR PURPOSE ON THIS PRODUCT IS LIMITED IN DURATION TO THE DURATION OF THIS WARRANTY. SONY® Digital Camera LIMITED WARRANTY (US Only) Sony Electronics Inc. ("Sony") warrants this product against defects in material or workmanship for the time periods and as fuses or batteries). ... under this Limited Warranty, "refurbished" means a product or part that such data, software, or other than Sony or a Sony Retailer. This Limited Warranty does not cover Sony products sold AS IS or WITH ALL FAULTS or consumables (such as set forth below when purchased directly from ...
...OR FITNESS FOR A PARTICULAR PURPOSE ON THIS PRODUCT IS LIMITED IN DURATION TO THE DURATION OF THIS WARRANTY. SONY® Digital Camera LIMITED WARRANTY (US Only) Sony Electronics Inc. ("Sony") warrants this product against defects in material or workmanship for the time periods and as fuses or batteries). ... under this Limited Warranty, "refurbished" means a product or part that such data, software, or other than Sony or a Sony Retailer. This Limited Warranty does not cover Sony products sold AS IS or WITH ALL FAULTS or consumables (such as set forth below when purchased directly from ...

Instruction Manual
Page 2
.... • Check the model name on -line manual. Checking the supplied items The number in parentheses indicates the number of pieces. • Camera (1) • Rechargeable battery pack NP-BN (1) (This rechargeable battery pack cannot be used with Cyber-shot that are supplied with the NP-BN1... for in the USA and Canada) (1) • Wrist strap (1) • Instruction Manual (this manual) (1) • Notes on the many functions of the camera. 1 Access the Sony support page. English Learning more about the camera ("Cyber-shot User Guide") "Cyber-shot User Guide" is an on the bottom of your...
.... • Check the model name on -line manual. Checking the supplied items The number in parentheses indicates the number of pieces. • Camera (1) • Rechargeable battery pack NP-BN (1) (This rechargeable battery pack cannot be used with Cyber-shot that are supplied with the NP-BN1... for in the USA and Canada) (1) • Wrist strap (1) • Instruction Manual (this manual) (1) • Notes on the many functions of the camera. 1 Access the Sony support page. English Learning more about the camera ("Cyber-shot User Guide") "Cyber-shot User Guide" is an on the bottom of your...

Instruction Manual
Page 8
...tap. • Do not use conditions and circumstances, no guarantee is made regarding damage to, malfunction of, or the water-proof performance of this camera has passed the in the recommended operating water temperature range of 0°C to 40°C (32°F to 104°F). • The ...shock resistance of this camera. • As for dust-proof/shock-proof performance, there is no guarantee that no foreign matter such as from a height of 1.5 m (5 ft) onto...
...tap. • Do not use conditions and circumstances, no guarantee is made regarding damage to, malfunction of, or the water-proof performance of this camera has passed the in the recommended operating water temperature range of 0°C to 40°C (32°F to 104°F). • The ...shock resistance of this camera. • As for dust-proof/shock-proof performance, there is no guarantee that no foreign matter such as from a height of 1.5 m (5 ft) onto...

Instruction Manual
Page 9
.... GB 9 Notes on using a cable. • Do not open/close the battery/memory card cover while under /near water. • This camera sinks in a shady location with good ventilation. Cleaning after use within 60 minutes, and do not open and close the battery/memory card cover with...be seen. This is not a malfunction. • If water drops or other foreign matter is a risk this will be degraded. • Allow the camera to sit in under /near water. Prevent the sealing gasket from sinking. • Faint, white, circular spots may get inside . Place your hand through...
.... GB 9 Notes on using a cable. • Do not open/close the battery/memory card cover while under /near water. • This camera sinks in a shady location with good ventilation. Cleaning after use within 60 minutes, and do not open and close the battery/memory card cover with...be seen. This is not a malfunction. • If water drops or other foreign matter is a risk this will be degraded. • Allow the camera to sit in under /near water. Prevent the sealing gasket from sinking. • Faint, white, circular spots may get inside . Place your hand through...

Instruction Manual
Page 10
... discoloration, and degradation of water-proof performance. • To maintain the water-proof performance, we recommend that once a year you take the camera to your dealer, or to an authorized repair shop, to have the sealing gasket of the battery/memory card cover replaced for a while to... allow the camera to sit with sunscreen or suntan oil. • This camera is constructed to drain. • Bubbles may appear when the camera is not a malfunction. • The camera body may become discolored if it clean. • Do not allow...
... discoloration, and degradation of water-proof performance. • To maintain the water-proof performance, we recommend that once a year you take the camera to your dealer, or to an authorized repair shop, to have the sealing gasket of the battery/memory card cover replaced for a while to... allow the camera to sit with sunscreen or suntan oil. • This camera is constructed to drain. • Bubbles may appear when the camera is not a malfunction. • The camera body may become discolored if it clean. • Do not allow...

Instruction Manual
Page 11
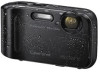
GB G Microphone H Lens I Speaker J LCD screen K (Playback) button L Mode lamp M Mode button N Hook for wrist strap O / (In-Camera Guide/Delete) button P MENU button Q Control button MENU on . Identifying parts A ON/OFF (Power) button B Shutter button C For shooting: W/T (zoom) lever ...AF illuminator F Charge lamp/Light sensor • The brightness of the LCD monitor is automatically adjusted to the camera may occur. Otherwise, you cannot firmly secure the camera, and damage to the ambient lighting conditions using the light sensor. GB 11 Do not cover the light ...
GB G Microphone H Lens I Speaker J LCD screen K (Playback) button L Mode lamp M Mode button N Hook for wrist strap O / (In-Camera Guide/Delete) button P MENU button Q Control button MENU on . Identifying parts A ON/OFF (Power) button B Shutter button C For shooting: W/T (zoom) lever ...AF illuminator F Charge lamp/Light sensor • The brightness of the LCD monitor is automatically adjusted to the camera may occur. Otherwise, you cannot firmly secure the camera, and damage to the ambient lighting conditions using the light sensor. GB 11 Do not cover the light ...

Instruction Manual
Page 12
Inserting the battery pack Battery eject lever 1 Open the cover. 2 Insert the battery pack. • While pressing the battery eject lever, insert the battery pack as illustrated. GB 12 Make sure that the battery eject lever locks after insertion. • Securely close the battery cover until you hear the slide lock on the cover catch in place and so that the yellow mark under the slide lock can no longer be seen. • Closing the cover with the battery inserted incorrectly may damage the camera. • Push the end of the cover to close it.
Inserting the battery pack Battery eject lever 1 Open the cover. 2 Insert the battery pack. • While pressing the battery eject lever, insert the battery pack as illustrated. GB 12 Make sure that the battery eject lever locks after insertion. • Securely close the battery cover until you hear the slide lock on the cover catch in place and so that the yellow mark under the slide lock can no longer be seen. • Closing the cover with the battery inserted incorrectly may damage the camera. • Push the end of the cover to close it.

Instruction Manual
Page 13
...in countries/regions other than the USA and Canada Charge lamp Lit: Charging Off: Charging finished Flashing: Charging error or charging paused temporarily because the camera is not finished, remove and re-insert the battery pack. The Charge lamp lights orange, and charging starts. • Turn off the... pack even when it is partially charged. • When the Charge lamp flashes and charging is not within the proper temperature range 1 Connect the camera to the AC Adaptor (supplied), using the dedicated USB cable (supplied). 2 Connect the AC Adaptor to the wall outlet (wall socket).
...in countries/regions other than the USA and Canada Charge lamp Lit: Charging Off: Charging finished Flashing: Charging error or charging paused temporarily because the camera is not finished, remove and re-insert the battery pack. The Charge lamp lights orange, and charging starts. • Turn off the... pack even when it is partially charged. • When the Charge lamp flashes and charging is not within the proper temperature range 1 Connect the camera to the AC Adaptor (supplied), using the dedicated USB cable (supplied). 2 Connect the AC Adaptor to the wall outlet (wall socket).

Instruction Manual
Page 14
...temperature is outside the recommended range. When the temperature gets back within the appropriate range, the charging resumes. x Charging by connecting the camera to a computer using the dedicated USB cable. Notes • If the Charge lamp on conditions of 25°C (77°F). ...use and circumstances. Notes • The above charging time applies when charging a fully depleted battery pack at a temperature of use only genuine Sony brand battery packs, dedicated USB cable (supplied) and AC Adaptor (supplied). x Charging time (Full charge) The charging time is finished, ...
...temperature is outside the recommended range. When the temperature gets back within the appropriate range, the charging resumes. x Charging by connecting the camera to a computer using the dedicated USB cable. Notes • If the Charge lamp on conditions of 25°C (77°F). ...use and circumstances. Notes • The above charging time applies when charging a fully depleted battery pack at a temperature of use only genuine Sony brand battery packs, dedicated USB cable (supplied) and AC Adaptor (supplied). x Charging time (Full charge) The charging time is finished, ...

Instruction Manual
Page 15
...ten times. No guarantees are made for shooting under the following conditions: (CIPA: Camera & Imaging Products Association) - [Disp. Shooting once every 30 seconds. - Viewing (still images) Approx. 210 min. Using Sony microSD memory card (Class 4 or faster) (sold separately) - Resolution] is ...switched alternately between the computer and the camera. Do not charge for an extended period of 25°C (77°F). &#...
...ten times. No guarantees are made for shooting under the following conditions: (CIPA: Camera & Imaging Products Association) - [Disp. Shooting once every 30 seconds. - Viewing (still images) Approx. 210 min. Using Sony microSD memory card (Class 4 or faster) (sold separately) - Resolution] is ...switched alternately between the computer and the camera. Do not charge for an extended period of 25°C (77°F). &#...

Instruction Manual
Page 16
...you can import images to a computer without worrying about draining the battery pack by connecting to a computer using the dedicated USB cable while the camera is available only in playback mode. Press the (Playback) button to switch to the playback screen. • The AC Adaptor AC-UD11 (sold... standby for shooting, and turning on the CIPA standard, and is for movies is based on and off the camera. - "Continuous shooting (movies)": When continuous shooting ends because of the camera, power is not supplied even if you make a USB connection using the dedicated USB cable. • If ...
...you can import images to a computer without worrying about draining the battery pack by connecting to a computer using the dedicated USB cable while the camera is available only in playback mode. Press the (Playback) button to switch to the playback screen. • The AC Adaptor AC-UD11 (sold... standby for shooting, and turning on the CIPA standard, and is for movies is based on and off the camera. - "Continuous shooting (movies)": When continuous shooting ends because of the camera, power is not supplied even if you make a USB connection using the dedicated USB cable. • If ...

Instruction Manual
Page 17
...M2) card Make sure that the yellow mark under the slide lock can no longer be seen. Inserting a memory card (sold separately). • With the camera lens facing upward, as illustrated, insert the memory card straight in until it clicks into place. • If you push forcefully on the microSD memory... card (in the direction of the battery insertion slot) while inserting it, you may damage the camera. • Be careful when removing the microSD memory card, as it may pop out quickly. 3 Close the cover. • Securely close the battery ...
...M2) card Make sure that the yellow mark under the slide lock can no longer be seen. Inserting a memory card (sold separately). • With the camera lens facing upward, as illustrated, insert the memory card straight in until it clicks into place. • If you push forcefully on the microSD memory... card (in the direction of the battery insertion slot) while inserting it, you may damage the camera. • Be careful when removing the microSD memory card, as it may pop out quickly. 3 Close the cover. • Securely close the battery ...

Instruction Manual
Page 19
... [Date & Time], then select [OK] t [OK]. • Midnight is indicated as 12:00 AM, and noon as 12:00 PM. 5 Follow the instructions on the camera for the first time. • It may be depleted faster.
... [Date & Time], then select [OK] t [OK]. • Midnight is indicated as 12:00 AM, and noon as 12:00 PM. 5 Follow the instructions on the camera for the first time. • It may be depleted faster.

Instruction Manual
Page 21
... the shutter button again. GB 21 x Deleting an image 1 Press / (Delete) button. 2 Select [This Image] with v on the control button. x Returning to protect the camera depending on the ambient temperature. • Continuous shooting is possible for approximately 29 minutes at one time at the... camera's default settings and when the temperature is approximately 25°C (77°F). Recording may stop to shooting images Press the shutter button halfway down. Press ...
... the shutter button again. GB 21 x Deleting an image 1 Press / (Delete) button. 2 Select [This Image] with v on the control button. x Returning to protect the camera depending on the ambient temperature. • Continuous shooting is possible for approximately 29 minutes at one time at the... camera's default settings and when the temperature is approximately 25°C (77°F). Recording may stop to shooting images Press the shutter button halfway down. Press ...

Instruction Manual
Page 22
The operation guide for the selected item is displayed. • If you press the / (In-Camera Guide) button when the MENU screen is equipped with a built-in instruction guide. GB 22 This allows you can search the guide using keywords or icons. MENU / (In-Camera Guide) 1 Press the MENU button. 2 Select the desired MENU item, then press the / (InCamera Guide) button. In-Camera Guide This camera is not displayed, you to search the camera's functions according to your needs.
The operation guide for the selected item is displayed. • If you press the / (In-Camera Guide) button when the MENU screen is equipped with a built-in instruction guide. GB 22 This allows you can search the guide using keywords or icons. MENU / (In-Camera Guide) 1 Press the MENU button. 2 Select the desired MENU item, then press the / (InCamera Guide) button. In-Camera Guide This camera is not displayed, you to search the camera's functions according to your needs.

Instruction Manual
Page 23
...playing back can use the self-timer. (Flash): Allows you to select a flash mode for still images. Center button (Tracking focus): The camera tracks the subject and adjusts focus automatically even when the subject is selected in Picture Effect, sets the color hue. Shoot a still image with...a Function Guide that allows you to easily select from the functions. Shoot still images using the control button or MENU button on the camera. Select recording mode when shooting panoramic images. GB 23 Select pre-set settings to the desired effect. Control button GB MENU Function Guide...
...playing back can use the self-timer. (Flash): Allows you to select a flash mode for still images. Center button (Tracking focus): The camera tracks the subject and adjusts focus automatically even when the subject is selected in Picture Effect, sets the color hue. Shoot a still image with...a Function Guide that allows you to easily select from the functions. Shoot still images using the control button or MENU button on the camera. Select recording mode when shooting panoramic images. GB 23 Select pre-set settings to the desired effect. Control button GB MENU Function Guide...

Instruction Manual
Page 24
...Set the Smile Shutter function sensitivity for still images, panoramic images or movie files. Set DRO function to your needs. Search the camera's functions according to correct the brightness and contrast and improve the image quality. GB 24 Select the focus method. Select to pan the... camera when shooting Sweep Panorama images. Adjust the exposure manually. Adjust color tones of the subject to measure to extract. Set the ...
...Set the Smile Shutter function sensitivity for still images, panoramic images or movie files. Set DRO function to your needs. Search the camera's functions according to correct the brightness and contrast and improve the image quality. GB 24 Select the focus method. Select to pan the... camera when shooting Sweep Panorama images. Adjust the exposure manually. Adjust color tones of the subject to measure to extract. Set the ...

Instruction Manual
Page 25
...GB 25 You can be displayed and only [Format] can change the default settings on the (Settings) screen. Delete an image. Search the camera's functions according to a still image. Retouch a face on a still image. Resolution/Digital Shooting Settings Zoom/Red Eye Reduction/Write Date Main Settings...If a memory card is provided as a final selection. Viewing Easy Mode Beauty Effect Retouch Delete Slideshow Protect Print (DPOF) Rotate In-Camera Guide Increase the text size on the screen for ease of continuous playback. Retouch an image using various effects. Rotate a still image.
...GB 25 You can be displayed and only [Format] can change the default settings on the (Settings) screen. Delete an image. Search the camera's functions according to a still image. Retouch a face on a still image. Resolution/Digital Shooting Settings Zoom/Red Eye Reduction/Write Date Main Settings...If a memory card is provided as a final selection. Viewing Easy Mode Beauty Effect Retouch Delete Slideshow Protect Print (DPOF) Rotate In-Camera Guide Increase the text size on the screen for ease of continuous playback. Retouch an image using various effects. Rotate a still image.

Instruction Manual
Page 26
... compatible with Macs. Importing images from your Mac. For details, visit the following URL: www.sony.net/pm Notes • An Internet connection is required to use them. Use the applications that are installed on your camera Viewing images on Calendar Sharing images on "PlayMemories Online" Uploading images to network services z Downloading...
... compatible with Macs. Importing images from your Mac. For details, visit the following URL: www.sony.net/pm Notes • An Internet connection is required to use them. Use the applications that are installed on your camera Viewing images on Calendar Sharing images on "PlayMemories Online" Uploading images to network services z Downloading...

Instruction Manual
Page 27
www.sony.net/pm 2 Follow the instructions on To the USB / A/V the screen to a computer is displayed, connect the camera and computer using the dedicated USB cable (supplied). To a USB jack x Viewing "PlayMemories Home Help Guide" For details on how to use "... the "Cyber-shot User Guide" (page 2) or the following URL, then click [Install] t [Run]. GB • When the message to connect the camera to complete the OUT terminal installation. x Installing "PlayMemories Home" on a computer 1 Using the Internet browser on your computer, go to the following PlayMemories Home ...
www.sony.net/pm 2 Follow the instructions on To the USB / A/V the screen to a computer is displayed, connect the camera and computer using the dedicated USB cable (supplied). To a USB jack x Viewing "PlayMemories Home Help Guide" For details on how to use "... the "Cyber-shot User Guide" (page 2) or the following URL, then click [Install] t [Run]. GB • When the message to connect the camera to complete the OUT terminal installation. x Installing "PlayMemories Home" on a computer 1 Using the Internet browser on your computer, go to the following PlayMemories Home ...


