
Operating Instructions
Page 4
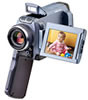
... MPEG2 format of this camcorder adopts the format only. Main Features Recording moving pictures or still images, and playing them back •Recording moving pictures on tapes (p. 29) •Playing back tapes (p. 42) •Recording still images on the "Memory Stick"s (p. 49, 114) •Recording moving pictures on the "Memory Stick"s (p. 129) •Viewing still images...
... MPEG2 format of this camcorder adopts the format only. Main Features Recording moving pictures or still images, and playing them back •Recording moving pictures on tapes (p. 29) •Playing back tapes (p. 42) •Recording still images on the "Memory Stick"s (p. 49, 114) •Recording moving pictures on the "Memory Stick"s (p. 129) •Viewing still images...
Operating Instructions
Page 5
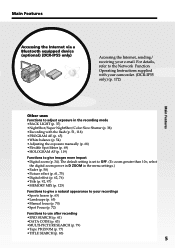
...a Bluetooth equipped device (optional) (DCR-IP55 only) Accessing the Internet, sending/ receiving your recordings •Sports lesson (p. 65) •Landscape (p. 65) •Manual focus (p. 70) •Spot Focus (p. 72) Functions to give images more impact •Digital zoom (p. 34). For details, ...•Picture effect (p. 61, 75) •Digital effect (p. 62, 76) •Title (p. 92, 97) •MEMORY MIX (p. 125) Functions to use after recording •END SEARCH (p. 41) •DATA CODE (p. 43) •MULTI-PICTURE SEARCH (p. 79) •Tape PB ZOOM (p. 77) •TITLE SEARCH (p. ...
...a Bluetooth equipped device (optional) (DCR-IP55 only) Accessing the Internet, sending/ receiving your recordings •Sports lesson (p. 65) •Landscape (p. 65) •Manual focus (p. 70) •Spot Focus (p. 72) Functions to give images more impact •Digital zoom (p. 34). For details, ...•Picture effect (p. 61, 75) •Digital effect (p. 62, 76) •Title (p. 92, 97) •MEMORY MIX (p. 125) Functions to use after recording •END SEARCH (p. 41) •DATA CODE (p. 43) •MULTI-PICTURE SEARCH (p. 79) •Tape PB ZOOM (p. 77) •TITLE SEARCH (p. ...

Operating Instructions
Page 6
...84 Editing Dubbing a tape 85 Recording video or TV programs 88 Superimposing a title 92 Making your own titles 97 The Micro Cassette Memory 100 Labeling a cassette 6 Basics Playing back a tape 42 To display the screen indicators - Basic operations 8 Quick Start Guide - Digital effect ....... 62 ...Using the PROGRAM AE 65 Adjusting the exposure manually 68 Using the spot light-metering mode - BACK LIGHT 37 Shooting in CAMERA mode ... 49 Adjusting the...
...84 Editing Dubbing a tape 85 Recording video or TV programs 88 Superimposing a title 92 Making your own titles 97 The Micro Cassette Memory 100 Labeling a cassette 6 Basics Playing back a tape 42 To display the screen indicators - Basic operations 8 Quick Start Guide - Digital effect ....... 62 ...Using the PROGRAM AE 65 Adjusting the exposure manually 68 Using the spot light-metering mode - BACK LIGHT 37 Shooting in CAMERA mode ... 49 Adjusting the...
Operating Instructions
Page 7
... camcorder to your computer - Memory photo recording 114 Recording an image from a tape as a still image 122 Superimposing a still image in a "Memory Stick" on the "Memory Stick" - Introduction 151 Connecting your camcorder to your computer using the i.LINK cable - For Macintosh users 171 Using the Network function (DCR-IP55 only) Accessing the network 172 Customising...
... camcorder to your computer - Memory photo recording 114 Recording an image from a tape as a still image 122 Superimposing a still image in a "Memory Stick" on the "Memory Stick" - Introduction 151 Connecting your camcorder to your computer using the i.LINK cable - For Macintosh users 171 Using the Network function (DCR-IP55 only) Accessing the network 172 Customising...

Operating Instructions
Page 8
...(1) Slide the POWER switch down . MEMORY/NETWORK (DCR-IP55) MEMORY: Use this mode when you record on a "Memory Stick," or play back or edit an image recorded on a tape or "Memory Stick". 8 NETWORK: Use this mode when you use the network (DCR-IP55 only) function. VCR Use this mode when you ... and select the mode To supply power for the camcorder, see "Step 1 Preparing the power supply" on a tape. CAMERA Use this mode when you record on page 17. 1,2 CAMERA MEMORY/ NET- For details, refer to operate the camcorder. Each time you slide it down, the mode changes ...
...(1) Slide the POWER switch down . MEMORY/NETWORK (DCR-IP55) MEMORY: Use this mode when you record on a "Memory Stick," or play back or edit an image recorded on a tape or "Memory Stick". 8 NETWORK: Use this mode when you use the network (DCR-IP55 only) function. VCR Use this mode when you ... and select the mode To supply power for the camcorder, see "Step 1 Preparing the power supply" on a tape. CAMERA Use this mode when you record on page 17. 1,2 CAMERA MEMORY/ NET- For details, refer to operate the camcorder. Each time you slide it down, the mode changes ...

Operating Instructions
Page 10
... power cord (p. 20) Use the battery pack when using your camcorder through the wrist strap to record pictures on a tape This chapter introduces you to the basic features to prevent the camera from dropping as illustrated. Open the DC IN jack cover. Cassette window OPEN/EJECT 10 Cassette compartment... back of your camcorder. Otherwise, the cassette cannot be inserted or ejected. 2 Slide OPEN/ EJECT in parentheses "( )" for more information. Recording on tepes of the cassette into it clicks. After the cassette compartment goes down completely, close . Turn the grip to the...
... power cord (p. 20) Use the battery pack when using your camcorder through the wrist strap to record pictures on a tape This chapter introduces you to the basic features to prevent the camera from dropping as illustrated. Open the DC IN jack cover. Cassette window OPEN/EJECT 10 Cassette compartment... back of your camcorder. Otherwise, the cassette cannot be inserted or ejected. 2 Slide OPEN/ EJECT in parentheses "( )" for more information. Recording on tepes of the cassette into it clicks. After the cassette compartment goes down completely, close . Turn the grip to the...

Operating Instructions
Page 11
...your thumb or the supplied stylus (DCR-IP55 only) supporting the LCD screen from the rear of the touch panel to start playback. Your camcorder starts recording. WORK VCR (CHG) OFF ON MODE POWER 2 Press of the touch panel to rewind the tape. 3 Press of it. Quick ...the POWER switch to your camcorder through the wrist strap. 5 Press START/ STOP. Set the clock setting before recording (p. 22). CAMERA MEMORY/ NET- The VCR lamp lights up . To stop recording, press START/ STOP again. Monitoring the playback picture on the camcorder to VCR. WORK VCR (CHG) OFF ON...
...your thumb or the supplied stylus (DCR-IP55 only) supporting the LCD screen from the rear of the touch panel to start playback. Your camcorder starts recording. WORK VCR (CHG) OFF ON MODE POWER 2 Press of the touch panel to rewind the tape. 3 Press of it. Quick ...the POWER switch to your camcorder through the wrist strap. 5 Press START/ STOP. Set the clock setting before recording (p. 22). CAMERA MEMORY/ NET- The VCR lamp lights up . To stop recording, press START/ STOP again. Monitoring the playback picture on the camcorder to VCR. WORK VCR (CHG) OFF ON...
Operating Instructions
Page 14
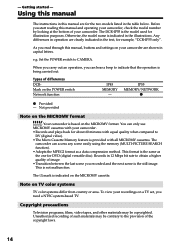
...camcorder. •Records and plays back for illustration purposes. - The DCR-IP55 is the model used for about 60 minutes with equal quality when compared to obtain a higher quality of the copyright laws. 14 Copyright precautions Television programs, films, video tapes, and other materials...recorded and the next scene is based on the MICROMV cassette. To view your camcorder are shown in 12 Mbps bit rate to DV (digital video). •The Micro Cassette Memory feature is the same as a data compression method. Unauthorized recording of such materials may be contrary to CAMERA...
...camcorder. •Records and plays back for illustration purposes. - The DCR-IP55 is the model used for about 60 minutes with equal quality when compared to obtain a higher quality of the copyright laws. 14 Copyright precautions Television programs, films, video tapes, and other materials...recorded and the next scene is based on the MICROMV cassette. To view your camcorder are shown in 12 Mbps bit rate to DV (digital video). •The Micro Cassette Memory feature is the same as a data compression method. Unauthorized recording of such materials may be contrary to CAMERA...

Operating Instructions
Page 23
... started Step 2 Setting the date and time The year changes as the data code. If you do not set the date and time and are recorded on the LCD screen for noon. 23 If you use the camcorder in the menu settings. Note on the time indicator The internal clock of... DST, SUMMERTIME is used Set DST SET to ON in a region where summer time is displayed on the tape or the "Memory Stick" as follows: 2000 2002 2079 To return to the local time (p. 24). Note Instead of your camcorder abroad Set the clock...
... started Step 2 Setting the date and time The year changes as the data code. If you do not set the date and time and are recorded on the LCD screen for noon. 23 If you use the camcorder in the menu settings. Note on the time indicator The internal clock of... DST, SUMMERTIME is used Set DST SET to ON in a region where summer time is displayed on the tape or the "Memory Stick" as follows: 2000 2002 2079 To return to the local time (p. 24). Note Instead of your camcorder abroad Set the clock...
Operating Instructions
Page 27
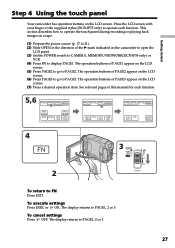
...go to FN Press EXIT. See relevant pages of PAGE3 appear on the camcorder to open the LCD panel. (3) Set the POWER switch to CAMERA, MEMORY/NETWORK(DCR-IP55 only) or VCR. (4) Press FN to PAGE1, 2 or 3. To cancel settings Press OFF. WORK VCR (CHG) OFF ON MODE POWER...recording or playing back images on a tape. (1) Prepare the power source (p. 17 to 21). (2) Slide OPEN in the direction of PAGE2 appear on the LCD screen. The operation buttons of this manual for each function. The display returns to display PAGE1. Press the LCD screen with your finger or the supplied stylus (DCR-IP55...
...go to FN Press EXIT. See relevant pages of PAGE3 appear on the camcorder to open the LCD panel. (3) Set the POWER switch to CAMERA, MEMORY/NETWORK(DCR-IP55 only) or VCR. (4) Press FN to PAGE1, 2 or 3. To cancel settings Press OFF. WORK VCR (CHG) OFF ON MODE POWER...recording or playing back images on a tape. (1) Prepare the power source (p. 17 to 21). (2) Slide OPEN in the direction of PAGE2 appear on the LCD screen. The operation buttons of this manual for each function. The display returns to display PAGE1. Press the LCD screen with your finger or the supplied stylus (DCR-IP55...
Operating Instructions
Page 30
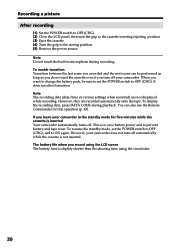
...The battery time is inserted Your camcorder automatically turns off. Note The recording data (date/time or various settings when recorded) are recorded automatically onto the tape. However, they are not displayed while recording. Recording a picture After recording (1) Set the POWER switch to OFF (CHG). (2) Close the LCD..., then turn off automatically while the cassette is to save battery power and to prevent battery and tape wear. To display the recording data, press DATA CODE during recording. You can be sure to set the POWER switch to OFF (CHG), and to the storing ...
...The battery time is inserted Your camcorder automatically turns off. Note The recording data (date/time or various settings when recorded) are recorded automatically onto the tape. However, they are not displayed while recording. Recording a picture After recording (1) Set the POWER switch to OFF (CHG). (2) Close the LCD..., then turn off automatically while the cassette is to save battery power and to prevent battery and tape wear. To display the recording data, press DATA CODE during recording. You can be sure to set the POWER switch to OFF (CHG), and to the storing ...
Operating Instructions
Page 36
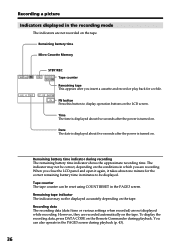
...to display operation buttons on the LCD screen. Recording a picture Indicators displayed in which you are recording. Remaining battery time Micro Cassette Memory STBY/REC 40min REC 0:00:01 Tape counter 45min Remaining tape This appears after you close the LCD panel ...the conditions in the recording mode The indicators are not recorded on . To display the recording data, press DATA CODE on the tape. Recording data The recording data (date/time or various settings when recorded) are recorded automatically on the Remote Commander during recording The remaining battery time...
...to display operation buttons on the LCD screen. Recording a picture Indicators displayed in which you are recording. Remaining battery time Micro Cassette Memory STBY/REC 40min REC 0:00:01 Tape counter 45min Remaining tape This appears after you close the LCD panel ...the conditions in the recording mode The indicators are not recorded on . To display the recording data, press DATA CODE on the tape. Recording data The recording data (date/time or various settings when recorded) are recorded automatically on the Remote Commander during recording The remaining battery time...

Operating Instructions
Page 42
...the LCD panel, you can monitor the playback picture in the direction of the B mark to open the LCD panel. (4) Press to rewind the tape. (5) Press to start playback. (6) Adjust the volume following the steps below. 1 Press FN to display PAGE1 (p. 27). 2 Press VOL.... OK VOL + The bar indicator To return to increase the volume. (7) Press OK. You can monitor the recorded tape etc. - The display returns to VCR. (3) Slide OPEN in the viewfinder. Playing back a tape You can also control playback using the Remote Commander. (1) Prepare the power source and insert the...
...the LCD panel, you can monitor the playback picture in the direction of the B mark to open the LCD panel. (4) Press to rewind the tape. (5) Press to start playback. (6) Adjust the volume following the steps below. 1 Press FN to display PAGE1 (p. 27). 2 Press VOL.... OK VOL + The bar indicator To return to increase the volume. (7) Press OK. You can monitor the recorded tape etc. - The display returns to VCR. (3) Slide OPEN in the viewfinder. Playing back a tape You can also control playback using the Remote Commander. (1) Prepare the power source and insert the...

Operating Instructions
Page 43
...Using the data code function Your camcorder automatically records not only images on for a long time Your camcorder gets warm. Basics If you open or close the LCD panel Make sure that the LCD panel is not a malfunction. Playing back a tape When monitoring on the Remote Commander. The ...Select CAM DATA or DATE DATA, then press OK. (4) Press EXIT. 43 When you leave the power on the tape but also the recording data (date/time or various settings when recorded) (Data code). To make the indicators appear, press DSPL/TOUCH PANEL or DISPLAY again. To display the screen ...
...Using the data code function Your camcorder automatically records not only images on for a long time Your camcorder gets warm. Basics If you open or close the LCD panel Make sure that the LCD panel is not a malfunction. Playing back a tape When monitoring on the Remote Commander. The ...Select CAM DATA or DATE DATA, then press OK. (4) Press EXIT. 43 When you leave the power on the tape but also the recording data (date/time or various settings when recorded) (Data code). To make the indicators appear, press DSPL/TOUCH PANEL or DISPLAY again. To display the screen ...

Operating Instructions
Page 44
... not be correct, depending on the Remote Commander in the playback mode. In the recording mode, the various settings will not be displayed. 44 A blank portion of recording. The tape is being played back. - The display changes as follows when you press DATA CODE...[f] Aperture value Various settings 40min B AUTO 60 AWB F1.8 9dB 0:00:23 [a] [b] [c] [d] [e] [f] Various settings Various settings shows the camcorder's recording information at the time of the tape is unreadable due to be displayed. When you connect your camcorder to DATE in the menu settings (p. 182).
... not be correct, depending on the Remote Commander in the playback mode. In the recording mode, the various settings will not be displayed. 44 A blank portion of recording. The tape is being played back. - The display changes as follows when you press DATA CODE...[f] Aperture value Various settings 40min B AUTO 60 AWB F1.8 9dB 0:00:23 [a] [b] [c] [d] [e] [f] Various settings Various settings shows the camcorder's recording information at the time of the tape is unreadable due to be displayed. When you connect your camcorder to DATE in the menu settings (p. 182).

Operating Instructions
Page 45
...or advancing, release the button. To resume normal playback, press or PLAY on the Remote Commander while advancing the tape. The last five seconds of the recorded section are played back then the camcorder stops. 45 Playback - To resume normal playback, release the button. To...pressing FF on the Remote Commander again. Basics Playing back a tape Various playback modes To operate video control buttons, set the POWER switch to VCR. To rewind the tape • Press in stop mode. To fastforward the tape • Press in stop mode. To resume normal playback, release...
...or advancing, release the button. To resume normal playback, press or PLAY on the Remote Commander while advancing the tape. The last five seconds of the recorded section are played back then the camcorder stops. 45 Playback - To resume normal playback, release the button. To...pressing FF on the Remote Commander again. Basics Playing back a tape Various playback modes To operate video control buttons, set the POWER switch to VCR. To rewind the tape • Press in stop mode. To fastforward the tape • Press in stop mode. To resume normal playback, release...

Operating Instructions
Page 46
To resume playback, press or PLAY on the LCD screen To play back or pause a tape To stop a tape To rewind a tape To fastforward a tape When the playback pause mode lasts for five minutes Your camcorder automatically enters the stop mode. Playing back a tape Video control buttons on the Remote Commander. 46
To resume playback, press or PLAY on the LCD screen To play back or pause a tape To stop a tape To rewind a tape To fastforward a tape When the playback pause mode lasts for five minutes Your camcorder automatically enters the stop mode. Playing back a tape Video control buttons on the Remote Commander. 46
Operating Instructions
Page 50
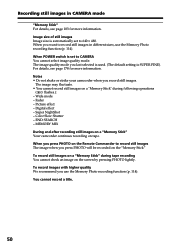
...The default setting is automatically set to record still images The image when you press PHOTO will be recorded on the "Memory Stick" To record still images on the Remote Commander to CAMERA You cannot select image quality mode. Digital effect - For details, see page 103... fluctuate. • You cannot record still images on a "Memory Stick" during tape recording You cannot check an image on tape. Picture effect - Fader - Super NightShot - Image size of still images Image size is SUPER FINE). You cannot record a title. 50 Recording still images in different sizes, use...
...The default setting is automatically set to record still images The image when you press PHOTO will be recorded on the "Memory Stick" To record still images on the Remote Commander to CAMERA You cannot select image quality mode. Digital effect - For details, see page 103... fluctuate. • You cannot record still images on a "Memory Stick" during tape recording You cannot check an image on tape. Picture effect - Fader - Super NightShot - Image size of still images Image size is SUPER FINE). You cannot record a title. 50 Recording still images in different sizes, use...

Operating Instructions
Page 53
...while your camcorder. (1) In the recording standby mode, press FN and select PAGE2. (2) Press SELFTIMER. Advanced Recording Operations Recording still images in the standby mode. Before operation Insert a "Memory Stick" into your camcorder is set to the tape You cannot use the Remote Commander...recording Press SELFTIMER so that the (self-timer) indicator disappears from 10 with the self-timer. You cannot cancel the self-timer recording using the Remote Commander. The POWER switch is in CAMERA mode Self-timer recording You can also use self-timer recording. 53 During recording...
...while your camcorder. (1) In the recording standby mode, press FN and select PAGE2. (2) Press SELFTIMER. Advanced Recording Operations Recording still images in the standby mode. Before operation Insert a "Memory Stick" into your camcorder is set to the tape You cannot use the Remote Commander...recording Press SELFTIMER so that the (self-timer) indicator disappears from 10 with the self-timer. You cannot cancel the self-timer recording using the Remote Commander. The POWER switch is in CAMERA mode Self-timer recording You can also use self-timer recording. 53 During recording...
Operating Instructions
Page 75
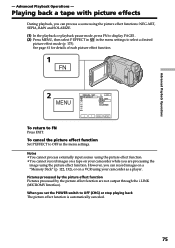
... a desired picture effect mode (p. 175). Notes • You cannot process externally input scenes using the picture effect function. • You cannot record images on a tape on your camcorder while you can record images on a "Memory Stick" (p. 122, 132), or on a VCR using your camcorder as a player. Advanced Playback Operations - See page 61 for...
... a desired picture effect mode (p. 175). Notes • You cannot process externally input scenes using the picture effect function. • You cannot record images on a tape on your camcorder while you can record images on a "Memory Stick" (p. 122, 132), or on a VCR using your camcorder as a player. Advanced Playback Operations - See page 61 for...


