Operating Guide
Page 1
Digital Video Camera Recorder Operating Guide DCR-DVD92/DVD103/DVD203/ DVD403/DVD602/DVD653/DVD703/ DVD803 2-587-622-13 (1) Enjoying with your DVD Handycam 10 Getting Started 16 Easy Handycam 27 Recording/ Playback 32 Playback on DVD devices 44 Using the Recorded disc 50 Using the Setup items 52 Editing on DVD Handycam 72 Dubbing 78 Using a Computer 82 Troubleshooting 87 Additional Information 105 © 2005 Sony Corporation
Digital Video Camera Recorder Operating Guide DCR-DVD92/DVD103/DVD203/ DVD403/DVD602/DVD653/DVD703/ DVD803 2-587-622-13 (1) Enjoying with your DVD Handycam 10 Getting Started 16 Easy Handycam 27 Recording/ Playback 32 Playback on DVD devices 44 Using the Recorded disc 50 Using the Setup items 52 Editing on DVD Handycam 72 Dubbing 78 Using a Computer 82 Troubleshooting 87 Additional Information 105 © 2005 Sony Corporation
Operating Guide
Page 4
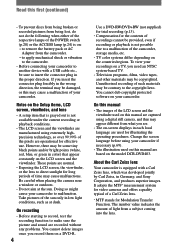
... protected software on the model DCR-DVD403. On recording • Before starting to record, test the recording function to make sure the picture and sound are normal. • Exposing the LCD screen, the viewfinder, or the lens to the copyright laws. Doing so might cause your camcorder. To view your camcorder to another device with a USB cable etc., be copyrighted. It adopts the MTF* measurement system for video cameras...
... protected software on the model DCR-DVD403. On recording • Before starting to record, test the recording function to make sure the picture and sound are normal. • Exposing the LCD screen, the viewfinder, or the lens to the copyright laws. Doing so might cause your camcorder. To view your camcorder to another device with a USB cable etc., be copyrighted. It adopts the MTF* measurement system for video cameras...
Operating Guide
Page 5
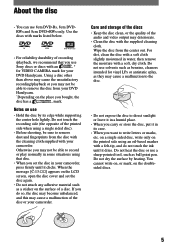
... can use Sony discs or discs with an * for VIDEO CAMERA mark for vinyl LPs or antistatic splay, as they may not be able to remove dust and fingerprints from the disc with the cleaning cloth supplied with the supplied cleaning cloth. Wipe the disc from your DVD Handycam. * Depending on the surface of recording /playback, we recommend that disc. • When you set the disc again...
... can use Sony discs or discs with an * for VIDEO CAMERA mark for vinyl LPs or antistatic splay, as they may not be able to remove dust and fingerprints from the disc with the cleaning cloth supplied with the supplied cleaning cloth. Wipe the disc from your DVD Handycam. * Depending on the surface of recording /playback, we recommend that disc. • When you set the disc again...
Operating Guide
Page 6
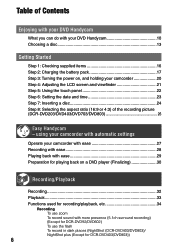
... recording picture (DCR-DVD203/DVD403/DVD703/DVD803 26 Easy Handycam - using your camcorder with automatic settings Operate your camcorder with ease 27 Recording with ease 28 Playing back with ease 29 Preparation for playing back on a DVD player (Finalizing 30 Recording/Playback Recording 32 Playback 33 Functions used for recording/playback, etc 34 Recording To use zoom To record sound with your DVD Handycam 10 Choosing a disc 13 Getting Started Step 1: Checking supplied items 16 Step 2: Charging the battery pack 17 Step 3: Turning...
... recording picture (DCR-DVD203/DVD403/DVD703/DVD803 26 Easy Handycam - using your camcorder with automatic settings Operate your camcorder with ease 27 Recording with ease 28 Playing back with ease 29 Preparation for playing back on a DVD player (Finalizing 30 Recording/Playback Recording 32 Playback 33 Functions used for recording/playback, etc 34 Recording To use zoom To record sound with your DVD Handycam 10 Choosing a disc 13 Getting Started Step 1: Checking supplied items 16 Step 2: Charging the battery pack 17 Step 3: Turning...
Operating Guide
Page 7
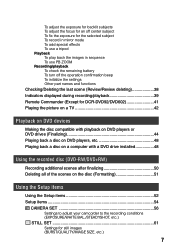
... use a tripod Playback To play back the images in sequence To use PB ZOOM Recording/playback To check the remaining battery To turn off the operation confirmation beep To initialize the settings Other part names and functions Checking/Deleting the last scene (Review/Review deleting 38 Indicators displayed during recording/playback 39 Remote Commander (Except for DCR-DVD92/DVD602 41 Playing the picture on a TV 42 Playback on DVD devices Making the disc compatible with playback on DVD players or DVD drives (Finalizing 44 Playing back a disc...
... use a tripod Playback To play back the images in sequence To use PB ZOOM Recording/playback To check the remaining battery To turn off the operation confirmation beep To initialize the settings Other part names and functions Checking/Deleting the last scene (Review/Review deleting 38 Indicators displayed during recording/playback 39 Remote Commander (Except for DCR-DVD92/DVD602 41 Playing the picture on a TV 42 Playback on DVD devices Making the disc compatible with playback on DVD players or DVD drives (Finalizing 44 Playing back a disc...
Operating Guide
Page 8
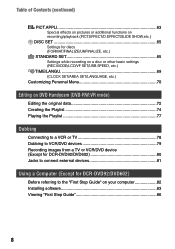
....) STANDARD SET 65 Settings while recording on a disc or other basic settings (REC MODE/LCD/VF SET/USB SPEED, etc.) TIME/LANGU 69 (CLOCK SET/AREA SET/LANGUAGE, etc.) Customizing Personal Menu 70 Editing on DVD Handycam (DVD-RW:VR mode) Editing the original data 72 Creating the Playlist 74 Playing the Playlist 77 Dubbing Connecting to a VCR or TV 78 Dubbing to VCR/DVD devices 79 Recording images from a TV or VCR/DVD device (Except for DCR-DVD92/DVD602 80 Jacks to connect external devices 81 Using...
....) STANDARD SET 65 Settings while recording on a disc or other basic settings (REC MODE/LCD/VF SET/USB SPEED, etc.) TIME/LANGU 69 (CLOCK SET/AREA SET/LANGUAGE, etc.) Customizing Personal Menu 70 Editing on DVD Handycam (DVD-RW:VR mode) Editing the original data 72 Creating the Playlist 74 Playing the Playlist 77 Dubbing Connecting to a VCR or TV 78 Dubbing to VCR/DVD devices 79 Recording images from a TV or VCR/DVD device (Except for DCR-DVD92/DVD602 80 Jacks to connect external devices 81 Using...
Operating Guide
Page 11
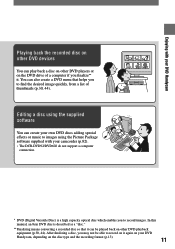
... images using the Picture Package software supplied with your DVD Handycam Playing back the recorded disc on other DVD devices You can play back a disc on other DVD players or on the DVD drive of thumbnails (p.30, 44). After finalizing a disc, you finalize** it again on your camcorder (p.82). • The DCR-DVD92/DVD602 do not support a computer connection. * DVD (Digital Versatile Disc) is described as a "disc." ** Finalizing means converting a recorded disc so that helps you to record...
... images using the Picture Package software supplied with your DVD Handycam Playing back the recorded disc on other DVD devices You can play back a disc on other DVD players or on the DVD drive of thumbnails (p.30, 44). After finalizing a disc, you finalize** it again on your camcorder (p.82). • The DCR-DVD92/DVD602 do not support a computer connection. * DVD (Digital Versatile Disc) is described as a "disc." ** Finalizing means converting a recorded disc so that helps you to record...
Operating Guide
Page 12
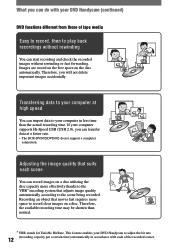
.... Therefore, the available recording time may be shorten than the actual recording time. If your computer supports Hi-Speed USB (USB 2.0), you can do not support a computer connection. This feature enables your computer in accordance with your DVD Handycam (continued) DVD functions different from those of the recorded scenes. Therefore, you will not delete important images accidentally. Images are stored on the free space on a disc utilizing the disc capacity more space...
.... Therefore, the available recording time may be shorten than the actual recording time. If your computer supports Hi-Speed USB (USB 2.0), you can do not support a computer connection. This feature enables your computer in accordance with your DVD Handycam (continued) DVD functions different from those of the recorded scenes. Therefore, you will not delete important images accidentally. Images are stored on the free space on a disc utilizing the disc capacity more space...
Operating Guide
Page 19
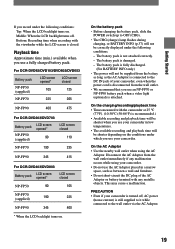
... 345 415 For DCR-DVD403/DVD803 Battery pack LCD screen opened* LCD screen closed . On the battery pack • Before changing the battery pack, slide the POWER switch up to OFF (CHG). • The CHG (charge) lamp flashes during charging, or BATTERY INFO (p.37) will not be shorter depending on the conditions under which you use your camcorder. The battery pack is damaged. - The battery pack is not...
... 345 415 For DCR-DVD403/DVD803 Battery pack LCD screen opened* LCD screen closed . On the battery pack • Before changing the battery pack, slide the POWER switch up to OFF (CHG). • The CHG (charge) lamp flashes during charging, or BATTERY INFO (p.37) will not be shorter depending on the conditions under which you use your camcorder. The battery pack is damaged. - The battery pack is not...
Operating Guide
Page 25
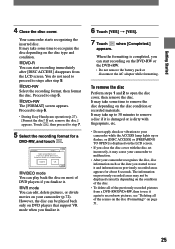
... [DISC ACCESS] or [PREPARING TO OPEN] is completed, you can edit, delete pictures, or divide movies on your camcorder recognizes the disc, disc information such as the date you close the disc cover with the disc set incorrectly, it and information on the LCD screen. • If you started to step 7. 5 Select the recording format for about 8 seconds. It may not be played back only on the disc condition...
... [DISC ACCESS] or [PREPARING TO OPEN] is completed, you can edit, delete pictures, or divide movies on your camcorder recognizes the disc, disc information such as the date you close the disc cover with the disc set incorrectly, it and information on the LCD screen. • If you started to step 7. 5 Select the recording format for about 8 seconds. It may not be played back only on the disc condition...
Operating Guide
Page 34
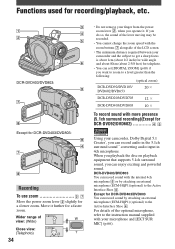
... you operate it further for a faster zoom. DCR-DVD403/DVD803 You can record audio in the 5.1ch surround sound** converting audio input in 4ch microphone. Except for DCR-DVD92/DVD602 Using your microphone and [EXT SUR MIC] (p.66). Move it . If you do so, the sound of the lever moving may be recorded. • You cannot change the zoom speed with the zoom buttons alongside of the optional microphone, refer to a level...
... you operate it further for a faster zoom. DCR-DVD403/DVD803 You can record audio in the 5.1ch surround sound** converting audio input in 4ch microphone. Except for DCR-DVD92/DVD602 Using your microphone and [EXT SUR MIC] (p.66). Move it . If you do so, the sound of the lever moving may be recorded. • You cannot change the zoom speed with the zoom buttons alongside of the optional microphone, refer to a level...
Operating Guide
Page 61
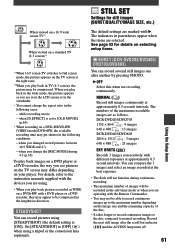
... record pictures using [STEADYSHOT] (the default setting is set to [OLD MOVIE] (p.64). • When recording on a DVD-R/DVD-RW (VIDEO mode)/DVD+RW, the available recording time may appear to be recorded in the self-timer mode or when you are using a tripod or the conversion lens (optional). Record the next still image after another by pressing PHOTO. OFF Select this when not recording continuously. For details, refer to the instruction manuals...
... record pictures using [STEADYSHOT] (the default setting is set to [OLD MOVIE] (p.64). • When recording on a DVD-R/DVD-RW (VIDEO mode)/DVD+RW, the available recording time may appear to be recorded in the self-timer mode or when you are using a tripod or the conversion lens (optional). Record the next still image after another by pressing PHOTO. OFF Select this when not recording continuously. For details, refer to the instruction manuals...
Operating Guide
Page 79
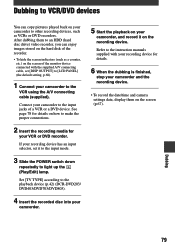
... connections. 2 Insert the recording media for details. 6 When the dubbing is finished, stop your camcorder and the recording device. • To record the date/time and camera settings data, display them to an HDD (hard disc drive) video recorder, you can copy pictures played back on your VCR or DVD recorder. Refer to the instruction manuals supplied with your recording device for your camcorder to other recording devices, such as a counter, etc.) on the screen of the monitor device connected with the supplied A/V connecting cable, set [DISP OUTPUT] to [LCD...
... connections. 2 Insert the recording media for details. 6 When the dubbing is finished, stop your camcorder and the recording device. • To record the date/time and camera settings data, display them to an HDD (hard disc drive) video recorder, you can copy pictures played back on your VCR or DVD recorder. Refer to the instruction manuals supplied with your recording device for your camcorder to other recording devices, such as a counter, etc.) on the screen of the monitor device connected with the supplied A/V connecting cable, set [DISP OUTPUT] to [LCD...
Operating Guide
Page 82
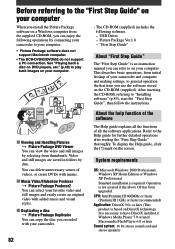
USB Driver - Refer to have DirectX installed.)/ Windows Media Player 7.0 or later/ Macromedia Flash Player 6.0 or later Sound system: 16 bit stereo sound card and stereo speakers 82 See "Playing back a disc on DVD players, etc." (p.48) to play back images on DirectX technology. About the help function of the software The Help guide explains all the functions of your camcorder and computer and making settings, to general operation the first time you use the...
USB Driver - Refer to have DirectX installed.)/ Windows Media Player 7.0 or later/ Macromedia Flash Player 6.0 or later Sound system: 16 bit stereo sound card and stereo speakers 82 See "Playing back a disc on DVD players, etc." (p.48) to play back images on DirectX technology. About the help function of the software The Help guide explains all the functions of your camcorder and computer and making settings, to general operation the first time you use the...
Operating Guide
Page 86
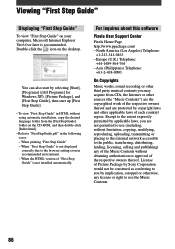
..., uploading, transmitting or placing to the external network accessible to the public, transferring, distributing, lending, licensing, selling and publishing) any license or right to use the Music Contents. 86 License of Picture Package by Sony Corporation would not be construed as conferring to "FirstStepGuide.pdf" in HTML without obtaining authorization or approval of "First Step Guide" is not installed automatically...
..., uploading, transmitting or placing to the external network accessible to the public, transferring, distributing, lending, licensing, selling and publishing) any license or right to use the Music Contents. 86 License of Picture Package by Sony Corporation would not be construed as conferring to "FirstStepGuide.pdf" in HTML without obtaining authorization or approval of "First Step Guide" is not installed automatically...
Operating Guide
Page 89
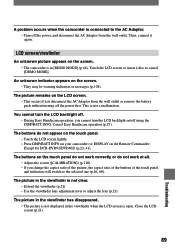
..., connect it again. The picture remains on the Remote Commander: Except for DCR-DVD92/DVD602) (p.22, 41). The picture in the viewfinder has disappeared. • The picture is not displayed in the viewfinder is not clear. • Extend the viewfinder (p.21). • Use the viewfinder lens adjustment lever to cancel [DEMO MODE]. Cancel Easy Handycam operation (p.27). Touch the LCD screen or insert a disc...
..., connect it again. The picture remains on the Remote Commander: Except for DCR-DVD92/DVD602) (p.22, 41). The picture in the viewfinder has disappeared. • The picture is not displayed in the viewfinder is not clear. • Extend the viewfinder (p.21). • Use the viewfinder lens adjustment lever to cancel [DEMO MODE]. Cancel Easy Handycam operation (p.27). Touch the LCD screen or insert a disc...
Operating Guide
Page 91
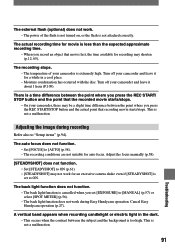
...). Adjusting the image during Easy Handycam operation. Cancel Easy Handycam operation (p.27). This is extremely high. The back light function does not function. • The back light function is cancelled when you press the REC START/STOP button and the actual point that moves fast, the time available for an excessive camera shake even if [STEADYSHOT] is too high. Adjust the focus manually (p.58). [STEADYSHOT] does not function. • Set [STEADYSHOT...
...). Adjusting the image during Easy Handycam operation. Cancel Easy Handycam operation (p.27). This is extremely high. The back light function does not function. • The back light function is cancelled when you press the REC START/STOP button and the actual point that moves fast, the time available for an excessive camera shake even if [STEADYSHOT] is too high. Adjust the focus manually (p.58). [STEADYSHOT] does not function. • Set [STEADYSHOT...
Operating Guide
Page 101
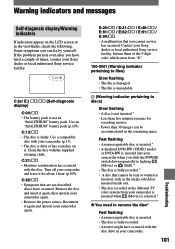
... again and operate your camcorder again. • Remove the power source. Fast flashing • An unrecognizable disc is inserted.* • A finalized DVD-RW (VIDEO mode) or DVD+RW is inserted into your camcorder when you slide the POWER switch down repeatedly to light up (Movie) or (Still).* • The disc is fully recorded.* • A disc that you have occurred. Warning indicators and messages Self-diagnosis display/Warning...
... again and operate your camcorder again. • Remove the power source. Fast flashing • An unrecognizable disc is inserted.* • A finalized DVD-RW (VIDEO mode) or DVD+RW is inserted into your camcorder when you slide the POWER switch down repeatedly to light up (Movie) or (Still).* • The disc is fully recorded.* • A disc that you have occurred. Warning indicators and messages Self-diagnosis display/Warning...

Operating Guide
Page 117
... Cleaning cloth 5 CLOCK SET 23 COLOR SLOW S (Color Slow Shutter) ...... 59, 95 Computer 82 Connect TV 42, 78 VCR 78 Copyright 4, 80, 86, 104 Counter 39 D DATA CODE 67 DATE/TIME 68 DC IN jack 17 DC plug 17 DEMO MODE 64 DIGITAL ZOOM 60 Disc cover OPEN switch...... 24 DISC REMAIN 68 DISC SET 65 Disc title 46, 65 DISP/BATT INFO.... 21, 22, 37 Display indicators .......... 39, 40 DISP OUTPUT 68 Dubbing 79 DVD menu 45 D.EFFECT (Digital...
... Cleaning cloth 5 CLOCK SET 23 COLOR SLOW S (Color Slow Shutter) ...... 59, 95 Computer 82 Connect TV 42, 78 VCR 78 Copyright 4, 80, 86, 104 Counter 39 D DATA CODE 67 DATE/TIME 68 DC IN jack 17 DC plug 17 DEMO MODE 64 DIGITAL ZOOM 60 Disc cover OPEN switch...... 24 DISC REMAIN 68 DISC SET 65 Disc title 46, 65 DISP/BATT INFO.... 21, 22, 37 Display indicators .......... 39, 40 DISP OUTPUT 68 Dubbing 79 DVD menu 45 D.EFFECT (Digital...
Operating Guide
Page 118
... color system 105 TV TYPE 42 See Personal Menu R Rechargeable battery pack See Battery Recording 28, 32 Recording time 18 REC lamp 37, 68 REC MODE 65 REC START/STOP 32 Remaining battery 37 Remote Commander 41 Remote sensor 37 RESET 37 Review 38 Review deleting 38 S Self-diagnosis display ........ 101 SELF-TIMER 59 SEPIA 64 Setup 52 CAMERA SET 56 DISC SET 65 PICT.APPLI 63 Setup items 54 STANDARD SET......... 65 STILL SET 61 TIME/LANGU 69 Using the Setup...
... color system 105 TV TYPE 42 See Personal Menu R Rechargeable battery pack See Battery Recording 28, 32 Recording time 18 REC lamp 37, 68 REC MODE 65 REC START/STOP 32 Remaining battery 37 Remote Commander 41 Remote sensor 37 RESET 37 Review 38 Review deleting 38 S Self-diagnosis display ........ 101 SELF-TIMER 59 SEPIA 64 Setup 52 CAMERA SET 56 DISC SET 65 PICT.APPLI 63 Setup items 54 STANDARD SET......... 65 STILL SET 61 TIME/LANGU 69 Using the Setup...


