Operating Instructions
Page 1
4-153-060-31(1) FM/AM Compact Disc Player Operating Instructions US Mode d'emploi FR Owner's Record The model and serial numbers are located on the bottom of the unit. Refer to these numbers whenever you call upon your Sony dealer regarding this product. Pour annuler l'affichage de démonstration (DEMO), reportez-vous à la page 6. Record the serial number in the space provided below. To cancel the demonstration (DEMO) display, see page 6. CDX-GT640UI Serial No. Model No. CDX-GT640UI ©2009 Sony Corporation
4-153-060-31(1) FM/AM Compact Disc Player Operating Instructions US Mode d'emploi FR Owner's Record The model and serial numbers are located on the bottom of the unit. Refer to these numbers whenever you call upon your Sony dealer regarding this product. Pour annuler l'affichage de démonstration (DEMO), reportez-vous à la page 6. Record the serial number in the space provided below. To cancel the demonstration (DEMO) display, see page 6. CDX-GT640UI Serial No. Model No. CDX-GT640UI ©2009 Sony Corporation
Operating Instructions
Page 4
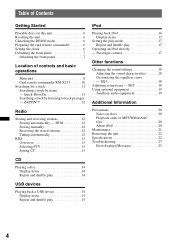
...CT 13 CD Playing a disc 14 Display items 14 Repeat and shuffle play 14 USB devices Playing back a USB device 14 Display items 15 Repeat and shuffle play 15 iPod Playing back iPod 16 Display items 17 Setting the play mode 17 ...DEMO mode 6 Preparing the card remote commander 6 Setting the clock 6 Detaching the front panel 7 Attaching the front panel 7 Location of MP3/WMA/AAC files 20 About iPod 20 Maintenance 21 Removing the unit 22 Specifications 22 Troubleshooting 23 Error displays/Messages 25 4 EQ3 18 Adjusting setup items - ZAPPIN 12 Radio Storing and receiving...
...CT 13 CD Playing a disc 14 Display items 14 Repeat and shuffle play 14 USB devices Playing back a USB device 14 Display items 15 Repeat and shuffle play 15 iPod Playing back iPod 16 Display items 17 Setting the play mode 17 ...DEMO mode 6 Preparing the card remote commander 6 Setting the clock 6 Detaching the front panel 7 Attaching the front panel 7 Location of MP3/WMA/AAC files 20 About iPod 20 Maintenance 21 Removing the unit 22 Specifications 22 Troubleshooting 23 Error displays/Messages 25 4 EQ3 18 Adjusting setup items - ZAPPIN 12 Radio Storing and receiving...
Operating Instructions
Page 6
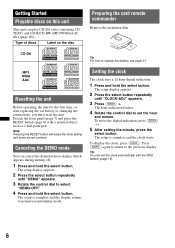
...the select button repeatedly until "CLOCK-ADJ" appears. 3 Press (SEEK) +. Canceling the DEMO mode You can set the hour and minute. The setup is complete and the clock starts. MP3 WMA AAC Resetting the unit Before operating the unit for the first time, or after replacing the ... and hold the select button. The setup display appears. 2 Press the select button repeatedly until "DEMO" appears. 3 Rotate the control dial to normal reception/play CD-DA (also containing CD TEXT) and CD-R/CD-RW (MP3/WMA/AAC files (page 20)). Press (DSPL) again to return to the previous display.
...the select button repeatedly until "CLOCK-ADJ" appears. 3 Press (SEEK) +. Canceling the DEMO mode You can set the hour and minute. The setup is complete and the clock starts. MP3 WMA AAC Resetting the unit Before operating the unit for the first time, or after replacing the ... and hold the select button. The setup display appears. 2 Press the select button repeatedly until "DEMO" appears. 3 Rotate the control dial to normal reception/play CD-DA (also containing CD TEXT) and CD-R/CD-RW (MP3/WMA/AAC files (page 20)). Press (DSPL) again to return to the previous display.
Operating Instructions
Page 19
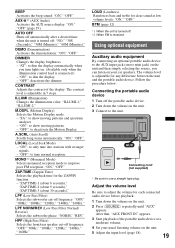
...3 Connect to the unit. The volume level is adjustable in 7 steps. After that, "AUX FRONT IN" appears. 3 Start playback of the display. DEMO (Demonstration) Activates the demonstration: "ON," "OFF." DIMMER Changes the display brightness. - "SA": to show moving patterns. - "ON": to show moving ...HPF (High Pass Filter) Selects the front/rear speaker cut -off automatically after a desired time when the unit is received. M.DSPL (Motion Display) Selects the Motion Display mode. - "OFF": to use a straight type plug. LOUD (Loudness) Reinforces bass and treble for any difference between ...
...3 Connect to the unit. The volume level is adjustable in 7 steps. After that, "AUX FRONT IN" appears. 3 Start playback of the display. DEMO (Demonstration) Activates the demonstration: "ON," "OFF." DIMMER Changes the display brightness. - "SA": to show moving patterns. - "ON": to show moving ...HPF (High Pass Filter) Selects the front/rear speaker cut -off automatically after a desired time when the unit is received. M.DSPL (Motion Display) Selects the Motion Display mode. - "OFF": to use a straight type plug. LOUD (Loudness) Reinforces bass and treble for any difference between ...
Operating Instructions
Page 23
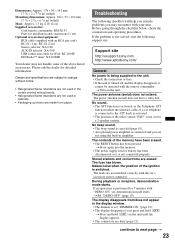
...time are subject to next page t 23 The leads are not using the built-in amplifier. t Press and hold (OFF). Support site http://esupport.sony.com http://www.xplodsony.com/ General No power is being supplied to the ATT lead) is activated. • The position of the above listed ...RCA pin cord): RC-61 (1 m), RC-62 (2 m) Source selector: XA-C40 AUX-IN selector: XA-300 USB connection cable for 5 minutes with "DEMO-ON" set, demonstration mode starts. t Turn on the unit until the display appears. • The connectors are made from /does not appear in the display window. • The...
...time are subject to next page t 23 The leads are not using the built-in amplifier. t Press and hold (OFF). Support site http://esupport.sony.com http://www.xplodsony.com/ General No power is being supplied to the ATT lead) is activated. • The position of the above listed ...RCA pin cord): RC-61 (1 m), RC-62 (2 m) Source selector: XA-C40 AUX-IN selector: XA-300 USB connection cable for 5 minutes with "DEMO-ON" set, demonstration mode starts. t Turn on the unit until the display appears. • The connectors are made from /does not appear in the display window. • The...


