
Operating Instructions
Page 3
... commander RM-X151 (CDX-GT320/GT32W only 6 CD Display items 8 Repeat and shuffle play 8 Radio Storing and receiving stations 8 Storing automatically - BAL/ FAD/SUB 9 Customizing the equalizer curve - Table of Contents About this manual 4 Welcome 4 Getting Started Resetting the unit (CDX-GT320/GT32W only 5 Preparing the card remote commander (CDXGT320/GT32W only 5 Setting the clock 5 Detaching the...
... commander RM-X151 (CDX-GT320/GT32W only 6 CD Display items 8 Repeat and shuffle play 8 Radio Storing and receiving stations 8 Storing automatically - BAL/ FAD/SUB 9 Customizing the equalizer curve - Table of Contents About this manual 4 Welcome 4 Getting Started Resetting the unit (CDX-GT320/GT32W only 5 Preparing the card remote commander (CDXGT320/GT32W only 5 Setting the clock 5 Detaching the...
Operating Instructions
Page 5
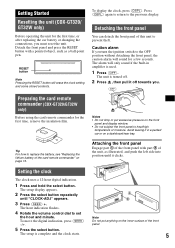
...alarm If you . Tip For how to the OFF position without detaching the front panel, the caution alarm will sound for a few seconds. Setting the clock The clock uses a 12-hour digital indication. 1 Press and hold the select button. Attaching the front panel Engage part A of the front panel with ...ignition switch to replace the battery, see "Replacing the lithium battery of the unit, as a ball-point pen. Getting Started Resetting the unit (CDX-GT320/ GT32W only) Before operating the unit for the first time, remove the insulation film. The setup display appears. 2 Press the select ...
...alarm If you . Tip For how to the OFF position without detaching the front panel, the caution alarm will sound for a few seconds. Setting the clock The clock uses a 12-hour digital indication. 1 Press and hold the select button. Attaching the front panel Engage part A of the front panel with ...ignition switch to replace the battery, see "Replacing the lithium battery of the unit, as a ball-point pen. Getting Started Resetting the unit (CDX-GT320/ GT32W only) Before operating the unit for the first time, remove the insulation film. The setup display appears. 2 Press the select ...
Operating Instructions
Page 8
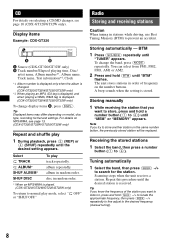
...name, Album number*1, Album name, Track name, Text information*2, Clock *1 Album number is displayed only when the album is changed. (CDX-GT320/GT32W/GT220/GT22W only) *2 When playing an MP3, ID3...until "BTM" flashes. Tuning automatically 1 Select the band, then press (SEEK) -/+ to (6)). Radio Storing and receiving stations Caution When tuning in random order. Tip If you know the frequency of...and settings. BTM 1 Press (SOURCE) repeatedly until the desired setting appears. Note If you try to prevent an accident. CD For details on selecting a CD/MD changer, see page 13. (CDX-GT320...
...name, Album number*1, Album name, Track name, Text information*2, Clock *1 Album number is displayed only when the album is changed. (CDX-GT320/GT32W/GT220/GT22W only) *2 When playing an MP3, ID3...until "BTM" flashes. Tuning automatically 1 Select the band, then press (SEEK) -/+ to (6)). Radio Storing and receiving stations Caution When tuning in random order. Tip If you know the frequency of...and settings. BTM 1 Press (SOURCE) repeatedly until the desired setting appears. Note If you try to prevent an accident. CD For details on selecting a CD/MD changer, see page 13. (CDX-GT320...

Operating Instructions
Page 9
..." or "OFF"). 4 Press and hold the select button. CLOCK-ADJ (Clock Adjust) (page 5) BEEP To set "DEMO-ON" (z) or "DEMO-OFF." AUX-A*1 (AUX Audio) To turn the AUX source display "AUX-A-ON" (z) or "AUX-A-OFF" (page 10). DEMO (Demonstration) To set "BEEP-ON" (z) or "BEEP-OFF." CDX-GT320/GT32W - The volume level is complete and...
..." or "OFF"). 4 Press and hold the select button. CLOCK-ADJ (Clock Adjust) (page 5) BEEP To set "DEMO-ON" (z) or "DEMO-OFF." AUX-A*1 (AUX Audio) To turn the AUX source display "AUX-A-ON" (z) or "AUX-A-OFF" (page 10). DEMO (Demonstration) To set "BEEP-ON" (z) or "BEEP-OFF." CDX-GT320/GT32W - The volume level is complete and...

