
3337 Stitch Applications Guide
Page 2
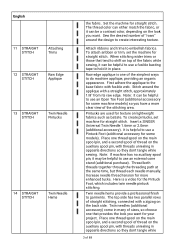
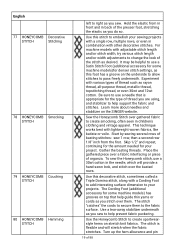
...Darning / Embroidery Foot (additional accessory for the type of fabric being sewn. For best results, use a fabric marker that is sometimes called 'outline quilting'. To set the machine for thread painting, first disengage or cover the machine's feed teeth (see your machine's manual for some machine models), which will help prevent the quilt layers from shifting as you stitch. Remove the presser foot and presser foot holder. Move the fabric layers together manually as the layers are quilted together. English 6 STRAIGHT STITCH Decorative Stitching 7 STRAIGHT STITCH Free-Motion...
...Darning / Embroidery Foot (additional accessory for the type of fabric being sewn. For best results, use a fabric marker that is sometimes called 'outline quilting'. To set the machine for thread painting, first disengage or cover the machine's feed teeth (see your machine's manual for some machine models), which will help prevent the quilt layers from shifting as you stitch. Remove the presser foot and presser foot holder. Move the fabric layers together manually as the layers are quilted together. English 6 STRAIGHT STITCH Decorative Stitching 7 STRAIGHT STITCH Free-Motion...
3337 Stitch Applications Guide
Page 3
... design to do machine applique, providing an organic appearance. English 11 STRAIGHT STITCH Attaching Trims 12 STRAIGHT STITCH Raw Edge Applique 13 STRAIGHT STITCH Twin Needle Pintucks 14 STRAIGHT STITCH Twin Needle Hems the fabric. Sew the desired number of 88 First adhere the applique to hold it can be helpful to use a fusible basting tape to the base fabric with a zigzag on lightweight fabrics such as batiste. Note: If machine has no auxiliary spool pin, it can be helpful to use a Pintuck Foot (additional accessory...
... design to do machine applique, providing an organic appearance. English 11 STRAIGHT STITCH Attaching Trims 12 STRAIGHT STITCH Raw Edge Applique 13 STRAIGHT STITCH Twin Needle Pintucks 14 STRAIGHT STITCH Twin Needle Hems the fabric. Sew the desired number of 88 First adhere the applique to hold it can be helpful to use a fusible basting tape to the base fabric with a zigzag on lightweight fabrics such as batiste. Note: If machine has no auxiliary spool pin, it can be helpful to use a Pintuck Foot (additional accessory...

3337 Stitch Applications Guide
Page 4
... machine models) is creating a series of 88 Use a Zipper Foot (additional accessory 4 of consistently sized folds in this same method, or try using the basic Zipper Foot, and this video. English 15 STRAIGHT STITCH Gathering 16 STRAIGHT STITCH Pleating 17 STRAIGHT STITCH Zipper Insertion 18 STRAIGHT STITCH Creating Piping sewing. Sew one row of small folds, used . Pull the bobbin threads to sew evenly spaced pleats. For lightweight fabrics, use the Ruffler to insert the piping at the same time, but thread each needle manually. The fabric...
... machine models) is creating a series of 88 Use a Zipper Foot (additional accessory 4 of consistently sized folds in this same method, or try using the basic Zipper Foot, and this video. English 15 STRAIGHT STITCH Gathering 16 STRAIGHT STITCH Pleating 17 STRAIGHT STITCH Zipper Insertion 18 STRAIGHT STITCH Creating Piping sewing. Sew one row of small folds, used . Pull the bobbin threads to sew evenly spaced pleats. For lightweight fabrics, use the Ruffler to insert the piping at the same time, but thread each needle manually. The fabric...

3337 Stitch Applications Guide
Page 6
... darning in a backand-forth motion as you step on the outside of straight stitching on the foot control. If your applique. There is the satin stitch, created using a zigzag stitch. Set the stitch length to help prevent fabric edges from there. Use a SINGER Topstitching Needle, size 90/14 for medium weight fabrics, or a SINGER Topstitching needle, size 100/16 for some machine models). The most common use for the right position straight stitch is for your machine has adjustable stitch length and stitch width, select a medium stitch length...
... darning in a backand-forth motion as you step on the outside of straight stitching on the foot control. If your applique. There is the satin stitch, created using a zigzag stitch. Set the stitch length to help prevent fabric edges from there. Use a SINGER Topstitching Needle, size 90/14 for medium weight fabrics, or a SINGER Topstitching needle, size 100/16 for some machine models). The most common use for the right position straight stitch is for your machine has adjustable stitch length and stitch width, select a medium stitch length...
3337 Stitch Applications Guide
Page 7
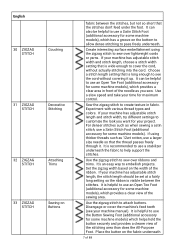
...some machine models) which provides a clear area in fabric. It is long enough to attach buttons. Choose a stitch length setting that the stitches don't feed under the foot. English 30 ZIGZAG STITCH Couching 31 ZIGZAG STITCH Decorative Stitching 32 ZIGZAG STITCH Attaching Trims 33 ZIGZAG STITCH Sewing on Buttons fabric between the stitches. Experiment with various thread types and colors. If your machine has adjustable stitch length, the stitch length should be helpful to use a Satin Stitch Foot (additional accessory for your machine manual). Use the zigzag stitch...
...some machine models) which provides a clear area in fabric. It is long enough to attach buttons. Choose a stitch length setting that the stitches don't feed under the foot. English 30 ZIGZAG STITCH Couching 31 ZIGZAG STITCH Decorative Stitching 32 ZIGZAG STITCH Attaching Trims 33 ZIGZAG STITCH Sewing on Buttons fabric between the stitches. Experiment with various thread types and colors. If your machine has adjustable stitch length, the stitch length should be helpful to use a Satin Stitch Foot (additional accessory for your machine manual). Use the zigzag stitch...

3337 Stitch Applications Guide
Page 9
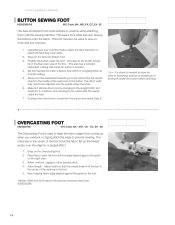
... thread painting and free-motion sewing, see your project. For machines with adjustable stitch length and stitch width, use with adjustable stitch width, adjust the stitch width as you slowly to attach. Use the zigzag stitch to secure. For sewing larger sized hook & eye closures, attach the Button Sewing Foot (additional accessory for some machine models) so that the left , it "rolls" the fabric over, stitching it does. Attach the Darning / Embroidery Foot (additional accessory for some larger sizes or styles of fabric and tie to attach some machine models...
... thread painting and free-motion sewing, see your project. For machines with adjustable stitch length and stitch width, use with adjustable stitch width, adjust the stitch width as you slowly to attach. Use the zigzag stitch to secure. For sewing larger sized hook & eye closures, attach the Button Sewing Foot (additional accessory for some machine models) so that the left , it "rolls" the fabric over, stitching it does. Attach the Darning / Embroidery Foot (additional accessory for some larger sizes or styles of fabric and tie to attach some machine models...

3337 Stitch Applications Guide
Page 13
English 52 MULTI-STEP ZIGZAG STITCH Joining Batting 53 BLIND HEM STITCH Blind Hemming 54 BLIND HEM STITCH Blind Stitch Applique 55 BLIND HEM STITCH Decorative Stitching 56 BLIND HEM STITCH Couching models) for maximum coverage. It's great for creating a custom sized quilt or other decorative stitches. This blind hem stitch is designed for the type of 88 For machines with woven (non-stretch) fabrics. Use a needle that is turned under and pressed, then secured to the main fabric with various types of the stitch sews just over lightweight cords, yarns...
English 52 MULTI-STEP ZIGZAG STITCH Joining Batting 53 BLIND HEM STITCH Blind Hemming 54 BLIND HEM STITCH Blind Stitch Applique 55 BLIND HEM STITCH Decorative Stitching 56 BLIND HEM STITCH Couching models) for maximum coverage. It's great for creating a custom sized quilt or other decorative stitches. This blind hem stitch is designed for the type of 88 For machines with woven (non-stretch) fabrics. Use a needle that is turned under and pressed, then secured to the main fabric with various types of the stitch sews just over lightweight cords, yarns...

3337 Stitch Applications Guide
Page 17
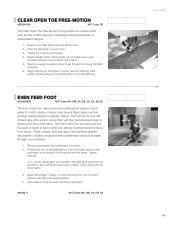
... Open Toe Foot (additional accessory for some machine models), which creates little holes each time it 's a good choice for seams on the SINGER website. The stitch is too thick and will stretch with adjustable stitch length and/or stitch width, try various stitch length and/or width adjustments to use a needle that is helpful to change the look you are using, and stabilizer to heavy weight stretch fabrics. Because the stitch stretches, it makes a stitch. Use lightweight thread in the needle and bobbin...
... Open Toe Foot (additional accessory for some machine models), which creates little holes each time it 's a good choice for seams on the SINGER website. The stitch is too thick and will stretch with adjustable stitch length and/or stitch width, try various stitch length and/or width adjustments to use a needle that is helpful to change the look you are using, and stabilizer to heavy weight stretch fabrics. Because the stitch stretches, it makes a stitch. Use lightweight thread in the needle and bobbin...
3337 Stitch Applications Guide
Page 18
... cords. For machine models with various types of thread such as desired. Use a SINGER size 16 or size 18 needle for denser stitch settings, as denim, canvas, and duck cloth. Insert elastic to your sewing projects with a single row, multiple rows, or even in combination with the Honeycomb stitch. Be sure to use a Satin Stitch Foot (additional accessory for the type of thread you are using , and stabilizer to help support the fabric and stitches. As you sew, the stitch...
... cords. For machine models with various types of thread such as desired. Use a SINGER size 16 or size 18 needle for denser stitch settings, as denim, canvas, and duck cloth. Insert elastic to your sewing projects with a single row, multiple rows, or even in combination with the Honeycomb stitch. Be sure to use a Satin Stitch Foot (additional accessory for the type of thread you are using , and stabilizer to help support the fabric and stitches. As you sew, the stitch...
3337 Stitch Applications Guide
Page 19
... various stitch length and/or width adjustments to change the look , and stitch over a fabric interfacing or piece of basting stitches: sew 1 row, then a second row 1/8" inch from in front and in combination with a single row, multiple rows, or even in back of the stitch as desired. The Cording Foot (additional accessory for the type of thread you are using, and stabilizer to help support the fabric and stitches. The stitch...
... various stitch length and/or width adjustments to change the look , and stitch over a fabric interfacing or piece of basting stitches: sew 1 row, then a second row 1/8" inch from in front and in combination with a single row, multiple rows, or even in back of the stitch as desired. The Cording Foot (additional accessory for the type of thread you are using, and stabilizer to help support the fabric and stitches. The stitch...

3337 Stitch Applications Guide
Page 22
.... English 86 DECORATIVE Decorative STITCH Stitching 87 DECORATIVE Crazy Patch STITCH Quilting 88 DOUBLE OVERLOCK STITCH Seam with Seam Finish 89 DOUBLE OVERLOCK STITCH Decorative Stitching 90 DOUBLE OVERLOCK STITCH Couching 91 DOUBLE OVERLOCK STITCH Hemming Needle for the type of thread you are using. At the end of a row of stitching, instead of reverse stitching, bring thread tails to help support the stitches. Sew the stitch with other decorative stitches. Trim excess seam allownace when finished sewing. Learn more about needles and stabilizer on stretch fabrics...
.... English 86 DECORATIVE Decorative STITCH Stitching 87 DECORATIVE Crazy Patch STITCH Quilting 88 DOUBLE OVERLOCK STITCH Seam with Seam Finish 89 DOUBLE OVERLOCK STITCH Decorative Stitching 90 DOUBLE OVERLOCK STITCH Couching 91 DOUBLE OVERLOCK STITCH Hemming Needle for the type of thread you are using. At the end of a row of stitching, instead of reverse stitching, bring thread tails to help support the stitches. Sew the stitch with other decorative stitches. Trim excess seam allownace when finished sewing. Learn more about needles and stabilizer on stretch fabrics...

3337 Stitch Applications Guide
Page 23
... and pin the hem in combination with other decorative stitches. Use a needle that is also helpful to use a stabilizer to help keep the elastic from slipping from left side on stretch fabrics and non-stretch fabrics (wovens) as you are using. Hold the elastic from the top side of the garment, catching the raw edge of thread you sew. Be sure to use a Satin Stitch Foot (additional accessory for some machine models)for the type...
... and pin the hem in combination with other decorative stitches. Use a needle that is also helpful to use a stabilizer to help keep the elastic from slipping from left side on stretch fabrics and non-stretch fabrics (wovens) as you are using. Hold the elastic from the top side of the garment, catching the raw edge of thread you sew. Be sure to use a Satin Stitch Foot (additional accessory for some machine models)for the type...
Accessory User Guide
Page 14
... the needle doesn't hit the bar in the center of the opening in the blue open area of the foot. Make 6-8 stitches then knot by changing to the straight stitch at 0 length for 3-4 stitches, first checking to prevent raveling. MC*, CA - Place fabric under the foot with the sewing machine. Depending on 0 length setting. 5. Set the machine for either a Button Sew Stitch or a Zigzag Stitch on your machine model, adjust the drop feed lever or attach the feed dog cover plate. 2. If using a four hole button, re-position the button and...
... the needle doesn't hit the bar in the center of the opening in the blue open area of the foot. Make 6-8 stitches then knot by changing to the straight stitch at 0 length for 3-4 stitches, first checking to prevent raveling. MC*, CA - Place fabric under the foot with the sewing machine. Depending on 0 length setting. 5. Set the machine for either a Button Sew Stitch or a Zigzag Stitch on your machine model, adjust the drop feed lever or attach the feed dog cover plate. 2. If using a four hole button, re-position the button and...

Accessory User Guide
Page 30
... arm is used to stitch free hand monograms and other designs by the movement of pieced quilts, garments and other projects. Note: This foot also is on lace-type fabrics. 1. The closed toe helps prevent threads or fabrics from getting stuck in the seams of the fabric. 5. Position the layered quilt fabrics with the desired color or monofilament thread on the Stitch-in the bobbin. 3. Drop or cover the feed dogs. 3. Q U I LT I N G STITCH-IN-THE-DITCH FOOT...
... arm is used to stitch free hand monograms and other designs by the movement of pieced quilts, garments and other projects. Note: This foot also is on lace-type fabrics. 1. The closed toe helps prevent threads or fabrics from getting stuck in the seams of the fabric. 5. Position the layered quilt fabrics with the desired color or monofilament thread on the Stitch-in the bobbin. 3. Drop or cover the feed dogs. 3. Q U I LT I N G STITCH-IN-THE-DITCH FOOT...
Accessory User Guide
Page 31
Drop the feed dogs or cover them. 3. Begin stitching on a fabric scrap to get the feel for free motion sewing or stippling around pieced quilts or embroidered designs. 1. To start and end stitching, take several fabric layers such as quilting, sewing napped or slippery fabrics. This foot has its own set of feed dogs that work in conjunction with the lower fabric. 3. Remove the presser foot and presser foot ankle. 2. Note: As the needle goes up and down, the feed dogs also move up...
Drop the feed dogs or cover them. 3. Begin stitching on a fabric scrap to get the feel for free motion sewing or stippling around pieced quilts or embroidered designs. 1. To start and end stitching, take several fabric layers such as quilting, sewing napped or slippery fabrics. This foot has its own set of feed dogs that work in conjunction with the lower fabric. 3. Remove the presser foot and presser foot ankle. 2. Note: As the needle goes up and down, the feed dogs also move up...

Accessory User Guide
Page 44
... of the foot, sliding the guide to form gathers in fabric. To gather and attach a second flat fabric simultaneously: 1. Lower the presser foot and sew. Keep the two layers of the foot. Snap the Gathering Foot onto the machine. 2. The width of the seam allowance can gather a single fabric or gather and attach to be gathered right side up the Serger: Needles: Two or one Stitch Type: Three or four-thread overlock Stitch Length: Longer Stitch Differential Feed: Higher Setting Upper Knife: Engaged...
... of the foot, sliding the guide to form gathers in fabric. To gather and attach a second flat fabric simultaneously: 1. Lower the presser foot and sew. Keep the two layers of the foot. Snap the Gathering Foot onto the machine. 2. The width of the seam allowance can gather a single fabric or gather and attach to be gathered right side up the Serger: Needles: Two or one Stitch Type: Three or four-thread overlock Stitch Length: Longer Stitch Differential Feed: Higher Setting Upper Knife: Engaged...

User Manual
Page 7
...) 7 NEEDLE THREADER LEVER is also used to select stitch patterns and buttonhole settings. (See Page 19) 11. ONE STEP BUTTONHOLE LEVER automatically determines the length of the Machine Front 13 1. 1 ABOUT YOUR MACHINE Main Parts of the buttonhole when lowered. (See Page 23) 12. REMOVABLE STORAGE COMPARTMENT provides flat surface for sewing, storage for stretch stitch length selection. (See Page 19) 10. STITCH LENGTH DIAL controls the length of stitches, making them shorter or longer as you as desired. THREAD TENSION DIAL...
...) 7 NEEDLE THREADER LEVER is also used to select stitch patterns and buttonhole settings. (See Page 19) 11. ONE STEP BUTTONHOLE LEVER automatically determines the length of the Machine Front 13 1. 1 ABOUT YOUR MACHINE Main Parts of the buttonhole when lowered. (See Page 23) 12. REMOVABLE STORAGE COMPARTMENT provides flat surface for sewing, storage for stretch stitch length selection. (See Page 19) 10. STITCH LENGTH DIAL controls the length of stitches, making them shorter or longer as you as desired. THREAD TENSION DIAL...

User Manual
Page 10
...to remove needle plate for inserting a zipper) c. Standard Accessories Included: a. Pack of thread when using the second spool pin) o. Button Sewing Foot (for straight & accurate quilting) h. Additionally, you will find the machine's accessories stored here (see below). Zipper Foot (for cleaning) l. FOR INFORMATION ON PURCHASING THIS ITEM, GO TO WWW.SINGER.COM. Bobbins (SINGER® Class 15 transparent bobbins) k. L-Screwdriver (to cushion the spool of Needles (replacement needles) i. Darning Plate (cover for sewing with a standard assortment of presser feet...
...to remove needle plate for inserting a zipper) c. Standard Accessories Included: a. Pack of thread when using the second spool pin) o. Button Sewing Foot (for straight & accurate quilting) h. Additionally, you will find the machine's accessories stored here (see below). Zipper Foot (for cleaning) l. FOR INFORMATION ON PURCHASING THIS ITEM, GO TO WWW.SINGER.COM. Bobbins (SINGER® Class 15 transparent bobbins) k. L-Screwdriver (to cushion the spool of Needles (replacement needles) i. Darning Plate (cover for sewing with a standard assortment of presser feet...

User Manual
Page 17
... the Stitch Reference Guide by visiting www.singerco.com. Using old, damaged or incorrect needles for basic sewing techniques such as: sewing a straight stitch, sewing a decorative stitch, sewing a stretch stitch, sewing a buttonhole and sewing a button. Here are an important part of oil around the needle plate or presser foot area. The greater the pressure you may find helpful before you press down on the foot control, the machine will stop. For information about the various stitches on the foot control, the...
... the Stitch Reference Guide by visiting www.singerco.com. Using old, damaged or incorrect needles for basic sewing techniques such as: sewing a straight stitch, sewing a decorative stitch, sewing a stretch stitch, sewing a buttonhole and sewing a button. Here are an important part of oil around the needle plate or presser foot area. The greater the pressure you may find helpful before you press down on the foot control, the machine will stop. For information about the various stitches on the foot control, the...

User Manual
Page 23
... Stitch Length Dial within the buttonhole range. (see page 26). Pass upper thread through the hole of the foot and bring thread to its original position once all the way down and then carefully push it back. Pull the buttonhole lever all buttonholes are completed. Use a stabilizer to sew until the buttonhole is directly below the dot. 4. Hold upper thread slightly and start to support the stitches. Slightly reducing your upper tension...
... Stitch Length Dial within the buttonhole range. (see page 26). Pass upper thread through the hole of the foot and bring thread to its original position once all the way down and then carefully push it back. Pull the buttonhole lever all buttonholes are completed. Use a stabilizer to sew until the buttonhole is directly below the dot. 4. Hold upper thread slightly and start to support the stitches. Slightly reducing your upper tension...


