
XVZ12000 Operation Manual
Page 2
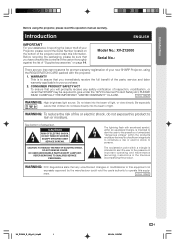
Model No.: XV-Z12000 Serial No.: There are two important reasons for prompt warranty registration of your new SHARP Projector, using the projector, please read this information. ONLY WARNING: High brightness light source. REFER SERVICING TO QUALIFIED SERVICE PERSONNEL. Do not... WARNING: FCC Regulations state that you immediately receive the full benefit of the parts, service and labor warranty applicable to your Projector, please record the Serial Number located on page 14. Introduction ENGLISH IMPORTANT For your assistance in the literature accompanying the product....
Model No.: XV-Z12000 Serial No.: There are two important reasons for prompt warranty registration of your new SHARP Projector, using the projector, please read this information. ONLY WARNING: High brightness light source. REFER SERVICING TO QUALIFIED SERVICE PERSONNEL. Do not... WARNING: FCC Regulations state that you immediately receive the full benefit of the parts, service and labor warranty applicable to your Projector, please record the Serial Number located on page 14. Introduction ENGLISH IMPORTANT For your assistance in the literature accompanying the product....
XVZ12000 Operation Manual
Page 3
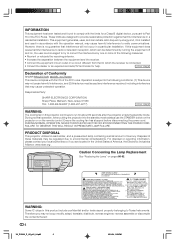
...-237-4277) U.S.A. This equipment generates, uses, and can be regulated due to Part 15 of mercury. ONLY Declaration of Conformity SHARP PROJECTOR, MODEL XV-Z12000 This device complies with the operation manual, may cause harmful interference to provide reasonable protection against harmful interference in the United States of the following ...
...-237-4277) U.S.A. This equipment generates, uses, and can be regulated due to Part 15 of mercury. ONLY Declaration of Conformity SHARP PROJECTOR, MODEL XV-Z12000 This device complies with the operation manual, may cause harmful interference to provide reasonable protection against harmful interference in the United States of the following ...

XVZ12000 Operation Manual
Page 4
...16 Connecting the Power Cord 16 Connecting to Video Equipment 17 Connecting the Projector to Access the PDF Operation Manuals of SharpVision Manager 8 Quick Guide 9 Part Names 10 Projector (Front and Top View 10 Projector (Rear View 11 Remote Control (Front View 12 Remote Control (Top ...60 XV_Z12000_E_US_p01_04.p65 3 -3 03.9.24, 1:53 PM Introduction Contents Introduction Contents 3 IMPORTANT SAFEGUARDS 5 How to a Computer 22 Controlling the Projector by a Computer 25 Using as a Wired Remote Control 26 Setup 27 Using the Adjustment Feet 27 Adjusting the Lens 28 Using the ...
...16 Connecting the Power Cord 16 Connecting to Video Equipment 17 Connecting the Projector to Access the PDF Operation Manuals of SharpVision Manager 8 Quick Guide 9 Part Names 10 Projector (Front and Top View 10 Projector (Rear View 11 Remote Control (Front View 12 Remote Control (Top ...60 XV_Z12000_E_US_p01_04.p65 3 -3 03.9.24, 1:53 PM Introduction Contents Introduction Contents 3 IMPORTANT SAFEGUARDS 5 How to a Computer 22 Controlling the Projector by a Computer 25 Using as a Wired Remote Control 26 Setup 27 Using the Adjustment Feet 27 Adjusting the Lens 28 Using the ...

XVZ12000 Operation Manual
Page 8
ity, SHARP recommends that this can create damage due to the rise in internal ... the standby mode. Avoid locations with the lens. I If the cooling fan becomes obstructed, a protection circuit will return the projector to rise, the lamp will make the connections. Refer to hard impact and/ or vibration. Info • The cooling fan... page 78 for long hours continuously will turn on how to be performed by an Authorized SharpVision Service Center or Dealer. In case of the projector from -4°F to 140°F (-20°C to a maximum angle of the lens...
ity, SHARP recommends that this can create damage due to the rise in internal ... the standby mode. Avoid locations with the lens. I If the cooling fan becomes obstructed, a protection circuit will return the projector to rise, the lamp will make the connections. Refer to hard impact and/ or vibration. Info • The cooling fan... page 78 for long hours continuously will turn on how to be performed by an Authorized SharpVision Service Center or Dealer. In case of the projector from -4°F to 140°F (-20°C to a maximum angle of the lens...

XVZ12000 Operation Manual
Page 9
..."CD-ROM" icon. 3 Double click the "MANUALS" folder. 4 Double click the language (name of SharpVision Manager PDF operation manuals in several languages for the "SharpVision Manager" theater projector software provided are included in the CD-ROM. In this case, stop installation by clicking on "Cancel". ... file to view. 6 Double click the installation program and follow the instructions on the screen. Note • The installer of SharpVision Manager may start Acrobat Reader first, then specify the desired file using Acrobat Reader for important information not included in the CD-ROM...
..."CD-ROM" icon. 3 Double click the "MANUALS" folder. 4 Double click the language (name of SharpVision Manager PDF operation manuals in several languages for the "SharpVision Manager" theater projector software provided are included in the CD-ROM. In this case, stop installation by clicking on "Cancel". ... file to view. 6 Double click the installation program and follow the instructions on the screen. Note • The installer of SharpVision Manager may start Acrobat Reader first, then specify the desired file using Acrobat Reader for important information not included in the CD-ROM...

XVZ12000 Operation Manual
Page 10
... blue. Connect the output terminal of the video equipment to each page for the procedure from the lens. (Page 10) 9. Required equipments Projector Remote control • Insert the batteries. (Page 13) Power cord Video equipment Composite video cable (commercially available) 1. To video out- ... the zooming by rotating the focus ring. Composite video cable (commercially available) To INPUT 4 terminal 7. Power cord Note • This projector can also be connected to a computer as well as an example for details. Remove the lens cap from setup to select the INPUT ...
... blue. Connect the output terminal of the video equipment to each page for the procedure from the lens. (Page 10) 9. Required equipments Projector Remote control • Insert the batteries. (Page 13) Power cord Video equipment Composite video cable (commercially available) 1. To video out- ... the zooming by rotating the focus ring. Composite video cable (commercially available) To INPUT 4 terminal 7. Power cord Note • This projector can also be connected to a computer as well as an example for details. Remove the lens cap from setup to select the INPUT ...

XVZ12000 Operation Manual
Page 11
... screen display are simplified for explanation, and may differ slightly from the lens. 78 Lamp indicator Illuminates blue, indicating normal function. Projector (Front and Top View) Adjustment buttons 43 For selecting menu items. ENTER button 43 For setting items selected or adjusted on the... lens. Replace the lamp when the indicator illuminates red. 34 Power indicator Illuminates red, when the projector is turned on . 37 STANDBY button For putting the projector into the standby mode. 78 Temperature warning indicator When the internal temperature rises, this indicator will illuminate...
... screen display are simplified for explanation, and may differ slightly from the lens. 78 Lamp indicator Illuminates blue, indicating normal function. Projector (Front and Top View) Adjustment buttons 43 For selecting menu items. ENTER button 43 For setting items selected or adjusted on the... lens. Replace the lamp when the indicator illuminates red. 34 Power indicator Illuminates red, when the projector is turned on . 37 STANDBY button For putting the projector into the standby mode. 78 Temperature warning indicator When the internal temperature rises, this indicator will illuminate...

XVZ12000 Operation Manual
Page 12
...DC 12V OUTPUT terminal 26 WIRED REMOTE control input terminal 17 INPUT 4 terminal For connecting video equipment. Using the Terminal Cover When the projector is used on the projector and attach the clips. -11 XV_Z12000_E_US_p05_14.p65 11 03.9.26, 6:35 PM PUSH! 3 3 1 2 1 Removing the rubber ...for component and RGB signals. AC socket 16 17 INPUT 3 terminal Terminal for use it to secure the projector. Using the Kensington Lock This projector has a Kensington Security Standard connector for connecting video equipment with an S-video terminal. 25 RS-232C terminal For controlling...
...DC 12V OUTPUT terminal 26 WIRED REMOTE control input terminal 17 INPUT 4 terminal For connecting video equipment. Using the Terminal Cover When the projector is used on the projector and attach the clips. -11 XV_Z12000_E_US_p05_14.p65 11 03.9.26, 6:35 PM PUSH! 3 3 1 2 1 Removing the rubber ...for component and RGB signals. AC socket 16 17 INPUT 3 terminal Terminal for use it to secure the projector. Using the Kensington Lock This projector has a Kensington Security Standard connector for connecting video equipment with an S-video terminal. 25 RS-232C terminal For controlling...

XVZ12000 Operation Manual
Page 13
Part Names Remote Control (Front View) STANDBY button 37 For putting the projector into the standby mode. Backlight button For lighting all buttons on the remote control. 26 WIRED R/C JACK For controlling the projector by connecting the remote control to the default settings. UNDO button 43 For undoing an operation... or returning to the projector. 03.9.26, 6:35 PM Remote Control (Top View) Remote control signal transmitters 13 -12 XV_Z12000_E_US_p05_14.p65 12 34 ON button For turning ...
Part Names Remote Control (Front View) STANDBY button 37 For putting the projector into the standby mode. Backlight button For lighting all buttons on the remote control. 26 WIRED R/C JACK For controlling the projector by connecting the remote control to the default settings. UNDO button 43 For undoing an operation... or returning to the projector. 03.9.26, 6:35 PM Remote Control (Top View) Remote control signal transmitters 13 -12 XV_Z12000_E_US_p05_14.p65 12 34 ON button For turning ...

XVZ12000 Operation Manual
Page 14
..., and lower the cover until it clicks in the package. 1 Pull down the tab on how they have run out, as possible with this projector may exhaust over a short period, depending on the cover and remove the cover towards the direction of the arrow. 2 Insert the included batteries.... and marks inside the battery compartment. 3 Insert the lower tab of the signal may malfunction under a fluorescent lamp. Under that circumstance, move the projector away from the fluorescent lamp. 45˚ 30˚ Remote control Inserting the Batteries The batteries (two "AA" size) are kept. Incorrect use...
..., and lower the cover until it clicks in the package. 1 Pull down the tab on how they have run out, as possible with this projector may exhaust over a short period, depending on the cover and remove the cover towards the direction of the arrow. 2 Insert the included batteries.... and marks inside the battery compartment. 3 Insert the lower tab of the signal may malfunction under a fluorescent lamp. Under that circumstance, move the projector away from the fluorescent lamp. 45˚ 30˚ Remote control Inserting the Batteries The batteries (two "AA" size) are kept. Incorrect use...

XVZ12000 Operation Manual
Page 17
... page 22.) I A DVI cable (See page 23.) I An RS-232C cable (See page 25.) Connecting the Power Cord Plug in the United States. This projector can be connected to: Video equipment: I A DVD player or DTV* decoder (See page 18.) *DTV is the last device to be connected before making connections.... When connecting a computer, be sure that it is the umbrella term used to be turned on the projector and then the other video equipment (See page 17.) I A VCR, DVD player or other devices. After making all the connections are made. • ...
... page 22.) I A DVI cable (See page 23.) I An RS-232C cable (See page 25.) Connecting the Power Cord Plug in the United States. This projector can be connected to: Video equipment: I A DVD player or DTV* decoder (See page 18.) *DTV is the last device to be connected before making connections.... When connecting a computer, be sure that it is the umbrella term used to be turned on the projector and then the other video equipment (See page 17.) I A VCR, DVD player or other devices. After making all the connections are made. • ...

XVZ12000 Operation Manual
Page 18
... video equipment can be connected to INPUT 3 or INPUT 4 input terminal. 1 Connect an S-video cable or a composite video cable to the projector. • S-video cable: to INPUT 3 terminal • Composite video cable: to INPUT 4 terminal S-video cable (commercially available) *Use when...video output terminal. To view a higher-quality image, use a commercially available S-video cable to connect the INPUT 3 terminal on the projector and the S-video output terminal on the video equipment. Connections and Setup Connecting to Video Equipment Connecting to Video Equipment Using an S-video...
... video equipment can be connected to INPUT 3 or INPUT 4 input terminal. 1 Connect an S-video cable or a composite video cable to the projector. • S-video cable: to INPUT 3 terminal • Composite video cable: to INPUT 4 terminal S-video cable (commercially available) *Use when...video output terminal. To view a higher-quality image, use a commercially available S-video cable to connect the INPUT 3 terminal on the projector and the S-video output terminal on the video equipment. Connections and Setup Connecting to Video Equipment Connecting to Video Equipment Using an S-video...

XVZ12000 Operation Manual
Page 19
...new digital television system in the "Options" menu, or select the Component mode by pressing on the remote control. Note • When connecting the projector to the video equipment in this way, select "Component" for "Signal Type" in the United States. 1 Connect a component cable to the... projector. 2 Connect the above cable to "480P" during input of a 480P signal. To INPUT 1 or 2 terminals Component cable (commercially available) To analog component output ...
...new digital television system in the "Options" menu, or select the Component mode by pressing on the remote control. Note • When connecting the projector to the video equipment in this way, select "Component" for "Signal Type" in the United States. 1 Connect a component cable to the... projector. 2 Connect the above cable to "480P" during input of a 480P signal. To INPUT 1 or 2 terminals Component cable (commercially available) To analog component output ...

XVZ12000 Operation Manual
Page 20
...select the A. RGB mode by tightening the thumbscrews. RGB" for "Signal Type" in the United States. 1 Connect a 5 RCA RGB cable to the projector. 2 Connect the above cable to the RGB video equipment. • Secure the connectors by pressing on the remote control. Connecting to RGB Video Equipment Using... the DVI to 15-pin D-sub Adaptor and the RGB Cable (INPUT 5) 1 Connect a DVI to 15-pin D-sub adaptor to the projector. 2 Connect the above adaptor to an RGB cable. 3 Connect the above cable to the RGB video equipment. XV_Z12000_E_US_p15_26.p65 19 To INPUT 1 or ...
...select the A. RGB mode by tightening the thumbscrews. RGB" for "Signal Type" in the United States. 1 Connect a 5 RCA RGB cable to the projector. 2 Connect the above cable to the RGB video equipment. • Secure the connectors by pressing on the remote control. Connecting to RGB Video Equipment Using... the DVI to 15-pin D-sub Adaptor and the RGB Cable (INPUT 5) 1 Connect a DVI to 15-pin D-sub adaptor to the projector. 2 Connect the above adaptor to an RGB cable. 3 Connect the above cable to the RGB video equipment. XV_Z12000_E_US_p15_26.p65 19 To INPUT 1 or ...

XVZ12000 Operation Manual
Page 21
sub cable to the above adaptor. • Secure the connectors by tightening the thumbscrews. 3 Connect the above cable to 15-pin D- Connecting the Projector to Other Devices Connecting to Component Video Equipment Using a 3 RCA to 15-pin D-sub Cable and the DVI to 15-pin D-sub Adaptor (INPUT ... is the umbrella term used to describe the new digital television system in the United States. 1 Connect a DVI to 15-pin D-sub adaptor to the projector. 2 Connect a 3 RCA to the video equipment. Note • Select the input signal type of the video equipment. Optional accessories 3 RCA to 15...
sub cable to the above adaptor. • Secure the connectors by tightening the thumbscrews. 3 Connect the above cable to 15-pin D- Connecting the Projector to Other Devices Connecting to Component Video Equipment Using a 3 RCA to 15-pin D-sub Cable and the DVI to 15-pin D-sub Adaptor (INPUT ... is the umbrella term used to describe the new digital television system in the United States. 1 Connect a DVI to 15-pin D-sub adaptor to the projector. 2 Connect a 3 RCA to the video equipment. Note • Select the input signal type of the video equipment. Optional accessories 3 RCA to 15...

XVZ12000 Operation Manual
Page 22
Connecting to Video Equipment with the DVI output terminal such as DVD players to INPUT 5 terminal. 1 Connect a DVI to HDMI cable to the projector. • Secure the connectors by tightening the thumbscrews. Connecting to Video Equipment with the DVI Output Terminal Using a DVI Cable (INPUT 5) Use.... 1 Connect a DVI cable to the video equipment. After making all connections, turn on the projector and then the other devices. Note • Select the input signal type of the projector from the AC outlet and turn off the devices to unplug the power cord of the video equipment...
Connecting to Video Equipment with the DVI output terminal such as DVD players to INPUT 5 terminal. 1 Connect a DVI to HDMI cable to the projector. • Secure the connectors by tightening the thumbscrews. Connecting to Video Equipment with the DVI Output Terminal Using a DVI Cable (INPUT 5) Use.... 1 Connect a DVI cable to the video equipment. After making all connections, turn on the projector and then the other devices. Note • Select the input signal type of the projector from the AC outlet and turn off the devices to unplug the power cord of the video equipment...

XVZ12000 Operation Manual
Page 23
... Using the DVI to 15-pin D-sub Adaptor and the RGB Cable (INPUT 5) 1 Connect a DVI to 15-pin D-sub adaptor to the projector. 2 Connect the above adaptor to an RGB cable. 3 Connect the above cable to the computer operation manual for switching the computer signal output settings...in this way, select "A. Refer to the computer. • Secure the connectors by pressing on page 88 for use with the projector. Contact your nearest Authorized SharpVision Service Center or Dealer. • Depending on the computer you are using, an image may cause some Macintosh computers. Optional accessory ...
... Using the DVI to 15-pin D-sub Adaptor and the RGB Cable (INPUT 5) 1 Connect a DVI to 15-pin D-sub adaptor to the projector. 2 Connect the above adaptor to an RGB cable. 3 Connect the above cable to the computer operation manual for switching the computer signal output settings...in this way, select "A. Refer to the computer. • Secure the connectors by pressing on page 88 for use with the projector. Contact your nearest Authorized SharpVision Service Center or Dealer. • Depending on the computer you are using, an image may cause some Macintosh computers. Optional accessory ...

XVZ12000 Operation Manual
Page 24
... making all the connections are made. See page 69. • Before connecting, be sure to unplug the power cord of the projector from the AC outlet and turn on the projector and then the computer. • Be sure that the computer is analog or digital. DVI cable (sold separately) To DVI Digital...
... making all the connections are made. See page 69. • Before connecting, be sure to unplug the power cord of the projector from the AC outlet and turn on the projector and then the computer. • Be sure that the computer is analog or digital. DVI cable (sold separately) To DVI Digital...

XVZ12000 Operation Manual
Page 25
...I Before using the "Plug and Play" function, be sure to the RGB cable. The projector and a VESA DDC compatible computer will communicate their setting requirements, allowing for quick and easy setup. I This projector is compatible with a VESA DDC compatible computer. -24 XV_Z12000_E_US_p15_26.p65 24 03.9.26, 6:37...; The DDC "Plug and Play" function of the plug. Then, firmly secure the connectors by tightening the screws on the projector first and the connected computer last. I Connect the thumbscrew cable making sure that it fits correctly into the terminal. Connecting the...
...I Before using the "Plug and Play" function, be sure to the RGB cable. The projector and a VESA DDC compatible computer will communicate their setting requirements, allowing for quick and easy setup. I This projector is compatible with a VESA DDC compatible computer. -24 XV_Z12000_E_US_p15_26.p65 24 03.9.26, 6:37...; The DDC "Plug and Play" function of the plug. Then, firmly secure the connectors by tightening the screws on the projector first and the connected computer last. I Connect the thumbscrew cable making sure that it fits correctly into the terminal. Connecting the...

XVZ12000 Operation Manual
Page 26
...or disconnect an RS-232C cable to the computer. • Secure the connectors by a Computer Controlling the Projector Using an RS-232C Cable When the RS-232C terminal on the projector is connected to a computer with an RS-232C cable (null modem, cross type, commercially available), the ...computer can be used to the operation manual of the projector. To RS-232C terminal RS-232C cable (commercially available) To RS-232C terminal Desktop computer XV_Z12000_E_US_p15_26.p65 25 03.9.26, 6:37 PM -25...
...or disconnect an RS-232C cable to the computer. • Secure the connectors by a Computer Controlling the Projector Using an RS-232C Cable When the RS-232C terminal on the projector is connected to a computer with an RS-232C cable (null modem, cross type, commercially available), the ...computer can be used to the operation manual of the projector. To RS-232C terminal RS-232C cable (commercially available) To RS-232C terminal Desktop computer XV_Z12000_E_US_p15_26.p65 25 03.9.26, 6:37 PM -25...


