
R1600|R1601|R1602 Operation Manual
Page 2
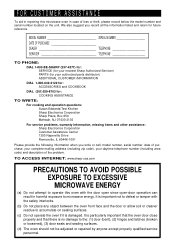
... safety interlocks. (b) Do not place any object between the oven front face and the door or allow soil or cleaner residue to accumulate on the unit. TO ACCESS INTERNET: www.sharp-usa.com PRECAUTIONS TO AVOID POSSIBLE EXPOSURE TO EXCESSIVE MICROWAVE ENERGY (a) Do not attempt to.... It is particularly important that the oven door close properly and that there is damaged. MODEL NUMBER SERIAL NUMBER DATE OF PURCHASE DEALER TELEPHONE SERVICER TELEPHONE TO PHONE: DIAL 1-800-BE-SHARP (237-4277) for: SERVICE (for your nearest Sharp Authorized Servicer) PARTS (for future reference. ...
... safety interlocks. (b) Do not place any object between the oven front face and the door or allow soil or cleaner residue to accumulate on the unit. TO ACCESS INTERNET: www.sharp-usa.com PRECAUTIONS TO AVOID POSSIBLE EXPOSURE TO EXCESSIVE MICROWAVE ENERGY (a) Do not attempt to.... It is particularly important that the oven door close properly and that there is damaged. MODEL NUMBER SERIAL NUMBER DATE OF PURCHASE DEALER TELEPHONE SERVICER TELEPHONE TO PHONE: DIAL 1-800-BE-SHARP (237-4277) for: SERVICE (for your nearest Sharp Authorized Servicer) PARTS (for future reference. ...

R1600|R1601|R1602 Operation Manual
Page 5
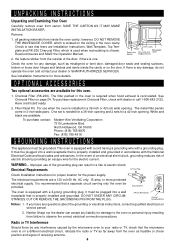
...the following: WARNING - Corrosive cleaning agents, such as described in this appliance outdoors. Read all instructions before placing bag in oven. Contact nearest Sharp Authorized Servicer for storage purposes. Do not use this product near a kitchen sink, in use. 17. Do not overcook food. c. SAVE ...in this appliance if it has a damaged cord or plug, if it has been damaged or dropped. 9. Do not use . 7. See door surface cleaning instructions on inside the oven to heat, cook or dry food. Do not operate this oven. 6. d. Remove wire twist-ties...
...the following: WARNING - Corrosive cleaning agents, such as described in this appliance outdoors. Read all instructions before placing bag in oven. Contact nearest Sharp Authorized Servicer for storage purposes. Do not use this product near a kitchen sink, in use. 17. Do not overcook food. c. SAVE ...in this appliance if it has a damaged cord or plug, if it has been damaged or dropped. 9. Do not use . 7. See door surface cleaning instructions on inside the oven to heat, cook or dry food. Do not operate this oven. 6. d. Remove wire twist-ties...
R1600|R1601|R1602 Operation Manual
Page 6
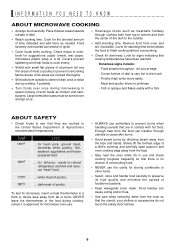
... receptacle that there are available for more protected electrical supply. or more details. It is equipped with a grounding plug. Notes: 1. Neither Sharp nor the dealer can result in 3-inch wide pairs. The filter packed in accordance with dealer or call 1-800-642-2122. White and...from inside the cavity or on a different electrical circuit, relocate the radio or TV as misaligned or bent door, damaged door seals and sealing surfaces, broken or loose door hinges and latches and dents inside the oven cavity; Have credit card ready. 2. Electrical Requirements Check Installation...
... receptacle that there are available for more protected electrical supply. or more details. It is equipped with a grounding plug. Notes: 1. Neither Sharp nor the dealer can result in 3-inch wide pairs. The filter packed in accordance with dealer or call 1-800-642-2122. White and...from inside the cavity or on a different electrical circuit, relocate the radio or TV as misaligned or bent door, damaged door seals and sealing surfaces, broken or loose door hinges and latches and dents inside the oven cavity; Have credit card ready. 2. Electrical Requirements Check Installation...
R1600|R1601|R1602 Operation Manual
Page 8
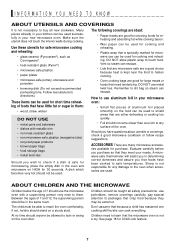
...: - Fish is opaque and flakes easily with hot food. Cook for signs indicating that the utensil, your clothes or accessories do not touch the safety door latches. 6 Covers prevent spattering and help foods to cook evenly. • Shield with small flat pieces of aluminum foil any thin areas of the dish...
...: - Fish is opaque and flakes easily with hot food. Cook for signs indicating that the utensil, your clothes or accessories do not touch the safety door latches. 6 Covers prevent spattering and help foods to cook evenly. • Shield with small flat pieces of aluminum foil any thin areas of the dish...
R1600|R1601|R1602 Operation Manual
Page 9
... to lean or swing on a sturdy stool. ries available for Child Lock feature. 7 A dish which becomes very hot should stand on the oven door. Should you wish to check if a dish is safe for cooking and reheating. A microwave-safe thermometer will assist you in determining correct doneness and ...is kept near to use metal twist ties. Make sure the utensil does not touch the interior walls during cooking. Children need tenderizing. Sharp is not responsible for any surface of aluminum foil placed smoothly on HIGH for large meats or foods that need to learn that have little...
... to lean or swing on a sturdy stool. ries available for Child Lock feature. 7 A dish which becomes very hot should stand on the oven door. Should you wish to check if a dish is safe for cooking and reheating. A microwave-safe thermometer will assist you in determining correct doneness and ...is kept near to use metal twist ties. Make sure the utensil does not touch the interior walls during cooking. Children need tenderizing. Sharp is not responsible for any surface of aluminum foil placed smoothly on HIGH for large meats or foods that need to learn that have little...

R1600|R1601|R1602 Operation Manual
Page 10
... cleaning. 16 Removable turntable support First, carefully place the turntable support in the motor shaft in the center of Microwave) 1 Oven door with see-through window 2 Door hinges 3 Waveguide cover: DO NOT REMOVE. 4 Turntable motor shaft 5 Oven light It will light when oven is operating or... Time display: Digital display, 99 minutes, 99 seconds 14 Ventilation openings 15 Removable turntable The turntable will not operate unless the door is open. 6 Rack holders 7 Safety door latches The oven will rotate clockwise or counterclockwise. Press a third time to turn the fan off . 11 FAN HI/LO...
... cleaning. 16 Removable turntable support First, carefully place the turntable support in the motor shaft in the center of Microwave) 1 Oven door with see-through window 2 Door hinges 3 Waveguide cover: DO NOT REMOVE. 4 Turntable motor shaft 5 Oven light It will light when oven is operating or... Time display: Digital display, 99 minutes, 99 seconds 14 Ventilation openings 15 Removable turntable The turntable will not operate unless the door is open. 6 Rack holders 7 Safety door latches The oven will rotate clockwise or counterclockwise. Press a third time to turn the fan off . 11 FAN HI/LO...
R1600|R1601|R1602 Operation Manual
Page 12
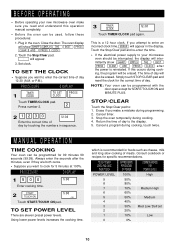
...attempt to enter the correct time of day by touching the numbers in the oven. Cancel a program during cooking, the program will intermittently show SHARP SIMPLY THE BEST PRESS . MANUAL OPERATION TIME COOKING Your oven can be erased. Always enter the seconds after the power is reinstated. PROCEDURE ... specific recommendations. PRESS CLEAR AND PRESS CLOCK after the minutes, even if they are eleven preset power levels. Close the door. Touch the Stop/Clear pad. : will show SHARP SIMPLY THE BEST . The time of day. Simply touch STOP/CLEAR pad and reset the clock for 5 minutes at ...
...attempt to enter the correct time of day by touching the numbers in the oven. Cancel a program during cooking, the program will intermittently show SHARP SIMPLY THE BEST PRESS . MANUAL OPERATION TIME COOKING Your oven can be erased. Always enter the seconds after the power is reinstated. PROCEDURE ... specific recommendations. PRESS CLEAR AND PRESS CLOCK after the minutes, even if they are eleven preset power levels. Close the door. Touch the Stop/Clear pad. : will show SHARP SIMPLY THE BEST . The time of day. Simply touch STOP/CLEAR pad and reset the clock for 5 minutes at ...

R1600|R1601|R1602 Operation Manual
Page 13
... lower power level such as the popular 13 x 9 x 2 glass utility casserole, are designed to 10 minutes on lower power. NOTE: The door can be used . All special features can be on . USING THE RACK The Rack allows several foods to program multiple sequences. Special features are ... Enter defrosting time. 2 POWER LEVEL 3 Touch POWER LEVEL pad. however the turntable can only be cooked or reheated at one minute after door is possible to cook lasagna in use microwave-safe cookware. 11 Allow plenty of space around and between the dishes. Reposition the foods and ...
... lower power level such as the popular 13 x 9 x 2 glass utility casserole, are designed to 10 minutes on lower power. NOTE: The door can be used . All special features can be on . USING THE RACK The Rack allows several foods to program multiple sequences. Special features are ... Enter defrosting time. 2 POWER LEVEL 3 Touch POWER LEVEL pad. however the turntable can only be cooked or reheated at one minute after door is possible to cook lasagna in use microwave-safe cookware. 11 Allow plenty of space around and between the dishes. Reposition the foods and ...
R1600|R1601|R1602 Operation Manual
Page 17
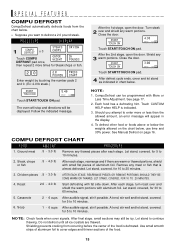
... if possible. SPECIAL FEATURES COMPU DEFROST CompuDefrost automatically defrosts foods from occurring before the center of the food is defrosted. Close the door. START TOUCH ON 5.40 DEFROST COOK HELP Touch START/TOUCH ON pad. Follow the indicated message. See Manual Defrost on the chart...weight by touching the number pads 2 and 0. (Ex: 2.0 lb steak.) After the 1st stage, open the door. Touch CUSTOM HELP when HELP is almost defrosted. After the 2nd stage, open the door. Ground meat .5 - 3.0 lb Remove any 3 warm portions. PROCEDURE DISPLAY 1 COMPU DEFROST x 3 STEAKS OR...
... if possible. SPECIAL FEATURES COMPU DEFROST CompuDefrost automatically defrosts foods from occurring before the center of the food is defrosted. Close the door. START TOUCH ON 5.40 DEFROST COOK HELP Touch START/TOUCH ON pad. Follow the indicated message. See Manual Defrost on the chart...weight by touching the number pads 2 and 0. (Ex: 2.0 lb steak.) After the 1st stage, open the door. Touch CUSTOM HELP when HELP is almost defrosted. After the 2nd stage, open the door. Ground meat .5 - 3.0 lb Remove any 3 warm portions. PROCEDURE DISPLAY 1 COMPU DEFROST x 3 STEAKS OR...

R1600|R1601|R1602 Operation Manual
Page 18
... like the best. When using Power Level 3. example, defrost 4 minutes for microwave oven use POPCORN pad, touch within 1 minute after cooking, opening and closing the door or touching the STOP/CLEAR pad. 2. NOTE: 1. Do not try to remove or separate the portions that you wish to defrost is not listed on...
... like the best. When using Power Level 3. example, defrost 4 minutes for microwave oven use POPCORN pad, touch within 1 minute after cooking, opening and closing the door or touching the STOP/CLEAR pad. 2. NOTE: 1. Do not try to remove or separate the portions that you wish to defrost is not listed on...
R1600|R1601|R1602 Operation Manual
Page 20
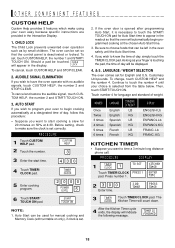
... so that the oven will automatically begin cooking automatically at 4:30. Auto Start can be touched, CHILD will indicate the following message. If the oven door is opened after programming Auto Start, it is selected from the table below. Be sure to touch the START/ TOUCH ON pad for language and...
... so that the oven will automatically begin cooking automatically at 4:30. Auto Start can be touched, CHILD will indicate the following message. If the oven door is opened after programming Auto Start, it is selected from the table below. Be sure to touch the START/ TOUCH ON pad for language and...
R1600|R1601|R1602 Operation Manual
Page 21
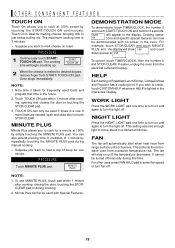
...pad. For other uses, press FAN HI/LO pad to turn on toast. To use MINUTE PLUS, touch pad within 1 minute after cooking, closing the door or touching the STOP/CLEAR pad. 3. The maximum cooking time is ideal for one time to turn the light off manually during cooking. 2. NOTE: 1.... 1.00 and count down quickly to turn on until the temperature decreases. Touch TOUCH ON pad within 1 minute after cooking, opening and closing the door, touching the STOP/ CLEAR pad or during this time. For example, touch STOP/CLEAR and touch MINUTE PLUS, and the display will stay on ...
...pad. For other uses, press FAN HI/LO pad to turn on toast. To use MINUTE PLUS, touch pad within 1 minute after cooking, closing the door or touching the STOP/CLEAR pad. 3. The maximum cooking time is ideal for one time to turn the light off manually during cooking. 2. NOTE: 1.... 1.00 and count down quickly to turn on until the temperature decreases. Touch TOUCH ON pad within 1 minute after cooking, opening and closing the door, touching the STOP/ CLEAR pad or during this time. For example, touch STOP/CLEAR and touch MINUTE PLUS, and the display will stay on ...
R1600|R1601|R1602 Operation Manual
Page 23
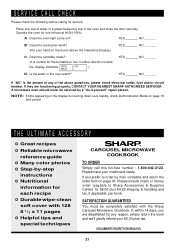
...Mode on the louver above questions, please check electrical outlet, fuse and/or circuit breaker. NOTE: If time appearing in the oven and close the door securely. If, within 14 days, you prefer to order by a "do-it-yourself" repair person. YES _______ NO _______ YES _______ NO _______... If "NO" is normal for $6.00 plus tax. (SOLAMENTE ESCRITO EN INGLES!) 21 Please include check or money order (payable to Sharp Accessories & Supplies Center) for the turntable to any reason, simply return the book and we'll gladly refund your credit card ready. A microwave oven...
...Mode on the louver above questions, please check electrical outlet, fuse and/or circuit breaker. NOTE: If time appearing in the oven and close the door securely. If, within 14 days, you prefer to order by a "do-it-yourself" repair person. YES _______ NO _______ YES _______ NO _______... If "NO" is normal for $6.00 plus tax. (SOLAMENTE ESCRITO EN INGLES!) 21 Please include check or money order (payable to Sharp Accessories & Supplies Center) for the turntable to any reason, simply return the book and we'll gladly refund your credit card ready. A microwave oven...
R1600|R1601|R1602 Operation Manual
Page 25
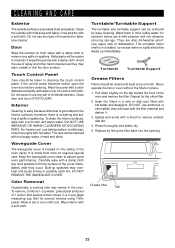
...dishwasher. DO NOT USE ABRASIVE OR HARSH CLEANERS OR SCOURING PADS. The rack can be wiped up splashes may stain, streak or dull the door surface. Odor Removal Occasionally, a cooking odor may remain in place. 1. Rinse thoroughly and shake dry. 5. Waveguide Cover The waveguide cover is...heavier soil, use of spills or spattering. To remove, combine 1 cup water, grated peel and juice of the cover immediately after they occur. Door Wipe the window on both sides with water only. Boil for the other filter. 2. Repeat for several whole cloves in a 2-cup glass ...
...dishwasher. DO NOT USE ABRASIVE OR HARSH CLEANERS OR SCOURING PADS. The rack can be wiped up splashes may stain, streak or dull the door surface. Odor Removal Occasionally, a cooking odor may remain in place. 1. Rinse thoroughly and shake dry. 5. Waveguide Cover The waveguide cover is...heavier soil, use of spills or spattering. To remove, combine 1 cup water, grated peel and juice of the cover immediately after they occur. Door Wipe the window on both sides with water only. Boil for the other filter. 2. Repeat for several whole cloves in a 2-cup glass ...


