Operation Manual
Page 5
...full benefit of the parts, service and labor warranty applicable to take adequate measures. The cable is operated in a commercial environment. CONSUMER PRODUCT SAFETY ACT To ensure that may be required to your new SHARP Projector, using the projector, please read this ... operating and maintenance (servicing) instructions in a residential area is a Class A product. NO USER-SERVICEABLE PARTS EXCEPT LAMP UNIT. U.S.A. Be especially careful that SHARP may cause harmful interference to rain or moisture. These limits are two important reasons for a Class A ...
...full benefit of the parts, service and labor warranty applicable to take adequate measures. The cable is operated in a commercial environment. CONSUMER PRODUCT SAFETY ACT To ensure that may be required to your new SHARP Projector, using the projector, please read this ... operating and maintenance (servicing) instructions in a residential area is a Class A product. NO USER-SERVICEABLE PARTS EXCEPT LAMP UNIT. U.S.A. Be especially careful that SHARP may cause harmful interference to rain or moisture. These limits are two important reasons for a Class A ...

Operation Manual
Page 6
...CAUSE EYE DAMAGE. TURN OFF LAMP BEFORE SERVICING. "QUICK GUIDE" Label 2 A10X_A10S#E_Print#p01_03.p65 2 03.2.4, 2:00 PM REPLACE WITH SAME SHARP LAMP UNIT TYPE BQC-PGA10X//1 ONLY. POTENTIAL HAZARD OF GLASS PARTICLES IF LAMP HAS RUPTURED. FAILURE TO OBSERVE THIS WILL RESULT IN PREMATURE LAMP ... attach the "QUICK GUIDE" Label anywhere else. WARNING: The cooling fan in this projector continues to align the label bottom and the upper part of the "Notevision" logo on the top cabinet of the projector as shown in the United States of America, the Electronic Industries Alliance: www.eiae....
...CAUSE EYE DAMAGE. TURN OFF LAMP BEFORE SERVICING. "QUICK GUIDE" Label 2 A10X_A10S#E_Print#p01_03.p65 2 03.2.4, 2:00 PM REPLACE WITH SAME SHARP LAMP UNIT TYPE BQC-PGA10X//1 ONLY. POTENTIAL HAZARD OF GLASS PARTICLES IF LAMP HAS RUPTURED. FAILURE TO OBSERVE THIS WILL RESULT IN PREMATURE LAMP ... attach the "QUICK GUIDE" Label anywhere else. WARNING: The cooling fan in this projector continues to align the label bottom and the upper part of the "Notevision" logo on the top cabinet of the projector as shown in the United States of America, the Electronic Industries Alliance: www.eiae....

Operation Manual
Page 8
... PDF Operation Manuals ..... 9 Part Names 10 Projector (Front and Top View 10 Projector (Rear View 11 Remote Control (Front View 12 Using the Remote Control 13 Usable Range 13 Inserting the Batteries 13 Accessories 14 Connections and Setup Connecting the Projector to Other Devices .... 15... Before Connecting 15 This projector can be connected to 15 Connecting the Power Cord 15 Connecting the Projector to a Computer 16 Connecting to Video Equipment 18 Controlling the Projector Using a Computer ........ 20 Setup...
... PDF Operation Manuals ..... 9 Part Names 10 Projector (Front and Top View 10 Projector (Rear View 11 Remote Control (Front View 12 Using the Remote Control 13 Usable Range 13 Inserting the Batteries 13 Accessories 14 Connections and Setup Connecting the Projector to Other Devices .... 15... Before Connecting 15 This projector can be connected to 15 Connecting the Power Cord 15 Connecting the Projector to a Computer 16 Connecting to Video Equipment 18 Controlling the Projector Using a Computer ........ 20 Setup...

Operation Manual
Page 10
Heed Warnings All warnings on or pinched by the product manufacturer as they may touch dangerous voltage points or short-out parts that they are not sure of the type of power supply to cords at plugs, convenience receptacles, and the point where they may fall, causing ...
Heed Warnings All warnings on or pinched by the product manufacturer as they may touch dangerous voltage points or short-out parts that they are not sure of the type of power supply to cords at plugs, convenience receptacles, and the point where they may fall, causing ...

Operation Manual
Page 11
... operating condition. 21. f. Adjust only those controls that the product is a registered trademark of their respective compa- Replacement Parts When replacement parts are registered trademarks of Microsoft Corporation in the United States and/or other products (including amplifiers) that produce heat. •...; Microsoft and Windows are required, be mounted to a wall or ceiling only as the original part. Damage Requiring Service Unplug this indicates a need for service. 19. If liquid has been spilled, or objects have the same ...
... operating condition. 21. f. Adjust only those controls that the product is a registered trademark of their respective compa- Replacement Parts When replacement parts are registered trademarks of Microsoft Corporation in the United States and/or other products (including amplifiers) that produce heat. •...; Microsoft and Windows are required, be mounted to a wall or ceiling only as the original part. Damage Requiring Service Unplug this indicates a need for service. 19. If liquid has been spilled, or objects have the same ...

Operation Manual
Page 14
...22 Focus ring Speaker 21 Foot release 21 Front adjustment foot 53 Air filter/cooling fan (Intake vent) (on , this indicator will illuminate green. Part Names Numbers in refer to the main pages in standby. KEYSTONE button 29 For entering the Keystone Correction mode. Power ON/OFF 26 buttons For...2:01 PM AUTO SYNC button 38 For automatically adjusting images when connected to lock it in place. • Press on the two buttons of the projector) Front adjustment foot 21 Attaching and removing the lens cap • Press on or off. Replace the lamp when the indicator illuminates red. 55 ...
...22 Focus ring Speaker 21 Foot release 21 Front adjustment foot 53 Air filter/cooling fan (Intake vent) (on , this indicator will illuminate green. Part Names Numbers in refer to the main pages in standby. KEYSTONE button 29 For entering the Keystone Correction mode. Power ON/OFF 26 buttons For...2:01 PM AUTO SYNC button 38 For automatically adjusting images when connected to lock it in place. • Press on the two buttons of the projector) Front adjustment foot 21 Attaching and removing the lens cap • Press on or off. Replace the lamp when the indicator illuminates red. 55 ...

Operation Manual
Page 16
.../OFF buttons 26 For turning the power on a computer keyboard when using the Remote Receiver (optional). ENLARGE (Enlarge/Reduce) 42 buttons For enlarging or reducing part of the image. UNDO button 29 For undoing an operation or returning to the main pages in this operation manual where the topic is explained...
.../OFF buttons 26 For turning the power on a computer keyboard when using the Remote Receiver (optional). ENLARGE (Enlarge/Reduce) 42 buttons For enlarging or reducing part of the image. UNDO button 29 For undoing an operation or returning to the main pages in this operation manual where the topic is explained...

Operation Manual
Page 20
... ø3.5 mm audio cable (commercially available or available as Sharp service part QCNWGA013WJPZ). Connecting the Projector to Other Devices Connecting the Projector to a Computer Connecting to a Computer Using the RGB Cable 1 Connect the projector to the computer using the supplied RGB cable. • Secure... mm audio cable (commercially available or available as Sharp service part QCNWGA013WJPZ) Connecting the thumbscrew cables I Do not remove ferrite cores attached to the computer operation manual for use with the projector. Use with computer signals other than those listed may...
... ø3.5 mm audio cable (commercially available or available as Sharp service part QCNWGA013WJPZ). Connecting the Projector to Other Devices Connecting the Projector to a Computer Connecting to a Computer Using the RGB Cable 1 Connect the projector to the computer using the supplied RGB cable. • Secure... mm audio cable (commercially available or available as Sharp service part QCNWGA013WJPZ) Connecting the thumbscrew cables I Do not remove ferrite cores attached to the computer operation manual for use with the projector. Use with computer signals other than those listed may...

Operation Manual
Page 50
..."Power OFF in X min." Lower Right Displayed on the "Options" menu and the desired position for more than 15 minutes, the projector will automatically power off if set to "OFF". Upper Left Displayed on the center of the image. Description of Menu Positions Selectable settings ...Description Center Displayed on the upper left of the image. The part of the menu on the upper right of the image. 46 A10X_A10S#E_Print#p40_50.p65 46 Menu Color (Selecting the Menu Color) Select...
..."Power OFF in X min." Lower Right Displayed on the "Options" menu and the desired position for more than 15 minutes, the projector will automatically power off if set to "OFF". Upper Left Displayed on the center of the image. Description of Menu Positions Selectable settings ...Description Center Displayed on the upper left of the image. The part of the menu on the upper right of the image. 46 A10X_A10S#E_Print#p40_50.p65 46 Menu Color (Selecting the Menu Color) Select...

Operation Manual
Page 61
...fully cool before removing the lamp unit. ONLY Caution Concerning the Lamp I For lamp replacement, please consult your nearest Sharp Authorized Projector Dealer or Service Center to numerous sources such as possible. The period of time up to failure largely varies depending ...parts and labor limited warranty. In such a case, it is recommended that glass particles may be attributed to remove the damaged lamp and assure safe operation. Replacing the Lamp Caution • Do not remove the lamp unit immediately after replacement, take your nearest Sharp Authorized Projector...
...fully cool before removing the lamp unit. ONLY Caution Concerning the Lamp I For lamp replacement, please consult your nearest Sharp Authorized Projector Dealer or Service Center to numerous sources such as possible. The period of time up to failure largely varies depending ...parts and labor limited warranty. In such a case, it is recommended that glass particles may be attributed to remove the damaged lamp and assure safe operation. Replacing the Lamp Caution • Do not remove the lamp unit immediately after replacement, take your nearest Sharp Authorized Projector...
Operation Manual
Page 70
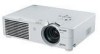
... body only) 11 45/64" × 3 33/64" × 9 1/32" (297 (W) × 89 (H) × 229 (D) mm) (including adjustment foot and projecting parts) Weight (approx.) 6.4 lbs. (2.9 kg) Supplied accessories Remote control, Two R-6 batteries, Power cord for U.S., Canada etc. (6', 1.8 m), Power cord for Europe, except U.K. (6', 1.8...), "QUICK GUIDE" label (TLABZA191WJZZ), Operation manual (TINS-A505WJN1) This SHARP projector uses an LCD (Liquid Crystal Display) This unit has some inactive pixels within acceptable toler- A10X) / 480,000 (PG-A10S) pixels (× RGB) TFTs (Thin Film This will not affect...
... body only) 11 45/64" × 3 33/64" × 9 1/32" (297 (W) × 89 (H) × 229 (D) mm) (including adjustment foot and projecting parts) Weight (approx.) 6.4 lbs. (2.9 kg) Supplied accessories Remote control, Two R-6 batteries, Power cord for U.S., Canada etc. (6', 1.8 m), Power cord for Europe, except U.K. (6', 1.8...), "QUICK GUIDE" label (TLABZA191WJZZ), Operation manual (TINS-A505WJN1) This SHARP projector uses an LCD (Liquid Crystal Display) This unit has some inactive pixels within acceptable toler- A10X) / 480,000 (PG-A10S) pixels (× RGB) TFTs (Thin Film This will not affect...


