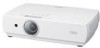
Plc-xc50 Lamp - Sanyo XC50 PLC XGA LCD Projector
Related Manual Pages

Similar Questions

How To Calculate Lamp Life Left On A Sanyo Plc Xu41
how+to+calculate+lamp+life+left+on+a+sanyo+plc+xu41 please
how+to+calculate+lamp+life+left+on+a+sanyo+plc+xu41 please
(Posted by karenrob296 10 years ago)

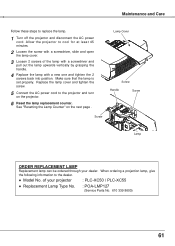
Sanyo Plc-xu41 Lamp Counter Check
Hi i have sanyo plc-xu41 projector and i'm going to sell that but for better listing i need find out...
Hi i have sanyo plc-xu41 projector and i'm going to sell that but for better listing i need find out...
(Posted by jonnydsale 11 years ago)

Part The Lamp Shines Through
On The Sanyo Plc-xt15a
can the part in front of the lamp be replaced easy?
can the part in front of the lamp be replaced easy?
(Posted by dmiller76529 12 years ago)