
Owners Manual
Page 4
Shooting 1 Press the ON/OFF button for at least 1 second to end the recording. h Press the [ ] button again to turn the camera on. MENU button ON/OFF button [] button [ ] button 10M-S 15 Ful -HD 000:00:17 iii English h A still image is captured. For how to set the date and time appears, press the MENU button 2 times to cancel it. To record a video clip: h Press the [ ] button to set the date and time, see page 33. 2 Record. h If the screen to begin recording a video clip. To take a photo: h Press the [ ] button.
Shooting 1 Press the ON/OFF button for at least 1 second to end the recording. h Press the [ ] button again to turn the camera on. MENU button ON/OFF button [] button [ ] button 10M-S 15 Ful -HD 000:00:17 iii English h A still image is captured. For how to set the date and time appears, press the MENU button 2 times to cancel it. To record a video clip: h Press the [ ] button to set the date and time, see page 33. 2 Record. h If the screen to begin recording a video clip. To take a photo: h Press the [ ] button.

Owners Manual
Page 5
... play back. h The display changes to the Playback Screen. 2 Select the image to go i Sanyo declines any claim for compensation for recorded contents etc. Playback 1 Press the REC/PLAY button. REC/PLAY button SET button Arrow keys Full-HD 6.5MB OK 100-0006 00:00:05 Orange frame Remaining battery power indication English...
... play back. h The display changes to the Playback Screen. 2 Select the image to go i Sanyo declines any claim for compensation for recorded contents etc. Playback 1 Press the REC/PLAY button. REC/PLAY button SET button Arrow keys Full-HD 6.5MB OK 100-0006 00:00:05 Orange frame Remaining battery power indication English...

Owners Manual
Page 25
... Definition*. GETTING THE MOST OUT OF YOUR CAMERA Your dual camera can capture full high definition (full HD) 1920 × 1080-pixel video clips. High-quality images with which you can easily create your original DVDs. It includes an operation mode that ... without getting flustered, as well as software with "Full High Definition*" (pages 48 and 59) Your camera can record video clips in one highperformance camera. * "Full High Definition" by SANYO Dual Camera signifies recording at a resolution of 1920 pixels horizontally ×1080 pixels vertically. English 16 Also, the H.264/MPEG...
... Definition*. GETTING THE MOST OUT OF YOUR CAMERA Your dual camera can capture full high definition (full HD) 1920 × 1080-pixel video clips. High-quality images with which you can easily create your original DVDs. It includes an operation mode that ... without getting flustered, as well as software with "Full High Definition*" (pages 48 and 59) Your camera can record video clips in one highperformance camera. * "Full High Definition" by SANYO Dual Camera signifies recording at a resolution of 1920 pixels horizontally ×1080 pixels vertically. English 16 Also, the H.264/MPEG...

Owners Manual
Page 26
... images when you try to capture a fast-moving subject or when you zoom in on a subject. 17 English Example: Select video and photo size SN OK RECORDING MENU 1 1 2 3 VIDEO PHOTO SCENE SELECT Ful -HD 10M-S 1 FILTER 2 FLASH 3 SELF-TIMER OK Image stabilizer for sharp pictures (pages 50 and 91) Your camera can compensate...
... images when you try to capture a fast-moving subject or when you zoom in on a subject. 17 English Example: Select video and photo size SN OK RECORDING MENU 1 1 2 3 VIDEO PHOTO SCENE SELECT Ful -HD 10M-S 1 FILTER 2 FLASH 3 SELF-TIMER OK Image stabilizer for sharp pictures (pages 50 and 91) Your camera can compensate...

Owners Manual
Page 45
SETUP 10M-S 7126 Ful -HD 001:00:12 SD 2010.12.24 18:41 100-0006 SD 2F0u61l.l05-H.M1D2B.24 00:0108:0:451 6.5MB OK 100-0006 00:00:05 REC/PLAY button English 36 h The mode changes each time the REC/PLAY button is pressed. SWITCHING BETWEEN THE RECORDING MODE AND PLAYBACK MODE Switch between the recording mode (for recording) and the playback mode (for viewing your recorded images). 1 Turn on the camera (page 30). 2 Press the REC/PLAY button. h The mode changes.
SETUP 10M-S 7126 Ful -HD 001:00:12 SD 2010.12.24 18:41 100-0006 SD 2F0u61l.l05-H.M1D2B.24 00:0108:0:451 6.5MB OK 100-0006 00:00:05 REC/PLAY button English 36 h The mode changes each time the REC/PLAY button is pressed. SWITCHING BETWEEN THE RECORDING MODE AND PLAYBACK MODE Switch between the recording mode (for recording) and the playback mode (for viewing your recorded images). 1 Turn on the camera (page 30). 2 Press the REC/PLAY button. h The mode changes.

Owners Manual
Page 49
h The Menu Screen for the selected tab appears. 5 Press [H]. SETUP Using the NORMAL Mode Menu 4 Press [I ] Tab RECORDING MENU 1 1 2 3 VIDEO PHOTO Ful -HD 10M-S SCENE SELECT 1 FILTER 2 FLASH 3 SELF-TIMER SN OK Press [J] Press [H] RECORDING MENU 1 1 2 3 VIDEO PHOTO SCENE SELECT Ful -HD 10M-S 1 FILTER 2 FLASH 3 SELF-TIMER OK English 40 Press [I ] or [J] to select a tab.
h The Menu Screen for the selected tab appears. 5 Press [H]. SETUP Using the NORMAL Mode Menu 4 Press [I ] Tab RECORDING MENU 1 1 2 3 VIDEO PHOTO Ful -HD 10M-S SCENE SELECT 1 FILTER 2 FLASH 3 SELF-TIMER SN OK Press [J] Press [H] RECORDING MENU 1 1 2 3 VIDEO PHOTO SCENE SELECT Ful -HD 10M-S 1 FILTER 2 FLASH 3 SELF-TIMER OK English 40 Press [I ] or [J] to select a tab.

Owners Manual
Page 50
h The Setting Screen for the selected item appears. Press [I ] or [J] to select the item you wish to change 1 2 3 RECORDING MENU 1 VIDEO PHOTO Ful -HD 10M-S SCENE SELECT 1 FILTER 2 FLASH 3 SELF-TIMER OK Applicable mode 12M 4000x3000 11M 4480x2520[16:9] 10M-H 3648x2736 10M-S 3648x2736 7.5M 3648x2056[16:9] 2M 1920x1080[16:9] SET OK 41 English 6 Press [I ] Press [J] Press SET Select an item to change , and press the SET button. h To return to the Menu Screen, press the MENU button.
h The Setting Screen for the selected item appears. Press [I ] or [J] to select the item you wish to change 1 2 3 RECORDING MENU 1 VIDEO PHOTO Ful -HD 10M-S SCENE SELECT 1 FILTER 2 FLASH 3 SELF-TIMER OK Applicable mode 12M 4000x3000 11M 4480x2520[16:9] 10M-H 3648x2736 10M-S 3648x2736 7.5M 3648x2056[16:9] 2M 1920x1080[16:9] SET OK 41 English 6 Press [I ] Press [J] Press SET Select an item to change , and press the SET button. h To return to the Menu Screen, press the MENU button.

Owners Manual
Page 56
Overview of the NORMAL Mode Setting Screen NORMAL Mode Recording Menu RECORDING MENU 1 1 2 3 VIDEO PHOTO SCENE SELECT Ful-HD 1 10M-S 2 3 1 FILTER 4 2 FLASH 5 3 SELF-TIMER 6 OK 7 47 English
Overview of the NORMAL Mode Setting Screen NORMAL Mode Recording Menu RECORDING MENU 1 1 2 3 VIDEO PHOTO SCENE SELECT Ful-HD 1 10M-S 2 3 1 FILTER 4 2 FLASH 5 3 SELF-TIMER 6 OK 7 47 English

Owners Manual
Page 57
SETUP 1 Video clip settings (page 84) !: Record at 1920 × 1080 pixels, 30 fps (30p). Y: Record at 1920 × 1080 pixels, 60 fields/s (60i). ": Record at 1280 × 720 pixels, 60 fps (60p). &: Record at 1280 × 720 pixels, 30 fps (30p). ): Record at 640 &#...
SETUP 1 Video clip settings (page 84) !: Record at 1920 × 1080 pixels, 30 fps (30p). Y: Record at 1920 × 1080 pixels, 60 fields/s (60i). ": Record at 1280 × 720 pixels, 60 fps (60p). &: Record at 1280 × 720 pixels, 30 fps (30p). ): Record at 640 &#...

Owners Manual
Page 71
h It is not necessary to stop recording. [] button Recording time 2M Full-HD RERCEC00000::0000::0099 5 5 Available recording time remaining English 62 h Press the [ ] button again to keep the [ ] button pressed while recording. h Recording begins. h When the remaining recording time available for the currently recording clip becomes little, a countdown of the remaining recording time appears on the camera (page 30), and set it to the recording mode (page 36). 2 Press the [ ] button. SIMPLE/SHOOTING VIDEO CLIP RECORDING 1 Turn on the display. 3 End the recording.
h It is not necessary to stop recording. [] button Recording time 2M Full-HD RERCEC00000::0000::0099 5 5 Available recording time remaining English 62 h Press the [ ] button again to keep the [ ] button pressed while recording. h Recording begins. h When the remaining recording time available for the currently recording clip becomes little, a countdown of the remaining recording time appears on the camera (page 30), and set it to the recording mode (page 36). 2 Press the [ ] button. SIMPLE/SHOOTING VIDEO CLIP RECORDING 1 Turn on the display. 3 End the recording.

Owners Manual
Page 77
SIMPLE/SHOOTING SHOOT A STILL IMAGE WHILE RECORDING A VIDEO CLIP You can capture a still image (a single-shot) while recording a video clip. 1 Turn on the camera (page 30), and set it to the recording mode (page 36). 2 Press the [ ] button. [ ] button [ ] button 3 When you see a scene you'd like to capture as a still image, press the [ ] button. 4 Press the [ ] button to end the video clip recording. 2M Full-HD RERCEC00000::0000::0099 English 68
SIMPLE/SHOOTING SHOOT A STILL IMAGE WHILE RECORDING A VIDEO CLIP You can capture a still image (a single-shot) while recording a video clip. 1 Turn on the camera (page 30), and set it to the recording mode (page 36). 2 Press the [ ] button. [ ] button [ ] button 3 When you see a scene you'd like to capture as a still image, press the [ ] button. 4 Press the [ ] button to end the video clip recording. 2M Full-HD RERCEC00000::0000::0099 English 68

Owners Manual
Page 81
h The image information for the framed image is displayed fullscreen. h The image you wish to play back. h If a video clip was selected, playback begins. h Use the arrow keys to move the orange frame to the file you selected in step 2 is shown at the bottom of the screen. 3 Press the SET button. Orange frame 2010. 12.24 18:41 SD Full-HD 6.5MB OK 100-0006 00:00:05 SET button English 72 SIMPLE/PLAYBACK PLAYBACK SIMPLE/PLAYBACK PLAYING BACK VIDEO CLIPS AND STILL IMAGES 1 Set the camera to the playback mode (page 36). 2 Select the image to play back. Press [J].
h The image information for the framed image is displayed fullscreen. h The image you wish to play back. h If a video clip was selected, playback begins. h Use the arrow keys to move the orange frame to the file you selected in step 2 is shown at the bottom of the screen. 3 Press the SET button. Orange frame 2010. 12.24 18:41 SD Full-HD 6.5MB OK 100-0006 00:00:05 SET button English 72 SIMPLE/PLAYBACK PLAYBACK SIMPLE/PLAYBACK PLAYING BACK VIDEO CLIPS AND STILL IMAGES 1 Set the camera to the playback mode (page 36). 2 Select the image to play back. Press [J].

Owners Manual
Page 88
h The screen to select files to delete appears. 2010. 12.25 14:25 SD Full-HD 37.6MB DELETE OK 100-0006 00:00:25 3 Select an image you wish to delete. h To delete other files, select the files, select "DELETE" ...
h The screen to select files to delete appears. 2010. 12.25 14:25 SD Full-HD 37.6MB DELETE OK 100-0006 00:00:25 3 Select an image you wish to delete. h To delete other files, select the files, select "DELETE" ...

Owners Manual
Page 100
... working... When motion compensation is enabled, i The following operations. i When the scene select function is active Both the video stabilizer and the photo stabilizer are shown on the monitor: Full-HD 001:00:05 The video stabilizer is active SD The photo stabilizer is set to work correctly. i The photo stabilizer is + or Q, it... motion. HINT If the motion compensation does not seem to be possible for the camera to =. 91 English h Setting the flash operation to "ON". h Starting video clip recording.
... working... When motion compensation is enabled, i The following operations. i When the scene select function is active Both the video stabilizer and the photo stabilizer are shown on the monitor: Full-HD 001:00:05 The video stabilizer is active SD The photo stabilizer is set to work correctly. i The photo stabilizer is + or Q, it... motion. HINT If the motion compensation does not seem to be possible for the camera to =. 91 English h Setting the flash operation to "ON". h Starting video clip recording.
Owners Manual
Page 101
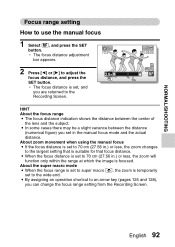
... focus distance, and press the SET button. i In some cases there may be a slight variance between the center of the lens and the subject. Ful -HD 000101:0:000::005 SD HINT About the focus range i The focus distance indication shows the distance between the distance (numerical figure) you set , and you...
... focus distance, and press the SET button. i In some cases there may be a slight variance between the center of the lens and the subject. Ful -HD 000101:0:000::005 SD HINT About the focus range i The focus distance indication shows the distance between the distance (numerical figure) you set , and you...

Owners Manual
Page 102
Focus mode setting When the spot focus setting is selected, the focus mark + appears in the center of the monitor. 10M-S 7112 Ful -HD 001:00:05 SD Focus mark Light-measuring mode setting When spot light-measuring is selected, the light-measuring spot mark appears in the center of the monitor. 10M-S 7112 Ful -HD 001:00:05 SD Light-measuring spot mark 93 English
Focus mode setting When the spot focus setting is selected, the focus mark + appears in the center of the monitor. 10M-S 7112 Ful -HD 001:00:05 SD Focus mark Light-measuring mode setting When spot light-measuring is selected, the light-measuring spot mark appears in the center of the monitor. 10M-S 7112 Ful -HD 001:00:05 SD Light-measuring spot mark 93 English

Owners Manual
Page 109
h The exposure compensation numerical value is pressed. [G] key [H] key 10M-S 7112 Ful -HD 001:00:05 SD Pointer Exposure compensation bar English 100 h The exposure compensation bar appears. 3 Press [G] or [H] to adjust the exposure. h The exposure compensation can ...
h The exposure compensation numerical value is pressed. [G] key [H] key 10M-S 7112 Ful -HD 001:00:05 SD Pointer Exposure compensation bar English 100 h The exposure compensation bar appears. 3 Press [G] or [H] to adjust the exposure. h The exposure compensation can ...

Owners Manual
Page 113
... remove the protect icon from a file, move the orange frame to the file you wish to protect. 2010.12.25 14:25 100-0006 SD Full-HD 37.6MB 00:00:25 LOCK 4 Press the SET button. h Use the arrow keys to move the orange frame to protect. 1 Display the NORMAL Mode...
... remove the protect icon from a file, move the orange frame to the file you wish to protect. 2010.12.25 14:25 100-0006 SD Full-HD 37.6MB 00:00:25 LOCK 4 Press the SET button. h Use the arrow keys to move the orange frame to protect. 1 Display the NORMAL Mode...

Owners Manual
Page 122
...1 2010.12.24 20:53 100-0016 SD Full-HD 00:00:05 00:00:05 SAVE RELEASE 113 English EDIT VIDEO CUT JOIN OK 2 Select "JOIN" and press the SET button. h The specified video clip is labeled with a number. Joining video clips CAUTION i Video clips that were photographed in different modes cannot be ...to join, and press the SET button. h The 8-image playback display for video clips appears. 2010.12.24 SD Full-HD SAVE 20:53 100-0016 00:00:05 OK 3 Move the orange frame to the video clip you wish to 9 video clips can be joined. 1 Display the NORMAL Mode Playback Menu (page 38...
...1 2010.12.24 20:53 100-0016 SD Full-HD 00:00:05 00:00:05 SAVE RELEASE 113 English EDIT VIDEO CUT JOIN OK 2 Select "JOIN" and press the SET button. h The specified video clip is labeled with a number. Joining video clips CAUTION i Video clips that were photographed in different modes cannot be ...to join, and press the SET button. h The 8-image playback display for video clips appears. 2010.12.24 SD Full-HD SAVE 20:53 100-0016 00:00:05 OK 3 Move the orange frame to the video clip you wish to 9 video clips can be joined. 1 Display the NORMAL Mode Playback Menu (page 38...

Owners Manual
Page 129
INFO HD-SHQ 100-0001 2 3 2 1 1280×720 30fps SHQ 4.2MB 4 Press the MENU button for MPEG-4 AVC/H.264 00:00:03 5 at least 1 second. h The Information Screen 0.3 6 appears. h If the MENU button is ; 2010.12.25 19:30 9 pressed again, the Information Screen is canceled. 1 Video clip mode settings 2 Image or sound...
INFO HD-SHQ 100-0001 2 3 2 1 1280×720 30fps SHQ 4.2MB 4 Press the MENU button for MPEG-4 AVC/H.264 00:00:03 5 at least 1 second. h The Information Screen 0.3 6 appears. h If the MENU button is ; 2010.12.25 19:30 9 pressed again, the Information Screen is canceled. 1 Video clip mode settings 2 Image or sound...

