Instruction Manual, VPC-E1000
Page 5
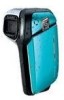
... when handling the camera. If the internal fluid has entered your body or clothes, rinse with its polarities inverted might damage the glass on the screen or cause the internal fluid to leak. Do not use . Touching a hot battery might damage cords and cables, resulting in humid, steamy, smoky, or dusty...
... when handling the camera. If the internal fluid has entered your body or clothes, rinse with its polarities inverted might damage the glass on the screen or cause the internal fluid to leak. Do not use . Touching a hot battery might damage cords and cables, resulting in humid, steamy, smoky, or dusty...

Instruction Manual, VPC-E1000
Page 22
... an extended period of time. Press the MENU button and select [Setup] menu with the S / T buttons and press the SET button. The Date/Time setting screen will be set if/when: Camera is set the correct date and time. 1. After confirming all settings are correct, press the SET button. Slide the...
... an extended period of time. Press the MENU button and select [Setup] menu with the S / T buttons and press the SET button. The Date/Time setting screen will be set if/when: Camera is set the correct date and time. 1. After confirming all settings are correct, press the SET button. Slide the...

Instruction Manual, VPC-E1000
Page 28
... the shutter button one more time during recording, or wait for 30 seconds at [Off] in [Single] capture mode. J Voice memo is displayed on the screen immediately, and the voice memo recording starts. 7. Slide the mode switch to exit from the menu. Select [On] with Capture the X button. J [VOICE RECORDING] is...] with a voice memo. Compose the image, press the shutter button down halfway, then press it down fully. EN-27 J Voice memo is displayed on the screen. 6. Press the MENU button to [ ]. 2.
... the shutter button one more time during recording, or wait for 30 seconds at [Off] in [Single] capture mode. J Voice memo is displayed on the screen immediately, and the voice memo recording starts. 7. Slide the mode switch to exit from the menu. Select [On] with Capture the X button. J [VOICE RECORDING] is...] with a voice memo. Compose the image, press the shutter button down halfway, then press it down fully. EN-27 J Voice memo is displayed on the screen. 6. Press the MENU button to [ ]. 2.

Instruction Manual, VPC-E1000
Page 29
Slide the mode switch to exit from the menu screen. d. f. The zoom setting is enlarged (zoomed), the more pixelated (grainier) the image will appear. 1. Using the Digital Zoom Using a combination of 3 times optical zoom and 4 ...
Slide the mode switch to exit from the menu screen. d. f. The zoom setting is enlarged (zoomed), the more pixelated (grainier) the image will appear. 1. Using the Digital Zoom Using a combination of 3 times optical zoom and 4 ...

Instruction Manual, VPC-E1000
Page 33
...Bright scenes or strong reflected light such as ski slopes * When the sky accounts for a large area on the screen. EN-32 Set the exposure value with the overall screen intentionally made when the blue text appears. 2. The set in the order of the exposure compensation is as the...as evergreen trees or darkish leaves Backlight correction (+1.3, fixed) * When the background is bright and the subject is displayed on the screen - (negative) compensation * People illuminated by a spotlight, in brightness between the subject and the background (the contrast) is very small within the...
...Bright scenes or strong reflected light such as ski slopes * When the sky accounts for a large area on the screen. EN-32 Set the exposure value with the overall screen intentionally made when the blue text appears. 2. The set in the order of the exposure compensation is as the...as evergreen trees or darkish leaves Backlight correction (+1.3, fixed) * When the background is bright and the subject is displayed on the screen - (negative) compensation * People illuminated by a spotlight, in brightness between the subject and the background (the contrast) is very small within the...

Instruction Manual, VPC-E1000
Page 37
... the image was rotated will result in the thumbnail display. [ ] PLAYBACK MODE Playing Back Still Images You can play back the still images on the screen. 2. An [ ] icon is displayed at its regular size.
... the image was rotated will result in the thumbnail display. [ ] PLAYBACK MODE Playing Back Still Images You can play back the still images on the screen. 2. An [ ] icon is displayed at its regular size.

Instruction Manual, VPC-E1000
Page 38
Playing Back Video Clips You can also play back your images on a TV screen. To stop video playback, press the T button. Slide the mode switch to [ ]. Connect one end of the AV cable to the AV OUT terminal of ...the video equipment you recording with the W / X buttons. 3. Turn the TV and camera on the screen. 2. Slide the mode switch to [ ]. 2. To pause video playback, press the SET button. Playing Back Still Images/Video Clips on a TV You can play back...
Playing Back Video Clips You can also play back your images on a TV screen. To stop video playback, press the T button. Slide the mode switch to [ ]. Connect one end of the AV cable to the AV OUT terminal of ...the video equipment you recording with the W / X buttons. 3. Turn the TV and camera on the screen. 2. Slide the mode switch to [ ]. 2. To pause video playback, press the SET button. Playing Back Still Images/Video Clips on a TV You can play back...

Instruction Manual, VPC-E1000
Page 39
Press the shutter button. [VOICE RECORDING] is displayed on the screen. 2. Slide the mode switch to [ ]. 2. The last image appears on the screen and recording starts. 4. An [ ] icon is displayed on screen when you to attach the voice memo with a voice memo. Slideshow Display The slideshow function enables you press the SET button. To...
Press the shutter button. [VOICE RECORDING] is displayed on the screen. 2. Slide the mode switch to [ ]. 2. The last image appears on the screen and recording starts. 4. An [ ] icon is displayed on screen when you to attach the voice memo with a voice memo. Slideshow Display The slideshow function enables you press the SET button. To...

Instruction Manual, VPC-E1000
Page 40
... entire image, while the yellow frame shows the location of magnification factor is displayed enlarged, and a blue frame and yellow frame are displayed on the screen. Slide the mode switch to enlarge. 5. To return to enlarge from 1x to 4x in 0.5x increments. You can also select the image you want...
... entire image, while the yellow frame shows the location of magnification factor is displayed enlarged, and a blue frame and yellow frame are displayed on the screen. Slide the mode switch to enlarge. 5. To return to enlarge from 1x to 4x in 0.5x increments. You can also select the image you want...

Instruction Manual, VPC-E1000
Page 43
... prints for each individual image. [All]: Sets DPOF for all images at once. The playback menu is displayed. 5. Set the number of prints setting screen. 7. You can select the images to be printed. [Off]: The date of the image will read the embedded information on your memory card. Select... and how many prints to make with the W / X Play buttons. 3. Press the MENU button. The DPOF setting screen is displayed. 4. MENU:Exit SET:Adj. The date setting screen appears. 9. MENU:Exit SET:Enter Play MENU:Exit SET:Enter EN-42 You can set DPOF with the DPOF menu in...
... prints for each individual image. [All]: Sets DPOF for all images at once. The playback menu is displayed. 5. Set the number of prints setting screen. 7. You can select the images to be printed. [Off]: The date of the image will read the embedded information on your memory card. Select... and how many prints to make with the W / X Play buttons. 3. Press the MENU button. The DPOF setting screen is displayed. 4. MENU:Exit SET:Adj. The date setting screen appears. 9. MENU:Exit SET:Enter Play MENU:Exit SET:Enter EN-42 You can set DPOF with the DPOF menu in...

Instruction Manual, VPC-E1000
Page 44
...size (640 x 480) Image captured with other camera Protected images Video clips Images cannot be resized when the SD/SDHC memory card is finished, the screen returns to change with the S / T buttons, and press the SET button. 4. It is available. To quit resizing, press the MENU button...the camera before you want to playback mode. Select [Resize] with the S / T buttons, and press the SET button. When resizing ends, the screen returns to resize. 2. This creates a file containing the DPOF information, and when the operation is write protected 1. Select the image size that you want...
...size (640 x 480) Image captured with other camera Protected images Video clips Images cannot be resized when the SD/SDHC memory card is finished, the screen returns to change with the S / T buttons, and press the SET button. 4. It is available. To quit resizing, press the MENU button...the camera before you want to playback mode. Select [Resize] with the S / T buttons, and press the SET button. When resizing ends, the screen returns to resize. 2. This creates a file containing the DPOF information, and when the operation is write protected 1. Select the image size that you want...

Instruction Manual, VPC-E1000
Page 45
... the last-captured image during capture. 1. Press the button. Slide the mode switch to [ ] or [ ]. 2. The last image and quick delete menu appear on the screen. 2. To not delete, select [Cancel], and press the SET button. Erasing at Photography Mode (Quick Delete Function) The quick delete function enables you want to...
... the last-captured image during capture. 1. Press the button. Slide the mode switch to [ ] or [ ]. 2. The last image and quick delete menu appear on the screen. 2. To not delete, select [Cancel], and press the SET button. Erasing at Photography Mode (Quick Delete Function) The quick delete function enables you want to...

Instruction Manual, VPC-E1000
Page 48
... that approach the conditions that will appear. * 64 / 100 / 200 / 400 / 1000 / Auto Metering This sets the metering method for capturing images. Use of the screen is measured, and the exposure is convenient when the white balance does not offer a good match. Saturation This sets the saturation of the image that...
... that approach the conditions that will appear. * 64 / 100 / 200 / 400 / 1000 / Auto Metering This sets the metering method for capturing images. Use of the screen is measured, and the exposure is convenient when the white balance does not offer a good match. Saturation This sets the saturation of the image that...

Instruction Manual, VPC-E1000
Page 50
... the LCD monitor. Digital Zoom This sets whether or not to use digital zoom at the time of recording can be printed directly on the screen immediately after the image is captured. * On / Off EN-49 The LCD becomes brighter with the S button and darker with the T button. The adjustment range...
... the LCD monitor. Digital Zoom This sets whether or not to use digital zoom at the time of recording can be printed directly on the screen immediately after the image is captured. * On / Off EN-49 The LCD becomes brighter with the S button and darker with the T button. The adjustment range...

Instruction Manual, VPC-E1000
Page 56
Connect one specific image. [All]: Select to print all images. [DPOF]: Select to print images with DPOF settings. [Exit]: Exit from Images option. The [USB] screen appears. 4. Printing images SET:Enter When the camera is properly connected to a PictBridge compliant printer, the PictBridge menu is available, images can be printed by ...
Connect one specific image. [All]: Select to print all images. [DPOF]: Select to print images with DPOF settings. [Exit]: Exit from Images option. The [USB] screen appears. 4. Printing images SET:Enter When the camera is properly connected to a PictBridge compliant printer, the PictBridge menu is available, images can be printed by ...

Instruction Manual, VPC-E1000
Page 58
J The [USB] screen appears. 4. From the Windows desktop, double click on the removable disk and locate the DCIM folder. 8. Double click on "My Computer". 6. J Copy & Paste or Drag-N-...
J The [USB] screen appears. 4. From the Windows desktop, double click on the removable disk and locate the DCIM folder. 8. Double click on "My Computer". 6. J Copy & Paste or Drag-N-...

Instruction Manual, VPC-E1000
Page 60
... must include: Microphone Sound card Speakers or headphones Network or Internet connection Install the PC Camera Driver The PC-camera driver included on -screen instructions to videoconference with business associates, or have a real-time conversation with the camera into your computer. The PC camera function is ... supported for Windows. This mode is not included with the camera. Click "Install PC-Cam driver". EN-59 The welcome screen appears. 2. Insert the CD-ROM that came with friends or family. Video conferencing (or video editing) software is not supported for Mac.
... must include: Microphone Sound card Speakers or headphones Network or Internet connection Install the PC Camera Driver The PC-camera driver included on -screen instructions to videoconference with business associates, or have a real-time conversation with the camera into your computer. The PC camera function is ... supported for Windows. This mode is not included with the camera. Click "Install PC-Cam driver". EN-59 The welcome screen appears. 2. Insert the CD-ROM that came with friends or family. Video conferencing (or video editing) software is not supported for Mac.

Instruction Manual, VPC-E1000
Page 61
... launch the NetMeeting program. 2. Connect the Camera to its respective help documentation. Connect one end of videoconference application software, refer to Your Computer 1. The [USB] screen appears. 4. USB 2. Windows NetMeeting) To use a tripod. SET:Enter Run Your Application Software (i.e.
... launch the NetMeeting program. 2. Connect the Camera to its respective help documentation. Connect one end of videoconference application software, refer to Your Computer 1. The [USB] screen appears. 4. USB 2. Windows NetMeeting) To use a tripod. SET:Enter Run Your Application Software (i.e.
Instruction Manual, VPC-E1000
Page 62
...browse, modify and distribute digital media. It is complete photo project software for owners of digital cameras, WebCams, DV camcorders, scanners, or anyone who strives to effectively organize a large collection of your CD-ROM drive. Organize them conveniently ...albums, cards, posters, slideshows, and more. Click "INSTALL PHOTO EXPRESS 5.0". Follow the on -screen instructions to complete the installation. Follow the on -screen instructions to complete the installation. EDITING SOFTWARE INSTALLATION Installing Photo Explorer Ulead® Photo Explorer provides ...
...browse, modify and distribute digital media. It is complete photo project software for owners of digital cameras, WebCams, DV camcorders, scanners, or anyone who strives to effectively organize a large collection of your CD-ROM drive. Organize them conveniently ...albums, cards, posters, slideshows, and more. Click "INSTALL PHOTO EXPRESS 5.0". Follow the on -screen instructions to complete the installation. Follow the on -screen instructions to complete the installation. EDITING SOFTWARE INSTALLATION Installing Photo Explorer Ulead® Photo Explorer provides ...

Instruction Manual, VPC-E1000
Page 63
... software are not supported on the Mac. The application software are not supported on the Windows Vista. Click "INSTALL Cool 360 SE". Follow the on-screen instructions to install and use wizard deliver great-looking panoramas fast while advanced warping, blending and alignment tools ensure excellent results. Installing Cool 360 Ulead..., refer to -use the application software in "Administrator" mode. Insert the CD-ROM that came with the camera into your CD-ROM drive. The welcome screen appears. 2.
... software are not supported on the Mac. The application software are not supported on the Windows Vista. Click "INSTALL Cool 360 SE". Follow the on-screen instructions to install and use wizard deliver great-looking panoramas fast while advanced warping, blending and alignment tools ensure excellent results. Installing Cool 360 Ulead..., refer to -use the application software in "Administrator" mode. Insert the CD-ROM that came with the camera into your CD-ROM drive. The welcome screen appears. 2.


