
Owners Manual
Page 6
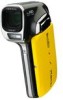
h Press the [ ] button again to begin recording a video clip. To record a video clip: h Press the [ ] button to end the recording. h A still image is captured. [ ] button [ ] button ON/OFF button MENU button v English Shooting 1 Press the ON/OFF button for at least 1 second to cancel it. h If the screen to set the date and time, see page 33. 2 Record. For how to set the date and time appears, press the MENU button 2 times to turn the camera on. To take a photo: h Press the [ ] button.
h Press the [ ] button again to begin recording a video clip. To record a video clip: h Press the [ ] button to end the recording. h A still image is captured. [ ] button [ ] button ON/OFF button MENU button v English Shooting 1 Press the ON/OFF button for at least 1 second to cancel it. h If the screen to set the date and time, see page 33. 2 Record. For how to set the date and time appears, press the MENU button 2 times to turn the camera on. To take a photo: h Press the [ ] button.

Owners Manual
Page 9
Burn your recorded video clips onto a DVD Using the supplied CD-ROM (Xacti Software CD), you can store your captured images on the [OK] button. h When the window appears .... Check the [No thanks !] option button, and then click on a DVD. h After clicking on the application program, follow the instructions shown on [TotalMedia Extreme for SANYO]. h The installation window opens. 2 Click on the monitor to install the program.
Burn your recorded video clips onto a DVD Using the supplied CD-ROM (Xacti Software CD), you can store your captured images on the [OK] button. h When the window appears .... Check the [No thanks !] option button, and then click on a DVD. h After clicking on the application program, follow the instructions shown on [TotalMedia Extreme for SANYO]. h The installation window opens. 2 Click on the monitor to install the program.

Owners Manual
Page 14
Burn video clips onto a DVD Here's how to write your computer's DVD drive. 2 Double-click the desktop [TotalMedia Extreme for SANYO window. For information on other operations, please see the Help file for TotalMedia Extreme. 1 Insert a blank DVD in your recorded data onto a DVD in the upper right corner of the TotalMedia Extreme for SANYO] icon. 11 Click the [×] button in the MPEG2 format. h TotalMedia Extreme for SANYO is exited. h TotalMedia Extreme for SANYO is launched, and the startup page appears. [Create video] icon xiii English
Burn video clips onto a DVD Here's how to write your computer's DVD drive. 2 Double-click the desktop [TotalMedia Extreme for SANYO window. For information on other operations, please see the Help file for TotalMedia Extreme. 1 Insert a blank DVD in your recorded data onto a DVD in the upper right corner of the TotalMedia Extreme for SANYO] icon. 11 Click the [×] button in the MPEG2 format. h TotalMedia Extreme for SANYO is exited. h TotalMedia Extreme for SANYO is launched, and the startup page appears. [Create video] icon xiii English

Owners Manual
Page 15
3 Click the [Create video] icon. h The TotalMedia Studio screen appears. [New DVD project] English xiv
3 Click the [Create video] icon. h The TotalMedia Studio screen appears. [New DVD project] English xiv

Owners Manual
Page 16
h The screen to create a video clip to burn to DVD appears. [Insert video] xv English 4 Click [New DVD project].
h The screen to create a video clip to burn to DVD appears. [Insert video] xv English 4 Click [New DVD project].

Owners Manual
Page 17
5 Click [Insert video]. h The files you wish to burn to DVD. h To select multiple files, keep the [Ctrl] key pressed while selecting files. 6 Click the [Open] button. Selected files Size of the window. h The screen to select the video clip file to burn to DVD are shown in step 5 and the total size of the files to burn to DVD appears. h Click on the file you selected in the lower part of selected files English xvi
5 Click [Insert video]. h The files you wish to burn to DVD. h To select multiple files, keep the [Ctrl] key pressed while selecting files. 6 Click the [Open] button. Selected files Size of the window. h The screen to select the video clip file to burn to DVD are shown in step 5 and the total size of the files to burn to DVD appears. h Click on the file you selected in the lower part of selected files English xvi

Owners Manual
Page 19
h A window appears asking if you burned to save your settings from steps 5 through 7. English xviii h Saving the project will save the project. h It is recommended that you save the project if you intend to again edit the same video clips that you wish to DVD. h The screen to burn files to the DVD appears. [Burn] button 9 Click the [Burn] button. 8 Click the [Produce] tab.
h A window appears asking if you burned to save your settings from steps 5 through 7. English xviii h Saving the project will save the project. h It is recommended that you save the project if you intend to again edit the same video clips that you wish to DVD. h The screen to burn files to the DVD appears. [Burn] button 9 Click the [Burn] button. 8 Click the [Produce] tab.

Owners Manual
Page 27
...54 Select the recording size 56 Select the focus setting 57 Hints for taking pictures 58 VIDEO CLIP RECORDING 59 SHOOTING SINGLE SHOTS 60 Using the flash 63 SHOOT A STILL IMAGE WHILE RECORDING A VIDEO CLIP ..........65 MACRO-PHOTOGRAPHY (ZOOM 67 AFTER USING THE CAMERA IN WATER 69 PLAYBACK PLAYING... BACK VIDEO CLIPS AND STILL IMAGES 70 How to save one frame from a video clip as a still image 73 SLIDESHOW PLAYBACK 74 PLAYBACK VOLUME 75 DELETING FILES 76 Delete single/delete all/delete folder...
...54 Select the recording size 56 Select the focus setting 57 Hints for taking pictures 58 VIDEO CLIP RECORDING 59 SHOOTING SINGLE SHOTS 60 Using the flash 63 SHOOT A STILL IMAGE WHILE RECORDING A VIDEO CLIP ..........65 MACRO-PHOTOGRAPHY (ZOOM 67 AFTER USING THE CAMERA IN WATER 69 PLAYBACK PLAYING... BACK VIDEO CLIPS AND STILL IMAGES 70 How to save one frame from a video clip as a still image 73 SLIDESHOW PLAYBACK 74 PLAYBACK VOLUME 75 DELETING FILES 76 Delete single/delete all/delete folder...

Owners Manual
Page 28
„ NORMAL SHOOTING RECORDING MENU 1 82 Video setting 82 Still image setting 85 Scene select setting 86 Filter setting 86 Self-timer setting 87 RECORDING MENU 2 88 Motion compensation (image stabilizer) setting ... setting 98 PLAYBACK PLAYBACK MENU 1 99 Slideshow settings 99 File protect setting 100 Resize 102 Rotate 102 PLAYBACK MENU 2 103 Correcting the image 103 Editing video clips 104 Printing instructions 113 FILE INFO DISPLAY 117 3 English
„ NORMAL SHOOTING RECORDING MENU 1 82 Video setting 82 Still image setting 85 Scene select setting 86 Filter setting 86 Self-timer setting 87 RECORDING MENU 2 88 Motion compensation (image stabilizer) setting ... setting 98 PLAYBACK PLAYBACK MENU 1 99 Slideshow settings 99 File protect setting 100 Resize 102 Rotate 102 PLAYBACK MENU 2 103 Correcting the image 103 Editing video clips 104 Printing instructions 113 FILE INFO DISPLAY 117 3 English

Owners Manual
Page 29
... For audio recordings 136 CHECKING THE REMAINING BATTERY PACK CHARGE 137 „ OTHER DEVICES AND CONNECTIONS CONNECTING TO A TV CONNECTING TO A TV 139 Connecting to a video input terminal 140 Connecting to the HDMI terminal 140 PLAYING BACK ON A TV 141 CONNECTING TO A PRINTER PRINTING 142 English 4 „ OPTION SETTINGS DISPLAY THE...
... For audio recordings 136 CHECKING THE REMAINING BATTERY PACK CHARGE 137 „ OTHER DEVICES AND CONNECTIONS CONNECTING TO A TV CONNECTING TO A TV 139 Connecting to a video input terminal 140 Connecting to the HDMI terminal 140 PLAYING BACK ON A TV 141 CONNECTING TO A PRINTER PRINTING 142 English 4 „ OPTION SETTINGS DISPLAY THE...

Owners Manual
Page 31
...; "NOISE REDUCTION setting" on page 122 Optimize the photo quality • "Select the recording size" on pages 42 and 56. • "Video setting" on pages 46 and 82 • "Still image setting" on pages 46 and 85 Set the camera's color/contrast characteristics • "... abundance of your purposes in on the subject • "MACRO- Shooting/recording Basic operation Convenient functions Additional functions Getting started shooting/recording • "VIDEO CLIP RECORDING" on page 59 • "SHOOTING SINGLE SHOTS" on page 60 • "Sequential shots" on page 85 • "Audio recording...
...; "NOISE REDUCTION setting" on page 122 Optimize the photo quality • "Select the recording size" on pages 42 and 56. • "Video setting" on pages 46 and 82 • "Still image setting" on pages 46 and 85 Set the camera's color/contrast characteristics • "... abundance of your purposes in on the subject • "MACRO- Shooting/recording Basic operation Convenient functions Additional functions Getting started shooting/recording • "VIDEO CLIP RECORDING" on page 59 • "SHOOTING SINGLE SHOTS" on page 60 • "Sequential shots" on page 85 • "Audio recording...

Owners Manual
Page 33
Playback Basic operation Convenient functions Additional functions Getting started viewing images • "PLAYING BACK VIDEO CLIPS AND STILL IMAGES" on page 70 Adjust the speaker volume • "PLAYBACK VOLUME" pages 51 and 75 Search for image/ audio files • "21-...
Playback Basic operation Convenient functions Additional functions Getting started viewing images • "PLAYING BACK VIDEO CLIPS AND STILL IMAGES" on page 70 Adjust the speaker volume • "PLAYBACK VOLUME" pages 51 and 75 Search for image/ audio files • "21-...

Owners Manual
Page 34
... • "File protect setting" on pages 51 and 100 Format a card • "Formatting (initializing)" on pages 124 and 134 Delete a part of a video clip and join video clips • "Editing video clips" on pages 52 and 104 Specify the number of prints, index print, and date imprint • "Printing instructions" on pages 52...
... • "File protect setting" on pages 51 and 100 Format a card • "Formatting (initializing)" on pages 124 and 134 Delete a part of a video clip and join video clips • "Editing video clips" on pages 52 and 104 Specify the number of prints, index print, and date imprint • "Printing instructions" on pages 52...

Owners Manual
Page 35
...; "Copy data from your camera to the computer" on page ix Burn files copied to the computer onto a DVD • "Burn video clips onto a DVD" on page xiii Playback • "About video clip files recorded with this camera" on page 8 in the Xacti Software CD INSTRUCTION MANUAL Using as a webcam • "USING...
...; "Copy data from your camera to the computer" on page ix Burn files copied to the computer onto a DVD • "Burn video clips onto a DVD" on page xiii Playback • "About video clip files recorded with this camera" on page 8 in the Xacti Software CD INSTRUCTION MANUAL Using as a webcam • "USING...

Owners Manual
Page 40
GETTING THE MOST OUT OF YOUR CAMERA Your dual camera can record video clips in water at a temperature of less than 40 °C (104°F), at the beach or by the pool. 15 English You can easily create your original DVDs. Waterproof capability The camera is equipped to approximately 60 minutes. It includes an operation mode that lets even novice shutterbugs record and play back without getting flustered, as well as software with which you can enjoy taking pictures at a depth of less than 3.0 m (9.84 ft.), for up to safely be used in Full High Definition*.
GETTING THE MOST OUT OF YOUR CAMERA Your dual camera can record video clips in water at a temperature of less than 40 °C (104°F), at the beach or by the pool. 15 English You can easily create your original DVDs. Waterproof capability The camera is equipped to approximately 60 minutes. It includes an operation mode that lets even novice shutterbugs record and play back without getting flustered, as well as software with which you can enjoy taking pictures at a depth of less than 3.0 m (9.84 ft.), for up to safely be used in Full High Definition*.

Owners Manual
Page 41
You get both compact file size and high picture quality in one highperformance camera. * "Full High Definition" by SANYO Dual Camera signifies recording at a resolution of 1920 pixels horizontally ×1080 pixels vertically. High-quality images with "Full High Definition*" (pages 46 and 56) Your camera can capture full high definition (full HD) 1920 × 1080-pixel video clips. English 16 Also, the H.264/MPEG-4 AVC standard is used for formatting video files.
You get both compact file size and high picture quality in one highperformance camera. * "Full High Definition" by SANYO Dual Camera signifies recording at a resolution of 1920 pixels horizontally ×1080 pixels vertically. High-quality images with "Full High Definition*" (pages 46 and 56) Your camera can capture full high definition (full HD) 1920 × 1080-pixel video clips. English 16 Also, the H.264/MPEG-4 AVC standard is used for formatting video files.

Owners Manual
Page 42
...-easy operation (page 36) Select from two recording/playback modes: the "SIMPLE mode" for full use of all the camera's many features and functions. Example: Select video and photo size SN OK RECORDING MENU 1 1 2 3 VIDEO PHOTO SCENE SELECT Ful -HD 14M-S 1 FILTER 2 FLASH 3 SELF-TIMER OK Image stabilizer for sharp pictures (pages 48 and...
...-easy operation (page 36) Select from two recording/playback modes: the "SIMPLE mode" for full use of all the camera's many features and functions. Example: Select video and photo size SN OK RECORDING MENU 1 1 2 3 VIDEO PHOTO SCENE SELECT Ful -HD 14M-S 1 FILTER 2 FLASH 3 SELF-TIMER OK Image stabilizer for sharp pictures (pages 48 and...

Owners Manual
Page 43
automatically via a Wi-Fi network. Instructions for the Eye-Fi transfer feature can transfer video files if your Eye-Fi card has a video upload function. Also, you can easily upload photos to capture clear face shots, are provided. Eye-Fi smart By inserting a commercially sold Eye-Fi ...card (SD card with wireless LAN) in your camera, you can be found at the following website: http://sanyo.com/xacti/english/ English...
automatically via a Wi-Fi network. Instructions for the Eye-Fi transfer feature can transfer video files if your Eye-Fi card has a video upload function. Also, you can easily upload photos to capture clear face shots, are provided. Eye-Fi smart By inserting a commercially sold Eye-Fi ...card (SD card with wireless LAN) in your camera, you can be found at the following website: http://sanyo.com/xacti/english/ English...

Owners Manual
Page 54
.... k When the battery or internal camera (excluding battery) temperature rises during use h During camera use as soon as the \ icon remains flashing). 29 English h During video recording, a countdown indicator will appear as the \ icon remains flashing). About the temperature alert icon \ During camera use . however it is flashing), it cannot be...
.... k When the battery or internal camera (excluding battery) temperature rises during use h During camera use as soon as the \ icon remains flashing). 29 English h During video recording, a countdown indicator will appear as the \ icon remains flashing). About the temperature alert icon \ During camera use . however it is flashing), it cannot be...

Owners Manual
Page 63
SETUP Using the SIMPLE Mode Menu 4 Press [I ] Select an item to change Description of selected item Select video and photo size SN SET OK Press [J] Press the SET button To keep in HDTV size 14M 2M HDTV size 14M [4:3] SESTET OK English 38 h The Setting Screen for the selected item appears. Press [I ] or [J] to select the item you wish to change , and press the SET button.
SETUP Using the SIMPLE Mode Menu 4 Press [I ] Select an item to change Description of selected item Select video and photo size SN SET OK Press [J] Press the SET button To keep in HDTV size 14M 2M HDTV size 14M [4:3] SESTET OK English 38 h The Setting Screen for the selected item appears. Press [I ] or [J] to select the item you wish to change , and press the SET button.


