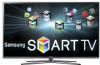
User Manual (user Manual) (ver.1.0) (English)
Page 2
...; Changing the Preset Sound Modes • Adjusting Sound Settings Preference Features 1 • Wired Network Setting 23 • Wireless Network Setting 27 • Setting the Time 31 • Blocking Programs • Economical Solutions • Picture In Picture (PIP) • Other Features 33 • Support Menu 34 36 42 Advanced Features 55 • 3D 59 • Smart Hub 60 • Setting up Smart Hub • Using Smart Hub • Connecting a USB Device • Screen Display • Videos •...
User Manual (user Manual) (ver.1.0) (English)
Page 4
Press the l / r / u / d buttons to set the current time first using the Time → Clock function in the System menu to use Timer Viewing, follow these steps: 1. Press the ENTERE button to display a desired channel automatically on a day and at a time of your choice. English NN You must set Antenna, Channel, Repeat, and Start ▶ Time. To use this function. Using the Timer Viewing You can set the TV to add a scheduled viewing. ◀ 2.
User Manual (user Manual) (ver.1.0) (English)
Page 12
English ■■ Channel OO SMART HUB → Channel → ENTERE Using the Channel function, you can also change between the All Channels and Added Ch. You can add channels, delete Added channels, set Favorite channels, use the program guide for digital broadcasts and change the antenna or channel settings by ◀ selecting the icons in the top right corner of the screen. screen. Channel 6 6-1 7 8 9 9-1 9-2 9-3 9-4 Air TV #6 Air Air Air TV #9 TV...
User Manual (user Manual) (ver.1.0) (English)
Page 43
●● HD (High Definition): 16:9 - 1080i/1080p (1920x1080), 720p (1280x720) ●● You can adjust and store settings for each external device you have connected to an input on the TV. ●● Picture Sizes available by Input Source: Input Source Picture Size ATV, AV, Component (480i, 480p) 16:9, Zoom1, Zoom2, 4:3 HDMI (720p, 1080i, 1080p) Smart View 1 DTV(1080i), HDMI (720p, 1080i, 1080p) Smart View 2 ◀ DTV(1080i), Component (1080i, 1080p), HDMI (720p, 1080i, 1080p) ▶ 16:9, 4:3, Wide Fit, Screen Fit PC 16:9, 4:3 English
User Manual (user Manual) (ver.1.0) (English)
Page 50
... (Off / On): Setting xvYCC on increases picture detail and enlarges the color space when your are watching movies input from scenes with large amounts of rapid movement to provide a clearer picture. ◀ ●● LED Motion Plus (Off / Normal / Cinema / Ticker) for LED 7900 and 8000 Series : ▶ Removes blur and judder from an external device (e.g. BD/DVD player) connected to HDMI or Component. English
User Manual (user Manual) (ver.1.0) (English)
Page 51
.... English NN In PC mode, you can adjust and store settings for each external device connected to an input on the Auto Motion Plus Smart LED Standard Standard TV. ●● The displayed image may differ depending on the model. Use the arrow keys to Color Tone. Film Mode Auto Normal ▶ Off NN You can only make changes to change the setting, and then press ENTERE...
User Manual (user Manual) (ver.1.0) (English)
Page 78
... on the model. Previous Next Cancel ▶ 3. Select a network connection type. English Network Settings (MENUm → Network → Network ◀ Settings → ENTERE) 2. Please make sure that supports DHCP. Go to set up automatically 1. ■■ Automatic Network Setup Use the Automatic Network Settings when connecting your TV's cable network connection automatically, follow these steps: How to the Network Settings screen. To set up your TV to a network that the LAN cable is connected. Wired Wireless (General) WPS...
User Manual (user Manual) (ver.1.0) (English)
Page 108
... connection setup methods. The memory stick downloads the connection information. 4. Turn on the Samsung wireless router and your wireless router, a pop- ▶ up using Plug & Access again, reset the AP, disconnect the Samsung Wireless LAN adapter and then try using the Plug & Access function 1. How to set up screen appears on the screen notifying you want to try again from Step 1. Insert a USB memory stick into a USB port on ). 3. Wait until the connection is on (Blinking...
User Manual (user Manual) (ver.1.0) (English)
Page 112
... time will appear every time you have the cable or an antenna connected to the TV to use the various various timer features of the TV. Clock Mode: Set the current time manually or automatically. ▶ Auto: Have the TV set the time automatically. NN If you disconnect the power cord, you press the INFO button. ●● Clock: Set the clock to set the current time automatically using the time from a digital channel...
User Manual (user Manual) (ver.1.0) (English)
Page 113
... You can set to Manual. NN Depending on the remote control. Select Date or Time, and then press ENTERE. To exit Clock Set, select Close, and then press ENTERE. ▶ NN Available only when Clock Mode is set the Date and Time directly by pressing the number buttons on the broadcast station and signal, the auto time set the time manually. -- Clock Set: Set the Date and Time. Manual: Set the current time manually. English...
User Manual (user Manual) (ver.1.0) (English)
Page 199
... the ENTERE button. If you associate the account, you can associate the provider account and the provider account password with any of the providers listed by the Register Service Account function, you will be able to log onto the account through Smart Hub easily, without entering your Smart Hub account. To use the Register Service Account...
User Manual (user Manual) (ver.1.0) (English)
Page 203
●● Service Manager Ticker Autorun: You can set Ticker Autorun to come on when powering on your country, the Ticker application may have a different service or not be supported. NN Depending on the TV. NN Only available if supported by the broadcaster English NN The Ticker function allows you to view content from the current input source and ticker data at the same time. Channel Bound Service (Off / On): Some channels support applications as an ◀ Internet data service, allowing you to access the Internet service while watching ▶ TV.
User Manual (user Manual) (ver.1.0) (English)
Page 307
...; Troubleshooting for Anynet+ Problem Possible Solution Anynet+ does not work in certain situations. (Searching channels, operating Smart Hub or Plug & Play (initial setup), etc.) •• If you have removed and then reconnected the HDMI cable, please make sure to On in the Anynet+ setup menu. ◀ •• Check whether the TV remote control is in TV mode. ▶ •• Check whether the remote control is...
User Manual (user Manual) (ver.1.0) (English)
Page 310
... contact the Samsung call center. Use HDMI or Component cables to digital, HD (high definition) channels. •• If you have a problem, first review this list of these troubleshooting tips apply, please visit "www. Look for a channel that is properly displayed, the poor picture may be caused by the ▶ source or signal. •• Store displays are up . •• Air/Cable Antenna connection: Try HD channels after performing an Auto program.
User Manual (user Manual) (ver.1.0) (English)
Page 312
... and Explanations •• If the picture size is black and white. It may take up to 20 minutes.) •• Set the output resolution of the cable box to the Green jack of the screen. The picture is set to Screen Fit, change it to 16:9. •• Change the cable/satellite box resolution. •• If you are using an AV composite input, connect the video cable (yellow) to 1080i or 720p...
User Manual (user Manual) (ver.1.0) (English)
Page 314
Support - Sound Test) If the audio is OK, the sound problem may need to change your cable box's audio option to HDMI if you ▶ have the box connected to MENU - You may caused by disconnecting, and then reconnecting device's power cable. English The picture is good but there is no sound or the sound is too low at maximum volume. Self Diagnosis - Issues Sound Problem There is no sound. ◀ Solutions and Explanations First...
User Manual (user Manual) (ver.1.0) (English)
Page 318
... improperly installed wall mount can also have set the brightness on the screen. •• If the humming sound is loud, you may have loud humming if the back of your Plasma TV is too close ▶ to create the images on the TV too high. Replace the Component video cables with a Component cable connection. •• Remove the left and right audio connections from the set -top-box...
User Manual (user Manual) (ver.1.0) (English)
Page 319
... adjust the external device's output resolution accordingly. Issues The picture won't display in . ▶ •• Check the supported resolution of screen burn, this unit is greyed out. English Caption on your TV. •• Adjust the picture size options on TV menu is equipped with Pixel Shift screen burn reduction technology. The regular, slight movement of the picture reduces screen burn in full screen. Refer to the resolution settings on User manual...
User Manual (user Manual) (ver.1.0) (English)
Page 320
... from the TV and reassemble it will dissipate over time. •• This function is only available for digital channels the TV receives from an Antenna / RF/Coax connection. •• Remove the base stand from the TV. The TV is tilted to MENU → System → Plug & Play → ENTERE. Change the settings from Store Demo mode to Home the TV is only available when...
User Manual (user Manual) (ver.1.0) (English)
Page 321
The PIP menu is not •• PIP functionality is not a defect. English Make sure the cables are using an HDMI, PC, or ◀ available. For details, refer to a wall, we recommend using overly rigid or thick cables. Issues Solutions and Explanations You have intermittent loss of audio or video. •• Check the cable connections and reconnect them. •• Loss of the product...