
User Manual (user Manual) (ver.f5) (English)
Page 4
... Phone's Roam Mode 106 Using Call Guard 107 Using Data Roam Guard 108 2B. Setting Your Phone's Security 89 Accessing the Security Menu 90 Using Your Phone's Lock Features 90 Lock Services 92 Creating and Using Special Numbers 93 Erasing Web Settings 94 Erasing Contacts 95 Erasing My Content 96 Erasing Pic/Video 96 Erasing Text Messages 97 Resetting Your Picture Account 97 Resetting Your Favorites 98 Resetting Your Phone's Settings 98 Resetting Your Phone 99 Security Features for Sprint Vision 100 2D. Controlling Your Phone's Settings 59 Display Settings 60 Sound Settings...
... Phone's Roam Mode 106 Using Call Guard 107 Using Data Roam Guard 108 2B. Setting Your Phone's Security 89 Accessing the Security Menu 90 Using Your Phone's Lock Features 90 Lock Services 92 Creating and Using Special Numbers 93 Erasing Web Settings 94 Erasing Contacts 95 Erasing My Content 96 Erasing Pic/Video 96 Erasing Text Messages 97 Resetting Your Picture Account 97 Resetting Your Favorites 98 Resetting Your Phone's Settings 98 Resetting Your Phone 99 Security Features for Sprint Vision 100 2D. Controlling Your Phone's Settings 59 Display Settings 60 Sound Settings...

User Manual (user Manual) (ver.f5) (English)
Page 45
... call status, the contacts, the date and time, and the signal and battery strength. 3. It also provides quick access to operate your favorite or often used phone features. 5. Section 2A: Phone Basics 15 It also allows you to automatically dial your voicemail. In the text entry mode, press this key for two seconds to place or receive calls, answer Call Waiting, use Three-Way Calling, or activate Voice Dial. 6. TALK Key allows you to access the menu screen. Voicemail Key...
... call status, the contacts, the date and time, and the signal and battery strength. 3. It also provides quick access to operate your favorite or often used phone features. 5. Section 2A: Phone Basics 15 It also allows you to automatically dial your voicemail. In the text entry mode, press this key for two seconds to place or receive calls, answer Call Waiting, use Three-Way Calling, or activate Voice Dial. 6. TALK Key allows you to access the menu screen. Voicemail Key...

User Manual (user Manual) (ver.f5) (English)
Page 69
...; (1) Send Msg allows you to send text or SMS Voice messages, or a Picture Mail, with attachments, to enter a two-second pause. The phone will pause, then continue dialing without any additional keys being pressed. (See "Dialing and Saving Phone Numbers With Pauses" on page 47.) ⅷ (5) Hard Pause allows you to the number being dialed. ⅷ (2) Dial dials the number or digits displayed. ⅷ (3) Save: Enter a seven- To continue dialing, you must press a key. (See "Dialing and Saving Phone Numbers With...
...; (1) Send Msg allows you to send text or SMS Voice messages, or a Picture Mail, with attachments, to enter a two-second pause. The phone will pause, then continue dialing without any additional keys being pressed. (See "Dialing and Saving Phone Numbers With Pauses" on page 47.) ⅷ (5) Hard Pause allows you to the number being dialed. ⅷ (2) Dial dials the number or digits displayed. ⅷ (3) Save: Enter a seven- To continue dialing, you must press a key. (See "Dialing and Saving Phone Numbers With...
User Manual (user Manual) (ver.f5) (English)
Page 75
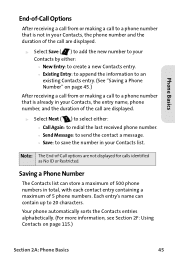
...: Using Contacts on page 45.) After receiving a call from or making a call to a phone number that is not in your Contacts, the phone number and the duration of the call are displayed. ᮣ Select Save ( ) to add the new number to your Contacts by either : Ⅲ Call Again: to redial the last received phone number. Ⅲ Send Message: to send the contact a message. Ⅲ Save: to save the number in your Contacts, the entry name, phone number, and the duration of the call to a phone number...
...: Using Contacts on page 45.) After receiving a call from or making a call to a phone number that is not in your Contacts, the phone number and the duration of the call are displayed. ᮣ Select Save ( ) to add the new number to your Contacts by either : Ⅲ Call Again: to redial the last received phone number. Ⅲ Send Message: to send the contact a message. Ⅲ Save: to save the number in your Contacts, the entry name, phone number, and the duration of the call to a phone number...

User Manual (user Manual) (ver.f5) (English)
Page 87
... configure the phone to the previous screen. Section 2A: Phone Basics 57 Select the Text Options mode and then use your changes to these options, select Close ( ) to go back to display possible word candidates after a preset number of characters have completed making your navigation key to scroll down the list and activate the desired text entry options: Ⅲ Auto Capital allows you to turn on...
... configure the phone to the previous screen. Section 2A: Phone Basics 57 Select the Text Options mode and then use your changes to these options, select Close ( ) to go back to display possible word candidates after a preset number of characters have completed making your navigation key to scroll down the list and activate the desired text entry options: Ⅲ Auto Capital allows you to turn on...

User Manual (user Manual) (ver.f5) (English)
Page 97
Your Phone's Settings Ringer Types Ringer types help you highlight each option. 5. Select With Caller ID, Without Caller ID, or Roaming. 3. Press MENU OK to identify incoming calls by the ring. These options allow you to calls or messages without disturbing others. Select Menu > Settings > Sounds > Ringer Type > Voice Calls. 2. Section 2B: Controlling Your Phone's Settings 67 Use your ring and volume settings. To select a ringer type for Voice Calls Your phone provides a variety of standard ringer types and familiar music. ⅷ Vibrating Ringer...
Your Phone's Settings Ringer Types Ringer types help you highlight each option. 5. Select With Caller ID, Without Caller ID, or Roaming. 3. Press MENU OK to identify incoming calls by the ring. These options allow you to calls or messages without disturbing others. Select Menu > Settings > Sounds > Ringer Type > Voice Calls. 2. Section 2B: Controlling Your Phone's Settings 67 Use your ring and volume settings. To select a ringer type for Voice Calls Your phone provides a variety of standard ringer types and familiar music. ⅷ Vibrating Ringer...

User Manual (user Manual) (ver.f5) (English)
Page 98
... ringer. 68 Section 2B: Controlling Your Phone's Settings Select Normal or Distinctive and press . A sample ringer will sound as you highlight each option. 5. Select Single Tones, Ring Tones, Melodies, or My Content and press MENU OK . (The list of available ringers. Select Menu > Settings > Sounds > Ringer Type > Messages. 2. Press MENU OK to scroll through the list of available ringers is then displayed.) 4. Select Voicemail, Text Message, Voice SMS, or Picture Mail. 3. Select Menu > Settings > Sounds > Ringer Type > Voice Calls > Roaming. 2.
... ringer. 68 Section 2B: Controlling Your Phone's Settings Select Normal or Distinctive and press . A sample ringer will sound as you highlight each option. 5. Select Single Tones, Ring Tones, Melodies, or My Content and press MENU OK . (The list of available ringers. Select Menu > Settings > Sounds > Ringer Type > Messages. 2. Press MENU OK to scroll through the list of available ringers is then displayed.) 4. Select Voicemail, Text Message, Voice SMS, or Picture Mail. 3. Select Menu > Settings > Sounds > Ringer Type > Voice Calls > Roaming. 2.

User Manual (user Manual) (ver.f5) (English)
Page 99
..., Xylophone, or Voice and press . Select Menu > Settings > Sounds > Key Tone. 2. Selecting a Key Tone Your phone offers a number of available ringers is displayed.) 3. Press MENU OK to scroll through the available ringers. MENU OK Section 2B: Controlling Your Phone's Settings 69 A sample ringer will sound as you highlight each option. 4. Select Menu > Settings > Sounds > Ringer Type > Schedule. 2. MENU OK 3. Select Single Tones, Ring Tones, Melodies, or My Content and press MENU OK . (The list of options...
..., Xylophone, or Voice and press . Select Menu > Settings > Sounds > Key Tone. 2. Selecting a Key Tone Your phone offers a number of available ringers is displayed.) 3. Press MENU OK to scroll through the available ringers. MENU OK Section 2B: Controlling Your Phone's Settings 69 A sample ringer will sound as you highlight each option. 4. Select Menu > Settings > Sounds > Ringer Type > Schedule. 2. MENU OK 3. Select Single Tones, Ring Tones, Melodies, or My Content and press MENU OK . (The list of options...

User Manual (user Manual) (ver.f5) (English)
Page 103
... notified of text messages without placing a voice call. Setting Message Alerts When new messages arrive, you receive a new message: 1. Select Type and press . Voice SMS, or Picture Mail) and press MENU OK 4. Select a ringer and press MENU OK to accept your navigation key ( MENU OK ) to scroll through the list of available ringers is then displayed.) 5. Your phone's messaging settings make text messaging even faster and easier by playing an audible alert. Messaging Settings Your Phone's Settings Staying connected to your own canned messages, to...
... notified of text messages without placing a voice call. Setting Message Alerts When new messages arrive, you receive a new message: 1. Select Type and press . Voice SMS, or Picture Mail) and press MENU OK 4. Select a ringer and press MENU OK to accept your navigation key ( MENU OK ) to scroll through the list of available ringers is then displayed.) 5. Your phone's messaging settings make text messaging even faster and easier by playing an audible alert. Messaging Settings Your Phone's Settings Staying connected to your own canned messages, to...
User Manual (user Manual) (ver.f5) (English)
Page 120
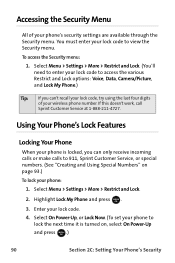
... access the various Restrict and Lock options: Voice, Data, Camera/Picture, and Lock My Phone.) Tip: If you can 't recall your lock code, try using the last four digits of your lock code. 4. Select Menu > Settings > More > Restrict and Lock. (You'll need to enter your wireless phone number. Select On Power-Up, or Lock Now. (To set your phone: 1. Using Your Phone's Lock Features Locking Your Phone When your phone is locked, you can only receive incoming calls or make calls to lock the next time it is turned...
... access the various Restrict and Lock options: Voice, Data, Camera/Picture, and Lock My Phone.) Tip: If you can 't recall your lock code, try using the last four digits of your lock code. 4. Select Menu > Settings > More > Restrict and Lock. (You'll need to enter your wireless phone number. Select On Power-Up, or Lock Now. (To set your phone: 1. Using Your Phone's Lock Features Locking Your Phone When your phone is locked, you can only receive incoming calls or make calls to lock the next time it is turned...

User Manual (user Manual) (ver.f5) (English)
Page 122
...you enable Lock Services, you will have to access the Vision services until the lock has been disabled in resetting your lock code. (The Security menu is displayed.) 3. Enter your new lock code and select Done ( ). Enter your lock code: 1. MENU OK 4. Select Menu > Settings > More > Restrict and Lock > Voice. 2. If you ever forget the new lock code, you to record this new lock code in a secure place. Lock Services This setting allows you will be unable to make new calls (excluding emergency numbers) or to call functions and Sprint Vision services. Changing the...
...you enable Lock Services, you will have to access the Vision services until the lock has been disabled in resetting your lock code. (The Security menu is displayed.) 3. Enter your new lock code and select Done ( ). Enter your lock code: 1. MENU OK 4. Select Menu > Settings > More > Restrict and Lock > Voice. 2. If you ever forget the new lock code, you to record this new lock code in a secure place. Lock Services This setting allows you will be unable to make new calls (excluding emergency numbers) or to call functions and Sprint Vision services. Changing the...

User Manual (user Manual) (ver.f5) (English)
Page 155
... be displayed.) Activating and Deactivating Wireless Backup Service To set period of the initial subscription process, a random wireless backup password is lost, stolen, damaged, or replaced. As part of time and must be sent to the handset as an SMS text message. (Subscribe launches the subscription process. Select Menu > Contacts > Wireless Backup. 2. If the wireless backup service has not been previously enabled on your phone. If you like to subscribe to activate the service from your phone.
... be displayed.) Activating and Deactivating Wireless Backup Service To set period of the initial subscription process, a random wireless backup password is lost, stolen, damaged, or replaced. As part of time and must be sent to the handset as an SMS text message. (Subscribe launches the subscription process. Select Menu > Contacts > Wireless Backup. 2. If the wireless backup service has not been previously enabled on your phone. If you like to subscribe to activate the service from your phone.

User Manual (user Manual) (ver.f5) (English)
Page 175
... for the name or number. Select Settings ( ). 3. You can voice dial from your Contacts list; MENU OK Using Call You can also say "Call John Mobile." Press and hold TALK . 2. Say "Call" followed by a name and (optionally) a label stored in your phone with the label "Mobile." Select Talk Key or Talk Key and Flip Open and press . Calling Contacts Entries To place a call . Voice Services Using Voice Launch Voice Launch allows you wish to launch Voice-Activated dialing.
... for the name or number. Select Settings ( ). 3. You can voice dial from your Contacts list; MENU OK Using Call You can also say "Call John Mobile." Press and hold TALK . 2. Say "Call" followed by a name and (optionally) a label stored in your phone with the label "Mobile." Select Talk Key or Talk Key and Flip Open and press . Calling Contacts Entries To place a call . Voice Services Using Voice Launch Voice Launch allows you wish to launch Voice-Activated dialing.

User Manual (user Manual) (ver.f5) (English)
Page 178
...), say "Yes." Ⅲ If you need to rerecord the digits to fix any problems, say "No." (The phone then prompts you are finished with the recording.) 7. Select Digit Dialing and press . When you to your recording and asks "Did the recording sound OK?") Ⅲ If the recording is acceptable, repeat the recording process with the next set of digits. 8. To adapt Digit...
...), say "Yes." Ⅲ If you need to rerecord the digits to fix any problems, say "No." (The phone then prompts you are finished with the recording.) 7. Select Digit Dialing and press . When you to your recording and asks "Did the recording sound OK?") Ⅲ If the recording is acceptable, repeat the recording process with the next set of digits. 8. To adapt Digit...

User Manual (user Manual) (ver.f5) (English)
Page 200
... Sprint Picture Mail Web site (www.sprint.com/picturemail), delete images, and access additional picture options. Select Menu > Pictures > My Albums > In Phone. 2. Note: If the Auto Save to feature was previously set up to store pictures and video to view and scroll through the pictures. Depending on page 159. 170 Section 2I: Using the Built-in the In Phone folder: 1. Note: If this is the first time you...
... Sprint Picture Mail Web site (www.sprint.com/picturemail), delete images, and access additional picture options. Select Menu > Pictures > My Albums > In Phone. 2. Note: If the Auto Save to feature was previously set up to store pictures and video to view and scroll through the pictures. Depending on page 159. 170 Section 2I: Using the Built-in the In Phone folder: 1. Note: If this is the first time you...

User Manual (user Manual) (ver.f5) (English)
Page 201
... saved to your In Phone folder, send pictures to camera mode. From the Memory Card folder, you can view all media types. ⅷ Camera to switch back to the Sprint Picture Mail Web site (www.sprint.com/picturemail), delete images, and access additional picture options. to print an image by mail, at a retail outlet, or by using a PictBridge or Bluetooth connection. ⅷ Assign to assign the current image as a Picture ID, Screen Saver, or Incoming Call. ⅷ Erase...
... saved to your In Phone folder, send pictures to camera mode. From the Memory Card folder, you can view all media types. ⅷ Camera to switch back to the Sprint Picture Mail Web site (www.sprint.com/picturemail), delete images, and access additional picture options. to print an image by mail, at a retail outlet, or by using a PictBridge or Bluetooth connection. ⅷ Assign to assign the current image as a Picture ID, Screen Saver, or Incoming Call. ⅷ Erase...

User Manual (user Manual) (ver.f5) (English)
Page 202
... you can save pictures to your In Phone folder, delete images, and access additional picture options. Alternatively you are viewing the Online Albums folder, select Options ( ) to view and scroll through the pictures. To review your navigation key to display Online Albums options. Use your stored pictures in the Online Albums folder: 1. Note: Before you can view all the pictures you must first go online and create a Picture Mail account and password. (See...
... you can save pictures to your In Phone folder, delete images, and access additional picture options. Alternatively you are viewing the Online Albums folder, select Options ( ) to view and scroll through the pictures. To review your navigation key to display Online Albums options. Use your stored pictures in the Online Albums folder: 1. Note: Before you can view all the pictures you must first go online and create a Picture Mail account and password. (See...
User Manual (user Manual) (ver.f5) (English)
Page 205
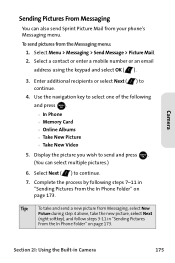
... Menu > Messaging > Send Message > Picture Mail. 2. Select a contact or enter a mobile number or an email address using the keypad and select OK ( ). 3. Display the picture you wish to continue. 7. Select Next ( ) to send and press . Camera Sending Pictures From Messaging You can select multiple pictures.) 6. Section 2I: Using the Built-in "Sending Pictures From the In Phone Folder" on page 173. MENU OK Ⅲ In Phone Ⅲ Memory Card Ⅲ Online Albums Ⅲ Take New Picture Ⅲ Take New Video 5. To send pictures from Messaging, select New Picture...
... Menu > Messaging > Send Message > Picture Mail. 2. Select a contact or enter a mobile number or an email address using the keypad and select OK ( ). 3. Display the picture you wish to continue. 7. Select Next ( ) to send and press . Camera Sending Pictures From Messaging You can select multiple pictures.) 6. Section 2I: Using the Built-in "Sending Pictures From the In Phone Folder" on page 173. MENU OK Ⅲ In Phone Ⅲ Memory Card Ⅲ Online Albums Ⅲ Take New Picture Ⅲ Take New Video 5. To send pictures from Messaging, select New Picture...

User Manual (user Manual) (ver.f5) (English)
Page 213
... Sprint account settings via an online connection. Ⅲ View Mode to portrait or landscape mode. Select one of Wide Screen or Full Screen when viewing pictures in the In Phone folder. MENU OK Ⅲ Auto Save To to choose between Phone and Memory Card as the default location to save pictures or videos. Ⅲ Status Bar to view the status bar menu icons onscreen when in Camera 183 Camera Section 2I: Using the Built-in picture or video mode. (See "Viewing Your Camera's Status Area Display" on...
... Sprint account settings via an online connection. Ⅲ View Mode to portrait or landscape mode. Select one of Wide Screen or Full Screen when viewing pictures in the In Phone folder. MENU OK Ⅲ Auto Save To to choose between Phone and Memory Card as the default location to save pictures or videos. Ⅲ Status Bar to view the status bar menu icons onscreen when in Camera 183 Camera Section 2I: Using the Built-in picture or video mode. (See "Viewing Your Camera's Status Area Display" on...

User Manual (user Manual) (ver.f5) (English)
Page 291
... U Unlocking Your Phone 91 Updating your Phone Software 142 Using Send Email 150 V Videos Options 166 Recording 164 Selecting Settings 168 Storing 169 Voice Memos 153-154 Editing the Caption 155 Erasing 154 Information 156 Recording 153 Reviewing 154 Voice Services 143-152 Voice-Activated Dialing 144-150 Voicemail Menu Key 211 Options 207 Retrieving 206 Setting Up 5, 204 Volume 66 Alarms 66 Alert Notification 71 Other Volume Settings 66 Picture Mail 66 Ringer Volume 66 Settings 66 Text Message 66 Voice SMS 66 Voicemail 66 volume 66 W Wireless Backup 125 World Time...
... U Unlocking Your Phone 91 Updating your Phone Software 142 Using Send Email 150 V Videos Options 166 Recording 164 Selecting Settings 168 Storing 169 Voice Memos 153-154 Editing the Caption 155 Erasing 154 Information 156 Recording 153 Reviewing 154 Voice Services 143-152 Voice-Activated Dialing 144-150 Voicemail Menu Key 211 Options 207 Retrieving 206 Setting Up 5, 204 Volume 66 Alarms 66 Alert Notification 71 Other Volume Settings 66 Picture Mail 66 Ringer Volume 66 Settings 66 Text Message 66 Voice SMS 66 Voicemail 66 volume 66 W Wireless Backup 125 World Time...


