
User Manual (user Manual) (ver.f6) (English)
Page 1
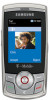
SGH-T659 Series PORTABLE Quad-BAND MOBILE PHONE User Manual Please read this manual before operating your phone, and keep it for future reference.
SGH-T659 Series PORTABLE Quad-BAND MOBILE PHONE User Manual Please read this manual before operating your phone, and keep it for future reference.

User Manual (user Manual) (ver.f6) (English)
Page 2
...75074 Toll Free Tel: 1.888.987.HELP (4357) Internet Address: http://www.samsungusa.com ©2009 Samsung Telecommunications America, LLC is not limited to Samsung and protected under federal laws, state laws, and international treaty provisions. Do you . You may not infringe..., trade secrets, copyrights, software, computer programs, and related documentation and other works of the Intellectual Property shall remain with SAMSUNG and its related entities. No title to or ownership in Mexico T659_UVIG2_CH_072009_F6 Intellectual Property All Intellectual Property, as defined below, ...
...75074 Toll Free Tel: 1.888.987.HELP (4357) Internet Address: http://www.samsungusa.com ©2009 Samsung Telecommunications America, LLC is not limited to Samsung and protected under federal laws, state laws, and international treaty provisions. Do you . You may not infringe..., trade secrets, copyrights, software, computer programs, and related documentation and other works of the Intellectual Property shall remain with SAMSUNG and its related entities. No title to or ownership in Mexico T659_UVIG2_CH_072009_F6 Intellectual Property All Intellectual Property, as defined below, ...

User Manual (user Manual) (ver.f6) (English)
Page 3
...EXCEPT AS SET FORTH IN THE EXPRESS WARRANTY CONTAINED ON THE WARRANTY PAGE ENCLOSED WITH THE PRODUCT, THE PURCHASER TAKES THE PRODUCT "AS IS", AND SAMSUNG MAKES NO EXPRESS OR IMPLIED WARRANTY OF ANY KIND WHATSOEVER WITH RESPECT TO THE PRODUCT, INCLUDING BUT NOT LIMITED TO THE MERCHANTABILITY OF THE PRODUCT... CONSTRUED TO CREATE AN EXPRESS OR IMPLIED WARRANTY OF ANY KIND WHATSOEVER WITH RESPECT TO THE PRODUCT. Disclaimer of ACCESS Co., Ltd. IN ADDITION, SAMSUNG SHALL NOT BE LIABLE FOR ANY DAMAGES OF ANY KIND RESULTING FROM THE PURCHASE OR USE OF THE PRODUCT OR ARISING FROM THE BREACH OF...
...EXCEPT AS SET FORTH IN THE EXPRESS WARRANTY CONTAINED ON THE WARRANTY PAGE ENCLOSED WITH THE PRODUCT, THE PURCHASER TAKES THE PRODUCT "AS IS", AND SAMSUNG MAKES NO EXPRESS OR IMPLIED WARRANTY OF ANY KIND WHATSOEVER WITH RESPECT TO THE PRODUCT, INCLUDING BUT NOT LIMITED TO THE MERCHANTABILITY OF THE PRODUCT... CONSTRUED TO CREATE AN EXPRESS OR IMPLIED WARRANTY OF ANY KIND WHATSOEVER WITH RESPECT TO THE PRODUCT. Disclaimer of ACCESS Co., Ltd. IN ADDITION, SAMSUNG SHALL NOT BE LIABLE FOR ANY DAMAGES OF ANY KIND RESULTING FROM THE PURCHASE OR USE OF THE PRODUCT OR ARISING FROM THE BREACH OF...

User Manual (user Manual) (ver.f6) (English)
Page 4
Table of Contents Section 1: Getting Started 5 Activating Your Phone 5 Switching the Phone On or Off 10 Setting Up Your Voice Mail 10 Section 2: Understanding Your Phone 12 Features of Your Phone 12 Open View of Your Phone 13 Keys 13 Camera View 15 Side Views of Your Phone 16 Display Layout 17 Missed Messages 17 Backlight 19 Section 3: Call Functions 20 Making a Call 20 Adjusting the Call Volume 21 Answering a Call 22 Call History 22 Vibration Profile 24 Selecting Functions and Options 24 Section 4: Menu Navigation 30 Menu Navigation 30 Section 5: Entering Text 31 Keys ...
Table of Contents Section 1: Getting Started 5 Activating Your Phone 5 Switching the Phone On or Off 10 Setting Up Your Voice Mail 10 Section 2: Understanding Your Phone 12 Features of Your Phone 12 Open View of Your Phone 13 Keys 13 Camera View 15 Side Views of Your Phone 16 Display Layout 17 Missed Messages 17 Backlight 19 Section 3: Call Functions 20 Making a Call 20 Adjusting the Call Volume 21 Answering a Call 22 Call History 22 Vibration Profile 24 Selecting Functions and Options 24 Section 4: Menu Navigation 30 Menu Navigation 30 Section 5: Entering Text 31 Keys ...

User Manual (user Manual) (ver.f6) (English)
Page 5
Section 6: Messaging 35 Types of Messages 35 Display Icons for Messaging 35 Text Messages 36 Picture Messages 38 Audio Postcards 39 Inbox 40 E-mail Messages 44 Instant Messaging (IM 44 Sentbox 45 Drafts 45 My Folders 46 Templates 46 Settings 47 Section 7: People 50 Using Contacts List 50 My Profile 50 Mobile Backup 50 Storing a Number in the Phone's Memory 51 Finding a Contact Entry 52 Dialing a Number from Contacts 53 Groups 53 Speed Dialing 54 Management 55 Call History 57 Section 8: web2go Browsing 58 Browser 58 Section 9: Media 62 web2go 62 Photos 62 Music 63...
Section 6: Messaging 35 Types of Messages 35 Display Icons for Messaging 35 Text Messages 36 Picture Messages 38 Audio Postcards 39 Inbox 40 E-mail Messages 44 Instant Messaging (IM 44 Sentbox 45 Drafts 45 My Folders 46 Templates 46 Settings 47 Section 7: People 50 Using Contacts List 50 My Profile 50 Mobile Backup 50 Storing a Number in the Phone's Memory 51 Finding a Contact Entry 52 Dialing a Number from Contacts 53 Groups 53 Speed Dialing 54 Management 55 Call History 57 Section 8: web2go Browsing 58 Browser 58 Section 9: Media 62 web2go 62 Photos 62 Music 63...

User Manual (user Manual) (ver.f6) (English)
Page 6
Games & Apps 71 TeleNav GPS Navigator 72 Other files 72 Memory status 73 Section 10: Organizer 74 Organizer 74 Calendar 74 TeleNav GPS Navigator 75 Alarm 76 Tasks 77 Memo 78 Calculator 78 Tip calculator 78 World clock 79 Converter 79 Timer 79 Stopwatch 80 RSS reader 80 Section 11: Changing Your Settings 81 myFaves Settings 81 Personalize 81 My Account 90 Help 90 Bluetooth 90 Menu design 92 Manage Online Album 93 Call settings 93 Advanced 97 Software update 97 Reset settings 98 Section 12: Camera 99 Using the Camera 99 Take and Send 99 Photos 101 3
Games & Apps 71 TeleNav GPS Navigator 72 Other files 72 Memory status 73 Section 10: Organizer 74 Organizer 74 Calendar 74 TeleNav GPS Navigator 75 Alarm 76 Tasks 77 Memo 78 Calculator 78 Tip calculator 78 World clock 79 Converter 79 Timer 79 Stopwatch 80 RSS reader 80 Section 11: Changing Your Settings 81 myFaves Settings 81 Personalize 81 My Account 90 Help 90 Bluetooth 90 Menu design 92 Manage Online Album 93 Call settings 93 Advanced 97 Software update 97 Reset settings 98 Section 12: Camera 99 Using the Camera 99 Take and Send 99 Photos 101 3

User Manual (user Manual) (ver.f6) (English)
Page 7
Record video 103 Videos 105 My Album 105 Section 13: Health and Safety Information 106 Health and Safety Information 106 Warning Regarding Display 107 Samsung Mobile Products and Recycling 108 UL Certified Travel Adapter 108 Consumer Information on Wireless Phones 108 Road Safety 114 Responsible Listening 115 Operating Environment 117 ...
Record video 103 Videos 105 My Album 105 Section 13: Health and Safety Information 106 Health and Safety Information 106 Warning Regarding Display 107 Samsung Mobile Products and Recycling 108 UL Certified Travel Adapter 108 Consumer Information on Wireless Phones 108 Road Safety 114 Responsible Listening 115 Operating Environment 117 ...

User Manual (user Manual) (ver.f6) (English)
Page 8
Activating Your Phone When you subscribe to start using your phone by sliding the battery cover in SIM card loaded with a plug-in the direction of small children. If necessary, switch off image displays. 1. Section 1: Getting Started This section explains how to a cellular network, you are provided with your subscription details, such as your voice mail. Remove the battery cover by first configuring your hardware, activating your service, and setting up your PIN, available optional services, and many others features. Installing the SIM Card Important!: The plug-in SIM card ...
Activating Your Phone When you subscribe to start using your phone by sliding the battery cover in SIM card loaded with a plug-in the direction of small children. If necessary, switch off image displays. 1. Section 1: Getting Started This section explains how to a cellular network, you are provided with your subscription details, such as your voice mail. Remove the battery cover by first configuring your hardware, activating your service, and setting up your PIN, available optional services, and many others features. Installing the SIM Card Important!: The plug-in SIM card ...

User Manual (user Manual) (ver.f6) (English)
Page 9
Make sure that the card's gold contacts face into the SIM card socket until the card touches the back of the card is not inserted correctly, the phone does not detect the SIM card. Note: If the card is positioned as shown below. Carefully slide the SIM card into the phone and that the upper-left angled corner of the socket. Getting Started 6 Lift up and remove the battery. 4. 3. Remove the battery and re-orient the card back into the slot.
Make sure that the card's gold contacts face into the SIM card socket until the card touches the back of the card is not inserted correctly, the phone does not detect the SIM card. Note: If the card is positioned as shown below. Carefully slide the SIM card into the phone and that the upper-left angled corner of the socket. Getting Started 6 Lift up and remove the battery. 4. 3. Remove the battery and re-orient the card back into the slot.

User Manual (user Manual) (ver.f6) (English)
Page 10
... by a rechargeable Li-ion battery. You can use the phone while the battery is properly installed before switching on the end align with your local Samsung dealer for charging the battery, is powered by sliding it back onto the phone until you hear it securely click. Replace the battery: • Slide...
... by a rechargeable Li-ion battery. You can use the phone while the battery is properly installed before switching on the end align with your local Samsung dealer for charging the battery, is powered by sliding it back onto the phone until you hear it securely click. Replace the battery: • Slide...

User Manual (user Manual) (ver.f6) (English)
Page 11
Getting Started 8 A discharged battery recharges fully in the travel adapter's connector into a standard AC wall outlet. 3. When charging is finished, unplug the adapter's power plug from the AC wall outlet and disconnect the travel adapter is connected the handset continuously power cycles and prevents proper operation. 2. Resecure the plastic cover over the interface jack on the right side of the phone and plug in approximately 4 hours. 1. If the battery is installed prior to connecting the travel adapter before using your phone for the first time. Plug the adapter's power plug...
Getting Started 8 A discharged battery recharges fully in the travel adapter's connector into a standard AC wall outlet. 3. When charging is finished, unplug the adapter's power plug from the AC wall outlet and disconnect the travel adapter is connected the handset continuously power cycles and prevents proper operation. 2. Resecure the plastic cover over the interface jack on the right side of the phone and plug in approximately 4 hours. 1. If the battery is installed prior to connecting the travel adapter before using your phone for the first time. Plug the adapter's power plug...

User Manual (user Manual) (ver.f6) (English)
Page 12
When the battery level becomes too low, the phone automatically turns off the backlight, but by turning off . Installing the Memory Card Your phone supports an optional memory card (microSD™) for use with this condition, your thumb to a 16 Gigabyte memory card. 1. Place the microSD card into the slot (as indicated). 2. a warning tone sounds and the "Battery low" message repeats at regular intervals on the card face the same direction as music, pictures, video or other devices. Ensure the microSD's gold contact pins face downward and the card is designed for data ...
When the battery level becomes too low, the phone automatically turns off the backlight, but by turning off . Installing the Memory Card Your phone supports an optional memory card (microSD™) for use with this condition, your thumb to a 16 Gigabyte memory card. 1. Place the microSD card into the slot (as indicated). 2. a warning tone sounds and the "Battery low" message repeats at regular intervals on the card face the same direction as music, pictures, video or other devices. Ensure the microSD's gold contact pins face downward and the card is designed for data ...

User Manual (user Manual) (ver.f6) (English)
Page 13
Removing the memory card 1. Press and hold until the power-off the phone, press and hold on the keypad. 2. Use the keypad to set up voice mail: 1. The phone searches for your network and after finding it click, then allow the memory card to Automatic at the factory. To change the language, use the Language menu. When you will be different depending on page 88. 3. Carefully remove the memory card. 5. If the phone is preset to release from the slot. 4. For more information, refer to enter the phone password. Setting Up Your Voice Mail For new users, follow the ...
Removing the memory card 1. Press and hold until the power-off the phone, press and hold on the keypad. 2. Use the keypad to set up voice mail: 1. The phone searches for your network and after finding it click, then allow the memory card to Automatic at the factory. To change the language, use the Language menu. When you will be different depending on page 88. 3. Carefully remove the memory card. 5. If the phone is preset to release from the slot. 4. For more information, refer to enter the phone password. Setting Up Your Voice Mail For new users, follow the ...

User Manual (user Manual) (ver.f6) (English)
Page 14
Accessing Your Voice Mail To check your Voice mail, ᮣ From your voice mail. 11 Follow the voice prompts to enter the password and access your phone, in Idle mode, press and hold on the keypad. - or - ᮣ From any another phone, dial the Voice mail number displayed at Menu ➔ Messaging ➔ Settings ➔ Messages Settings ➔ Voice mail.
Accessing Your Voice Mail To check your Voice mail, ᮣ From your voice mail. 11 Follow the voice prompts to enter the password and access your phone, in Idle mode, press and hold on the keypad. - or - ᮣ From any another phone, dial the Voice mail number displayed at Menu ➔ Messaging ➔ Settings ➔ Messages Settings ➔ Voice mail.

User Manual (user Manual) (ver.f6) (English)
Page 15
Features of Your Phone Your phone is in your phone. The following list outlines a few of your phone. • 2.0 Megapixel Camera with 2.5x Digital Zoom • Bluetooth® Wireless Technology • User friendly, menu driven access to -use . Section 2: Understanding Your Phone This section outlines some key features of the features included in use and offers many significant features. Understanding Your Phone 12 It also displays the screen and the icons that display when the phone is lightweight, easy-to features and options • Text Messaging, Picture Messaging, ...
Features of Your Phone Your phone is in your phone. The following list outlines a few of your phone. • 2.0 Megapixel Camera with 2.5x Digital Zoom • Bluetooth® Wireless Technology • User friendly, menu driven access to -use . Section 2: Understanding Your Phone This section outlines some key features of the features included in use and offers many significant features. Understanding Your Phone 12 It also displays the screen and the icons that display when the phone is lightweight, easy-to features and options • Text Messaging, Picture Messaging, ...

User Manual (user Manual) (ver.f6) (English)
Page 16
If you subscribe to directly access the Contacts. • Left key: displays the New message screen so you can compose a new message. In Idle mode: • Up key: allows you to directly access the Call history. • Down key: allows you subscribe to the illustrations. 1. If you to myFaves, navigates the myFaves icons. • Right key: launches the Audio Postcard. Open View of Your Phone The following illustrations show the main elements of your phone: 113 1 112 12 31 111 41 110 51 91 81 61 71 Keys The following list correlates to myFaves, navigates the myFaves ...
If you subscribe to directly access the Contacts. • Left key: displays the New message screen so you can compose a new message. In Idle mode: • Up key: allows you to directly access the Call history. • Down key: allows you subscribe to the illustrations. 1. If you to myFaves, navigates the myFaves icons. • Right key: launches the Audio Postcard. Open View of Your Phone The following illustrations show the main elements of your phone: 113 1 112 12 31 111 41 110 51 91 81 61 71 Keys The following list correlates to myFaves, navigates the myFaves ...

User Manual (user Manual) (ver.f6) (English)
Page 17
Voice mail key allows you to the bottom right line on the display screen. 4. Alphanumeric keys allow you to operate your phone on the Vibration Mode. 8. Right Soft key allows you to make or answer a call . It also provides quick access to the bottom left line on the display screen. 2. From Idle mode, if you press and hold the * key you to enter numbers, letters, and some special characters. 9. In Menu mode, this key for two seconds to Idle mode and cancels your voice mail. Press and hold this key for dialing sequences that include pauses (such as the received ...
Voice mail key allows you to the bottom right line on the display screen. 4. Alphanumeric keys allow you to operate your phone on the Vibration Mode. 8. Right Soft key allows you to make or answer a call . It also provides quick access to the bottom left line on the display screen. 2. From Idle mode, if you press and hold the * key you to enter numbers, letters, and some special characters. 9. In Menu mode, this key for two seconds to Idle mode and cancels your voice mail. Press and hold this key for dialing sequences that include pauses (such as the received ...

User Manual (user Manual) (ver.f6) (English)
Page 18
Mirror allows you to center the camera lens for self portraits. 15 Camera View The following illustration shows the back, open view of the phone. 1 12 1. Camera lens allows you to aim and shoot a picture using the camera. 2.
Mirror allows you to center the camera lens for self portraits. 15 Camera View The following illustration shows the back, open view of the phone. 1 12 1. Camera lens allows you to aim and shoot a picture using the camera. 2.

User Manual (user Manual) (ver.f6) (English)
Page 19
When receiving an incoming call . If you to adjust the Ring volume in standby mode (with which to carry the phone. 2. Memory card slot used to launch the camcorder. Understanding Your Phone 16 Volume keys allow you press and hold to install an optional microSD™ (memory) card for convenient, hands-free conversations. 5. Press to connect a power cable or optional accessories, such as a USB/data cable or a hands-free headset for additional data storage. 4. Camera key allows you to launch the camera, or press and hold the volume key, you can reject the call. 3. ...
When receiving an incoming call . If you to adjust the Ring volume in standby mode (with which to carry the phone. 2. Memory card slot used to launch the camcorder. Understanding Your Phone 16 Volume keys allow you press and hold to install an optional microSD™ (memory) card for convenient, hands-free conversations. 5. Press to connect a power cable or optional accessories, such as a USB/data cable or a hands-free headset for additional data storage. 4. Camera key allows you to launch the camera, or press and hold the volume key, you can reject the call. 3. ...

User Manual (user Manual) (ver.f6) (English)
Page 20
Display Layout Your phone's display screen provides a wealth of the screen. The display has three areas: Icon line Text Soft keys Missed Messages When you receive new messages, icons display in two locations: in the View tab on the phone's screen, and in the icon line at the top of information about your phone's status and options. Icon line View tab Soft keys 17
Display Layout Your phone's display screen provides a wealth of the screen. The display has three areas: Icon line Text Soft keys Missed Messages When you receive new messages, icons display in two locations: in the View tab on the phone's screen, and in the icon line at the top of information about your phone's status and options. Icon line View tab Soft keys 17
