

User Manual Xp/windows7 Ver.1.3 (English)
Page 2
... 25 Overview 33 Turning the Computer On and Off Chapter 2. Contents Chapter 1. Getting Started 1 Chapter 3. Settings and Upgrade 76 LCD Brightness Control 78 Samsung Control Center (Optional) 79 BIOS Setup 81 Setting a Boot Password 84 Changing the Boot Priority 85 Upgrading Memory (For 11.6 inch models) 87 Battery 94 Using the Security... 58 Adjusting the Volume 61 Wired Network 65 Wireless Network (Optional) 69 Sharing Content in a Home Network (Easy Content Share) (Optional) Chapter 1. Backup / Restore 96 Samsung Recovery Solution (Optional) Chapter 5.
... 25 Overview 33 Turning the Computer On and Off Chapter 2. Contents Chapter 1. Getting Started 1 Chapter 3. Settings and Upgrade 76 LCD Brightness Control 78 Samsung Control Center (Optional) 79 BIOS Setup 81 Setting a Boot Password 84 Changing the Boot Priority 85 Upgrading Memory (For 11.6 inch models) 87 Battery 94 Using the Security... 58 Adjusting the Volume 61 Wired Network 65 Wireless Network (Optional) 69 Sharing Content in a Home Network (Easy Content Share) (Optional) Chapter 1. Backup / Restore 96 Samsung Recovery Solution (Optional) Chapter 5.

User Manual Xp/windows7 Ver.1.3 (English)
Page 5
...click Tools > Internet Options > Advanced > Load defaults. 2. A This is completely discharged. To resolve this problem, enter the BIOS Setup and select Samsung Battery Calibration to connect an external monitor, TV or projector. To resolve this problem, reinstall Internet Explorer 8 or install Internet Explorer... 7 or earlier. A If you use the Samsung Recovery Solution function, you can I extend the battery usage time? For detailed information on a function, refer to its initial state...
...click Tools > Internet Options > Advanced > Load defaults. 2. A This is completely discharged. To resolve this problem, enter the BIOS Setup and select Samsung Battery Calibration to connect an external monitor, TV or projector. To resolve this problem, reinstall Internet Explorer 8 or install Internet Explorer... 7 or earlier. A If you use the Samsung Recovery Solution function, you can I extend the battery usage time? For detailed information on a function, refer to its initial state...

User Manual Xp/windows7 Ver.1.3 (English)
Page 8
For 1GB(=1,024MB) memory installed, Windows may report the capacity as 1,022MB or less) For more information, refer to the Samsung Recovery Solution section. Chapter 1. Getting Started 7 This is less than the actual capacity of memory or claims it for further use. (E.g. Before You Start About Memory Capacity Representation The memory capacity reported in Windows is because BIOS or a video adapter uses a portion of memory.
For 1GB(=1,024MB) memory installed, Windows may report the capacity as 1,022MB or less) For more information, refer to the Samsung Recovery Solution section. Chapter 1. Getting Started 7 This is less than the actual capacity of memory or claims it for further use. (E.g. Before You Start About Memory Capacity Representation The memory capacity reported in Windows is because BIOS or a video adapter uses a portion of memory.

User Manual Xp/windows7 Ver.1.3 (English)
Page 76
Chapter 3. Settings and Upgrade LCD Brightness Control 76 Samsung Control Center (Optional) 78 BIOS Setup 79 Setting a Boot Password 81 Changing the Boot Priority 84 Upgrading Memory (For 11.6 inch models) 85 Battery 87 Using the Security Slot (For 350U2B Models only) 94
Chapter 3. Settings and Upgrade LCD Brightness Control 76 Samsung Control Center (Optional) 78 BIOS Setup 79 Setting a Boot Password 81 Changing the Boot Priority 84 Upgrading Memory (For 11.6 inch models) 85 Battery 87 Using the Security Slot (For 350U2B Models only) 94
User Manual Xp/windows7 Ver.1.3 (English)
Page 80
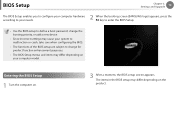
.... Settings and Upgrade 79 2 The BIOS Setup enables you to configure your computer hardware according to change for product function enhancement purposes. • The BIOS Setup menus and items may differ depending on your needs. When the booting screen (SAMSUNG logo) appears, press the F2 key... to enter the BIOS Setup. • Use the BIOS setup to define a boot password, change the booting priority...
.... Settings and Upgrade 79 2 The BIOS Setup enables you to configure your computer hardware according to change for product function enhancement purposes. • The BIOS Setup menus and items may differ depending on your needs. When the booting screen (SAMSUNG logo) appears, press the F2 key... to enter the BIOS Setup. • Use the BIOS setup to define a boot password, change the booting priority...

User Manual Xp/windows7 Ver.1.3 (English)
Page 81
... for the selected ( - System Setup Keys In the Setup, you have to configure security functions, including passwords. Press to another menu. BIOS Setup Chapter 3. Used to use the keyboard. The keyboard image may differ depending on your computer model. Setup Items Setup Menu SysInfo Advanced... & Right Keys Enter F10 Press to change the item value. Press to the Exit menu. Settings and Upgrade 80 The BIOS Setup Screen The BIOS Setup menus and items may differ from the actual keyboard. x) item appears automatically. Press to move to move up and down...
... for the selected ( - System Setup Keys In the Setup, you have to configure security functions, including passwords. Press to another menu. BIOS Setup Chapter 3. Used to use the keyboard. The keyboard image may differ depending on your computer model. Setup Items Setup Menu SysInfo Advanced... & Right Keys Enter F10 Press to change the item value. Press to the Exit menu. Settings and Upgrade 80 The BIOS Setup Screen The BIOS Setup menus and items may differ from the actual keyboard. x) item appears automatically. Press to move to move up and down...

User Manual Xp/windows7 Ver.1.3 (English)
Page 82
...81 XXXXXXXX 2 In the Set Supervisor Password item, press . • Do not lose or forget your password, contact a Samsung service center. The password can restrict system access to authorized users only and protect data and files saved on the computer model and... a service fee will be up to 8 alphanumeric characters. When setting a Supervisor Password, users other than a supervisor cannot use the computer or enter the BIOS Setup. By configuring a password, you have to enter a password to use the computer. 3 Enter a password, press , re-enter the password for confirmation...
...81 XXXXXXXX 2 In the Set Supervisor Password item, press . • Do not lose or forget your password, contact a Samsung service center. The password can restrict system access to authorized users only and protect data and files saved on the computer model and... a service fee will be up to 8 alphanumeric characters. When setting a Supervisor Password, users other than a supervisor cannot use the computer or enter the BIOS Setup. By configuring a password, you have to enter a password to use the computer. 3 Enter a password, press , re-enter the password for confirmation...

User Manual Xp/windows7 Ver.1.3 (English)
Page 83
Enter the Supervisor Password to change the hard disk drive password or the HDD Password Frozen message appears when entering the BIOS Setup and then selecting Security > HDD Password, press the Power button to turn the computer on boot item to Enabled. Press in the Set HDD ...
Enter the Supervisor Password to change the hard disk drive password or the HDD Password Frozen message appears when entering the BIOS Setup and then selecting Security > HDD Password, press the Power button to turn the computer on boot item to Enabled. Press in the Set HDD ...

User Manual Xp/windows7 Ver.1.3 (English)
Page 85
... highest boot priority device is configured to boot from actual product depending on the computer model and driver version. 1 Select the Boot menu in the BIOS Setup. 2 Press on theXBXXoXoXXtXDX evice Priority item. 3 Press the down key (↓) to move to the SATA HDD item and press the F6 key to...
... highest boot priority device is configured to boot from actual product depending on the computer model and driver version. 1 Select the Boot menu in the BIOS Setup. 2 Press on theXBXXoXoXXtXDX evice Priority item. 3 Press the down key (↓) to move to the SATA HDD item and press the F6 key to...

User Manual Xp/windows7 Ver.1.3 (English)
Page 93
... charge ON when using the computer on AC power. Then you change the power settings, the properties in the booting sequence to enter the BIOS Setup, select Advanced > Battery Life Cycle Extension, and set the Battery Life Extender to use time decreases, the battery life is reduced....The higher the power saving effect increases, the longer the graph bar is the Power-saving Effect? Extending the Battery Life (Optional) In the Samsung Control Center program, click System Controller > General and set it to Enable. In this case, although the battery use the battery life cycle ...
... charge ON when using the computer on AC power. Then you change the power settings, the properties in the booting sequence to enter the BIOS Setup, select Advanced > Battery Life Cycle Extension, and set the Battery Life Extender to use time decreases, the battery life is reduced....The higher the power saving effect increases, the longer the graph bar is the Power-saving Effect? Extending the Battery Life (Optional) In the Samsung Control Center program, click System Controller > General and set it to Enable. In this case, although the battery use the battery life cycle ...

User Manual Xp/windows7 Ver.1.3 (English)
Page 94
...? ='PCDNGF? =&KUCDNGF? 1 Disconnect the AC power adapter after turning off the computer. 2 Restart your computer and press the F2 button when the Samsung logo appears, to start the BIOS Setup. 4 Highlight Yes in the Battery Calibration Confirmation window and press . The Battery Calibration function is activated and the battery is forcefully discharged...
...? ='PCDNGF? =&KUCDNGF? 1 Disconnect the AC power adapter after turning off the computer. 2 Restart your computer and press the F2 button when the Samsung logo appears, to start the BIOS Setup. 4 Highlight Yes in the Battery Calibration Confirmation window and press . The Battery Calibration function is activated and the battery is forcefully discharged...

User Manual Xp/windows7 Ver.1.3 (English)
Page 136
Appendix 135 39 82 58 61 65 Index A AP B Battery BIOS Setup Booting Priority C CD Drive Charge Click D Double-Click Drag Dual View L LCD Brightness M 65 Monitor Connection / Output Multi Card Slot 88 O 79 Overview 84 P Password 46 Product Specifications 89 40 R Recorder S 41 41 Safety Precautions 51 Samsung Recovery Solution Scroll Security Slot 76 Shortcut Key SoundAlive Status Indicators Supervisor Password T 51 Touchpad 48 U User Password 25 V Volume Control 81 129 W Wired Network Wireless Network 58 8 96 43 94 36 60 27 81 Chapter 5.
Appendix 135 39 82 58 61 65 Index A AP B Battery BIOS Setup Booting Priority C CD Drive Charge Click D Double-Click Drag Dual View L LCD Brightness M 65 Monitor Connection / Output Multi Card Slot 88 O 79 Overview 84 P Password 46 Product Specifications 89 40 R Recorder S 41 41 Safety Precautions 51 Samsung Recovery Solution Scroll Security Slot 76 Shortcut Key SoundAlive Status Indicators Supervisor Password T 51 Touchpad 48 U User Password 25 V Volume Control 81 129 W Wired Network Wireless Network 58 8 96 43 94 36 60 27 81 Chapter 5.


