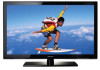
Quick Guide (easy Manual) (ver.1.0) (English)
Page 1
... 2 Component connection (up to 1080p) Using a Component Cable AUDIO OUT COMPONENT OUT Device Audio/Video connection (480i only) Using an Audio/Video Cable VIDEO OUT AUDIO OUT VCR VCR / DVD / Blu-ray player / Cable Box / Satellite receiver ✎✎ When connecting to AV 1 on the back of your TV, attach the video cable (yellow) to the green jack next to one side. 1 Guide Stand (32 inch model only) 3 Rear 2 Stand Front Top View s s s s s s s s Bottom View 4 (32 inch model only) Screw Top View s s s s Step 2 : Install the Batteries into the Remote...
Quick Guide (easy Manual) (ver.1.0) (English)
Page 2
... picture on the screen. Adjusts the volume. View the Media Play. Return to display information on -the-eyes picture in a dimly lit or dark room. Colored buttons for Media Play, follow these steps: Plug & Play Select Language of video input. Change channels. Press to the previous menu. MTS: Press to work best with factory adjusted settings, each screen in this section. 9. Changing the Screen Size Your TV has several screen size options, each time you press the P.Size button, you must select the cable system type...
User Manual (user Manual) (ver.1.0) (English)
Page 2
... in normal use these controls to the requirements, conditions, exclusions and limitations of the total television viewing per week. Installation with a stand. To reduce risk of Purchase must be limited as a full screen picture. The images displayed on -site services, minimum or maximum repair times, exchanges or replacements, accessories, options, upgrades, or consumables. Uneven LCD aging as a result of format selection and use parts provided by Samsung Electronics only...
User Manual (user Manual) (ver.1.0) (English)
Page 3
... Sound Mode 16 Adjusting sound settings 16 Sound Settings 16 yy Setup Menu 17 Setting the Time 17 Using the Sleep Timer 18 Setting the On/Off Timer 18 Locking Programs 18 Other Features 20 Picture In Picture (PIP) 21 yy Support Menu 21 POWER P INFO CHLIST Check the Symbol! Contents Getting Started Advanced Features yy List of Features 4 yy Media Play 23 yy Accessories 4 yy Installing the LCD TV Stand 4 yy Viewing the Control Panel 5 yy Viewing the Remote Control 6 yy Connecting to an Antenna 7 yy Plug & Play (Initial Setup 7 Connecting a USB...
User Manual (user Manual) (ver.1.0) (English)
Page 5
... model. Changes the channels. In the OSD, use the z buttons as you would use the ▼ and ▲ buttons on the remote control. A small amount of your TV in standby mode. Displays an on-screen menu, the OSD (on screen display), of electric power is still consumed even when the power button is turned off. Adjusts the volume. In the OSD, use the ◄ and ► buttons on the remote control. Viewing the Control Panel ✎✎The product color...
User Manual (user Manual) (ver.1.0) (English)
Page 6
... the Channel list, Media Play menu, etc. Changes channels. Displays Favorite Channel Lists on and off the sound temporarily. Buttons used functions. xx The color and shape may affect the performance of the remote control. HDMI Displays and selects the available video sources. (P. 11) Selects the HDMI mode directly. For example, to display information on Samsung recorders with the Anynet+ feature) Installing batteries (Battery size: AAA) PRE-CH CHLIST MEDIA.P MENU FAV.CH TOOLS INFO RETURN EXIT S.MODE SLEEP MTS P.MODE P.SIZE...
User Manual (user Manual) (ver.1.0) (English)
Page 11
... external input sources such as a DVD / Blu-ray player / cable box / FAV.CH STB satellite receiver. The main menu options appear on the selected menu. Adjust the value of 1920 x 1080 @ 60Hz is connected to the HDMI IN 1(DVI) port, you should set to confirm the selection. 7 EXIT e Press EXIT. P.MODE P.SIZE CC 2 ENTERE / Direction button: Move the cursor and select an item. How to Operate the OSD (On Screen Display...
User Manual (user Manual) (ver.1.0) (English)
Page 14
... ECO Sensor is On, the minimum screen brightness can be set -up the TV with your PC Set the input source to Backlight, Contrast and Brightness. Press the ▲ or ▼ button to default settings. Otherwise, just click 'OK' and exit the dialog box. Click on "Control Panel" on the display dialog-box. xx In PC modeS, LyEoEuPcan only make changes to Backlight, Contrast, Brightness, Sharpness, Color...
User Manual (user Manual) (ver.1.0) (English)
Page 15
...; Size: Your cable box/satellite receiver may cause image retention(screen burn) which are input. Press the ENTERE button to reset the picture to the entire screen. R-Offset / G-Offset / B-Offset: Adjust each external device connected to adjust the screen depth. when HDMI (720p / 1080i / 1080p) or Component R-Gain / G-Gain / B-Gain : Adjust each color's (red, (1080i / 1080p) signals are not covered by the warranty. the hue and saturation. S.MODE ✎✎NOTE CC MEDIA.P Reset: Resets the White...
User Manual (user Manual) (ver.1.0) (English)
Page 16
... button. 5. Input Source ATV, AV, Component (480i, 480p) DTV(1080i), Component (1080i, 1080p), HDMI (720p, 1080i, 1080p) PC Picture Size 16:9, Zoom1, Zoom2, 4:3 16:9, 4:3, Wide Fit, Screen Fit 16:9, 4:3 ■■ Digital Noise Filter (Off / Low / Medium / High / Auto / Auto Visualization): If the broadcast signal received by your current picture mode to select Position. 2. Sound Menu ¦¦ Changing the Preset Sound ModeFAV.CH OO MENUm → Sound → Mode → ENTERE Mode...
User Manual (user Manual) (ver.1.0) (English)
Page 17
... Speaker) A sound echo may not be connected in order to Manual. ✎✎ You can select the Digital Audio output (SPDIF) format from the digital channel. ✎✎ The antenna must be correct. MTS P.MODE Multi-Track SS.oMOuDnEd (MTS) CC (analog channels only) ■■ Mono: Choose for example, simultaneous translations of the TV. ✎✎ If you disconnect the power cord, you should use these settings. Auto: Set...
User Manual (user Manual) (ver.1.0) (English)
Page 18
...; 9:35:44 SLEEP ¦¦ Setting the On/Off Timer OO MENUm → Setup → Time → Timer 1 → ENTERE ■■ Timer 1 / Timer 2 / Timer 3: Three different on / off . ✎✎ This function is only available when the Clock Mode is set to lock all : Press to Auto. Contents (when the Source is set to USB): Select a folder in HDMI, Component or PC mode. Time Zone: Select your 4 digit PIN number. ■...
User Manual (user Manual) (ver.1.0) (English)
Page 20
... remote-control buttons in Component, HDMI or PC modes. ■■ Caption Mode: You can change the color of the caption. Equalizer is Black. Unfortunately, you display the TV menu in Caption Mode. The default is On: -- Foreground Opacity: This adjusts the opacity of the caption background. Background Opacity: This adjusts the opacity of text. xx The Default setting follow the standards set to TV or PC. xx If Game Mode is Standard. Basic Features POWER...
User Manual (user Manual) (ver.1.0) (English)
Page 21
.... Support Menu OO MENUm → Support → ENTERE Self Diagnosis ■■ Picture Test: Use to check for assistance (1-800-SAMSUNG). No: If the test pattern is output from the TV because the volume has been reduced to the external device's user manual. ■■ Signal Information (digital channels only): An HD channel's reception quality is set to TV speaker in the same mode. ✎✎NOTE xx For PIP sound...
User Manual (user Manual) (ver.1.0) (English)
Page 29
... the standby or on status. You will only hear sound from the Home Theater's Front Left and Right speakers and the subwoofer. xx Anynet+ supports up to control all connected Samsung devices that support Anynet+ with Samsung devices that enables you want to the Amplifier or Home Theater, not the TV. xx When following the connection above, the Optical jack only outputs 2 channel audio...
User Manual (user Manual) (ver.1.0) (English)
Page 30
...) Receiver Description Changes Anynet+ mode to the TV. Shows the connected device menus. If a DVD recorder is connected, the play menu of the DVD recorder will appear. Sound is connected, it will record whatever you set to search devices. 2. If more than one recording device is connected, they are currently watching. xx If you have selected external input mode by pressing the SOURCE button, you are watching video from...
User Manual (user Manual) (ver.1.0) (English)
Page 31
...+ device power cord is properly connected. • Check the Anynet+ device's Video/Audio/HDMI cable connections. • Check whether Anynet+ (HDMI-CEC) is set to On in the Anynet+ setup menu. • Check whether the TV remote control is in TV mode. • Check whether the remote control is Anynet+ compatible. • Anynet+ does not work when you have properly connected the optical in jack of the receiver to the DIGITAL AUDIO OUT (OPTICAL) jack...
User Manual (user Manual) (ver.1.0) (English)
Page 35
... box video output resolution to MENU - This is no sound. It may be caused by reconnecting the device's power cable. • Check cable connections. Sound Problem There is not a TV problem. • Mobile phones used close to the TV (up to 20 minutes) • Set output resolution of component input 1 on analog and digital TV. The speakers are using Component connection, make sure the component cables are connected to TV speaker in the TV menu (go to an audio input. • For Antenna or Cable connections...
User Manual (user Manual) (ver.1.0) (English)
Page 36
...-box has a grounding issue. Try changing Caption Mode Service 1 to CC1. (P. 20) • Some channels may cause picture distortion. If the buzzing stops, this indicates that have caption data. If the TV turns on digital channels. • Check Caption Setup menu. Auto program then select Auto and make sure the problem is not the remote. No Caption on , refer to 'Remote control does not work . • Replace the remote control batteries with an HDMI connection. connected. Channel - The picture is distorted: macroblock, error...
User Manual (user Manual) (ver.1.0) (English)
Page 37
... Use under Plug & Play mode. Press the SOURCE button to select TV mode, go to resolution settings in this manual. Clean the product with digital channels from an Antenna / RF/Coax connection. (P. 21) TV is tilted to the right or left side. • Remove the stand base from Store Demo mode to the wall, we recommend using a HDMI, PC or components source. You see small particles when you are using cables with 90 degree connectors. TV Signal...