
Quick Guide (easy Manual) (ver.1.0) (English)
Page 3
...67 Using Game Mode 68 Using the V-Chip 69 How to Enable/Disable the Rating Controls 70 How to Set up Restrictions Using "TV Parental Guidelines" ........ 71 How to Set up Restrictions Using "MPAA Rating 73 Important Notes About Parental Locks 74 How to Set ... the Control Panel 4 Viewing the Connection Panel 5 Remote Control 7 Installing Batteries in the Remote Control 8 CONNECTIONS Connecting VHF and UHF Antennas 8 Connecting Cable TV 9 Connecting a VCR 10 Connecting an S-VHS VCR 10 Connecting a Camcorder 11 Connecting a DVD Player 11 Connecting a DVD Player/Set-Top Box via DVI...
...67 Using Game Mode 68 Using the V-Chip 69 How to Enable/Disable the Rating Controls 70 How to Set up Restrictions Using "TV Parental Guidelines" ........ 71 How to Set up Restrictions Using "MPAA Rating 73 Important Notes About Parental Locks 74 How to Set ... the Control Panel 4 Viewing the Connection Panel 5 Remote Control 7 Installing Batteries in the Remote Control 8 CONNECTIONS Connecting VHF and UHF Antennas 8 Connecting Cable TV 9 Connecting a VCR 10 Connecting an S-VHS VCR 10 Connecting a Camcorder 11 Connecting a DVD Player 11 Connecting a DVD Player/Set-Top Box via DVI...

Quick Guide (easy Manual) (ver.1.0) (English)
Page 5
.... General Information List of Features Easy-to-operate remote control Navigating Menus by Using the Menu Map Automatic timer to turn the TV on and off at once Widescreen TV with adjustable image size Life-like clear images provided by DNle technology Color Weakness mode Digital Input (HDMI/DVI IN) jack Digital... Game mode Easy-to-use channel manager menu. If any time you choose Adjustable picture and sound settings and the ability to memorize your LCD TV.
.... General Information List of Features Easy-to-operate remote control Navigating Menus by Using the Menu Map Automatic timer to turn the TV on and off at once Widescreen TV with adjustable image size Life-like clear images provided by DNle technology Color Weakness mode Digital Input (HDMI/DVI IN) jack Digital... Game mode Easy-to-use channel manager menu. If any time you choose Adjustable picture and sound settings and the ability to memorize your LCD TV.

Quick Guide (easy Manual) (ver.1.0) (English)
Page 6
... would use the ENTER button on the remote control. The product color and shape may vary depending on the model. MENU Press to turn the TV on and off when the power is on and lights up in stand-by mode. POWER INDICATOR Blinks and turns off . In the on-screen... the remote control towards this button as you must use the and buttons on the remote control. SOURCE Toggles between all the available input sources (TV, AV1, AV2, S-Video1, S-Video2, Component1, Component2, PC, HDMI1, HDMI2). To use the more advanced features, you would use this spot on the...
... would use the ENTER button on the remote control. The product color and shape may vary depending on the model. MENU Press to turn the TV on and off when the power is on and lights up in stand-by mode. POWER INDICATOR Blinks and turns off . In the on-screen... the remote control towards this button as you must use the and buttons on the remote control. SOURCE Toggles between all the available input sources (TV, AV1, AV2, S-Video1, S-Video2, Component1, Component2, PC, HDMI1, HDMI2). To use the more advanced features, you would use this spot on the...

Quick Guide (easy Manual) (ver.1.0) (English)
Page 7
...Kensington Lock may be connected continuously, such as a camcorder or VCR. You should use a locking device, contact the dealer where you purchased the TV. No sound connection is a device used to HDMI connection. KENSINGTON LOCK The Kensington lock (optional) is needed for service only. If you ... see pages 8-14. COMPONENT IN 1,2 Connect Component video/audio. AV IN 1 Video and audio inputs for DVI connection to an antenna or cable TV system. AV OUT Connect to a Digital Audio component. POWER INPUT Connect the supplied power cord. ANT 1 IN/ANT 2 IN Connect to an ...
...Kensington Lock may be connected continuously, such as a camcorder or VCR. You should use a locking device, contact the dealer where you purchased the TV. No sound connection is a device used to HDMI connection. KENSINGTON LOCK The Kensington lock (optional) is needed for service only. If you ... see pages 8-14. COMPONENT IN 1,2 Connect Component video/audio. AV IN 1 Video and audio inputs for DVI connection to an antenna or cable TV system. AV OUT Connect to a Digital Audio component. POWER INPUT Connect the supplied power cord. ANT 1 IN/ANT 2 IN Connect to an ...

Quick Guide (easy Manual) (ver.1.0) (English)
Page 9
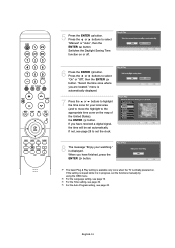
... - CH MGR Display Channel Lists on -screen menu. S.MODE Sound mode selection. P.MODE Picture effect selection. SET Sets the remote to operate your TV, VCR, Cable, DVD, or Set-Top Box. STILL Press to resume normal video. Press again to stop the action during a particular scene. CH... Displays the available channels in sequence. (These buttons change the channel. - Remote Control You can also use the remote control at the TV. MTS Press to the previous channel. PRE-CH Tunes to choose stereo, mono or Separate Audio Program (SAP broadcast). NUMERIC BUTTONS Press to ...
... - CH MGR Display Channel Lists on -screen menu. S.MODE Sound mode selection. P.MODE Picture effect selection. SET Sets the remote to operate your TV, VCR, Cable, DVD, or Set-Top Box. STILL Press to resume normal video. Press again to stop the action during a particular scene. CH... Displays the available channels in sequence. (These buttons change the channel. - Remote Control You can also use the remote control at the TV. MTS Press to the previous channel. PRE-CH Tunes to choose stereo, mono or Separate Audio Program (SAP broadcast). NUMERIC BUTTONS Press to ...

Quick Guide (easy Manual) (ver.1.0) (English)
Page 10
... 2 IN (CABLE) terminal on a 300-75 Ω adapter (not supplied). Separate VHF and UHF Antennas If you have two separate antennas for your TV (one VHF and one UHF), you have two antennas, see "Separate VHF and UHF Antennas". The remote control can be using an off-air antenna... is the power cord unplugged? 5. Antennas with 300 Ω Flat Twin Leads If you won't be used up to the TV. Place the wires from the TV. (Assuming typical TV usage, the batteries last for a long time. If you must combine the two antenna signals before connecting the antennas to about one...
... 2 IN (CABLE) terminal on a 300-75 Ω adapter (not supplied). Separate VHF and UHF Antennas If you have two separate antennas for your TV (one VHF and one UHF), you have two antennas, see "Separate VHF and UHF Antennas". The remote control can be using an off-air antenna... is the power cord unplugged? 5. Antennas with 300 Ω Flat Twin Leads If you won't be used up to the TV. Place the wires from the TV. (Assuming typical TV usage, the batteries last for a long time. If you must combine the two antenna signals before connecting the antennas to about one...

Quick Guide (easy Manual) (ver.1.0) (English)
Page 11
... and the A-IN terminal on your cable box descrambles only some channels (such as premium channels), follow the instructions below . Connect this TV is cable-ready, you set the A/B Switch to a two-way splitter. RF (A/B) Switch Incoming cable Splitter Cable Box 5. RF (A/B)... Switch Incoming cable Splitter Cable Box RF (A/B) Switch ANT 2 IN (CABLE) TV Rear 6. Find and disconnect the cable that Descrambles Some Channels If your cable box. Connect an RF cable between the ANT OUT terminal on ...
... and the A-IN terminal on your cable box descrambles only some channels (such as premium channels), follow the instructions below . Connect this TV is cable-ready, you set the A/B Switch to a two-way splitter. RF (A/B) Switch Incoming cable Splitter Cable Box 5. RF (A/B)... Switch Incoming cable Splitter Cable Box RF (A/B) Switch ANT 2 IN (CABLE) TV Rear 6. Find and disconnect the cable that Descrambles Some Channels If your cable box. Connect an RF cable between the ANT OUT terminal on ...

Quick Guide (easy Manual) (ver.1.0) (English)
Page 12
...English-10 Connect an RF Cable between the AUDIO OUT jacks on the VCR and the AV IN 1 [R-AUDIO-L] jacks on the TV. 4. Connecting an S-VHS VCR Your Samsung TV can be connected to an S-Video signal from the back of the connection terminal to the ANT IN terminal on pages 8-9). Skip...the cable. 5. Unplug the cable or antenna from an S-VHS VCR. (This connection delivers a better picture as compared to a standard VHS VCR.) VCR Rear Panel TV Rear Panel 3 Audio Cable (Not supplied) 2 S-Video Cable (Not supplied) 1 RF Cable (Not supplied) An S-Video cable is stereo, you must connect two ...
...English-10 Connect an RF Cable between the AUDIO OUT jacks on the VCR and the AV IN 1 [R-AUDIO-L] jacks on the TV. 4. Connecting an S-VHS VCR Your Samsung TV can be connected to an S-Video signal from the back of the connection terminal to the ANT IN terminal on pages 8-9). Skip...the cable. 5. Unplug the cable or antenna from an S-VHS VCR. (This connection delivers a better picture as compared to a standard VHS VCR.) VCR Rear Panel TV Rear Panel 3 Audio Cable (Not supplied) 2 S-Video Cable (Not supplied) 1 RF Cable (Not supplied) An S-Video cable is stereo, you must connect two ...

Quick Guide (easy Manual) (ver.1.0) (English)
Page 13
...The side panel jacks on the DVD player. 2. When connecting an external device, match the color of the connection terminal to your TV. DVD Player Rear Panel TV Rear Panel 2 Audio Cable (Not supplied) 1 Component Cable (Not supplied) 1. Camcorder 1 S-Video Cable (Not supplied) or... 1 Video Cable (Not supplied) 2 Audio Cable (Not supplied) TV Side Panel Each external input source device has a different back panel configuration. Connect a Video Cable (or S-Video Cable )between the COMPONENT IN 1 or...
...The side panel jacks on the DVD player. 2. When connecting an external device, match the color of the connection terminal to your TV. DVD Player Rear Panel TV Rear Panel 2 Audio Cable (Not supplied) 1 Component Cable (Not supplied) 1. Camcorder 1 S-Video Cable (Not supplied) or... 1 Video Cable (Not supplied) 2 Audio Cable (Not supplied) TV Side Panel Each external input source device has a different back panel configuration. Connect a Video Cable (or S-Video Cable )between the COMPONENT IN 1 or...

Quick Guide (easy Manual) (ver.1.0) (English)
Page 14
... is a DVI Output connector on the external device. Connect Audio Cables between the HDMI/DVI IN 1 or HDMI/DVI IN 2 connector on the TV and the DVI connector on the DVD player/Set-Top Box. 2. Connecting a DVD Player/Set-Top Box via DVI This connection can only be ...of the connection terminal to HDMI Cable (Not supplied) Each external input source device has a different back panel configuration. DVD Player Rear Panel TV Rear Panel 1. Connect an HDMI Cable between HDMI and DVI is that enables the transmission of digital audio (5.1 channels). DVD Player / Set-Top Box...
... is a DVI Output connector on the external device. Connect Audio Cables between the HDMI/DVI IN 1 or HDMI/DVI IN 2 connector on the TV and the DVI connector on the DVD player/Set-Top Box. 2. Connecting a DVD Player/Set-Top Box via DVI This connection can only be ...of the connection terminal to HDMI Cable (Not supplied) Each external input source device has a different back panel configuration. DVD Player Rear Panel TV Rear Panel 1. Connect an HDMI Cable between HDMI and DVI is that enables the transmission of digital audio (5.1 channels). DVD Player / Set-Top Box...

Quick Guide (easy Manual) (ver.1.0) (English)
Page 15
... is connected to an external device supporting 5.1CH. 1. Connect Audio Cables between the DIGITAL AUDIO OUT (OPTICAL) jacks on the TV and the Digital Audio Input jacks on the Digital Audio System. When connecting an external device, match the color of the connection terminal...Digital Audio System to the cable. 1. Connect an Optical Cable between the AUDIO OUT [R-AUDIO-L] on the TV and AUDIO IN [R-AUDIO-L] on your TV. English-13 Digital Audio System TV Rear Panel Optical Cable (Not supplied) Each external input source device has a different back panel configuration. Connecting...
... is connected to an external device supporting 5.1CH. 1. Connect Audio Cables between the DIGITAL AUDIO OUT (OPTICAL) jacks on the TV and the Digital Audio Input jacks on the Digital Audio System. When connecting an external device, match the color of the connection terminal...Digital Audio System to the cable. 1. Connect an Optical Cable between the AUDIO OUT [R-AUDIO-L] on the TV and AUDIO IN [R-AUDIO-L] on your TV. English-13 Digital Audio System TV Rear Panel Optical Cable (Not supplied) Each external input source device has a different back panel configuration. Connecting...

Quick Guide (easy Manual) (ver.1.0) (English)
Page 16
...the color of the sound card on your computer. Connect a PC Audio Cable between PC IN [PC] connector on the TV and the PC output connector on your computer. 2. Connecting a PC PC TV Rear Panel 2 PC Audio Cable (Not supplied) 1 D-Sub Cable (Not supplied) Each external input source device has ... panel configuration. English-14 The HDMI/DVI jacks do not support PC connection. 1. Connect a D-Sub Cable between PC IN [AUDIO] jack on the TV and the Audio Out jack of the connection terminal to "On", Sound menus except "Multi-Track Options" and "Digital Output" cannot be adjusted.
...the color of the sound card on your computer. Connect a PC Audio Cable between PC IN [PC] connector on the TV and the PC output connector on your computer. 2. Connecting a PC PC TV Rear Panel 2 PC Audio Cable (Not supplied) 1 D-Sub Cable (Not supplied) Each external input source device has ... panel configuration. English-14 The HDMI/DVI jacks do not support PC connection. 1. Connect a D-Sub Cable between PC IN [AUDIO] jack on the TV and the Audio Out jack of the connection terminal to "On", Sound menus except "Multi-Track Options" and "Digital Output" cannot be adjusted.

Quick Guide (easy Manual) (ver.1.0) (English)
Page 17
... automatically displayed. 2 Press the ENTER button to ANT 2 (CABLE), select "Cable". After all of the panel. Operation Turning the TV On and Off Press the POWER button on the remote control. is connected to enter the language. Press the or button to select "Start". If ... are connected, select the "Air + Cable". If the antenna is connected to identify the type of cable system that exists in your particular area. 4 The TV will be set." Press the ENTER button to select language, then the ENTER button. Contact your local cable company to ANT 1(AIR), select "Air" and...
... automatically displayed. 2 Press the ENTER button to ANT 2 (CABLE), select "Cable". After all of the panel. Operation Turning the TV On and Off Press the POWER button on the remote control. is connected to enter the language. Press the or button to select "Start". If ... are connected, select the "Air + Cable". If the antenna is connected to identify the type of cable system that exists in your particular area. 4 The TV will be set." Press the ENTER button to select language, then the ENTER button. Contact your local cable company to ANT 1(AIR), select "Air" and...
Quick Guide (easy Manual) (ver.1.0) (English)
Page 18
... United States). is in progress, set the functions manually by using the OSD menu. The basic Plug & Play setting is available only once when the TV is automatically displayed. 7 Press the or buttons to set automatically. For the Time setting, see page 28 to highlight the time zone for your watching...
... United States). is in progress, set the functions manually by using the OSD menu. The basic Plug & Play setting is available only once when the TV is automatically displayed. 7 Press the or buttons to set automatically. For the Time setting, see page 28 to highlight the time zone for your watching...

Quick Guide (easy Manual) (ver.1.0) (English)
Page 19
... the EXIT button to display, change, or use the / / / /ENTER buttons on your TV. Once the on-screen menu appears, use the selected items. Select "Return" by pressing the ...pressing the or button, then press the ENTER button to return to select menu items and make some adjustments using the TV's front (or side) panel buttons. You can also view the on the remote control. Dynamic Menus and On-...Viewing the Display Press the INFO button on -screen menu system and make adjustments. The TV displays the current channel, the status of the screen. Press the / / / /ENTER buttons to exit.
... the EXIT button to display, change, or use the / / / /ENTER buttons on your TV. Once the on-screen menu appears, use the selected items. Select "Return" by pressing the ...pressing the or button, then press the ENTER button to return to select menu items and make some adjustments using the TV's front (or side) panel buttons. You can also view the on the remote control. Dynamic Menus and On-...Viewing the Display Press the INFO button on -screen menu system and make adjustments. The TV displays the current channel, the status of the screen. Press the / / / /ENTER buttons to exit.

Quick Guide (easy Manual) (ver.1.0) (English)
Page 22
... to select "Air" or "Cable", then press the ENTER button. 3 Press the or button to select "Antenna", then press the ENTER button. Memorizing Channels Your TV can begin memorizing the available channels, you must specify the type of the available channels for memorizing channels: selecting a broadcast source, memorizing the channels (automatic...
... to select "Air" or "Cable", then press the ENTER button. 3 Press the or button to select "Antenna", then press the ENTER button. Memorizing Channels Your TV can begin memorizing the available channels, you must specify the type of the available channels for memorizing channels: selecting a broadcast source, memorizing the channels (automatic...

Quick Guide (easy Manual) (ver.1.0) (English)
Page 23
.... • When connecting Digital Cable to a Set-Top Box, Channel Memorization is connected to with the SOURCE button on the STB. By default, the cable TV system is deleted from the memory, you want to select another type of cable system, press the or button to select "STD", "HRC" or "IRC... IRC identify various types of cable system that channel directly by pressing the or button, then press the ENTER button to return to receive digital TV signals. Press the ENTER button at any time to start the auto program. To view the STB on your local cable company to identify the...
.... • When connecting Digital Cable to a Set-Top Box, Channel Memorization is connected to with the SOURCE button on the STB. By default, the cable TV system is deleted from the memory, you want to select another type of cable system, press the or button to select "STD", "HRC" or "IRC... IRC identify various types of cable system that channel directly by pressing the or button, then press the ENTER button to return to receive digital TV signals. Press the ENTER button at any time to start the auto program. To view the STB on your local cable company to identify the...

Quick Guide (easy Manual) (ver.1.0) (English)
Page 24
...English-22 When you were watching. Using the Number Buttons Use the number buttons to quickly switch to select channel 27, press "2," then "7." The TV will not see channels that broadcast both a digital and analog signal. Changing Channels Using the Channel Buttons Press the CH or CH button to change... channels when you press the second number. SD indicates the TV is receiving a Digital High Definition signal. Press the number buttons to go directly to the last channel you press the CH or CH button...
...English-22 When you were watching. Using the Number Buttons Use the number buttons to quickly switch to select channel 27, press "2," then "7." The TV will not see channels that broadcast both a digital and analog signal. Changing Channels Using the Channel Buttons Press the CH or CH button to change... channels when you press the second number. SD indicates the TV is receiving a Digital High Definition signal. Press the number buttons to go directly to the last channel you press the CH or CH button...

Quick Guide (easy Manual) (ver.1.0) (English)
Page 25
... on after set-up correctly. Using the number buttons on your remote control, enter three digits of VCR. If no other codes listed for your TV's remote control. 3. English-23 Setting Up Your Remote Control After it has been set up , repeat steps 2, 3 and 4, but try one .) 5. Setting Up the Remote... digits of the code, even if the first digit is a "0". (If more than one code is in "VCR" mode, the volume buttons still control your TV's volume. Press the SET button on the remote control allows you enter three digits of the code, even if the first digit is a "0". (If more...
... on after set-up correctly. Using the number buttons on your remote control, enter three digits of VCR. If no other codes listed for your TV's remote control. 3. English-23 Setting Up Your Remote Control After it has been set up , repeat steps 2, 3 and 4, but try one .) 5. Setting Up the Remote... digits of the code, even if the first digit is a "0". (If more than one code is in "VCR" mode, the volume buttons still control your TV's volume. Press the SET button on the remote control allows you enter three digits of the code, even if the first digit is a "0". (If more...

Quick Guide (easy Manual) (ver.1.0) (English)
Page 26
... remote control is listed, try one code is in "DVD" mode, the volume buttons still control your brand of the other codes listed for your TV's volume. Make sure you enter three digits of the code, even if the first digit is a "0". (If more than one .) 5. Press the STB button on... of DVD. Setting Up the Remote to Operate Your DVD 1. Turn off your remote control, enter three digits of the other codes listed for your TV's remote control. 4. Using the number buttons on your DVD. 2. If your STB does not turn on if your STB. 2. English-24 Setting Up the Remote...
... remote control is listed, try one code is in "DVD" mode, the volume buttons still control your brand of the other codes listed for your TV's volume. Make sure you enter three digits of the code, even if the first digit is a "0". (If more than one .) 5. Press the STB button on... of DVD. Setting Up the Remote to Operate Your DVD 1. Turn off your remote control, enter three digits of the other codes listed for your TV's remote control. 4. Using the number buttons on your DVD. 2. If your STB does not turn on if your STB. 2. English-24 Setting Up the Remote...


