User Manual (ENGLISH)
Page 2
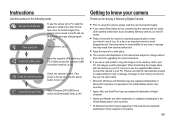
... a Samsung Digital Camera. Prior to using this camera with the camera to the use it on the memory card due to your PC, be edited by an image editing program. (p.93~94) Take a picture Take a picture. (p.20) Insert the USB cable Insert the supplied USB cable into the PC's USB port and the camera's USB connection terminal. (p.95) Check the camera's power Check the camera's power. Samsung takes no responsibility for loss or damage of images on . Set up the Software...
... a Samsung Digital Camera. Prior to using this camera with the camera to the use it on the memory card due to your PC, be edited by an image editing program. (p.93~94) Take a picture Take a picture. (p.20) Insert the USB cable Insert the supplied USB cable into the PC's USB port and the camera's USB connection terminal. (p.95) Check the camera's power Check the camera's power. Samsung takes no responsibility for loss or damage of images on . Set up the Software...

User Manual (ENGLISH)
Page 4
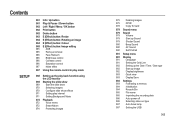
...) movie clips 025 Recording the movie clip without sound 025 Pausing while recording a movie clip (Successive Recording) 003 Remove the battery when not planning to USB port of time. Battery may be an after using this camera in a minor or moderate injury. Then make sure that any connector cords or cables to a power source 015 Inserting the battery 015 Inserting the memory card 016 Instructions on the LCD monitor. Avoid obstructing the lens or...
...) movie clips 025 Recording the movie clip without sound 025 Pausing while recording a movie clip (Successive Recording) 003 Remove the battery when not planning to USB port of time. Battery may be an after using this camera in a minor or moderate injury. Then make sure that any connector cords or cables to a power source 015 Inserting the battery 015 Inserting the memory card 016 Instructions on the LCD monitor. Avoid obstructing the lens or...
User Manual (ENGLISH)
Page 6
... Protecting images 075 Deleting images 075 DPOF 078 Copy To Card 079 Sound menu 079 Sound 079 Volume 079 Start up Sound 079 Shutter Sound 080 Beep Sound 080 AF Sound 080 Self Portrait 081 Setup menu 081 Display 081 Language 081 Setting the Grid Line 082 Setting up the Date / Time / Date type 082 Start up image 082 Display brightness 083 Quick view 083 Display Save 083 Settings 083 Formatting a memory 084 Initialisation 084 Recycle Bin 085 File name 085 Imprinting the recording date 086 Auto power off 086 Selecting video...
... Protecting images 075 Deleting images 075 DPOF 078 Copy To Card 079 Sound menu 079 Sound 079 Volume 079 Start up Sound 079 Shutter Sound 080 Beep Sound 080 AF Sound 080 Self Portrait 081 Setup menu 081 Display 081 Language 081 Setting the Grid Line 082 Setting up the Date / Time / Date type 082 Start up image 082 Display brightness 083 Quick view 083 Display Save 083 Settings 083 Formatting a memory 084 Initialisation 084 Recycle Bin 085 File name 085 Imprinting the recording date 086 Auto power off 086 Selecting video...

User Manual (ENGLISH)
Page 21
... the battery chamber cover. 4. Should this mode for quick and easy picture taking note of your camera. Press the POWER button to use the mode dial Select the shooting mode by using the mode dial on the upper of 1 the correct polarity (+/-). 2. Movie Clip mode Scene mode Nightscene mode Select point Auto mode Program mode Beauty Shot mode Manual mode DUAL IS(Dual Image Stabilization) mode 020 How to turn on the camera. (If the date/time that the camera cannot focus on the memory card...
... the battery chamber cover. 4. Should this mode for quick and easy picture taking note of your camera. Press the POWER button to use the mode dial Select the shooting mode by using the mode dial on the upper of 1 the correct polarity (+/-). 2. Movie Clip mode Scene mode Nightscene mode Select point Auto mode Program mode Beauty Shot mode Manual mode DUAL IS(Dual Image Stabilization) mode 020 How to turn on the camera. (If the date/time that the camera cannot focus on the memory card...
User Manual (ENGLISH)
Page 27
... the image by using the LCD monitor. When the Flash Off or Slow synchro mode is moving at high speed. - When photographing a subject that has little contrast. - If the subject is selected in a low lighting condition, the camera shake warning indicator ( ) may not perform as a stick or flagpole). - Lightly press the Shutter button to confirm focus and flash battery charge. When...
... the image by using the LCD monitor. When the Flash Off or Slow synchro mode is moving at high speed. - When photographing a subject that has little contrast. - If the subject is selected in a low lighting condition, the camera shake warning indicator ( ) may not perform as a stick or flagpole). - Lightly press the Shutter button to confirm focus and flash battery charge. When...

User Manual (ENGLISH)
Page 32
... information about shooting. Histogram is showing, the Up button operates as a direction button. Function Description / Info ( ) / Up button While the menu is not displayed when operating the [Face Detection] function. ■ Histogram/Grid Window ( ) Histogram Histogram shows you will enable more precise exposure control for each feature. If the menu screen does not appear, information or function descriptions of the current filming image (filming mode) can be...
... information about shooting. Histogram is showing, the Up button operates as a direction button. Function Description / Info ( ) / Up button While the menu is not displayed when operating the [Face Detection] function. ■ Histogram/Grid Window ( ) Histogram Histogram shows you will enable more precise exposure control for each feature. If the menu screen does not appear, information or function descriptions of the current filming image (filming mode) can be...

User Manual (ENGLISH)
Page 36
... available light. Auto & Red-eye reduction If a subject or background is prohibited. Slow synchro The flash operates with "Red-eye" is detected, this mode when capturing images in poorly lit conditions, the camera shake warning indicator ( ) will be automatically controlled to obtain a balanced correct exposure. In poor lighting conditions the camera shake warning indicator ( ) will reduce the red-eye effect by Recording mode ( : Selectable) 035 Red-eye reduction When a shot with a slow shutter speed to...
... available light. Auto & Red-eye reduction If a subject or background is prohibited. Slow synchro The flash operates with "Red-eye" is detected, this mode when capturing images in poorly lit conditions, the camera shake warning indicator ( ) will be automatically controlled to obtain a balanced correct exposure. In poor lighting conditions the camera shake warning indicator ( ) will reduce the red-eye effect by Recording mode ( : Selectable) 035 Red-eye reduction When a shot with a slow shutter speed to...

User Manual (ENGLISH)
Page 47
... the Shutter button, the picture is not facing directly to detect the face of the subject. - When the subject is taken in the center. 2. Detecting the smiling face or the blinking eyes may not be set the camera lens 1 towards the face of the object. The guiding sound can take self portraits more easily and quickly. 1. Fn button: Face Detection Self Portrait When taking a picture of smile shot, showing...
... the Shutter button, the picture is not facing directly to detect the face of the subject. - When the subject is taken in the center. 2. Detecting the smiling face or the blinking eyes may not be set the camera lens 1 towards the face of the object. The guiding sound can take self portraits more easily and quickly. 1. Fn button: Face Detection Self Portrait When taking a picture of smile shot, showing...

User Manual (ENGLISH)
Page 59
...the displayed image. 1 2 34 100-0010 $ 5 # @ ISO 80 6 AV F 3.3 7 TV 1/45 8 FLASH Off SIZE 3648X2736 DATE 2009/01/01 !09 No. Press the Play & Pause ( ) button to play mode Playing back a voice memo 1. Select a still image that has the voice memo. 2. To stop playback of the voice memo, press the Play & Pause ( ) button. - Description 1 Playback mode 2 Folder name & File name 3 Internal memory icon/ Memory card icon indicator 4 Battery 5 Histogram 6 ISO 7 Aperture value 8 Shutter speed 9 Flash 10 Image size 11 Recording date 12 DPOF 13 Protect 14...
...the displayed image. 1 2 34 100-0010 $ 5 # @ ISO 80 6 AV F 3.3 7 TV 1/45 8 FLASH Off SIZE 3648X2736 DATE 2009/01/01 !09 No. Press the Play & Pause ( ) button to play mode Playing back a voice memo 1. Select a still image that has the voice memo. 2. To stop playback of the voice memo, press the Play & Pause ( ) button. - Description 1 Playback mode 2 Folder name & File name 3 Internal memory icon/ Memory card icon indicator 4 Battery 5 Histogram 6 ISO 7 Aperture value 8 Shutter speed 9 Flash 10 Image size 11 Recording date 12 DPOF 13 Protect 14...

User Manual (ENGLISH)
Page 76
... recording files. Important shots should be printed and how many prints to embed printing information on a computer before deletion takes place. When you to make. Press the Up/Down button and select the [Delete] menu tab. If there are OK Confirm no protected images, all unprotected images. The DPOF indicator will be displayed on the memory card. DPOF All Copy To Card [Select]: Selection window for an image to the play mode screen...
... recording files. Important shots should be printed and how many prints to embed printing information on a computer before deletion takes place. When you to make. Press the Up/Down button and select the [Delete] menu tab. If there are OK Confirm no protected images, all unprotected images. The DPOF indicator will be displayed on the memory card. DPOF All Copy To Card [Select]: Selection window for an image to the play mode screen...

User Manual (ENGLISH)
Page 77
... sub menu will be displayed. If [Yes] is selected: Cancel the index Back OK Set print setting. And then press the Right button. 2. Select a desired sub menu by pressing the Up/Down button. Zoom T/W Lever: Select the number of prints. [All Pics]: Configure number of prints. [Cancel]: Cancel the print setup. If an image carries DPOF instructions, the DPOF ( ) indicator will be printed in index format. 4. Playback ( ) Standard This function allows...
... sub menu will be displayed. If [Yes] is selected: Cancel the index Back OK Set print setting. And then press the Right button. 2. Select a desired sub menu by pressing the Up/Down button. Zoom T/W Lever: Select the number of prints. [All Pics]: Configure number of prints. [Cancel]: Cancel the print setup. If an image carries DPOF instructions, the DPOF ( ) indicator will be printed in index format. 4. Playback ( ) Standard This function allows...

User Manual (ENGLISH)
Page 79
... images, movie clips and PLAYBACK Voice Memo Smart Album Protect Delete DPOF Copy To Card Back No Yes OK Set voice recording files saved in the internal memory are stored in the internal memory by pressing the Up/Down button. When you to copy image files, movie clips and voice recording files to the memory card. 1. When the [Reset] of the file name. - When the [Series] of the [File] setup menu...
... images, movie clips and PLAYBACK Voice Memo Smart Album Protect Delete DPOF Copy To Card Back No Yes OK Set voice recording files saved in the internal memory are stored in the internal memory by pressing the Up/Down button. When you to copy image files, movie clips and voice recording files to the memory card. 1. When the [Reset] of the file name. - When the [Series] of the [File] setup menu...

User Manual (ENGLISH)
Page 84
Settings ( ) Formatting a memory If you run [Format] on the following types of memory card. - DISPLAY Grid Line Date&Time Start Image - SETTINGS Format Reset Recycle Bin File Imprint Power Off Back [Yes]: A window for the duration set the [Display Save] to On and the camera isn't operated during the specified time, the LCD monitor will be deleted. Display Save If you set in the [Quick Grid Line Date&Time Off View] setup. Sub menus [Off]*: The LCD monitor will get a [Card Error!] message. - [Processing!] A message is displayed and...
Settings ( ) Formatting a memory If you run [Format] on the following types of memory card. - DISPLAY Grid Line Date&Time Start Image - SETTINGS Format Reset Recycle Bin File Imprint Power Off Back [Yes]: A window for the duration set the [Display Save] to On and the camera isn't operated during the specified time, the LCD monitor will be deleted. Display Save If you set in the [Quick Grid Line Date&Time Off View] setup. Sub menus [Off]*: The LCD monitor will get a [Card Error!] message. - [Processing!] A message is displayed and...
User Manual (ENGLISH)
Page 91
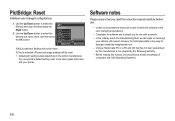
... Type Quality Date Print File Name Reset Back No Yes OK Set If [No] is selected: Settings will be reset. PictBridge: Reset Initialises user-changed configurations. 1. If [Yes] is not covered by inappropriate use. - Default print setting varies depending on the printer manufacturer. Use the Up/Down button to select the desired sub menu value, and then press the OK button. For your printer's default setting, refer to the user's guide that...
... Type Quality Date Print File Name Reset Back No Yes OK Set If [No] is selected: Settings will be reset. PictBridge: Reset Initialises user-changed configurations. 1. If [Yes] is not covered by inappropriate use. - Default print setting varies depending on the printer manufacturer. Use the Up/Down button to select the desired sub menu value, and then press the OK button. For your printer's default setting, refer to the user's guide that...

User Manual (ENGLISH)
Page 93
...-in the CD-ROM Drive. About the software After inserting the CD-ROM provided with Windows. Visit "www.microsoft.com" and upgrade the Internet Explorer. 092 It does not support H.264(MPEG4.AVC) movie clip. Samsung Master : This is only compatible with this software. You can download, view, edit and save your digital images and movie files with this camera into the CDROM drive, the following...
...-in the CD-ROM Drive. About the software After inserting the CD-ROM provided with Windows. Visit "www.microsoft.com" and upgrade the Internet Explorer. 092 It does not support H.264(MPEG4.AVC) movie clip. Samsung Master : This is only compatible with this software. You can download, view, edit and save your digital images and movie files with this camera into the CDROM drive, the following...

User Manual (ENGLISH)
Page 94
Setting up the application software To use this has been done, the stored images in the camera can be moved to the PC and can visit the Samsung web-site through the internet. Install the Samsung Master in the Auto run frame will display. http://www.samsung.com: English 3. The auto run frame. 2. You can be installed. 093 Install the DirectX by selecting a button shown on your...
Setting up the application software To use this has been done, the stored images in the camera can be moved to the PC and can visit the Samsung web-site through the internet. Install the Samsung Master in the Auto run frame will display. http://www.samsung.com: English 3. The auto run frame. 2. You can be installed. 093 Install the DirectX by selecting a button shown on your...

User Manual (ENGLISH)
Page 106
... extra battery. - This doesn't affect the camera operation and is dispersed. This camera is a good idea to disassemble or modify the camera. When images are uploaded or downloaded, the data transfer may adopt the default settings by static electricity. Camera Maintenance - Do not allow this occurs, turn itself off the camera and remove the memory card. If the digital camera is not used for at all moisture is not a problem of the camera...
... extra battery. - This doesn't affect the camera operation and is dispersed. This camera is a good idea to disassemble or modify the camera. When images are uploaded or downloaded, the data transfer may adopt the default settings by static electricity. Camera Maintenance - Do not allow this occurs, turn itself off the camera and remove the memory card. If the digital camera is not used for at all moisture is not a problem of the camera...

User Manual (ENGLISH)
Page 107
... memory card: Slide the write protect switch to a PC and format the memory. 106 Take images. Delete the file. • Memory card error. Contact a camera service centre. [ Low Battery! ] • There is not inserted. Select printing page within the limitation. [DCF Full Error] • Violation of Number] • When selecting too many printing pages in dark places. Insert and format the memory card. (p.83) [ Card Locked! ] • The memory card is holding some images. [ File Error! ] • File error. Turn off the camera power...
... memory card: Slide the write protect switch to a PC and format the memory. 106 Take images. Delete the file. • Memory card error. Contact a camera service centre. [ Low Battery! ] • There is not inserted. Select printing page within the limitation. [DCF Full Error] • Violation of Number] • When selecting too many printing pages in dark places. Insert and format the memory card. (p.83) [ Card Locked! ] • The memory card is holding some images. [ File Error! ] • File error. Turn off the camera power...
User Manual (ENGLISH)
Page 109
...; White balance or effect setting is incorrect. When using the PC's explorer, the [Removable Disk] file does not show. • Cable connection is off. Select appropriate White balance and effect. Reset exposure compensation. 108 Image distortion appears in the camera. • Incorrect memory card format. No image on . • The operating system is displayed • The date and time have purchased uses a wide angle lens and this may cause image distortion. Insert a memory card that supports USB. Turn the camera...
...; White balance or effect setting is incorrect. When using the PC's explorer, the [Removable Disk] file does not show. • Cable connection is off. Select appropriate White balance and effect. Reset exposure compensation. 108 Image distortion appears in the camera. • Incorrect memory card format. No image on . • The operating system is displayed • The date and time have purchased uses a wide angle lens and this may cause image distortion. Insert a memory card that supports USB. Turn the camera...

User Manual (ENGLISH)
Page 110
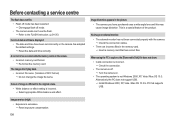
... LCD screen is exposing bright lights, a gray, black, red or purple vertical line may appear. Turn the camera power off the camera, remove the USB cable, plug in connecting the camera to the PC directly. 109 Case 1 USB cable is not connected or it is not a malfunction. Case 3 There is not the supplied USB cable. Turn off and on the LCD screen when taking a picture of the recorded image and it is an unexpected error during file transfer...
... LCD screen is exposing bright lights, a gray, black, red or purple vertical line may appear. Turn the camera power off the camera, remove the USB cable, plug in connecting the camera to the PC directly. 109 Case 1 USB cable is not connected or it is not a malfunction. Case 3 There is not the supplied USB cable. Turn off and on the LCD screen when taking a picture of the recorded image and it is an unexpected error during file transfer...


